Thingiverse
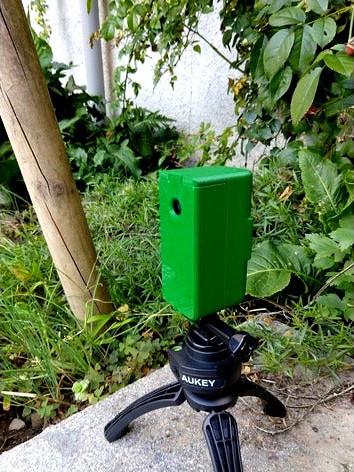
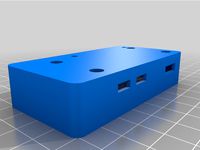
Li-Ion Battery-Powered PiZero Screwless Camera Housing by walterw
by Thingiverse
Last crawled date: 3 years, 1 month ago
This is a remix of gowen's PiZero Vertical Screwless Camera Housings, https://www.thingiverse.com/thing:1709013
I wanted to have a battery-powered camera with motion detection for short-timed observations (like if you want to know what that neighbour's cat does in your garden when you're not there).
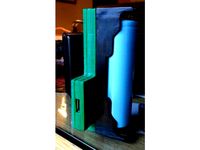
I already knew and liked gowen's camera housing and realized that a 18650 lithium-ion battery would fit in just perfectly.
Thank you gowen for the original design and for giving me the Solidworks files!
Just a few words of warning: LITHIUM-ION BATTERIES ARE DANGEROUS IF MISTREATED (by undercharging, overcharging, short-circuiting, burning, piercing etc. them). DON'T USE THEM IF YOU DO NOT KNOW WHAT YOU ARE DOING.
And, of course, I AM IN NO WAY RESPONSIBLE FOR YOU BURNING DOWN YOUR HOUSE, EXPLODING STUFF, DYING OR ANY OTHER DAMAGE THAT CAN OCCUR WHILE BUILDING OR USING THIS THING! I suggest watching some videos of Lithium Battery fire or explosions on You Tube, just for developing some waryness. And PLAN FOR THE (improbable, but possible) EVENT OF YOUR BATTERY CATCHING FIRE. Think first about how you want to get rid of the battery or fire (water is NOT an option) in case anything happens.
What you need:
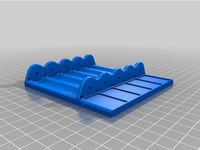
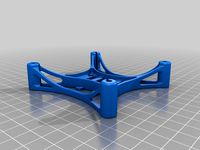
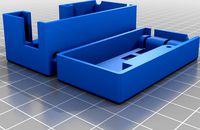
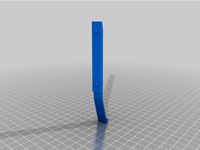
1) Each of the following parts: base, top, clamp, batt-minus
2) One of the two batt-plus parts: part-plus-button if your 18650 battery is buttom-top, part-plus-flat for flat-topped batteries
3) Said 18650 battery. You only need 0.5A, therefore the C-value is not that important. I'd suggest to get a good brand (samsung, panasonic, nothing with "fire" or "ultra" in the name). Protected cells are a little on the long side, but by modifying the batt-minus part you might be able to fit one in. Anyways, protected cells are either expensive (15+€ apiece) or fake. And fake means not protected at all.
4) A TP4056 charging AND battery protection circuit (unless the battery has one included). Like this one: https://www.amazon.it/TP4056-Lithium-Battery-Charger-Module/dp/B06XV5PVW6/ref=sr_1_2?ie=UTF8&qid=1536875972&sr=8-2&keywords=TP4056+protection
5) A sliding switch that fits mine. This is the most complicated part to source, i think. Here is the datasheet: http://www.knitter-switch.com/var/pms/model-589/MFS%20201%20N-SW.pdf
6) A Raspberry Pi Zero W
7) I used a LipoShim (https://shop.pimoroni.com/products/lipo-shim) for stepping up the batterie's 3.7V to 5V - and furthermore, the LipoShim shuts power off when the voltage reaches 3V. That is a much safer (for battery longevity) value than the 2.5V of the protection circuit inside the charging module. But any 0.5A stepup module should do.
8) some flexible cables that can support a few amperes. The ones I used were originally connected to a NEMA17 stepper motor
9) A raspberry ZERO Camera Module (mind the cable - it's different for full-size raspberries and zeroes) V1.3 or V2.
10) a Class 10 MicroSD card, 16GB should be enough
11) Soldering Iron and some tools
See below for further instructions.
I wanted to have a battery-powered camera with motion detection for short-timed observations (like if you want to know what that neighbour's cat does in your garden when you're not there).
I already knew and liked gowen's camera housing and realized that a 18650 lithium-ion battery would fit in just perfectly.
Thank you gowen for the original design and for giving me the Solidworks files!
Just a few words of warning: LITHIUM-ION BATTERIES ARE DANGEROUS IF MISTREATED (by undercharging, overcharging, short-circuiting, burning, piercing etc. them). DON'T USE THEM IF YOU DO NOT KNOW WHAT YOU ARE DOING.
And, of course, I AM IN NO WAY RESPONSIBLE FOR YOU BURNING DOWN YOUR HOUSE, EXPLODING STUFF, DYING OR ANY OTHER DAMAGE THAT CAN OCCUR WHILE BUILDING OR USING THIS THING! I suggest watching some videos of Lithium Battery fire or explosions on You Tube, just for developing some waryness. And PLAN FOR THE (improbable, but possible) EVENT OF YOUR BATTERY CATCHING FIRE. Think first about how you want to get rid of the battery or fire (water is NOT an option) in case anything happens.
What you need:
1) Each of the following parts: base, top, clamp, batt-minus
2) One of the two batt-plus parts: part-plus-button if your 18650 battery is buttom-top, part-plus-flat for flat-topped batteries
3) Said 18650 battery. You only need 0.5A, therefore the C-value is not that important. I'd suggest to get a good brand (samsung, panasonic, nothing with "fire" or "ultra" in the name). Protected cells are a little on the long side, but by modifying the batt-minus part you might be able to fit one in. Anyways, protected cells are either expensive (15+€ apiece) or fake. And fake means not protected at all.
4) A TP4056 charging AND battery protection circuit (unless the battery has one included). Like this one: https://www.amazon.it/TP4056-Lithium-Battery-Charger-Module/dp/B06XV5PVW6/ref=sr_1_2?ie=UTF8&qid=1536875972&sr=8-2&keywords=TP4056+protection
5) A sliding switch that fits mine. This is the most complicated part to source, i think. Here is the datasheet: http://www.knitter-switch.com/var/pms/model-589/MFS%20201%20N-SW.pdf
6) A Raspberry Pi Zero W
7) I used a LipoShim (https://shop.pimoroni.com/products/lipo-shim) for stepping up the batterie's 3.7V to 5V - and furthermore, the LipoShim shuts power off when the voltage reaches 3V. That is a much safer (for battery longevity) value than the 2.5V of the protection circuit inside the charging module. But any 0.5A stepup module should do.
8) some flexible cables that can support a few amperes. The ones I used were originally connected to a NEMA17 stepper motor
9) A raspberry ZERO Camera Module (mind the cable - it's different for full-size raspberries and zeroes) V1.3 or V2.
10) a Class 10 MicroSD card, 16GB should be enough
11) Soldering Iron and some tools
See below for further instructions.
Similar models
thingiverse
free
LI-ION CHARGER 18650 FOR TP4056 by torcente
...er 18650 for tp4056 by torcente
thingiverse
it combines a holder for 18650 lithium battery, with the very famous circuit tp4056
thingiverse
free
18650 5x Battery Charger with TP4056 slot by stefan_raw
...4056 slot by stefan_raw
thingiverse
a case for 5 18650 lithium-ion batteries including a place to mount a tp4056 charger circuit
grabcad
free

TP4056 Charging module for 18560 or 3.7 volt single cell lithium ion battery
...r 3.7 volt single cell lithium ion battery
grabcad
tp4056 charging module for 18560 or 3.7 volt single cell lithium ion battery.
thingiverse
free

N in 1 18650 TP4056 Charger by YXC
...harging board (25*19mm).
update:2018/10/01 v2
fits most of tp4056 boards.
fits most of 18650 batteries with protection circuit.
thingiverse
free

Stun gun by DIY_ZONE
...ttery
tp4056 lithium-ion 18650 battery charger module
400kv high voltage generator
on off rocker position switch
m3 nut and bolts
thingiverse
free

PiBox Zero Box (modulable screwless case) and IQAudio box by HeeBoo
...ader and the heatsink part or print the version you want
i did a module case for the iqaudio zero dac to stack on the pizero box.
grabcad
free

2S 3A 5A Li-ion Lithium Battery 18650 Charger BMS Protection Board Module 7.4V 8.4V datasheet pdf
....4v 8.4v datasheet pdf
grabcad
2s 3a 5a li-ion lithium battery 18650 charger bms protection board module 7.4v 8.4v datasheet pdf
thingiverse
free

PiZero Vertical Screwless Camera Housings Prusa MMU edition
...e the code as this is without proper supports. you probably want supports everywhere... probably as i never tried it differently.
cults
free

18650 Battery Charger - Printable DIY USB Powered TP4056 Li-Ion charger
...r circuit tp4056: http://amzn.to/2fdoq5z
18650 li-ion battery: http://amzn.to/2fehoyv
filament pla orange: http://amzn.to/2vwpxv5
thingiverse
free

Arduino Nano 33 IoT Case by tanery02048
...tery
i designed this case for an audio/vibration tachometer i'm building and thought others might appreciate the case design.
Walterw
thingiverse
free
Micro 107 Noob-Copter with SP-RACING-F3-EVO-Brush-Flight-Controller by walterw
...l thing. look there for more information!
as soon as i get positive feedback i will remove the "work in progress" flag.
thingiverse
free
Cat table lamp (IKEA Fado Hack) by walterw
... with 25cm diameter)
print a pair of ears, glue them to the lamp, and paint a cat face using a permanent marker or window colors.
thingiverse
free
Raspberry Pi 3 B Case for shorter screws by walterw
...
this case works for m2.5x16mm screws, but the top part now should be easy to change to fit any screw length between 10 and 20mm.
thingiverse
free
SD Keychain Holder by walterw
...ly possible way.
you could consult the picture if you need help.
i've printed this thing with pla and ngen and it works fine.
thingiverse
free

Saucer for Makies Tea Set by walterw
...ea set with a scale factor of 2, and this thing fits my cups. if you need it in original size you'll have to scale it to 50%.
thingiverse
free
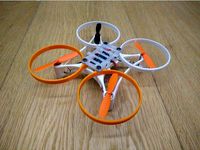
Micro 107 Noob-Copter by walterw
...ions
note 21.9.2018: i made a new remix for the sp-racing-f3-evo-brush-flight-controllerhttps://www.thingiverse.com/thing:3113259
thingiverse
free

Drone 3D by MudaLab
...the perfect frame model "micro 107 noob copter" from walterw ...
thingiverse
free

Raspberry Pi 3 b case for mounting to v-slot by rbross
...mount to the frame of my d-bot. i found walterw#39;s, looked good, and added a v-slot mount on the...
Pizero
thingiverse
free
PiBox Zero Box (modulable screwless case) and IQAudio box by HeeBoo
...for the iqaudio zero dac to stack on the pizero ...
thingiverse
free

Gameboy Advance mini by Nochii
...(i too lazy to make tutorial) battery place between pizero and hat. mini amplifier can place anywhere there still...
thingiverse
free

Pi02HQ - PiZero - HQ Cam Connector/Base & Gooseneck by posixp
...s a thin bottom which is to be removed after print (for added bed adheasion).
enjoy!
and as always - if you like, please like it!
thingiverse
free

PiZero Screwless Camera Housing - Under Cabinet by tdaly001
...et by tdaly001
thingiverse
made the base thicker so i could hang it from under a cabinet and the the camera would clear the lip.
thingiverse
free
pikvm zero by badsmoke
...by badsmoke thingiverse a housing for the pikvm as pizero as a suitable csi-hdmi module i have used this...
thingiverse
free

SeeMeCNC Rostock Max V3.2 Camera Mount by Flabioman
...cable attached) motioneyes image for raspberry pi zero https://github.com/ccrisan/motioneyeos/wiki/supported-devices pizero casehttps://www.thingiverse.com/thing:1886598 and backing plate and swivel fromhttps://www.thingiverse.com/thing:2873677 you will...
thingiverse
free

PiZero Volumio Adafruit Oled Bonnet Case by michp
...ps://www.thingiverse.com/thing:2914257
the musical notes on the front are from https://freesvg.org/musical-notes-silhouette-image
thingiverse
free

Pizero Support for ZeroCam by Funkypiwy
... band, keeps the support and the pizero case together.
an additional version with action cam compatible support, is also provided
thingiverse
free
piZero pi1541 Enclosure by evanevery
... held together with a single #4 x 1-1/4 screw. optionally, you can also use 4 short #3 screws up from the underside of the base.
Screwless
thingiverse
free

40mm Fan guard - the screwless way by marci10441
...of tuching into my fan.
i used it on the standard ender 3 fan.
with this guar, you can keep on using the stock buttonhead screws.
thingiverse
free

Raspberry Pi 3 Screwless case + Fan 40 mm by GrakovNe
...ingiverse
raspberry pi 3 closed minimal case with optional 40 mm fan holder.
high precision, no backlash, gaps and unused space
thingiverse
free

2040 Ender 3 Y Axis Belt Tensioner by GameFan
...ender 3 y axis belt tensioner by gamefan thingiverse screwless belt tensioner using the original hardware. if your printer...
thingiverse
free

Pi 4 Snapfit 60mm fan case by AshTheMaker
...my 60mm fan snapfit case design and features a screwless design that allows the pi and fan to clip...
thingiverse
free

NodeMCU V3 Case (screwless) by gdenicola
...ed up the gap for the usb port
product examples that are working with this model.
psu female connection
nodemcu
3 pin cables
psu
thingiverse
free

Buck converter housing LM2596S screwless by lilbaz95
...buck converter housing lm2596s screwless by lilbaz95
thingiverse
buck converter housing for lm2596s model.
enjoy !
thingiverse
free

Switch wall plate adapter - toggle to rocker by etreehi
...of a wall plate. designed to match with a covered/screwless decorator style. the adapter is press-fit to the switch...
thingiverse
free

Raspberry Pi camera mount bottom screwless by Wesomatic
...ts. home depot doesn't have them anyway i checked.
i've included the top and middle part as well but those are unchanged.
thingiverse
free
Screwless Antec One HDD Rail by Dumfing
...y runnerpack to allow it to not use screws.
it fits quite well and is flexible enough to be released on removal.
i printed at 0.3
thingiverse
free

Rubbermaid Drybox remix by woodwaker
...for the spool. https://www.thingiverse.com/thing:3988583. i liked the dry box screwless grommet for ptfe tube by ukwebb https://www.thingiverse.com/thing:2170536 for a...
Ion
3ddd
$1

Ion Lamp by Schoolhouse Electric
...e electric
3ddd
ion , lamp , edison
edison lamp
3ddd
$1
Лампа-ночник IOne
...лампа-ночник ione
3ddd
ione
лампа- ночник человечек ione (sm 360)
3d_ocean
$89

Kia Picanto (Morning) 3-door 2012
...2012 3docean 2011-2014 3-door city car compact car hatchback ion kia kia picanto korean morning picanto urban the 3d...
3d_ocean
$89

Peugeot iOn 2011
...ic full size cars is here. peugeot is making it available not just for a few intrepid adventurers, but for a wide customer bas...
archive3d
free

Table 3D Model
...doria n240310 - 3d model (*.gsm+*.3ds) for interior 3d visualization ...
3ddd
$1

Очиститель воздуха Zepter Therapy Air iOn
...ния- 27,8 м2
макс. объём пропускаемого воздуха- 5,8 м3/мин
размер (ширина x длина x высота)- 54,4 x 18,1 x 51,0 см
вес- 8,8 кг
3ddd
free

GIORGETTI ION 2012 Chi Wing Lo
... письменный
writing desk in walnut canaletto top, drawers and front panel in saddle leather.
3ddd
$1

Giorgetti Ion Desk & Ode Chair
...mp; ode chair
3ddd
giorgetti , стол
письменный стол giorgetti ion desk
и стул ode chair
3ddd
$1

Фен PHILIPS
...philips 3ddd philips , фен фен philips salondry active ion ...
3ddd
$1

Falmec Spring E ion
...falmec spring e ion
3ddd
falmec , вытяжка
вытяжка falmec spring e ion
Li
3d_ocean
$19
34 metal shaders
...materials files are all included in the main file li.. ...
3d_ocean
$85

Scion FR S Cabrio 2015
...author and created for fan . so if you li.. ...
3ddd
$1

Набор мягкой мебели Rebecca
...3ddd bazelini , rebecca набор мягкой мебели фабрики bazelini rebecca.http://www.bazelii.com/catalog/divany/bazelini-li/divan-bazelin-rebecca ...
3ddd
$1

Кухня Lis Master
...is master. модель "эксклюзивная".
техники и посуды нет.http://lismaster.com.ua/rus/goods/kitchen.html?id=2796
3d_ocean
$30
HDR 075 Parking Lot sIBL
....hdr panorama -full resolution .jpg tonemapped image -low resolution li.. ...
3d_ocean
$30

HDR 079 Rail Tracks sIBL
....hdr panorama -full resolution .jpg tonemapped image -low resolution li.. ...
3d_ocean
$30

HDR 076 Old Hangar sIBL
....hdr panorama -full resolution .jpg tonemapped image -low resolution li.. ...
3d_ocean
$35
HDR 118 Parking Lot sIBL
....hdr panorama -full resolution .jpg tonemapped image -low resolution li.. ...
3d_ocean
$30

HDR 085 Road sIBL
....hdr panorama -full resolution .jpg tonemapped image -low resolution li.. ...
3d_ocean
$30

sIBL Brick Wall HDR Panorama
....hdr panorama -full resolution .jpg tonemapped image -low resolution li.. ...
Battery
3d_export
$5
Duracell Battery 3D Model
... power electronic blender tv
duracell battery 3d model download .c4d .max .obj .fbx .ma .lwo .3ds .3dm .stl grins 109010 3dexport
3ddd
$1

Gaston Clock
...22.75" x 24.5" h material: wood uses: 1x aa battery (not included) installation: keyhole mount for...
3ddd
$1

The Emily + Meritt Bunny Alarm Clocks Pottery Barn
... x 2.75" deep x 8" high
expertly crafted of metal.
features whimsical detailing.
requires 2 aa batteries; not included.
3d_ocean
$89

Tesla Model S with chassis-interior
...tesla model s with chassis-interior 3docean american auto battery car chassis electric electricity fast interior model new p85...
3d_ocean
$10
Battery maxwell studio set up
...haded and ready to hit render! -maxwell 2.o studio set up -maya file, obj file format and maxwell file -very detail documentation
3d_ocean
$10

Realistic Flashlight Model, Texture, A&D Material
...model, texture, a&d material 3docean 3 d aluminum anodized battery powered bulb cell cgidx emergency flash flash light flash...
3d_ocean
$89
Tesla Roadster 2011
...tesla roadster 2011 3docean 2011-2014 battery bev darkstar eco electric google roadster sport tesla tesla...
3d_ocean
$5
Lithium Cells
...lithium cells 3docean battery button cell coin battery coin cell cr2016 cr2025 cr2032...
3d_ocean
$20
Maglite Mini Flashlight
...maglite mini flashlight 3docean army battery blackout camoflage dark flash flashlight lamp led light maglite...
3d_ocean
$89

Tesla Model S P85
...tesla model s p85 3docean american auto battery car chassis electric electricity fast interior model new p85...
Camera
3d_export
$30

Tripod 3D Model
...tripod 3d model 3dexport tripod camera photography studio lighting 3d virtualz tripod 3d model virtualz...
3d_ocean
$29

Low Poly Sports Bike
...2013. lighting with vray light and also has vray camera ...
3d_ocean
$29

Scania Truck
...trailer vehicle high poly truck with vray lighting and camera ...
3d_ocean
$29

Parrot Bebop Drone
...parrot bebop drone 3docean aircraft aviation camera chopper dji dron game helicopter parrot-bebop-quadcopter-drone phantom propeller quad...
3d_ocean
$49
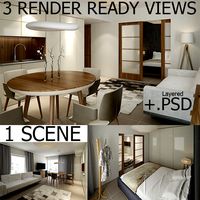
Interior Vray Scene with 3 RenderReady Views + PSD
...team7 textures vray interior vray scene with 3 renderready camera realistic v-ray & 3ds max 2014 interior scene, fully...
3d_ocean
$19
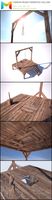
Western Gallow Camera Ready
...nd animated wild west wooden gallow. ready gibbet model for both wild west movie and game use. included files : .max (vray), ....
3d_ocean
$15

Highpoly 3d Model of Electrostatic Machine
...rigged:no animated: no uv mapped: no unwrapped uvs: yes camera: 0 lights: 0...
3d_ocean
$5

3d Text and Object Mockup - Wall
...visualisation vray white what’s included: vray rendering setup vray camera, vray lights and shadow studio scene render scene 5852×3901...
3d_ocean
$12

Google Cardboard
...(with .psd files included) + multiple positions + real camera effects (vray 3.0) +...
3d_ocean
$6

3d Text and Object Mockup - Wall
...visualisation vray white what’s included: vray rendering setup vray camera, vray lights and shadow studio scene render scene 5852×3901...
Powered
3d_export
$200

Fallout T51B Power Suit 3D Model
...ut t51b power suit 3d model
3dexport
fallout power armor t-51b videogame
fallout t51b power suit 3d model scifipro 38925 3dexport
3d_export
$7

Business Center 3D Model
...er table skyscraper lowpoly game photorealistic collection textures house business
business center 3d model ikaika 74521 3dexport
3d_export
$75

Strong Man 2014 3D Model
...es human male 18 nude anatomy power super superman 3d unity fbx max obj 3ds 3dmax
strong man 2014 3d model zeonman 85537 3dexport
3d_export
$5

Interior Kitchen 3D Model
...r table skyscraper lowpoly game photorealistic collection textures house business
interior kitchen 3d model ikaika 74528 3dexport
3d_export
$15

Classic Steam Train 3D Model
...ocomotive metal old power rail railroad railway retro smoke station steam steel
classic steam train 3d model jronn 65890 3dexport
3d_export
$95

BMW M235i F22 3D Model
... 2-series 2er coupe sport car premium german fast detailed realistic mental ray
bmw m235i f22 3d model fisherman3d 78086 3dexport
3d_export
$110
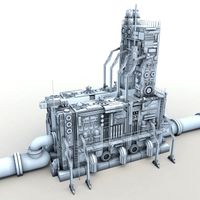
Power relay station 3D Model
...h poly gun anty-aircraft tower pipes futuristic structure sci fi powerplant plant
power relay station 3d model td3 53026 3dexport
3ddd
$1

RH VICTORIAN HOTEL FLOOR LAMP + DESK LAMP
...our lamp pairs the intricate open metalwork typical of flame-powered lanterns with the modern drama of an internal candelabra....
3d_ocean
$3

Schuko Socket
...nector power power point safety socket schuko socket wall socket
a schuko socket like the ones used in germany. colored old white
3d_ocean
$5
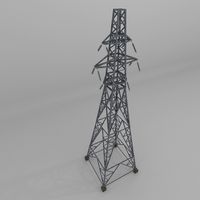
Column Power Lines
...ry iron line metal pole power pylon single steel structure supply tall technology tower voltage wire
column power lines 3d model.
Housing
3d_export
$25
Apartment House 106 Low Poly 3d Model 3D Model
...rior model home old windows background house noeclassical
apartment house 106 low poly 3d model 3d model cerebrate 90493 3dexport
3d_export
free

Download free Special UVmapped vase 3D Model
... vase 3d model
3dexport
vase decoration hight qualiy uv tileable house
special uvmapped vase 3d model best3dmodels 71953 3dexport
3d_export
$10

Golden barrel inn 3D Model
... 3d model
3dexport
inn medieval goden barrel pub zlatno burence kafana house old
golden barrel inn 3d model buncic 32748 3dexport
3d_export
$29

Rug Spiral 3D Model
...ouse villa contemporary cabinet chair rug lamp lounge blancket livingroom magic-carpet
rug spiral 3d model sbgwolf 39006 3dexport
3d_export
$59

Sofa 17 3D Model
...er photoreal chair fabric home house seating pillow cushion modern contemporary furniture
sofa 17 3d model sbgwolf 38995 3dexport
3d_export
$100

3D Model Detailed House Cutaway 6 3D Model
...living room kitchen aerial view flat apartment house home bedroom
3d model detailed house cutaway 6 3d model acdcz 64471 3dexport
3d_export
$99

Temple Gate 3D Model
... joss house monastery classical classic scripture entrance gate door architecture japan
temple gate 3d model net3d 56537 3dexport
3d_export
$19

Miami Building 3D Model
...ving building florida architecture structures house ocean architectural exterior
miami building 3d model guitargoa 73412 3dexport
3d_export
$50

Seafarers Union 3D Model
... model
3dexport
building fantasy house home merchant exterior architecture
seafarers union 3d model vanishingpoint 72951 3dexport
3d_export
$7
Business Center 3D Model
...er table skyscraper lowpoly game photorealistic collection textures house business
business center 3d model ikaika 74521 3dexport