Thingiverse

Recycled CD lamp by lynspm
by Thingiverse
Last crawled date: 3 years ago
Ever wondered what to do with old CDs and DVDs? Here comes the solution: turn them into a decorative lamp!
You will need
experience in building electrical equipment and knowledge to work with devices connected to mains voltage
soldering skills
24 white LEDs with 5mm diameter
a constant current power supply matching the power needs of the LEDs. In the given configuration, eight LEDs are connected in parallel, consuming around 150mA. Three of those eight-LED-strings will be connected in series, requiring around 8-9V. The design provides space for a power supply whose dimensions are 28x11x15mm. Try googling for 5W AC85-277V 150mA DC9-34V. You should be able to find something on aliexpress labeled "3-10*0.5W/150mA Candle Light Driver". I got mine on ebay.de however. Do not choose a version with more than 150mA, otherwise the LEDs will be overloaded (you may of course adapt the design to allow for more LEDs - it is just one variable).
a few cm/inches of internal cabling (thin insulated wire)
a power cable, preferably with a switch
a wire connector to connect the power cable with the power supply.
Assembly instructions:
Mount one column of eight LEDs at a time. Make sure all LEDs have the same orientation, i.e. the longer(anode) / shorter(cathode) wires must all be on the same side. Bend all wires down so that the wires from the upper LEDs reach the wires of the adjacent LEDs underneath. Solder the wires together, so that the eight LEDs are connected in parallel. This is not easy, because you will need to solder very close to the plastic, which does not like heat. Also, the wires may be a bit short, especially for the shorter side (cathode). In that case, you will need to fill the gaps with a liitle bit of solder. Don't try this if you don't have experience with soldering! Verify all connections with a multimeter before connecting a power supply!
Repeat for all three rows. Then locate the wiring holes running from one column to the next. Connect the anodes of one colum to the cathodes of the next column. In total you will have a series connection of three groups of eight diodes. Connect the positive output of the power supply with the anode side of the series and the negative output of the power supply with the cathode side.
You will want to check if everything works before final assembly. Warning if you do this with direct input from the line power, be extremely cautious not to touch any metallic part of the assembly! You have been warned!
The parts connect with a circular dovetail. Just set together and turn until it snaps in. Take care not to squeeze any cabling (see photo). That's it. Now fill in the CDs and cover the top, again with the circular dovetail. Have fun!
OpenSCAD version notice
The circular dovetail requires OpenSCAD 2016.xx or newer. It will not work with the current official release (2015.03) as this version does not support the angle argument in rotate_extrude(). You will need a development snapshot.
Similar models
thingiverse
free

5x LED Cube (easy to build) by Nussmann
...his at home! i accept no liability for damage to the hardware and / or damage of any other kind. you build this on your own risk!
thingiverse
free

USB desk lamp by K_Sherman
...once i've tested the bulb i pot the assembly in hot melt glue.
for hardware i use 2x 1/4-20 x 1in bolts and 2x 1/4-20 nuts.
thingiverse
free

Traffic Lights (3 Leds) by hardmoduino
...se and pole.
the base has four 3mm holes, to place four m3 screws, that are placed in the vertex of a 1/2" square (12,7 mm).
thingiverse
free

Smart Christmas Light Arch by auo
...ith a
corresponding firmware and home automation system you can now control
each single led (i used esp-home and home-assistant).
thingiverse
free

A light in the darkness
...r wire (plus) is connected directly to the anode (long lead) of the led.
the cathode (short lead) is connected to the pushbutton.
thingiverse
free

small single color LED Cube by MitchiLaser
... are the pins reserved for the transistors.
you can download the source and the compiled program for my exampe programm on github
thingiverse
free

Ender 3 / Pro / V2 Light Mod by WesCassar
...light unit to the power supply terminals.
brown wires are positive, blue wires are negative.
any questions then feel free to ask.
thingiverse
free

GoPro Hero 5 LED Ring Light by Modellerhouse
...please read the print settings i provided below.
all tolerances are in .15mm. that should be tight and it shouldn't fall off.
thingiverse
free

12V 360W Power supply cover with banana terminals by MishoIV
...://goo.gl/tqcyis
some wires and wire connectors to connect the banana terminals
this cover was designed to use with rc chargers.
thingiverse
free

Godox SL-60 LED Video Light Short Body by JohannesBerlin
... slide the power supply board back in place (the screws are not required anymore), solder the led- wire and put the rest together
Lynspm
thingiverse
free

Whetstone holder by lynspm
...eed
2pc 6 mm threaded rod (length around 25cm each, may be cut from 1m piece)
2 cover nuts 6 mm
2 wing nuts 6 mm
4 washers 6.4 mm
thingiverse
free

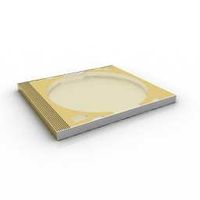
Slimline Dell Laptop Dock Spacer by lynspm
...mm - fits more snugly to the chamfered edge of the docking station and matches the height of the original dell part
covered holes
thingiverse
free

Fully customizable vaccine vial holder by lynspm
...
if you use it, consider donating to https://www.aerzte-ohne-grenzen.de/ or the corresponding local organization of your country.
thingiverse
free

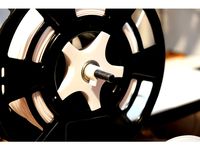
Parametric universal spool holder with variable number of cutouts by lynspm
... bearing prints more precisely in this orientation. therefore i reduced the extra diameter for the bearing from +0.6mm to +0.4mm.
thingiverse
free

OctoLapse camera holder with NeoPixel light by lynspm
...art so the screw heads are now accessible from the right side and the nuts are on the left. i used one m5x20 and one m5x15 screw.
thingiverse
free
Universal Spool Holder for M8 Threaded Rods and 608 Bearings by datdiy
...number of cutouts as seen in the design by lynspm changed the shape of the cutouts to an elliptic...
Cd
archibase_planet
free
CD
...cd
archibase planet
cd disc computer equipment
cd - 3d model (*.gsm+*.3ds) for interior 3d visualization.
3ddd
$1

CD
... , dvd , диски
детальная коробка под диски slim
3d_ocean
$5

CD Rack
...cd rack
3docean
album cd cd player compact disc dancing hifi jewel case music rack sound speaker
a cd rack with jewel cases
turbosquid
free

CD
...bosquid
free 3d model cd for download as blend, fbx, and obj on turbosquid: 3d models for games, architecture, videos. (1709427)
3ddd
$1
CD player
...cd player
3ddd
проигрыватель
cd player
3ddd
free

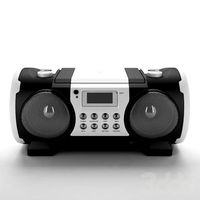
radio cd
...radio cd
3ddd
магнитофон
radio cd
3ddd
$1

Стойка CD
...стойка cd
3ddd
cd , стойка
материаля vray.текстуры есть.
3d_ocean
$5

CD and Case
...cd and case
3docean
album audio case cd compact disc disc dvd jewel case music
an audio cd and a case
turbosquid
$20

cd
... available on turbo squid, the world's leading provider of digital 3d models for visualization, films, television, and games.
turbosquid
$2

Cd
... available on turbo squid, the world's leading provider of digital 3d models for visualization, films, television, and games.
Recycled
turbosquid
$1
RECYCLE
... available on turbo squid, the world's leading provider of digital 3d models for visualization, films, television, and games.
3ddd
$1

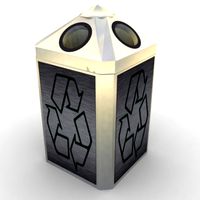
Recycle bin
...ycle bin. rendered in 3ds max and vray.
you can replace your own logo and change the color of the bin.
modifier stack available.
3d_ocean
$25

Recycle Bins
...ens in older versions. uses vray 1.5 sp5 for the lighting setup used for the preview. please contact me if you need in another...
3d_ocean
$2

Recycle Arrow
...l three-dimensional shape triangle white background
3d recycle arrow polygon 990 face include 3dsmax2010, c4d, fbx, obj, 3ds, lwo
turbosquid
$9

Recycling Bin
...quid
royalty free 3d model recycling bin for download as fbx on turbosquid: 3d models for games, architecture, videos. (1386366)
turbosquid
$10

Recycle Bin
...ty free 3d model recycle bin for download as ma, obj, and fbx on turbosquid: 3d models for games, architecture, videos. (1203083)
turbosquid
$9
Recycle Bin
...y free 3d model recycle bin for download as max, obj, and fbx on turbosquid: 3d models for games, architecture, videos. (1152735)
turbosquid
$2

Recycle Basket
...e 3d model recycle basket for download as blend, obj, and fbx on turbosquid: 3d models for games, architecture, videos. (1702963)
turbosquid
$29

recycling bin
...3d model recycling bin for download as 3ds, obj, c4d, and fbx on turbosquid: 3d models for games, architecture, videos. (1400375)
turbosquid
$15
Recycling Stand
...l recycling stand for download as max, max, fbx, obj, and 3ds on turbosquid: 3d models for games, architecture, videos. (1642505)
Lamp
archibase_planet
free
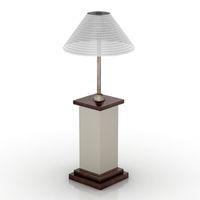
Lamp
...lamp
archibase planet
lamp reading lamp table lamp
lamp - 3d model (*.gsm+*.3ds) for interior 3d visualization.
archibase_planet
free
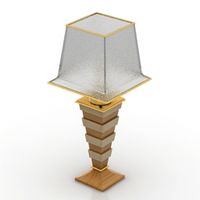
Lamp
...lamp
archibase planet
lamp reading lamp table lamp
lamp - 3d model (*.gsm+*.3ds) for interior 3d visualization.
archibase_planet
free

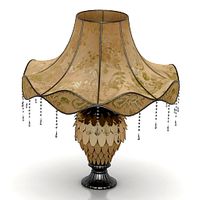
Lamp
...lamp
archibase planet
lamp table lamp reading lamp
lamp - 3d model (*.gsm+*.3ds) for interior 3d visualization.
archibase_planet
free

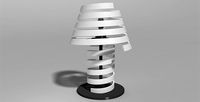
Lamp
...lamp
archibase planet
lamp table lamp reading lamp
lamp - 3d model (*.gsm+*.3ds) for interior 3d visualization.
archibase_planet
free

Lamp
...lamp
archibase planet
lamp reading lamp table lamp
lamp - 3d model (*.gsm+*.3ds) for interior 3d visualization.
archibase_planet
free
Lamp
...lamp
archibase planet
lamp reading lamp table lamp
lamp - 3d model (*.gsm+*.3ds) for interior 3d visualization.
archibase_planet
free
Lamp
...lamp
archibase planet
lamp table lamp reading lamp
lamp - 3d model (*.gsm+*.3ds) for interior 3d visualization.
archibase_planet
free

Lamp
...lamp
archibase planet
lamp table lamp reading lamp
lamp - 3d model (*.gsm+*.3ds) for interior 3d visualization.
archibase_planet
free
Lamp
...lamp
archibase planet
lamp reading lamp table lamp lantern
lamp - 3d model (*.3ds) for interior 3d visualization.
3d_ocean
$6
Lamp
...lamp
3docean
lamp
a high quality lamp.