Thingiverse
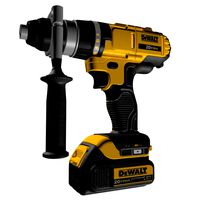
Black & Decker 20V MAX Regular or Extended 5.0Ah Battery AND Charger Holders (with 1" pegboard mounting option) by registeredthing
by Thingiverse
Last crawled date: 3 years, 4 months ago
Update 9-5-2020: There is a new model which includes a battery status indicator here:
https://www.thingiverse.com/thing:4588442
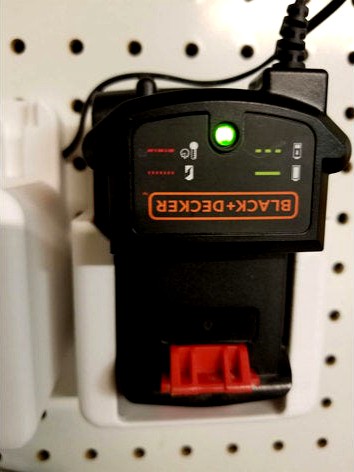
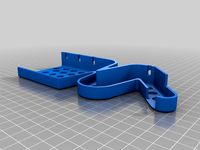
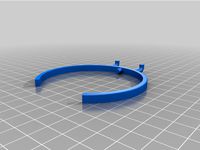
This is a collection of battery and battery charger holders for the Black and Decker 20V MAX Batteries (both regular size and extended 5.0Ah batteries).
These models have the following features:
Models for Extended 20V batteries.
Mounting holes to use with #8 screws (non pegboard versions).
Versions for mounting on 1" peg board (with pegs which you can optionally use #6 x 1/2" or M3 screws to better secure the holder into the peg)
Versions with a clip for storing the charger.
Charger storage versions have built in cable management guides.
Holes in the bottom of the holders for possibly better airflow (my extended batteries have vents in this area).
To determine which file you need, the files are named according to the options they include, for example:
BD-20V-Battery_Holder_V38_REG_CHARGER_PEG.stl
REG = Regular Size BatteryEXT = Extended Size Battery
CHARGER = (yes or no) has a clip for holding the charger
PEG = (yes or no) mounts on a 1" peg board
If not using the pegboard mounts use #8 screws for mounting.
For a more secure mounting on the pegboard, you can optionally install #6 x 1/2" or M3 x10mm screws in the holes which go through the pegs. Note that it is possible you could damage the holes in your pegboard by screwing the holders down through the pins. I have installed and removed these without damage to my pegboard after using the #6 screws to lock the pins in place, but I was careful to work them out when removing. If concerned, you may want to try testing the pegboard pins with screws in an obscure location first with the screws you plan to use and try M3 screws instead of the #6 screws which are a bit larger - or omit the screws all together.
If you are just needing a charger holder, I made one you can find here:
https://www.thingiverse.com/thing:4552501
The STEP file is included for easy remixing.
Parts are not oriented for printing, but I suggest printing them in the tall orientation (same way they would be mounted on the wall). Supports are required for the pegboard versions.
https://www.thingiverse.com/thing:4588442
This is a collection of battery and battery charger holders for the Black and Decker 20V MAX Batteries (both regular size and extended 5.0Ah batteries).
These models have the following features:
Models for Extended 20V batteries.
Mounting holes to use with #8 screws (non pegboard versions).
Versions for mounting on 1" peg board (with pegs which you can optionally use #6 x 1/2" or M3 screws to better secure the holder into the peg)
Versions with a clip for storing the charger.
Charger storage versions have built in cable management guides.
Holes in the bottom of the holders for possibly better airflow (my extended batteries have vents in this area).
To determine which file you need, the files are named according to the options they include, for example:
BD-20V-Battery_Holder_V38_REG_CHARGER_PEG.stl
REG = Regular Size BatteryEXT = Extended Size Battery
CHARGER = (yes or no) has a clip for holding the charger
PEG = (yes or no) mounts on a 1" peg board
If not using the pegboard mounts use #8 screws for mounting.
For a more secure mounting on the pegboard, you can optionally install #6 x 1/2" or M3 x10mm screws in the holes which go through the pegs. Note that it is possible you could damage the holes in your pegboard by screwing the holders down through the pins. I have installed and removed these without damage to my pegboard after using the #6 screws to lock the pins in place, but I was careful to work them out when removing. If concerned, you may want to try testing the pegboard pins with screws in an obscure location first with the screws you plan to use and try M3 screws instead of the #6 screws which are a bit larger - or omit the screws all together.
If you are just needing a charger holder, I made one you can find here:
https://www.thingiverse.com/thing:4552501
The STEP file is included for easy remixing.
Parts are not oriented for printing, but I suggest printing them in the tall orientation (same way they would be mounted on the wall). Supports are required for the pegboard versions.
Similar models
thingiverse
free

Black & Decker 20V MAX Regular or Extended 5.0Ah Battery AND Charger Holders REMIX with Status Indicator (and 1" pegboard mounting option) by registeredthing
...holder is charged or discharged, they are otherwise very similar these models have the following features: models for extended...
thingiverse
free

20v Dewalt Charger Pegboard Hooks
...they line up directly with the pegboard holes. this may fit other chargers if they have mounting holes spaced in inch increments.
thingiverse
free
Makita DC10WA Charger Holder for 1" Pegboard by jprossbach
...res are from an earlier version. i moved the screw holes down,
so as to allow you to use both the hooks and holes simultaneously.
thingiverse
free

DeWalt 20V Max Battery Pegboard Mount by Peaches491
...ild plate.
needs support for the overhang that covers the battery terminals.
supports dewalt 20v max batteries of various sizes.
thingiverse
free

Black & Decker 20V Battery Hanger by rsgeek
...if you need to add mounting holes for flat-head screws.
based on my holders for ryobi one+ batteries that you can find over here.
thingiverse
free

Pegboard Screw-in Module by 20sffactory
...eg board modular mount which can be screwed into anything to convert into a pegboard holder. pegboard size: 1 inch between holes.
thingiverse
free

Makita Battery Charger Pegboard Adapter by smokeyDaBear
...ight) embedded text show which side to mount the bracket to the charger assuming same definitions of orientation.
happy printing!
thingiverse
free
36 AA Battery holder (pegboard) by wowModels
...older, holds way more batteries. aerodynamic holes. faster printing. more pin holes.
1" x 1" pegboard with little holes
thingiverse
free

Black & Decker 20v Li-Ion charging station by Reversepivot1
... pink because that's what i have the most of, i can paint it, and i'm secure enough in my masculinity to have pink tools.
thingiverse
free

Dewalt Battery holder for Pegboard
...harger are almost 3 pounds wanted insurance they would fall.
i also used double sided 3m tape, to hold the charger to the holder.
Registeredthing
thingiverse
free

"Freezer Jail" Freezer Organizer / Divider (with STEP file) by registeredthing
...y remixing. please respect the non-commercial license, but if you would like to make these for sale please contact me for terms.
thingiverse
free
Headphone / Audio Jack Extender (Under Desk or Wall Mount) by registeredthing
...derdesk usb hub mount, check out my underdesk usb 3.0 hub mount with an audio jack here:https://www.thingiverse.com/thing:4662709
thingiverse
free

X carriage modified bl touch mount for ender 3, cr 10 by choser1543
...for ender 3, cr 10 by choser1543 thingiverse remixed registeredthing bl-touch mount: now instead of a nut, the screw...
thingiverse
free

Hydra Fan Duct & Tool Change System for CR10S PRO with MicroSwiss Hotend (REMIX) by registeredthing
...and the fan ducts. i used pla on the other parts.
step file included for easy remixing.
this was designed using viacad v12 pro.
thingiverse
free

Under Desk Headphone / Audio Jack Extender and Anker USB 3.0 Hub mount by registeredthing
...4dv9jmx/
part is not oriented for printing. if you print one, please post a make.
the step file is included for easy remixing.
thingiverse
free

15/32" Drill Bit Case by registeredthing
...rs.
this was designed using viacad v12 pro
step file is included for easy remixing and the parts are not oriented for printing.
thingiverse
free

Sony Headphones Strain Relief Boot (Sony MDR-V6) by registeredthing
...erse.com/thing:4662709
part is not oriented for printing (rotate so the larger end is down).
if you make one, please post a make.
thingiverse
free

Small and Smaller Size Mask ear savers (REMIX) with lanyard clip and mask retaining clip on one side by registeredthing
...r easy remixing.
update 9-2-2020: additional sizes can be found here (work in progress):https://www.thingiverse.com/thing:4586850
thingiverse
free

CR-10S Pro v1 cable chain with 90 degree brackets - REMIX with STEP file by registeredthing
...ports in cura (both types will help better support the large overhang on the base).
the step file is included for easy remixing.
thingiverse
free

Cable Shield For Ender 3 Control Box 40x20 Hole by draxus42
...is an exact copy of the remix by user "registeredthingquot;; only with the half of it that has the...
20V
3d_export
$47

Russian SS18 Satan Mod 5 3D Model
...3d model 3dexport russian soviet military ss 18 r-36 rs-20v satan rocket ballistic missile icbm intercontinental nuke nuclear strike...
3d_export
$10
drill dawalt 20v
....)<br>the model is completely ready for use visualization in 3ds max.<br>all previews rendered 3ds max 2013 mentalray
3d_export
$209
mtu-8000-20v engine
... in this model, please do not hesitate to contact us, we are looking forward to continuously dealing with you.<br>markos 3d
turbosquid
$20
DEWALT 20V Max Green Rotary Tough Laser DW079LG
...laser dw079lg for download as ma, max, 3ds, fbx, obj, and stl on turbosquid: 3d models for games, architecture, videos. (1548702)
thingiverse
free

DC adapter for ActivEnergy 20V power tools Li-Ion battery pack by suromark
...thingiverse
a connector to use the activenergy xyz561/2019sud 20v power tools accumulator as dc power source for hobby projects.
thingiverse
free

Spacer for DeWalt 20V Li-ion Battery Holder Mount by havunome by HunterG66
... by hunterg66
thingiverse
spacer for dewalt 20v li-ion battery holder mount
by havunomehttps://www.thingiverse.com/thing:3921812
thingiverse
free

DeWalt Battery holder (All 20v / 60v) by TurboUSMC
...h petg because i like the gray color matching.
hole in the bottom is to ensure any potential moisture can drain from the holder.
thingiverse
free

Parkside x20 to MAXmat 20V (ViceVersa) by GLoL
...68%234328%2319937%23796_668%232846%238107%2332_668%232717%237566%23816_668%231000022185%231000066058%230_668%233468%2315618%23945
thingiverse
free

DeWalt 20V Max Battery Adapter Pole Mount by Mcline27b
...tery coupled with a cc cv uv (undervoltage protected) step-up adapter to power an electric scooter, converting it from lead-acid.
thingiverse
free

12V Power Adapter for Dewalt 20V Battery by rybitski
...e on dewalt packs is fairly high but better safe than sorry. the downside to this design is the lack of under-voltage protection.
Decker
3d_ocean
$89

AEC Routemaster RM 1954
...1954 3docean 1954-1968 aec aec routemaster british bus double double-decker england london rm routemaster tourist transport uk the 3d...
archive3d
free

Bus 3D Model
...bus 3d model archive3d bus autobus double-decker two-decker bus busaec n310512 - 3d model (*.gsm+*.3ds) for exterior...
archive3d
free

Bus 3D Model
...bus 3d model archive3d bus double-decker two-decker motor bus bus n150111 - 3d model (*.3ds) for...
archive3d
free

Iron 3D Model
...archive3d iron flatiron flat iron smoothing-iron iron black & decker n131213 - 3d model (*.gsm+*.3ds) for interior 3d...
3ddd
$1

Iron BLACK & DECKER
...iron black & decker
3ddd
утюг , black&decker
iron black & decker
3ddd
free

Электроножовка
...электроножовка 3ddd электроножовка , пила электроножовка black & decker ...
3ddd
$1

Black & Decker электропила
... электропила , лобзик
модель электропилы black & decker, материалы vray
cg_studio
$39

Optare Versa Park and Ride3d model
...optare solo bus ashok leyland hinduja group saudi metro decker metrocity versa tempo sr arriva .max - optare versa...
cg_studio
$79

London Bus3d model
...london bus3d model cgstudio double decker bus busses london european automobile transportation transit metro public...
3ddd
$1

Black & Decker ударная дрель
... дрель , сверло
моделька ударной дрели black & decker, материалы vray
Pegboard
3d_export
$6

Workshop Tools 02 - PBR -
...vise<br>63 base pieces<br>73 prefabs<br>30 textures in 2k<br>10 materials<br>polygon count:<br>30,071<br>workbench: 848<br>pegboard 6<br>toolholder 01: 46<br>toolholder 02: 503<br>toolholder 03: 366<br>toolholder 04: 114<br>trisquare:...
turbosquid
free

puzzle pegboard with square and triangle puzzle
... pegboard with square and triangle puzzle for download as max on turbosquid: 3d models for games, architecture, videos. (1634635)
thingiverse
free
Pegboard Nutella jar holder / Soporte frasco Nutella para placa perforada by matiasdenker
...icio de 4mm de diametro en el cuello del frasco para que un pequeño perno impreso en la misma pieza se meta levemente. ver fotos.
thingiverse
free
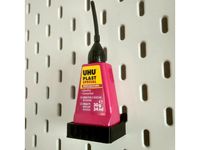
UHU Plast holder for pegboard / IKEA Skadis by emi14
...uhu plast holder for pegboard / ikea skadis by emi14
thingiverse
uhu plast holder for pegboard.
thingiverse
free
Reasonably Universal Controller Hook for IKEA SKÅDIS Pegboard by miguelangellv
...uelangellv
thingiverse
a remix from https://www.thingiverse.com/thing:3470056 with other hook type that they work better for me.
thingiverse
free

Pegboard Earring Holder (No Hooks) by Scottmg
...thingiverse
i took the original file of the pegboard earring holder and removed the hooks otherwise everything else is the same.
thingiverse
free

Pegboard Light Bar by noneroy
... wasn't wide enough for my led strips. i decided to go with a more square look as well but kept the very cool pegboard mount.
thingiverse
free

IKEA Skadis Ryobi Vacuum Mount by themaninthesuitcase
...https://www.thingiverse.com/thing:4541821 so it would mount to a ikea skadis pegboard you will need an m3 x12mm socket head screw...
thingiverse
free

Easy Box corner - for 3 mm wood thickness (no screw version) by joespace
...make a box to hold my tools on the pegboard this is still a work in progress, more photos...
thingiverse
free

Slot Modular Pegboard Mount by SimpleMakes12
...m3dpen: m- holder the 3d pen attachment
mheat: m- holder for the burner or solder attachment
mfoam: m- holder for the foam cutter
Charger
3d_export
$119

Dodge Charger 2015 3D Model
...fast american 2015
dodge charger 2015 3d model download .c4d .max .obj .fbx .ma .lwo .3ds .3dm .stl swan3dstudios 107290 3dexport
cg_studio
$40

Dodge Charger 19693d model
... blue speed
.dae .fbx .obj .blend - dodge charger 1969 3d model, royalty free license available, instant download after purchase.
cg_studio
$129

Dodge Charger Pro Touring 1968-19693d model
...o .fbx .c4d .3ds - dodge charger pro touring 1968-1969 3d model, royalty free license available, instant download after purchase.
3ddd
$1

Сервировка стола Ralph Lauren
...dinner napkin banded water goblet banded champagne flute leather charger sloane nickel hurricane polys: 596795 verts: 643136 добавлена библиотека...
3ddd
$1

Triangle USB Charger
...triangle usb charger
3ddd
зарядное устройство
triangle usb charger
model : uk md1
3d_ocean
$16

Dodge Charger - General Lee 1969
... polygonal road stylized transport transportation vehicle
low poly stylized version of an iconic dodge charger! hope you like it!
3d_ocean
$8

1974 Dodge Charger - Wheels Of Terror Base
... model is based on the car used in the movie wheels of terror. check my profile for a textured version of the car! for the lat...
3d_ocean
$15

Wheels Of Terror Charger
...d to look like the dodge charger from the movie wheels of terror. for the latest model, visit my website: http://syndicate3d.a...
3d_ocean
$5

Powerbank
...powerbank 3docean adaptor charger phone power powerbank powerbank phone charger models: downloadable model packages containing all necessary texture files....
3d_ocean
$89

Dodge Charger RT 1969
...y, in real units of measurement, qualitatively and maximally close to the original. model formats: - *.max (3ds max 2008 scanl...
Regular
3d_export
$10

Mordecai 3D Model
...mordecai 3d model 3dexport mordecai regular show cartoon character mordecai 3d model nicolobos77 77971...
cg_studio
$129

Chevrolet Cruze Sedan 20163d model
...2018 2019 2020 saloon car american usa europe gm regular popular cheap .obj .max .lwo .fbx .c4d .3ds -...
cg_studio
$129

Chevrolet Silverado LT Z71 Regular Cab GMTK2 Long Box 20163d model
...rolet silverado lt z71 regular cab gmtk2 long box 2016 3d model, royalty free license available, instant download after purchase.
3d_ocean
$89

Dodge Ram 1500 Regular Cab SLT 6-foot 4-inch Box 2
...y, in real units of measurement, qualitatively and maximally close to the original. model formats: - *.max (3ds max 2008 scanl...
3d_ocean
$89

Dodge Ram 1500 Regular Cab Laramie 120-inch Box 20
...y, in real units of measurement, qualitatively and maximally close to the original. model formats: - *.max (3ds max 2008 scanl...
3d_ocean
$89

Ford F-150 Regular Cab XL 2014
...y, in real units of measurement, qualitatively and maximally close to the original. model formats: - *.max (3ds max 2008 scanl...
3d_ocean
$89

Chevrolet Silverado HD RegularCab LongBed 2011
...0 spin: http://www.youtube.com/watch?v=pldpihnn2vi on a validation drive of the new, 2011 chevrolet silverado hd heavy-duty tr...
3d_ocean
$89

Toyota Hilux RegularCab 2012
...w.youtube.com/watch?v=fyxblqign8e the 3d model was created on real car base. model is created accurately, in real units of mea...
3d_ocean
$89

Toyota Tundra Regular Cab 2011
... in real units of measurement, qualitatively and maximally close to the original. model formats: - *.max (3ds max 2008 scanlin...
3d_ocean
$89

GMC Sierra Regular Cab Standard Box 2011
...http://www.youtube.com/watch?v=tccx5nkvm-m the 3d model was created on real car base. model is created accurately, in real uni...
Extended
3d_export
$99

Chevrolet Colorado 2012 Extended Cab 3D Model
...1 2012 2013 2014 2015 pickup extended cab supercab usa utility
chevrolet colorado 2012 extended cab 3d model squir 59279 3dexport
3d_export
$129

Chevrolet Silverado Extended Cab 1988-1999 3D Model
...ab
chevrolet silverado extended cab 1988-1999 3d model download .c4d .max .obj .fbx .ma .lwo .3ds .3dm .stl squir 104762 3dexport
3ddd
$1

подвес Kichler Lighting 2666ACO
...150 watts
light bulb socket type: medium base incandescent
light bulbs included: no
wiring type: hardwire
chain length: 36 inches
3ddd
$1
Kallista Bill Sofield Jenton
...coated with clear polyurethane for moisture resistance features two full-extended flanking drawers, one pivoting center drawer, two flanking doors...
3ddd
$1

Banks Extending Table
...етлое дерево. может иметь три варианта длинны.
нерасширенный: 1940мм
расширенный (1 лист): 2390мм
расширенный (2 листа): 2840мм
3ddd
$1

House of Troy Addison
...metry for turbosmooth.
object at 0.0.0, clean and light scene.
the archive contains the fbx & 3ds file & more previews.
3ddd
$1
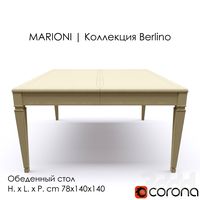
Обеденный стол MARIONI | BERLINO
...t, текстуры
масштаб: см (модели реальных размеров)
также присутствует файл для cinema 4d с настроенными матами для corona render.
3ddd
$1

Calligaris Orbital Dining Table
..., orbital , обеденный calligaris orbital table, 2 models, extended and simple. 3d max file, vray renderer, all materials...
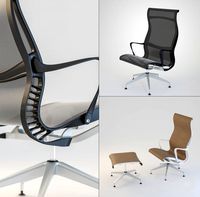
3ddd
free
Setu Lounge Chair and Ottoman
...n or upholstered fabrics.http://www.hermanmiller.com/products/seating/lounge-seating/setu-lounge-chair-and-ottoman.html
3d_ocean
$5

Low poly crates
...envato commercial licensing: dear customer, you need to purchase extended license for this item if the end...
Battery
3d_export
$5

Duracell Battery 3D Model
... power electronic blender tv
duracell battery 3d model download .c4d .max .obj .fbx .ma .lwo .3ds .3dm .stl grins 109010 3dexport
3ddd
$1

Gaston Clock
...22.75" x 24.5" h material: wood uses: 1x aa battery (not included) installation: keyhole mount for...
3ddd
$1

The Emily + Meritt Bunny Alarm Clocks Pottery Barn
... x 2.75" deep x 8" high
expertly crafted of metal.
features whimsical detailing.
requires 2 aa batteries; not included.
3d_ocean
$89

Tesla Model S with chassis-interior
...tesla model s with chassis-interior 3docean american auto battery car chassis electric electricity fast interior model new p85...
3d_ocean
$10
Battery maxwell studio set up
...haded and ready to hit render! -maxwell 2.o studio set up -maya file, obj file format and maxwell file -very detail documentation
3d_ocean
$10

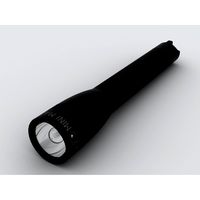
Realistic Flashlight Model, Texture, A&D Material
...model, texture, a&d material 3docean 3 d aluminum anodized battery powered bulb cell cgidx emergency flash flash light flash...
3d_ocean
$89
Tesla Roadster 2011
...tesla roadster 2011 3docean 2011-2014 battery bev darkstar eco electric google roadster sport tesla tesla...
3d_ocean
$5
Lithium Cells
...lithium cells 3docean battery button cell coin battery coin cell cr2016 cr2025 cr2032...
3d_ocean
$20
Maglite Mini Flashlight
...maglite mini flashlight 3docean army battery blackout camoflage dark flash flashlight lamp led light maglite...
3d_ocean
$89

Tesla Model S P85
...tesla model s p85 3docean american auto battery car chassis electric electricity fast interior model new p85...
Black
3d_export
$15
Pendant lamp Original BTC Stirrup Pendant Size 2 3D Model
...3d model 3dexport pendant lamp hanging original btc stirrup black stainless steel silver pendant lamp original btc stirrup pendant...
3d_export
$59

Zepter BlackWhite set 3D Model
...ishes magic harmony fine set black white champagne wine flutes stems classic
zepter blackwhite set 3d model mega3d 60680 3dexport
3d_export
$30

Samsung Galaxy Note 4 Charcoal Black 3D Model
...four phone flagship iphone apple quality blender cycles
samsung galaxy note 4 charcoal black 3d model dragosburian 96596 3dexport
3d_export
$15

Earth Moon Texture 3D Model
...travel universe galaxy star sun meteor asteroid comet blackhole black hole nebula earth moon texture 3d model clutchtrigger 49835...
3d_export
$10

Planet Mercury 3D Model
...travel universe galaxy star sun meteor asteroid comet blackhole black hole nebula planet mercury 3d model clutchtrigger 49645...
3d_export
$10

Planet Venus 3D Model
...travel universe galaxy star sun meteor asteroid comet blackhole black hole nebula planet venus 3d model clutchtrigger 49657...
3d_export
$10

Planet Earth 3D Model
...travel universe galaxy star sun meteor asteroid comet blackhole black hole nebula planet earth 3d model clutchtrigger 49647...
3d_export
$20

Headphones 1 3D Model
...c4d detailed music instrument sound studio headphone headphones ear black dark headphones 1 3d model cgaxis 70077...
3d_export
$19
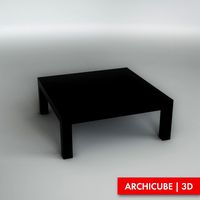
Black table 3D Model
...black table 3d model
3dexport
black coffee table quadratic furniture
black table 3d model archicube.3d 74286 3dexport
3d_export
$39

Table 007 3D Model
...table 007 3d model 3dexport coffee table black wooden glossy table 007 3d model archicube.3d 74277...
Option
3ddd
$1

Mongolian Lamb Bench
...во вкладку render, environment, effects и в hair render option выбрать режим mr...
3ddd
$1
Secto Design Octo 4240
...design octo 4240 3ddd secto design , octo finishing option natural birch white textile cable + ceiling cup black...
3ddd
$1
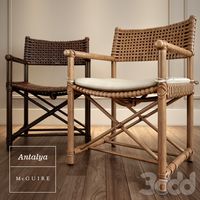
Antalya Arm Chair by McGuire
...laced rawhide arm chair no. lm-45 in two finish option: dark tobacco and pecan dimensions: width: 23" depth: 24"...
3ddd
$1

Fuleri Black carpet
...во вкладку render, environment, effects и в hair render option выбрать режим geometry. можно отключить модификатор и применить нужный...
3ddd
$1

Pair of Italian Brass Stools
...во вкладку render, environment, effects и в hair render option выбрать режим mr...
3ddd
$1

Classic Dinning Chair for Multipurpose use
...use 3ddd classic dinning chair - with 4 material option multipurpose use. 3ds max 2012-14 & fbx - vray...
3ddd
$1
YOSHI
...yoshi , nahoor лампа yoshi фирмы nahoor. официальный сайт: http://www.nahoor.com/index.php?optioncom_k2&view;=item&id;=62:yoshi&itemid;=220⟨=en ...
3ddd
$1

Стул
...chair by rossetto base available in a range of option made in italy steel framework, entirely moulded in cold-cure...
3ddd
$1

RH MODERN DESMOND BEDROOM SET
...system; requires a standard mattress only; box spring is optionl clean with a soft, damp cloth; do not use...
3ddd
$1

Real clothes
...одежда , свитер , ткань real clothes models 2 option polys: 414112 verts: 207052 support:...
Holders
3d_export
$8
Cup Holder 3D Model
...cup holder 3d model
3dexport
cup holder kitchen utility's
cup holder 3d model kingnin27 70463 3dexport
3d_export
$30

Office Set 10 3D Model
...e closets middle tower display keyboard books folders paper holder clock lamp pen
office set 10 3d model humster3d 21544 3dexport
3d_export
$20
Bath accessories Newform Base 3D Model
...lder brush dish tissue design home liquid paper roll fixture
bath accessories newform base 3d model modelplusmodel 29553 3dexport
3ddd
$1

IKEA SODERHAMN
...ene, polyester hollow fibre wadding
armrest cover/ three-seat section cover:
40% polyester, 16% cotton, 40% modacrylic, 4% nylon
3ddd
$1

Crate&Barrel Haunted House
...находятся модели: raven string lights london glass hurricane candle holders carved wood ravens black branch artificial wreath 296 509...
3ddd
$1

White Candle Holder Set
...white candle holder set
3ddd
подсвечник
белые керамические подсвечники
3ddd
$1

Alessi BLIP Utensil and Spoon Rest Holder
... держатель , ложка
держатель и ложка от фирмы alessi
размеры - 15 х 9 х 3,5 см
3d_export
$10
Document Tray 3D Model
...e letter executive tier three
document tray 3d model download .c4d .max .obj .fbx .ma .lwo .3ds .3dm .stl firdz3d 107186 3dexport
3d_export
$7

Suspended Candlestick Holder 3D Model
... general decor
suspended candlestick holder 3d model download .c4d .max .obj .fbx .ma .lwo .3ds .3dm .stl quartor 103576 3dexport
3d_export
$11

Cogwheel pencil holder 3D Model
... accessories house
cogwheel pencil holder 3d model download .c4d .max .obj .fbx .ma .lwo .3ds .3dm .stl cayman307 108406 3dexport
Mounting
3ddd
$1
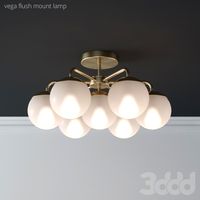
Vega flush mount lamp
...t lamp
3ddd
dimensions: 22.5"wx22.5"dx12"h
размеры: 58см х 58см х 31см
v-ray light included | v-ray light внутри
3ddd
$1
Currey & Company Balthazar
...or model for easy change or setup.
object at 0.0.0, clean and light scene.
the archive contains the obj file and more previews.
3d_ocean
$5
Rock_6
...unt mountain rock rocks stone
rock_6….............1474.polygon. .1476.vertices. 4096 * 4096 texture. obj,fbx,blend format models.
3d_ocean
$19

Low Poly Hotel
...s, flower beds and flower pots, trees, brunches, street lights, trashcans, wall mounted air freshener, air conditioners, fire ...
3d_ocean
$25

Low Poly Buildings
...e/warehouse, one grocery/minimarket, flower beds and flower pots, wall mounted air freshener, air conditioners, air intake, ae...
3d_ocean
$5

rock_4
...d rock rock stone
rock_4…...............1419.polygon. .1421.vertices. 4096 * 4096 texture obj,fbx,blend format model. game ready.
3d_ocean
$5

mountain_9
...n_9…........................12560 polygon. ...12562 vertices. 4096 * 4096 texture obj , fbx , and blend format model. game ready.
3d_ocean
$25

Low Poly City Block
... cafe, store/shop/supply/cafe building, flower beds and flower pots, trees, brunches, street lights, trashcans, wall mounted a...
3d_ocean
$5

Rock_3
...ount mountain rock stone
rock_3…..............6048.polygon 6127.point. 4096*4096 texture. obj,fbx,blend format model. game ready.
3d_ocean
$5

Rock_2
...unt mountain rock stone
rock_2…...............3196.polygon 3248.point. 4096*4096 texture. obj,fbx,blend format model. game ready.
5
3d_export
$99

Vauxhall Agila 2008 3D Model
...europe suzuki wagon r+ compact chevrolet mw city urban 5door hatchback splash vauxhall agila 2008 3d model humster3d 46740...
3d_export
$99

Toyota Yaris 2012 5door 3D Model
...2012 5-door 5d 3d 3-door 2013 2014 2015 2016 hatchback japan small city car
toyota yaris 2012 5door 3d model squir 47702 3dexport
3d_export
$99

Volkswagen Golf VII R 5door 2015 3D Model
...or volkswagen vw detailed interior golf vii 2017 hothatch 5door 5d
volkswagen golf vii r 5door 2015 3d model squir 90150 3dexport
3d_export
$99

Fiat Uno Attractive hatchback 5door 2013 3D Model
...013 2014 5-door hatchback compact italy italian brazil
fiat uno attractive hatchback 5door 2013 3d model humster3d 69192 3dexport
3d_export
$99

Vauxhall Insignia hatchback 2012 3D Model
...australia uk vauxhall insignia hatchback 2012 3d model humster3d 6595 ...
3d_export
$99

Citroen C4 Aircross 2013 3D Model
...peugeot 4008 citroen c4 aircross 2013 3d model humster3d 5075 ...
3ddd
$1
Ковры классические Isfahan
...ковры классические isfahan 3ddd ковер коллекция из 5 ковров isfahan, размеры 1400 х...
3ddd
$1

ferm_LIVING_baskets
...создаете себе красивый столик. в дополнение к столику идет декор.http://www.fermliving.com/webshop/shop/wire-baskets.aspx http://www.fermliving.com/webshop/shop/wire-baskets/wire-basket-top-3.aspx http://www.fermliving.com/webshop/shop/all-products/winebottle-candleholder-5aspx http://www.fermliving.com/webshop/shop/geometry-vase-1.aspx в архиве max...
3ddd
$1

Люстра Arte Lamp Cage A4320LM-5CC
...тикул: a4320lm-5cc
характеристики:
количество ламп 5 шт, тип ламп е14
диаметр: 680 мм.
высота: 450 мм.
высота с цепочкой: 900 мм.
3ddd
$1
Ralph Lauren WHITEHALL LARGE SCONCE IN BUTLER'S SILVER
...настенный (бра) rl2001bs dimensions: height: 17" width: 9¾" extension: 5" ...
1
3d_export
$100
PSO1M2 3D Model
...pso1m2 3d model
3dexport
sight weapon ussr russia pso pso-1 pso-1m2 sniper
pso1m2 3d model rosco.ru64776 34173 3dexport
3d_export
$20
BED 1 3D Model
...bed 1 3d model
3dexport
bed girl's bedroom
bed 1 3d model corbu 32960 3dexport
3d_export
$69

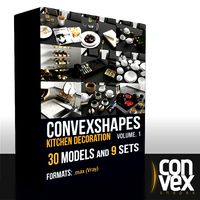
Convexshapes Kitchen Decoration Volume 1 3D Model
...rater meal spaghetti plate cutlery seafood chopping
convexshapes kitchen decoration volume 1 3d model convexshapes 69727 3dexport
3d_export
$69
Convexshapes Kitchen Decoration Volume 1 3D Model
...rater meal spaghetti plate cutlery seafood chopping
convexshapes kitchen decoration volume 1 3d model convexshapes 69722 3dexport
3d_export
$150
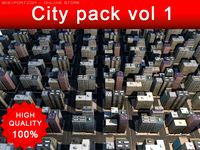
Cityscape pack vol 1 3D Model
...tro tile flat tree traffic environment scene aerial view textures materials
cityscape pack vol 1 3d model terreo76 30816 3dexport
3d_export
$8
Toyota GTOne Base 3D Model
...3d model 3dexport 1998 toyota gt-one gtone gt1 gt-1 gt/1 gt base sports muscle car vehicle transport exotic concept...
3d_export
$99

Convexshapes Kitchen Decoration Volume 1 3D Model
...rater meal spaghetti plate cutlery seafood chopping
convexshapes kitchen decoration volume 1 3d model convexshapes 69719 3dexport
3d_export
$20
Headphones 1 3D Model
...cinema c4d detailed music instrument sound studio headphone headphones ear black dark
headphones 1 3d model cgaxis 70077 3dexport
3d_export
$19
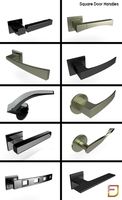
Square Door Handles Collection 1 3D Model
...madera bedroom recamara house casa decoration decoracion interior
square door handles collection 1 3d model jff111 74341 3dexport
3d_export
$99

Triumph GT6 Mk 1 3D Model
...onvertible sport speedster triumph spitfire 1967 1966 classic british leyland
triumph gt6 mk 1 3d model desmonster 77916 3dexport