Thingiverse
Xevo100 (brushed micro quad) by xeVox
by Thingiverse
Last crawled date: 3 years ago
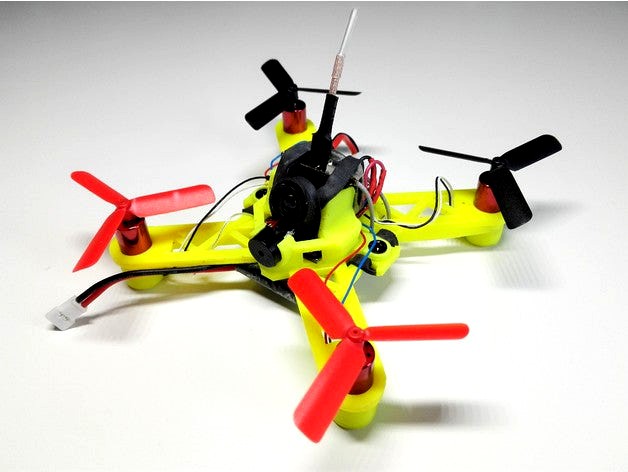
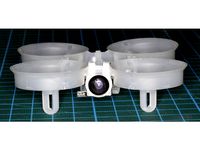
The Xevo100 is a tiny beast build around the "sp-racing F3 evo" flight controller. With about 67g it's very light weight, powerfull and a ton of fun to fly! It's perfect for beginners, since the frame is almost indestructable.
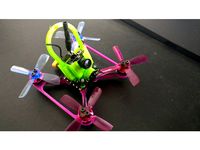
You can fly eighter indoors or outdoors, but if you choose to fly indoors take the small triblade props, since the bigger ones are way to strong. If you are new to flying, start learning the basics in Line of Slight flying outdoors, so you get used to the controls. There are also a ton of tutorials on youtube.
Check out our website for more cool stuff! HERE.
To build one for yourself you'll need:
parts from Banggood:
FC: sp-racing F3 evo
motors: 4x 8520 Racerstar brushed motor
A transmitter/reciever combo or just a reciever if you already got a transmitter
65mm biblade props (for outdoor flying only)
45mm triblade props (for indoor or outdoor flying)
AIO FPV Camera: TX01, TX02, TX03, TX04 (I highly recommend the TX04, since the cloverleave antennas break very fast)
9.5mm Buzzer
other parts:
some rubber bands (≥2x)
small M3 machine screws (3x)
tools:
soldering iron
3D printer (obviously...)
PC with betaflight app
Instructions:
1. Assembly
Print the frame using abs or petg filament (pla might work fine, but i think it will soften around the motors, since they tend to get really hot)
if you use abs filament, scale the model by 101%, because abs tends to shrink a lot when cooling down.
use a brim and print the first layer really slowly (~5mm/s)!
Depending on your 3D Printer's accuracy, you may have to widen the holes for the motors. You can use a 8.5mm drill bit, that you rotate by hand
Now you can insert the 4 motors. Looking at the top of the frame they go in like this:
The 2 cw motors (red and blue wire) have to be mounted on the top left and bottom right
The 2 ccw motors (white and black wire) have to be mounted on the top right and bottom left
Put in the rubber band for the battery
Before you mount the FC you should flash the current Firmware using betaflight
solder the bootloader jumperpads
make sure you always close chrome while doing anything in betaflight
open the app and download and install the 2 drivers (there are 2 links on the main page)
restart your PC
open the app and connect the FC via usb
go to the menu point "flash firmware and follow the steps of the screenshot
desolder the boatloader jumperpads
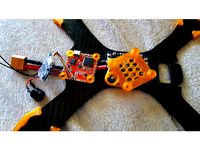
Secure the FC temporarly to the middle of the frame using some double sided sticky tape.
Solder the Motor wires to the Motor Pads on the FC. The ground wires (blue or black) are always facing to the front of the copter.
Solder the reciever wires to Uart 3 (starting from the back: black, red, white... the yellow one can be cut off)
Solder the Buzzer wires (not the Buzzer yet, only the wires, that should be ~20mm long) to the Buzzer pads
Solder the Battery wires
FPV setup:
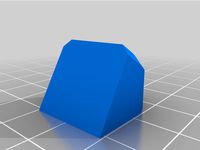
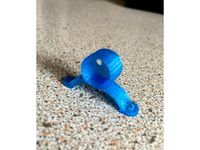
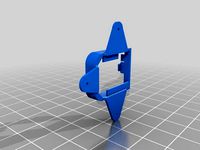
Depending on which camera you chosed to buy, download the right mount and print it in abs or petg filament with supports. (The Camera also gets really hot, so I would't recommend to use pla)
if you are using abs, scale the part in your slicer by 101%!
push the camera in the mount, you may need to remove a bit of the printed part in order to fit the camera perfectly. Use a hobby knife, but be carefull and wear some safety gloves!
take a rubber band and secure the camera and the reciever to the mount.
Solder the camera wires (eighter to Uart 1 or 2 or the battery pads)
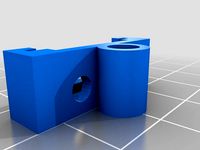
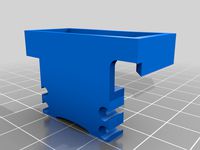
put the mount in place and thread the buzzer wires through the front of the mount, by sliding the FC in dedicated slot.
plug the reciever in
solder the buzzer to the buzzer wires (make sure you got the polarity right!)
screw the mount to the frame, make sure you don't overtighten the screws!
put the buzzer in place
Congratulation, you just finished your build! Now it's time to set up betaflight and bind your transmitter. There are a lot of tutorials already on youtube for doing that.
You can fly eighter indoors or outdoors, but if you choose to fly indoors take the small triblade props, since the bigger ones are way to strong. If you are new to flying, start learning the basics in Line of Slight flying outdoors, so you get used to the controls. There are also a ton of tutorials on youtube.
Check out our website for more cool stuff! HERE.
To build one for yourself you'll need:
parts from Banggood:
FC: sp-racing F3 evo
motors: 4x 8520 Racerstar brushed motor
A transmitter/reciever combo or just a reciever if you already got a transmitter
65mm biblade props (for outdoor flying only)
45mm triblade props (for indoor or outdoor flying)
AIO FPV Camera: TX01, TX02, TX03, TX04 (I highly recommend the TX04, since the cloverleave antennas break very fast)
9.5mm Buzzer
other parts:
some rubber bands (≥2x)
small M3 machine screws (3x)
tools:
soldering iron
3D printer (obviously...)
PC with betaflight app
Instructions:
1. Assembly
Print the frame using abs or petg filament (pla might work fine, but i think it will soften around the motors, since they tend to get really hot)
if you use abs filament, scale the model by 101%, because abs tends to shrink a lot when cooling down.
use a brim and print the first layer really slowly (~5mm/s)!
Depending on your 3D Printer's accuracy, you may have to widen the holes for the motors. You can use a 8.5mm drill bit, that you rotate by hand
Now you can insert the 4 motors. Looking at the top of the frame they go in like this:
The 2 cw motors (red and blue wire) have to be mounted on the top left and bottom right
The 2 ccw motors (white and black wire) have to be mounted on the top right and bottom left
Put in the rubber band for the battery
Before you mount the FC you should flash the current Firmware using betaflight
solder the bootloader jumperpads
make sure you always close chrome while doing anything in betaflight
open the app and download and install the 2 drivers (there are 2 links on the main page)
restart your PC
open the app and connect the FC via usb
go to the menu point "flash firmware and follow the steps of the screenshot
desolder the boatloader jumperpads
Secure the FC temporarly to the middle of the frame using some double sided sticky tape.
Solder the Motor wires to the Motor Pads on the FC. The ground wires (blue or black) are always facing to the front of the copter.
Solder the reciever wires to Uart 3 (starting from the back: black, red, white... the yellow one can be cut off)
Solder the Buzzer wires (not the Buzzer yet, only the wires, that should be ~20mm long) to the Buzzer pads
Solder the Battery wires
FPV setup:
Depending on which camera you chosed to buy, download the right mount and print it in abs or petg filament with supports. (The Camera also gets really hot, so I would't recommend to use pla)
if you are using abs, scale the part in your slicer by 101%!
push the camera in the mount, you may need to remove a bit of the printed part in order to fit the camera perfectly. Use a hobby knife, but be carefull and wear some safety gloves!
take a rubber band and secure the camera and the reciever to the mount.
Solder the camera wires (eighter to Uart 1 or 2 or the battery pads)
put the mount in place and thread the buzzer wires through the front of the mount, by sliding the FC in dedicated slot.
plug the reciever in
solder the buzzer to the buzzer wires (make sure you got the polarity right!)
screw the mount to the frame, make sure you don't overtighten the screws!
put the buzzer in place
Congratulation, you just finished your build! Now it's time to set up betaflight and bind your transmitter. There are a lot of tutorials already on youtube for doing that.
Similar models
thingiverse
free
IFlight XL8 v4 Buzzer Holder by ocedric
...erced on the bottom to let the sould pass through the hole already present in the frame.
i use tpu, you can use pla, petg or abs.
thingiverse
free

Eachine TX04 Mount for Inductrix / Tiny Whoop by cmot17
...nt for the eachine tx04 aio camera for the inductrix / tiny whoop frames. i'm using it on a cockroach frame from newbeedrone.
thingiverse
free
BLR TX04 mount - 20x20 by blistovmhz
...ictured on top of the blr - 90mm ovni frame.
camera is a press fit and won't fall out.
rx slot fits 15x20x4mm.
9x6mm beeper.
thingiverse
free
Betaflight F3/F7 12mm Buzzer Mount by IamTheBoy
...e the buzzer to the mount. if printed in pla, you may need to ream it out slightly, as its designed to be a slightly stretch fit.
thingiverse
free
Universal Buzzer/LED mount for Tomoquads Frames by TomoQuads
...g-ws2812-colorful-led-with-5v-active-alarm-buzzer-support-cleanflight-betaflight-p-1131891.html?rmmds=search&cur_warehouse=cn
thingiverse
free
Eachine E010(S) TX04 Camera Holder by TimeWaster
..., but you are on your own. i will and cannot give any guarantees or further help at all.
ye have been warned!
have fun tinkering!
thingiverse
free
FC soft mount & buzzer mount (TPU) by olivier30900
...amp; buzzer mount (tpu) by olivier30900
thingiverse
another fc soft mount
include buzzer mount (low profil)
i use sainsmart tpu
grabcad
free

SpeedyBee BT Nano 3
... case scenario happens, i can just solder one of these on and access betaflight with minimal drama!
https://tinyurl.com/yj6p3h5a
thingiverse
free
DJI FPV AirUnit mount for GEPRC Cygnet 3
...prepare m2 6mm studs.
you need to mount fc and esc separately. (you might need to rotate fc direction by betaflight configurator)
thingiverse
free
Betafpv Z1 camera and VTX mount for Beta65/S whoop by dovcharov
...ount. then solder 5v to 5v wires , gnd to gnd, and video to video, or to osd pins on betafpv flight controller (if you have osd).
Xevox
thingiverse
free

Gorilla by xeVox
...gorilla by xevox
thingiverse
a tribute to harambe the gorilla... rip bro
check out our website for more cool stuff! here.
thingiverse
free
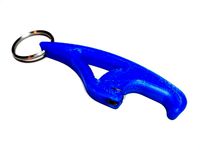
bottle opener by xeVox
...whole design, because the first one breaks on use.
make sure to use pla (not abs!) with 100% infill.
cheers and enjoy your beers!
thingiverse
free
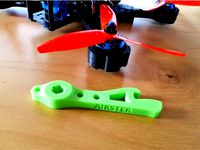
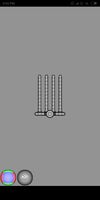
propeller changing tool by xeVox
...ur website for more cool stuff!
here.
i just changed the wrench width from 10 to 8mm and the smaller wrench width from 8 to 5mm.
thingiverse
free
LED-Mount for Wanhao duplicator i3 by xeVox
...p in the mount
use the two m3 screws and nuts to attach the mount to your printer
use some cable ties to hold the cables in place
thingiverse
free
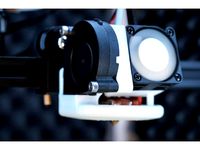
Ender 2/3/5 part-cooling fanduct (also fits CR10) by xeVox
...bout a millimeter, compared to the ender 2.
i just added a step-file, so you guys are able to remix the the design more easily ;)
thingiverse
free
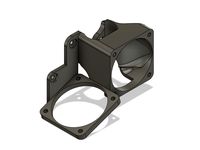
Lightweight CR10 dual 40mm fan extruder holder
...ender 2/3/5 part-cooling fan duct (also fits cr10) by xevox so go over there and check out their superb...
thingiverse
free

CR10 exruder fan
...ender 2/3/5 part-cooling fan duct (also fits cr10) by xevox so go over there and check out their superb...
thingiverse
free
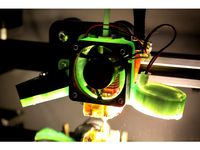
Lightweight CR10 extruder holder dual fan with light
...ender 2/3/5 part-cooling fan duct (also fits cr10) by xevox so go over there and check out their superb...
Brushed
3d_export
free

brush
...brush
3dexport
brush
3d_export
free

brush
...brush
3dexport
it is brush
archibase_planet
free

Brush
...brush
archibase planet
brush toilet brush sanitary ware
brush - 3d model (*.gsm+*.3ds) for interior 3d visualization.
archibase_planet
free

Brush
...rush
archibase planet
rack brush cleaner toilet brush sanitary ware
brush - 3d model (*.gsm+*.3ds) for interior 3d visualization.
archibase_planet
free

Brush
...brush
archibase planet
brushes
brush - 3d model (*.gsm+*.3ds) for interior 3d visualization.
archibase_planet
free

Brush
...brush
archibase planet
?oilet brush sanitary ware
brush - 3d model (*.gsm+*.3ds) for interior 3d visualization.
design_connected
$11

Brushes
...brushes
designconnected
smallaccents brushes computer generated 3d model.
turbosquid
$1
Brush
...rush
turbosquid
royalty free 3d model brush for download as on turbosquid: 3d models for games, architecture, videos. (1391784)
3d_export
$5
brush
...brush
3dexport
comb
turbosquid
$10
Brush
...squid
royalty free 3d model brush for download as ma and obj on turbosquid: 3d models for games, architecture, videos. (1191257)
Micro
3ddd
$1
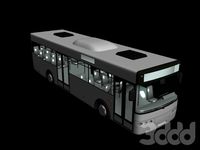
Micro
...micro
3ddd
автобус
turbosquid
$80

MICRO
...ty free 3d model micro for download as max, c4d, obj, and fbx on turbosquid: 3d models for games, architecture, videos. (1700743)
3ddd
$1

JBL Micro Wireless
... micro , колонка , плеер
jbl micro wireless
turbosquid
$10
Suppressor Micro
...quid
royalty free 3d model suppressor micro for download as on turbosquid: 3d models for games, architecture, videos. (1380433)
turbosquid
$20
Micro Meter
...osquid
royalty free 3d model micro meter for download as fbx on turbosquid: 3d models for games, architecture, videos. (1350448)
turbosquid
$7
NIghtstand Micro
...d
royalty free 3d model nightstand micro for download as max on turbosquid: 3d models for games, architecture, videos. (1248117)
3ddd
$1
Micro wind turbine
...micro wind turbine
3ddd
турбина
micro wind turbine for your green building projects
turbosquid
$29
Micro Speakers
... available on turbo squid, the world's leading provider of digital 3d models for visualization, films, television, and games.
turbosquid
$29
Micro Servo.max
... available on turbo squid, the world's leading provider of digital 3d models for visualization, films, television, and games.
turbosquid
$20

Micro cells
... available on turbo squid, the world's leading provider of digital 3d models for visualization, films, television, and games.
Quad
design_connected
$4

Quad
...quad
designconnected
brent comber quad computer generated 3d model. designed by comber, brent.
turbosquid
free

Quad
... available on turbo squid, the world's leading provider of digital 3d models for visualization, films, television, and games.
3d_ocean
$69
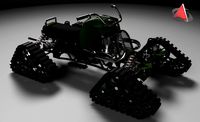
Quad bike
...uad bike
3docean
bike hi-poly moto quad quad bike quadbike
high-poly model quad bike. model uses mental ray materials and render.
3d_export
$14
quad bike
...quad bike
3dexport
3d_export
$50

Quad 3D Model
...quad 3d model
3dexport
quad atv
quad 3d model floris 64690 3dexport
turbosquid
$8
Space quad
...bosquid
royalty free 3d model space quad for download as stl on turbosquid: 3d models for games, architecture, videos. (1366239)
turbosquid
free
Ornament quad
...quid
royalty free 3d model 3d ornament quad for download as on turbosquid: 3d models for games, architecture, videos. (1628075)
turbosquid
$19
Quad Drone
...
royalty free 3d model quad drone for download as c4d and fbx on turbosquid: 3d models for games, architecture, videos. (1202459)
turbosquid
$150
Quad bike
... available on turbo squid, the world's leading provider of digital 3d models for visualization, films, television, and games.
turbosquid
$119
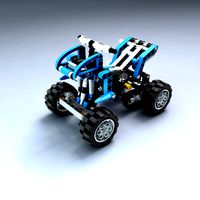
Lego quad
... available on turbo squid, the world's leading provider of digital 3d models for visualization, films, television, and games.