Thingiverse
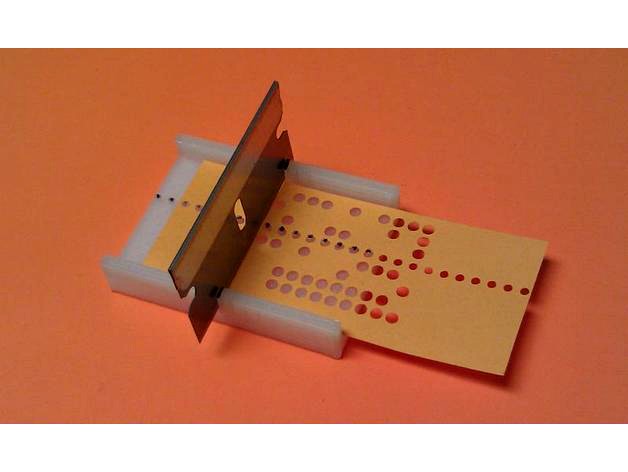
Teletype paper tape splicing and alignment guide jig by 1944GPW
by Thingiverse
Last crawled date: 3 years ago
If you are into vintage computing then you may find this little jig useful. It facilitates the cutting of sharp, straight cuts across 1" wide 8-level ASCII Teletype paper tape.
This makes it easier to trim, splice or join sections of paper tape for repair so it lessens jamming and tearing when run through a paper tape reader such as an ASR33, PC05, OP-80A, EECO CNC or whatever other paper tape reader you have.
Use
Place the tape to be cut onto the jig with the centre blade slot where you require cutting. Press down firmly until the tape feed sprocket holes are seated properly on the sprocket pins. Using a single edge razor blade positioned in the centre slot (make sure it is SHARP) press on one edgeand then right through. It should give a crisp snapping noise as it cuts. You could also use an X-acto #11 blade in a hobby knife.
Generating
The OpenSCAD parametric script is included so you can tweak it if you like. For instance to make it longer, just bump the PINS value. Although a 5-level Baudot RTTY paper tape will fit fine on the guide as it is, you can change the LEVEL variable from 8 (ASCII 8-level) to 5 (Baudot 5-level) specifically if you desire.
Printing
PLA is ideal. Infill was 25% but could be anywhere from there up to 100%. Printed with brim only, no raft. I touched the pins and cutting groove with a black permanent marker to improve locating visibility
Making Teletype paper tape without a punch
If you don't have an actual vintage paper tape punch you can use a home stencil cutting machine along with my PTAP2DXF program to make paper tape that is fully functional (as used in this thing's photo).
For more info visit https://github.com/1944GPW/ptap2dxf
Similar models
3dwarehouse
free

IBM 1011 PAPER TAPE READER (1959)
...sed by the tape reader. the models presented here depict the tape reader with external paper role, and the reel-to-reel versions.
3dwarehouse
free

IBM 1621 PAPER TAPE READER (1959)
... by the tape reader. the models represented here depicts the tape reader with external paper role, and the reel-to-reel versions.
3dwarehouse
free

IBM 1134 PAPER TAPE READER
...-up reels for reading punched tape fed in strips or from reels. this model represents the model 2 reel to reel paper tape reader.
thingiverse
free

Drill Press Hacksaw Jig by Jmadden99
...some lubricant.
10) pull the blade press back and start the drill press.
11) release the blade.
12) lubricate every minute or so.
thingiverse
free

Sanding sheet hole punch - Bosch - Parametric by mjstone
...the open edges can be used as guides for cutting a larger sheet to size.
can be customised to suit other sizes and hole spacings.
thingiverse
free

16mm film splice guide by brotherjethro
...ood.
btw, i printed mine in glow-in-the-dark pla. that's just what i had in the printer -- but aren't you jealous? :-)
thingiverse
free

Prop cutting jig for GF 2540 propellers and Beta 85
...rse
pin prop upside down in jig with center hole. press prop blade flat. trim prop to outside of jig with finger nail clippers.
3dwarehouse
free

IBM 1056 PUNCH CARD READER (1962)
...with the second reader being either a paper tape or programmed keyboard reader. this model represents an ibm 1056 model 1 reader.
thingiverse
free

Router Jig to cut CPU vents in cabinets by NailDRV
...double side tape. use a plunge router with guide bushing and a 1/4" spiral bit. makes a very attractive vent in the cabinet.
3dwarehouse
free

Whirligig Hub Jig
...whirligig hub jig
3dwarehouse
a jig to cut the blade slots into the hub of a whirligig turbine
Teletype
thingiverse
free

Model 37 Teletype Button by joeyd3119
...model 37 teletype button by joeyd3119
thingiverse
teletype model 37 button
thingiverse
free

Teletype Model 43 ribbon cartridge by menkelis
...teletype model 43 ribbon cartridge by menkelis
thingiverse
teletype model 43 ribbon cartridge.
last revised: 04/06/2021
thingiverse
free

Teletype Model 32/33 Platen Knob by mikea4
...teletype model 32/33 platen knob by mikea4
thingiverse
this is a platen knob for a teletype model 33 and 32.
thingiverse
free

Teletype 15 Accessory Knob by hoeken
...gned for adam and bill at the nyc resistor hackathon!
features:
m3 set screw
parametric design (diameter, height, bore)
easy grip
thingiverse
free

Keycaps for Teletype Model 15 by xavan
...he cover and i must also find or replace 2 missing keycaps.
as i could not find any spare parts, i made them using my 3d printer.
thingiverse
free

La-Z-Boy Switch by teletype
...hsg hsc-laz-r1 rev0. this is my first attempt at cad and second 3d printed object, so it could be smoother but gets the job done.
thingiverse
free

ASR-33 Answer back / HERE IS drum by RevK
...the characters for the answer back on an asr-33 teletype ...
thingiverse
free

K Mount to EF Canon mount lens adapter by EduardoChamorro
...enough to holde small,medium size lenses.i didn't tried with teletype lenses. has place to fit old smc pentax takumar...
cg_trader
free

Smartphone
...bertugas selama perang korea. setelah selesai, dirinya bergabung dengan teletype corporation, sebuah perusahaan penelitian dan pengembangan peralatan komunikasi di...
1944Gpw
thingiverse
free

Cable clip with screw or nail fixing tab by 1944GPW
...orks but is very tight and the cable is pinched too much. any opening larger than 120 degrees makes the cable too easy to remove.
thingiverse
free

Headphone holder suitable for adhesive tape fixture by 1944GPW
... even 10% or 5% would be fine, most computer headphones aren't heavy.
feel free to modify the openscad script to your liking.
thingiverse
free

Folding slat camping table clip by 1944GPW
...urpose.
update: i have added the profile dxf and openscad script so you can adjust it to suit your own circumstances if you like.
thingiverse
free

DEC PDP-11 keyring keyfob by 1944GPW
...s or use a backing plate but i was happy that wasn't needed.
shown is the keyfob attached to the console key for a pdp-11/05.
thingiverse
free

Myford ML7 lathe leadscrew handwheel pointer by 1944GPW
...e excess should do the trick.
the openscad script is included if you want to see how the pointer solid model is cobbled together.
thingiverse
free

Shower towel / face washer hook for glass wall or extruded edge shower recess by 1944GPW
...e these from white petg printed at 100% infill for maximum strength and also so there were no internal cavities to trap moisture.
thingiverse
free

Knob to suit Ryobi Pro Cut II line trimmer / whipper snipper / strimmer / weed whacker head by 1944GPW
...itable thick clothing and so on when operating.
power tools such as line trimmers can be extremely dangerous so always take care.
thingiverse
free

Desk benchtop cable fascia filler plug grommet by 1944GPW
...ions it should work fine.
as a courtesy please leave my name as the author of the program.
thanks, and i hope you find it useful.
thingiverse
free

DEC PDP-11 H960 rack fascia panel clip by 1944GPW
...at as a small addition (countersunk holes replacing the posts) and updated this script, set steel_screws to 1 in the customizer.
Splicing
3ddd
$1

"Splice" table and chairs
..."splice" table and chairs
3ddd
splice
комплект мебели из стола и 6 стульев
turbosquid
$90

SMT automatic splice tape
... available on turbo squid, the world's leading provider of digital 3d models for visualization, films, television, and games.
3ddd
$1

Splice Stool,Table,Bar Stool
... барный
набор мебели для бара, паба, дома.угловые формы придают индустриальный вид.
материал-березовая фанера.
3dfindit
free

Splices
...splices
3dfind.it
catalog: te connectivity
3dfindit
free

Junction Splices
...junction splices
3dfind.it
catalog: te connectivity
thingiverse
free

Cable Splices for BlueROV by thegwa
...cable splices for bluerov by thegwa
thingiverse
cable splices for bluerov
thingiverse
free

Tyrannosaurus splicing toys
...plicing toys
thingiverse
this toy design by ime3d
it have a splicing toys library
i use it teach 3~5 age kids what is dinosaur .
thingiverse
free

Rope Splicing Fid plk.nz by mukiwa
...rope splicing fid plk.nz by mukiwa
thingiverse
fid, rope splicing
thingiverse
free

Rope Splicing Fid plk.nz by mukiwa
...rope splicing fid plk.nz by mukiwa
thingiverse
fid, rope splicing
thingiverse
free

Rope Splicing Fid plk.nz by mukiwa
...rope splicing fid plk.nz by mukiwa
thingiverse
fid, rope splicing
Jig
turbosquid
$25

jig-saw_mid_SM
...uid
royalty free 3d model jig-saw_mid_sm for download as obj on turbosquid: 3d models for games, architecture, videos. (1244761)
turbosquid
$20
jig-saw_low
...osquid
royalty free 3d model jig-saw_low for download as obj on turbosquid: 3d models for games, architecture, videos. (1244760)
turbosquid
$10

jig-saw_hi
...bosquid
royalty free 3d model jig-saw_hi for download as obj on turbosquid: 3d models for games, architecture, videos. (1244757)
turbosquid
$7

Jig Armchair
...squid
royalty free 3d model jig armchair for download as max on turbosquid: 3d models for games, architecture, videos. (1648936)
turbosquid
$5

Jig Tail
... available on turbo squid, the world's leading provider of digital 3d models for visualization, films, television, and games.
turbosquid
$5
Jig Head
... available on turbo squid, the world's leading provider of digital 3d models for visualization, films, television, and games.
turbosquid
$5

Jig Head
... available on turbo squid, the world's leading provider of digital 3d models for visualization, films, television, and games.
turbosquid
$5
Jig Head
... available on turbo squid, the world's leading provider of digital 3d models for visualization, films, television, and games.
turbosquid
$5
Jig Head
... available on turbo squid, the world's leading provider of digital 3d models for visualization, films, television, and games.
turbosquid
$5

Jig Head
... available on turbo squid, the world's leading provider of digital 3d models for visualization, films, television, and games.
Alignment
3d_export
$5
orthodontic aligners
...aligners are plastic replicas of your teeth. wearing them puts gentle pressure on the teeth, ever-so-slightly repositioning them.
3d_export
$15
Wheel Alignment Lifts 3D Model
...heel alignment lifts
wheel alignment lifts 3d model download .c4d .max .obj .fbx .ma .lwo .3ds .3dm .stl poothian 108990 3dexport
3d_export
$99

Alignment Systems
...dimensions. -ideal for your auto service project. -scene for 3ds max 2012 and v-ray 2.0 !!!in file only 3d model without light!!!
turbosquid
$85

Film laser alignment cutting machine
...ng machine for download as 3ds, max, ige, obj, fbx, and sldas on turbosquid: 3d models for games, architecture, videos. (1423482)
3d_export
$159
Alignment Systems with Car Lift
...dimensions. -ideal for your auto service project. -scene for 3ds max 2012 and v-ray 2.0 !!!in file only 3d model without light!!!
3d_export
$15

modular rpg game environment - low poly - pbr - gameready
...aligned). textures folder(all pbr textures) other formats modular pieces (dae obj stl fbx ) modular environment (dae obj stl fbx)
3d_export
$5

bookshelf
...g unit a well-thought-out and solid look. the shelves align perfectly with the frame to create a strong and uniform expression.
3d_ocean
$4
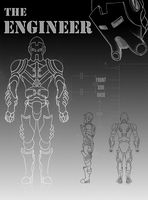
The Engineer
... to model: front view back view side view / both left and right with and without arm composite psd file of all views each imag...
3d_ocean
$25
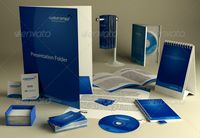
Stationary Presentation Kit
...st to the biggest, all beautifully aligned and positioned and ready to render. here’s what the scene contains: 1. single-fold ...
vizpark
$15

HDRI Skydome 30
...images were manually adjusted and corrected with dust removal, alignment and chromatic abberation...
Tape
3d_ocean
$5

Scotch Tape
...scotch tape
3docean
desk holder scotch tape sticky tape tape roll tesa work
scotch tape and a tape holder
3ddd
$1

Cassette Tape
...cassette tape
3ddd
кассета
cassette tape model of tdk
3ddd
$1

Paulangelo / Tape
...paulangelo / tape
3ddd
paulangelo , угловой
диван tape от paulangelo, home collection.
3d_ocean
$25

Tape recorder
...ic old realistic recording recordplayer reel tape retro senheiser speak stereo stylish tape turntable vintage voice
tape recorder
3d_export
$10

measuring tape
...ng tape
3dexport
measuring tape 3dmodel includes all materials , texture and lighting ,3dmax , 3ds , obj , dw. rendererd by vray
3d_export
$5
adhesive tape carrier
...adhesive tape carrier
3dexport
adhesive tape carrier
turbosquid
$15

Tape Measure
...uid
royalty free 3d model tape measure for download as blend on turbosquid: 3d models for games, architecture, videos. (1700720)
turbosquid
$5

Tape measures
...quid
royalty free 3d model tape measures for download as max on turbosquid: 3d models for games, architecture, videos. (1319446)
turbosquid
$3
Pvc taping
...bosquid
royalty free 3d model pvc taping for download as max on turbosquid: 3d models for games, architecture, videos. (1161550)
turbosquid
$1

Adhesive tape
...quid
royalty free 3d model adhesive tape for download as obj on turbosquid: 3d models for games, architecture, videos. (1352737)
Paper
archibase_planet
free

Paper
...paper
archibase planet
toilet paper lavatory paper toilet-paper
paper - 3d model (*.gsm+*.3ds) for interior 3d visualization.
archibase_planet
free

Paper
...r
archibase planet
toilet paper lavatory paper sanitary ware
toilet paper - 3d model (*.gsm+*.3ds) for interior 3d visualization.
archibase_planet
free
Paper
...paper
archibase planet
toilet paper lavatory paper bumf
paper 1 n120508 - 3d model (*.gsm+*.3ds) for interior 3d visualization.
turbosquid
free

Paper Planes and Crumpled Paper
... available on turbo squid, the world's leading provider of digital 3d models for visualization, films, television, and games.
3d_ocean
$8
Kitchen-Paper / Toilet-Paper
...e horizontal tileable and in three different resolutions. each texture has a color/diffuse, bump, normal and specular map. inc...
3d_ocean
$5

Paper Textures
...6×4096. these were acquired using a scanner and edited in photoshop for seamless property. the paper bag visible in the render...
3d_export
$5

paper bin
...paper bin
3dexport
paper bin
3ddd
$1

Paper Chandelier
...paper chandelier
3ddd
moooi
paper chandelier
3ddd
$1
Toilet paper
...toilet paper
3ddd
туалетная бумага
toilet paper
turbosquid
$15

the paper
... available on turbo squid, the world's leading provider of digital 3d models for visualization, films, television, and games.
Guide
turbosquid
$15

Guide drawer
...squid
royalty free 3d model guide drawer for download as dwg on turbosquid: 3d models for games, architecture, videos. (1261387)
turbosquid
$1
Road Guide
... available on turbo squid, the world's leading provider of digital 3d models for visualization, films, television, and games.
archive3d
free
Guide-board 3D Model
...ion sign guide sign
guide-board n170112 - 3d model (*.gsm+*.3ds) for exterior 3d visualization.
turbosquid
$2
soap cutter guide
...
royalty free 3d model soap cutter guide for download as stl on turbosquid: 3d models for games, architecture, videos. (1694030)
turbosquid
$15

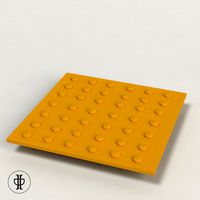
Blind Guiding tiles
...free 3d model blind guiding tiles for download as 3dm and dae on turbosquid: 3d models for games, architecture, videos. (1156598)
turbosquid
$69

Japanese Tour Guide
...d model japanese tour guide for download as max, fbx, and obj on turbosquid: 3d models for games, architecture, videos. (1614288)
turbosquid
$10
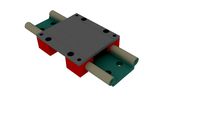
CNC Linear Guide
... available on turbo squid, the world's leading provider of digital 3d models for visualization, films, television, and games.
turbosquid
$1

Tank Model Guide
... available on turbo squid, the world's leading provider of digital 3d models for visualization, films, television, and games.
turbosquid
$1
Road Guide 2
... available on turbo squid, the world's leading provider of digital 3d models for visualization, films, television, and games.
3d_ocean
$9

Guide Books 3
...sformed separately and each have unique texture map on front and back cover. to make your work easier this model comes in thre...