Thingiverse
Marlin Firmware 1.1.8 Anycubic Kossel Plus - G33 "auto_calibrate" Updated by TsunamiSoul
by Thingiverse
Last crawled date: 3 years ago
This added file is a mix of the Marlin Firmware for the Anycubic Kossel Plus, and added modifications from the firmware of FLSUN kossel.
Anycubic not update the editable firmware, and in need levelling the printer correctly.
The more important step in this firmware is read the point "08. G29 Auto bed leveling", not use auto level M29 system, this firmware work whit M33 "auto_calibrate" and work for me fine, the level of the bed is simply perfect.
Is important for the auto calibrate make the steps in the point of the next link, the step "02" and "07", in the step "02" go to sub step "5. Run the G33 command" - "6. Set your Z-offset" and "7. Send M500 to save calibration from RAM to EEPROM"https://github.com/FLSun3dp/FLSun-Kossel-Mini/wiki/02.-Calibrate-your-printer
Simple and perfect for me, i not test the procedure in the screen, all the process i make from Printrun, is important use all the explained procedure in the marked steps from the link added.
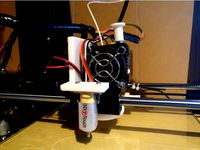
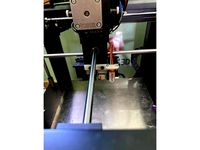
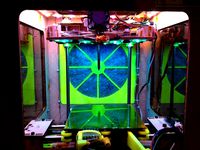
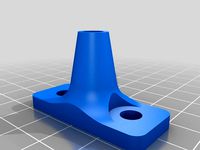
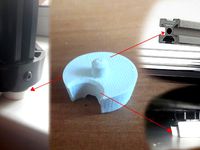
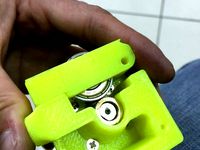
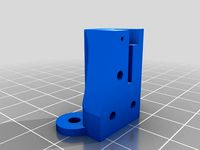
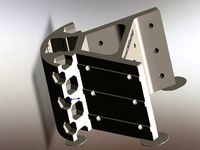
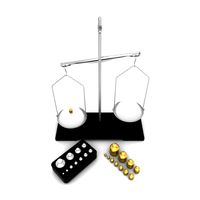
In the images appear the z prove i use.
I level the printer with z-prove in the effector, the offset is -0,1mm.
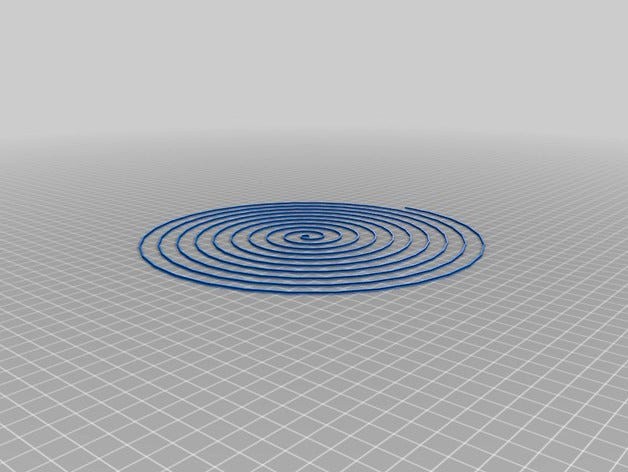
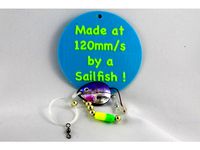
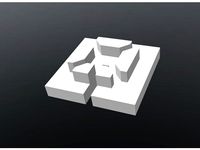
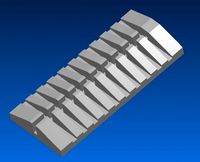
I add calibration spiral, scale for print.
Atention: my firmware have modified for me, is important edit and define the printer options, DELTA_HEIGHT and DELTA_DIAGONAL_ROD. Attention the motor directions for my TMC2100 drivers are inverse, please modify for your printer firmware and your drivers.
The marlin language is set to spanish, change it.
!!!! after install the firmware is important reset in the panel the EEPROM !!!!
I update the firmware with low speeds 25 january
!!!! After flashing the firmware do not forget to send the commands M502 and M500.
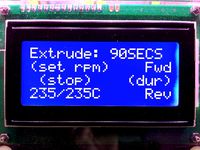
The process to auto calibrate is simply in various steps:
In printrun send the commands and wait finish:
G33 P1
(wait the auto calibrate)
G33 P2
(wait the auto calibrate)
G33 P5
(wait the auto calibrate)
G33 P10
(wait the auto calibrate)
G28
(HOME)
M851 Z0.0
(set offset Z to 0)
G90
(absolute positioning)
G1 Z1 - etc etc
(Start manually the "paper test" and obtain the correct Z offset, use it in the next command)
M851 Z0.xx
(Set your Z offset)
M500
(Save the correct configuration)
Test the calibration with the spiral - Perfect ; )
// Invert the stepper direction. Change (or reverse the motor connector) if an axis goes the wrong way. !!! Modificado para TMC2100 !!!
define INVERT_X_DIR false // DELTA does not invert
define INVERT_Y_DIR false
define INVERT_Z_DIR false
// Enable this option for Toshiba stepper drivers
//#define CONFIG_STEPPERS_TOSHIBA
// @section extruder
// For direct drive extruder v9 set to true, for geared extruder set to false. !!! Modificado para TMC2100 !!!
define INVERT_E0_DIR false
define INVERT_E1_DIR false
define INVERT_E2_DIR false
define INVERT_E3_DIR false
define INVERT_E4_DIR false
PD: sorry for my bad english
Anycubic not update the editable firmware, and in need levelling the printer correctly.
The more important step in this firmware is read the point "08. G29 Auto bed leveling", not use auto level M29 system, this firmware work whit M33 "auto_calibrate" and work for me fine, the level of the bed is simply perfect.
Is important for the auto calibrate make the steps in the point of the next link, the step "02" and "07", in the step "02" go to sub step "5. Run the G33 command" - "6. Set your Z-offset" and "7. Send M500 to save calibration from RAM to EEPROM"https://github.com/FLSun3dp/FLSun-Kossel-Mini/wiki/02.-Calibrate-your-printer
Simple and perfect for me, i not test the procedure in the screen, all the process i make from Printrun, is important use all the explained procedure in the marked steps from the link added.
In the images appear the z prove i use.
I level the printer with z-prove in the effector, the offset is -0,1mm.
I add calibration spiral, scale for print.
Atention: my firmware have modified for me, is important edit and define the printer options, DELTA_HEIGHT and DELTA_DIAGONAL_ROD. Attention the motor directions for my TMC2100 drivers are inverse, please modify for your printer firmware and your drivers.
The marlin language is set to spanish, change it.
!!!! after install the firmware is important reset in the panel the EEPROM !!!!
I update the firmware with low speeds 25 january
!!!! After flashing the firmware do not forget to send the commands M502 and M500.
The process to auto calibrate is simply in various steps:
In printrun send the commands and wait finish:
G33 P1
(wait the auto calibrate)
G33 P2
(wait the auto calibrate)
G33 P5
(wait the auto calibrate)
G33 P10
(wait the auto calibrate)
G28
(HOME)
M851 Z0.0
(set offset Z to 0)
G90
(absolute positioning)
G1 Z1 - etc etc
(Start manually the "paper test" and obtain the correct Z offset, use it in the next command)
M851 Z0.xx
(Set your Z offset)
M500
(Save the correct configuration)
Test the calibration with the spiral - Perfect ; )
// Invert the stepper direction. Change (or reverse the motor connector) if an axis goes the wrong way. !!! Modificado para TMC2100 !!!
define INVERT_X_DIR false // DELTA does not invert
define INVERT_Y_DIR false
define INVERT_Z_DIR false
// Enable this option for Toshiba stepper drivers
//#define CONFIG_STEPPERS_TOSHIBA
// @section extruder
// For direct drive extruder v9 set to true, for geared extruder set to false. !!! Modificado para TMC2100 !!!
define INVERT_E0_DIR false
define INVERT_E1_DIR false
define INVERT_E2_DIR false
define INVERT_E3_DIR false
define INVERT_E4_DIR false
PD: sorry for my bad english
Similar models
thingiverse
free
Anet A6 BLTouch/3DTouch mount (front) by thvranken
...isplay or with command m851) and saved to the eeprom (using the display or with command m500), in my case, this was around -2 mm.
thingiverse
free

Marlin 1.1.8 firmware for Anycubic Kossel(mini & plus), delta calibration circle by namsugak
...39;
you need to adjust it for your printer.
disabled calibration h_factor,r_factor,a_factor.
changed homing_feedrate_z to (50*60)
thingiverse
free

Marlin 2.0.5.3 For Anycubic Kossel Plus by riciweb
...onfigured for anycubic delta kossel plus, have fun!!!
fix up trigorilla 1.4 pins
improved auto-calibration of printer and hot bed
thingiverse
free

e3d v6 semi auto probe no xy offsets by AlbertP
... g33 and g29 with marlin firmware. there are no xy offsets of the probe which is required for delta auto calibration command g33.
thingiverse
free

Anycubic Kossel PID calibration
...ir mount:
kossel raspberry camera ir mount
extruder pid calibration.
simple extruder temperature calibration of your 3d printer.
thingiverse
free
BLtouch mount for Raise3D N2/N2+ by sylus
...org/docs/gcode/g029-mbl.html
z offset to set with you current setup could be set by a script on start gcode as :
m851 z-x.xx
m500
thingiverse
free

Anycubic Kossel Marlin 2.0.0
...
lcd freeze issue
babystepping issue
marlin 1.1.9:
this version has been tested over the past 6 months, works without any issuses
thingiverse
free

Tevo Black Widow BLTouch Mount by rtimberman52
...the gap smaller
m500 ; to save the value to eeprom
(remember the -1.4, -1.5 and -1.6 are just examples , yours will be different)
thingiverse
free

Marlin 1.1.9 for Anycubic kossel linear plus by maviles798
...te with this firmwarehttps://www.youtube.com/watch?v=gf6zgkouzhy&t=0s&list=plz-ug70vbhjoaeov4thgu4ae41rcotogx&index=4
thingiverse
free

Removable Bed Levelling Probes for Anycubic Kossel Linear by peaberry
...//github.com/marlinfirmware/marlin/issues/9344
some of the later bug-fix releases may fix this, but i haven't tried them yet.
Tsunamisoul
thingiverse
free

Arm Vibration Damper ø5mm for Anycubic Kossel by TsunamiSoul
...ms in my anycubic kossel and this is the damper.
only need 3 springs
please use and feel free for modify it.
include freecad file
thingiverse
free

Filament guide Kossel Anycubic 2020 by TsunamiSoul
...liers), the guide support fix with a little of glue.
i add the freecad file for free modification.
i print this design 0.2 mm pla
thingiverse
free

Anycubic Delta tower "big" screw head regulator by TsunamiSoul
...el free to modify it.
pd: add a new model 2mm more diameter.
the v3 correct errors in the contact with end stops, i recommend it.
thingiverse
free

Anycubic Kossel Linear Plus Top ends and extruder top support by TsunamiSoul
...piece out of the correct position.
pd: sorry for my bad english
i add the files in free cad 0.17 format, feel free for modify it.
thingiverse
free

BTT TFT35 V2 Case for Anycubic Predator by TsunamiSoul
... original, son necesarios unos cuantos tornillos para fijar las solapas.
mis solapas las imprimí en tpu.
archivo freecad incluido
thingiverse
free

Leather knife protection - 3D Maker tool - Cut by TsunamiSoul
... 5 in any online store, appear as leather knife or leather cut tool.
as always i attach the file in freecad for its modification.
thingiverse
free

Drum filament 1,75mm sample - Revolver by TsunamiSoul
...e are about 8 mm to reach the end cut and push with some fine tool.
as always i include the file in freecad for its modification.
thingiverse
free

Anycubic kossel delta filament cooler (Blower) Updated v3 by TsunamiSoul
...i use it.
pd: sorry for my bad english.
new version cover more angle and is 1,6mm separation to the model and hole for the screw.
thingiverse
free

Anycubic Kossel Plus Top Internal Spool holder - Fixed by TsunamiSoul
... 24 - 56mm holes by robotnikhttp://www.thingiverse.com/thing:127181
pd: in the photos appear prototypes not in the final version.
G33
unity_asset_store
$16

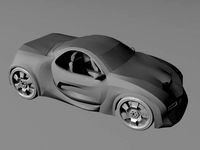
G33
...set store
elevate your workflow with the g33 asset from ruslan. find this & other land options on the unity asset store.
unrealengine
$24

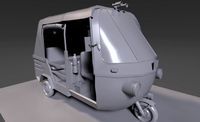
G33
...d study of all elements (salon, engine, bottom, wheels). it is carefully optimized for maximum performance on all modern devices.
thingiverse
free
e3d v6 semi auto probe no xy offsets by AlbertP
...probe which is required for delta auto calibration command g33 ...
thingiverse
free
Marlin 1.1.8 firmware for Anycubic Kossel(mini & plus), delta calibration circle by namsugak
...worse. g33 auto calibrationhttps://github.com/flsun3dp/flsun-kossel-mini/wiki/02.-calibrate-your-printerhttps://github.com/flsun3dp/flsun-kossel-mini/wiki/07.-g33-auto-calibration g29 vs g33 on delta printershttps://hennerley.wordpress.com/2018/01/29/g29-vs-g33 펌웨어 설명(modified firmware guide)https://goo.gl/h1ay29 anycubic kossel upgrade part 1...
thingiverse
free

HK bolt tool by death4u
...bolt tool for hk rifles. works with hk93, hk91, g33 g3, and cetme. after printing tap the hole with...
thingiverse
free

Mini screwdriver set holder by tmorris9
...set of jewelers screwdrivers that can be found here: http://www.sears.com/craftsman-6-pc-screwdriver-set-jewelers/p-00941106000p?prdno=33&blockno=33&blocktype=g33 ...
thingiverse
free

BLTOUCH remixed mount for Anycubic Kossel Pulley by Enochj
...compounded. once i erased the eeprom and did the g33 to a much smaller area it was all...
thingiverse
free

Anycubic Delta BLTouch Mount (Snap In) by laup_x
...for the linear plus version of the anycubic delta. g33 - delta auto calibration (http://marlinfw.org/docs/gcode/g033.html) works like a champ....
thingiverse
free

Auto level probe E3D V6 zero x y offset by capacitor
...run an auto level (g32 s2) and z correction (g33 s2). once this is complete i like to run...
Marlin
3d_export
$35

Marlin
...s : zbrush 3ds max ztool obj fbx dae 3ds stl properties : 8*14*6 production time : 15 hours 52 gram models are drawn with zbrush.
3ddd
$1
Faro Marlin pendant
...mpara colgante blancohttp://www.faro.es/es/productos/marlin-lampara-colgante-blanco/
polyrate: 14107
в архиве fbx+obj
3ddd
$1

Faro Marlin bra
...
marlin black wall lamphttp://www.faro.es/en/productos/marlin-lampara-aplique-negro/
polyrate: 15491
в архиве fbx+obj
turbosquid
$19
Blue marlin
...e 3d model blue marlin for download as max, obj, fbx, and dae on turbosquid: 3d models for games, architecture, videos. (1341037)
3d_export
$60
Marlin Blue 3D Model
...marlin blue 3d model
3dexport
fish sea 3ds marlin mental ray textured animals
marlin blue 3d model ojoalperro 57644 3dexport
3ddd
free

Brass Marlin
... винтаж , марлин
статуэтка марлина из латуни. винтаж.
3d_export
$60

martin p5m marlin
...d states navy performing naval patrols. it also served with the united states coast guard and the french navy. 285 were produced.
humster3d
$15

AMC Marlin 1965 Blueprint
...65 blueprint 3d model in the format you need. all our 3d models was created on real car base and maximally close to the original.
humster3d
$75

3D model of AMC Marlin 1965
...y a detailed 3d model of amc marlin 1965 in various file formats. all our 3d models were created maximally close to the original.
3d_export
$5
Blue marlin toon fish 3D 3D Model
...s 3d 3ds max obj lwo monster creature cartoon espadon animal aquatic
blue marlin toon fish 3d 3d model supercigale 26567 3dexport
Firmware
3d_export
$5
Pepe stool by Opinion Ciatti Italian
...design provides a special slope. additional decor - manual firmware<br>32 x 48 x h58...
3d_export
$5
LENNY BED by Felis
...removable. an additional decor of the headboard is a firmware that imitates the capitonne technique. the bed can be...
thingiverse
free

sidewider x1 firmware by Xavierart26
...sidewider x1 firmware by xavierart26
thingiverse
firmware for sidewider x1
thingiverse
free
Sailfish Firmware by jetty
... created with omnomnom creator:http://www.thingiverse.com/thing:24639.
note: this is not an official makerbot firmware release.
thingiverse
free
Jetty Accelerated Firmware by jetty
...y-firmware#toc66
any updates will be placed here, so check back often.
note: this is not an official makerbot firmware release.
thingiverse
free
Sigma Türkçe firmware (marlin1.1) by Paarthurnax
...sigma türkçe firmware (marlin1.1) by paarthurnax
thingiverse
sigma türkçe firmware (marlin1.1)
thingiverse
free

firmware for orca 040 by sellemann
...y sellemann
thingiverse
firmware and settings for orca 040 with 025 nozzle
i had trubble getting it to work but now its working.
thingiverse
free
Gen4 Interface Firmware by jetty
...-firmware#toc66
any updates will be placed here, so check back often.
note: this is not an official makerbot firmware release.
thingiverse
free

cl-260 standard firmware (outdated!) by renoisenoir
...re is not for 2018 or higher version of cl-260!
this firmware is for 2016-version of cl-260
it can be used for reference purpose.
thingiverse
free
Firmware Tronxy XY2 Pro Titan by droidlex
...flashed your printer with marlin firmware, this should help restore the factory firmware, including the boot screen and interface
Kossel
thingiverse
free
kossel bottom by keisukelin
...kossel bottom by keisukelin
thingiverse
kossel bottom
thingiverse
free
Leg for kossel by exelon
...leg for kossel by exelon
thingiverse
leg for kossel
thingiverse
free
Extruder for kossel by spencer_chen7
...extruder for kossel by spencer_chen7
thingiverse
extruder for kossel
thingiverse
free
Kossel parts by breezer83
...kossel parts by breezer83
thingiverse
kossel parts
thingiverse
free
Anycubic Kossel PID calibration
...ir mount:
kossel raspberry camera ir mount
extruder pid calibration.
simple extruder temperature calibration of your 3d printer.
thingiverse
free

Kossel Medium by flux83
...kossel medium by flux83
thingiverse
vertex for upgraded kossel mini
thingiverse
free
Kossel Mini by salesmendesandre
...kossel mini by salesmendesandre
thingiverse
custom kossel mini
frame 20x20
thingiverse
free
leg for kossel by ionulet
...leg for kossel by ionulet
thingiverse
leg for kossel with channel for end- stop cables
thingiverse
free

Optical Endstops Mounts for Kossel (with Better Kossel carriages) by dellfer
...stops on the anycubic kossel with better kossel carriages by codefreak https://www.thingiverse.com/thing:2501337
more precission
thingiverse
free
kossel??????? by wangrui19890704
...kossel??????? by wangrui19890704
thingiverse
??2020?2060???
Anycubic
thingiverse
free

anycubic filament holder
...anycubic filament holder
thingiverse
anycubic filament holder
thingiverse
free

Cableholder Anycubic Mega
...cableholder anycubic mega
thingiverse
cableholder anycubic mega
thingiverse
free

AnyCubic Toolholder by WildManPrinting
...anycubic toolholder by wildmanprinting
thingiverse
anycubic i3 mega toolholder that clips on the side of the spool a-frame.
thingiverse
free

AnyCubic Funnel by phana007
...anycubic funnel by phana007
thingiverse
funnel for anycubic resin and also a reducer for a normal soda bottle.
thingiverse
free
Anycubic Kossel PID calibration
...ir mount:
kossel raspberry camera ir mount
extruder pid calibration.
simple extruder temperature calibration of your 3d printer.
thingiverse
free

anycubic mega i3
...anycubic mega i3
thingiverse
anycubic i3 mega/mega s led 30mm 10-14v 6500k
thingiverse
free

Handle for anycubic by cruiser7
...handle for anycubic by cruiser7
thingiverse
its easier to handle the cover of the anycubic mono x and wash&care
thingiverse
free

anycubic predator Printbed by Lihyon
...anycubic predator printbed by lihyon
thingiverse
anycubic predator printbed
thingiverse
free

Anycubic Predator Triggers by marcelcountry
...anycubic predator triggers by marcelcountry
thingiverse
anycubic predator triggers
thingiverse
free

support anycubic cable by sarpdental
...support anycubic cable by sarpdental
thingiverse
support anycubic cable
Calibrate
turbosquid
$15
DEFIBRILLATOR CALIBRATORS
... available on turbo squid, the world's leading provider of digital 3d models for visualization, films, television, and games.
turbosquid
$3
Calibration Test Benches
...libration test benches for download as 3ds, obj, c4d, and fbx on turbosquid: 3d models for games, architecture, videos. (1355804)
turbosquid
$50

Smith & Wesson 50 Calibre Magnum
... available on turbo squid, the world's leading provider of digital 3d models for visualization, films, television, and games.
3d_export
$10
Laboratory Calibration Weight Set 1 3D Model
... 3d model
3dexport
laboratory lab science equipment weight set
laboratory calibration weight set 1 3d model bessoo 88084 3dexport
3d_export
$15
Laboratory Scale and Calibration Weight Set 3D Model
...port
laboratory lab science equipment weight set scale
laboratory scale and calibration weight set 3d model bessoo 88203 3dexport
3d_export
$5
3D printer filament calibration tool 3D Model
...ernier
3d printer filament calibration tool 3d model download .c4d .max .obj .fbx .ma .lwo .3ds .3dm .stl locoman 107942 3dexport
3d_export
$59
tag heuer link calibre 16 watch
...built to real-world scale. units used: centimeters. model is 18 centimeters tall.<br>scene objects are organized by groups.
3d_export
free
laser height reference calibration tool opt lasers
...ind out more about the engraving and cutting laser heads, this item was designed to work with, take a look at the following page:
3d_export
$99
Patek Philippe White Gold Calibre 89
...br>please note: this 3d model like all my other models cannot be used as nft, as is or modified<br>thank you for reading
archive3d
free
Modulor 3D Model
...modulor 3d model
archive3d
modulor standard calibrating device
Auto
3d_export
$5

auto
...auto
3dexport
auto
3ddd
$1

auto
...auto
3ddd
max7
turbosquid
$69
AUTO
...to
turbosquid
royalty free 3d model auto for download as obj on turbosquid: 3d models for games, architecture, videos. (1453538)
3d_export
$10

Auto
...auto
3dexport
3d_export
free

auto
...auto
3dexport
3ddd
$1

Auto posters
...auto posters
3ddd
машина
auto posters
turbosquid
$50

auto
... available on turbo squid, the world's leading provider of digital 3d models for visualization, films, television, and games.
turbosquid
$28

Auto
... available on turbo squid, the world's leading provider of digital 3d models for visualization, films, television, and games.
turbosquid
$20
auto
... available on turbo squid, the world's leading provider of digital 3d models for visualization, films, television, and games.
turbosquid
$5
auto
... available on turbo squid, the world's leading provider of digital 3d models for visualization, films, television, and games.
Plus
turbosquid
$2
plus-plus puzzle and lego
...d model plus-plus puzzle and lego for download as stl and obj on turbosquid: 3d models for games, architecture, videos. (1662633)
3ddd
$1
Стенка Plus
...стенка plus
3ddd
plus , модная мебель
фабрика "модная мебель", модель plus
3ddd
$1
Спальня METIS plus
... hulsta , metis , спальня
спальня metis plus
design_connected
$11
be plus B+
...be plus b+
designconnected
blå station be plus b+ chairs computer generated 3d model. designed by börge lindau.
design_connected
$11
Bank Plus
...bank plus
designconnected
röthlisberger kollektion bank plus coffee tables computer generated 3d model. designed by atelier oi.
3ddd
$1
elos Plus
... candela
elos plus — мультифункциональный аппарат для проведения лазерного и ipl лечений
3ddd
$1
Calligaris Even Plus
...calligaris even plus
3ddd
calligaris
calligaris_chair_even plus
design_connected
$29
Basket Plus
...nconnected
photo-realistic 3d models of the basket plus bed from bonaldo for 3d architectural and interior design presentations.
3ddd
free
Artpole Faktum Plus
... артполе , панель
artpole faktum plus
размеры:
высота 625мм
ширина 800мм
глубина 17мм
3ddd
$1

Мария / Jazz Plus
...мария / jazz plus
3ddd
мария
кухня фабрики мария модель__jazz plus
Updated
turbosquid
$5

orthographic room (updated)
...ee 3d model orthographic room (updated) for download as blend on turbosquid: 3d models for games, architecture, videos. (1375451)
turbosquid
$95

Romantic Bedroom - Updated
... available on turbo squid, the world's leading provider of digital 3d models for visualization, films, television, and games.
turbosquid
$39
Sofa. Updated release
... available on turbo squid, the world's leading provider of digital 3d models for visualization, films, television, and games.
turbosquid
$15

Procedurally updating cartoon crystal
...l procedurally updating cartoon crystal for download as blend on turbosquid: 3d models for games, architecture, videos. (1525853)
3d_export
$5
10 Surfboard s UPDATE
...10 surfboard s update
3dexport
3d_export
$10
chair updated rocking
...chair updated rocking
3dexport
armchair renewed plywood 18 mm. for cnc machines. layout in the stp archive.
turbosquid
free

Marble Table Updated
...el marble table for download as 3ds, obj, fbx, blend, and dae on turbosquid: 3d models for games, architecture, videos. (1201300)
turbosquid
$35
Mauser 1930the model is updated with the kits
... available on turbo squid, the world's leading provider of digital 3d models for visualization, films, television, and games.
turbosquid
$145

Contemporary Bedroom Collection Vol 1 - Updated
... available on turbo squid, the world's leading provider of digital 3d models for visualization, films, television, and games.
turbosquid
$16

B&B Mart Armchair MPRN (Updated)
...art armchair mprn (updated) for download as max, obj, and fbx on turbosquid: 3d models for games, architecture, videos. (1284355)
8
3ddd
$1
Italamp 387/8+8
...italamp 387/8+8
3ddd
italamp
люстра italamp 387/8+8
размеры 92x71h
3ddd
$1
8 марта
...8 марта
3ddd
8 марта
кресло 8 марта
design_connected
$16

No 8
...nected
photo-realistic 3d models of the sibast no 8 armchair from sibast for 3d architectural and interior design presentations.
3d_export
$5
hinge 8
...hinge 8
3dexport
hinge 8
3d_export
$5

iphone 8
...iphone 8
3dexport
iphone 8
turbosquid
$69

iPhone 8 and iPhone 8 Plus
... free 3d model iphone 8 and iphone 8 plus for download as max on turbosquid: 3d models for games, architecture, videos. (1202442)
turbosquid
$12

Calligraphic Digit 8 Number 8
...hic digit 8 number 8 for download as max, obj, fbx, and blend on turbosquid: 3d models for games, architecture, videos. (1389341)
3ddd
free

PLANTS 8
...plants 8
3ddd
цветок , горшок
plant 8,,, hope u all like it
3ddd
$1
8 Марта / Amadey
...8 марта / amadey
3ddd
8 марта
8 marta amadey
3d_export
$5

8 trees
...8 trees
3dexport
8 different trees with textures. the polygons refer to all trees together
1
turbosquid
$15

ring 1+1
... available on turbo squid, the world's leading provider of digital 3d models for visualization, films, television, and games.
turbosquid
$10

chair(1)(1)
... available on turbo squid, the world's leading provider of digital 3d models for visualization, films, television, and games.
turbosquid
$8

Chair(1)(1)
... available on turbo squid, the world's leading provider of digital 3d models for visualization, films, television, and games.
turbosquid
$2

RING 1(1)
... available on turbo squid, the world's leading provider of digital 3d models for visualization, films, television, and games.
turbosquid
$1

Table 1(1)
... available on turbo squid, the world's leading provider of digital 3d models for visualization, films, television, and games.
turbosquid
$1

house 1(1)
... available on turbo squid, the world's leading provider of digital 3d models for visualization, films, television, and games.
turbosquid
$59

Formula 1(1)
...lty free 3d model formula 1 for download as max, fbx, and obj on turbosquid: 3d models for games, architecture, videos. (1567088)
design_connected
$11

No 1
...no 1
designconnected
sibast no 1 computer generated 3d model. designed by sibast, helge.
turbosquid
$2

desert house(1)(1)
...3d model desert house(1)(1) for download as 3ds, max, and obj on turbosquid: 3d models for games, architecture, videos. (1055095)
turbosquid
$50
door 1 darkwood 1
... available on turbo squid, the world's leading provider of digital 3d models for visualization, films, television, and games.