Thingiverse
Ender 3 left side tool drawer and cover by MakerNewt
by Thingiverse
Last crawled date: 2 years, 10 months ago
Background
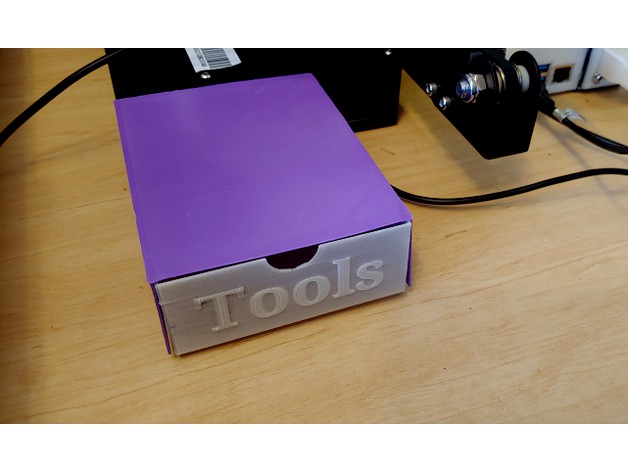
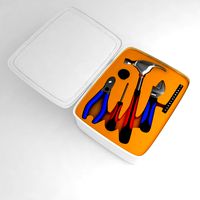
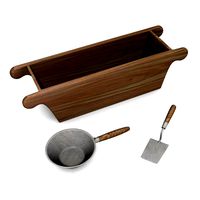
I couldn't find a drawer for the left side of the Ender 3, for the unused space in front of the motherboard case, so I designed this on Tinkercad.
It is designed for the cover screw onto the motherboard casing on the front, and extends forward to just short of the maximum extension of the bed, so it can fit inside an enclosure.
Updates
2021-07-04
After having printed both, I'm finding that the cover's left and right walls might be a little thin, as they push out a little once the drawer is in, so I'll be updating the files to create thicker walls.
Files provided
I provide two files for the drawer, one with the word "Tools" embossed on the front, and one with nothing written on the front.
I also provide the .OBJ file for Tinkercad in case somebody wants to tinker with this.
Size
Cover
40mm high (the same height as the motherboard case)
100mm wide (stops just left of the USB port)
130mm deep
Drawer
126mm deep, so it caters for the space the screw will take up
97mm wide, so it fits inside the cover, with some tolerance
38.75mm high, so it fits inside the cover, with some tolerance
Printing
Print the drawer as-is, no support necessary
Print the cover upside-down (with the roof on the bed), some supports for the screw holes and rail guide will be needed.For best results, print on a GLASS BED as the roof of the cover will be on the bed, you want as smooth a surface as possible. If you don't have a glass bed, you may need to smooth out the cover a bit using sandpaper for PLA or an acetone vapour bath for ABS.DO NOT print the cover standing up with the wall with the screw holes on the bed, as the height of the side walls will cause them to warp and split.
PLA or ABS or PETG should all be fine to print these in.
Optional
If you print the drawer with the "Tools" words on, in a light filament, then colouring in the embossed word with a permanent marker makes it look nice. :-)
If you like what you see, feel free to leave a tip. Or a comment, both will be equally appreciated.
Similar models
thingiverse
free

BTT TFT35 E3 V3.0 Case for Ender 5 by Efflon
...kercad so there are some tiny leftovers inside the case.
the tolerances are tight so measure what you have and scale accordingly.
thingiverse
free

Ender 3 v2 - v slot covers by sporte77
...in cura - you will need to add it 4 times - or just print out one at a time.
**at this time, i do not have any more shaved parts.
thingiverse
free
Dual Switch Case (for 30.5x21.5mm switches) by Jaecko
... also large enough to contain some wire junction terminals.
it is also still small enough to be printed with a vertex nano k8600.
thingiverse
free

Pi2 case#1 by jinx
... little further into the case than i would have liked. but i left it that way thinking " how often will i need access to it.
thingiverse
free

Ender 3 LCD cover + drawer by ManuelAlarcon
...i didnt printed yet so i dont really know if its have a better fit, if anyone printed i would apreciated some feedback, thanks :)
thingiverse
free

Ender 5 Back Cover + Pi Case by bloocool
... in and hidden from the front view.
materials used standoff screws (be sure to install standoffs before screwing into the case.)
thingiverse
free

Windowsill side cover
...etween windowsills and wall so i wanted to cover it. i've made this with tinkercad, link bellow if you want to fit your size.
thingiverse
free

Ender 3 tool drawer. by cmark962
...ixing but in my case there was no need and i glued the top.
the space below is for the passage of the usb cable for the raspberry
thingiverse
free

1964 Ford Galaxie 500 "Air" Dash Bezel by Reliant83
...e. i was unable to get the font right so it lacks the wording, but the fit is perfect.
printed on an ender 3 pro, with supports.
thingiverse
free

Ender 3 low profile control case for 30mm fans
...or the extra files in the images folder i have no idea why they are in there and i don't know how to get rid of them. sorry.
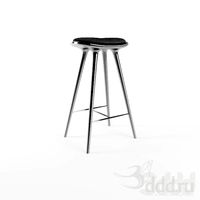
Ender
3ddd
$1

Enders / Elegance
...enders / elegance
3ddd
обогреватель
уличный газовый обогреватель enders elegance
высота: 2200 мм
3d_export
free

ender 3 frame cavity covers
... of the creality ender 3 - makes it look a bit more attractive it just slides into the open channels of the aluminium framework
turbosquid
$1

pen support for ender 3
...y free 3d model pen support for ender 3 for download as blend on turbosquid: 3d models for games, architecture, videos. (1611282)
3d_ocean
$9

Ender Dragon Minecraft
...ojang obj poly videogames
ender dragon minecraft created with cinema 4d r15 formats included: max 2013 – fbx 2012 – c4d r15 – obj
3d_export
free

Creality ender enclosure webcam mount
...e creality enclosure. sure is better than a tripod. change it up if it helps. i printed pla with 50% infill on my dd ender 3 pro.
3d_export
free

ender 3 enclosure corners
...er corners and 4 upper corners, using 25mmx25mm angled aluminium pieces that gets covered on inside of the frame with plexiglass
3d_export
free

ender 3 3d print bed clips
...ed + normal aluminium bed frame of the creality ender 3 = 6mm (b) these clips are designed for glass plate + aluminium bed = 4mm
3d_export
$5

GRUMPY CAT
...grumpy cat 3dexport grumpy cat to print in ender ...
3d_export
$5

Logs fire
...with one multi material for corona and vray r ender. albedo, normal, uvmap, roughness format jpg 4096x4096 models:...
3d_export
$42

excavator
...is the original size. 0.12 mm printing surface creality ender5 ...
Drawer
3d_export
$5

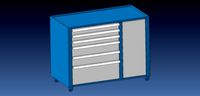
chest of drawers with drawers sonata
...chest of drawers with drawers sonata
3dexport
chest of drawers with drawers sonata
archibase_planet
free

Drawer
...drawer
archibase planet
drawer case locker
drawer - 3d model for interior 3d visualization.
archibase_planet
free
Drawer
...drawer
archibase planet
drawer dathroom furniture
drawer 896410 - 3d model for interior 3d visualization.
archibase_planet
free
Drawer
...drawer
archibase planet
drawer shelving case
drawer - 3d model (*.3ds) for interior 3d visualization.
archibase_planet
free
Drawer
...drawer
archibase planet
locker bureau drawer
drawer - 3d model (*.gsm+*.3ds) for interior 3d visualization.
archibase_planet
free

Drawer
...drawer
archibase planet
case drawer locker
drawer - 3d model (*.gsm+*.3ds) for interior 3d visualization.
archibase_planet
free
Drawer
...drawer
archibase planet
locker drawer case
drawer - 3d model (*.gsm+*.3ds) for interior 3d visualization.
archibase_planet
free

Drawer
...drawer
archibase planet
drawer case bathroom furniture
drawer 896411 - 3d model for interior 3d visualization.
archibase_planet
free
Drawer
...drawer
archibase planet
locker drawer case
drawer - 3d model (*.gsm+*.3ds) for interior 3d visualization.
archibase_planet
free

Drawer
...drawer
archibase planet
locker case drawer
drawer - 3d model (*.gsm+*.3ds) for interior 3d visualization.
Left
3d_export
$7

human-left-hand
...human-left-hand
3dexport
human-left-hand
3d_export
$5
Left arrrow 3D Model
...left arrrow 3d model
3dexport
left turn sign signal signage direction
left arrrow 3d model ryisnelly100 88746 3dexport
design_connected
$20
Nomade Chaise Left
... chaise left
designconnected
ligne roset nomade chaise left lounge chairs computer generated 3d model. designed by didier gomez.
design_connected
$16
Feng Chaise Left
...ng chaise left
designconnected
ligne roset feng chaise left lounge chairs computer generated 3d model. designed by didier gomez.
3ddd
$1

Vittorio-Left facing Sofa
...vittorio-left facing sofa
3ddd
vittorio , угловой
vittorio-left facing sofa
turbosquid
$33
Left Turn Sign
...ree 3d model left turn sign for download as 3ds, max, and obj on turbosquid: 3d models for games, architecture, videos. (1303404)
turbosquid
$15
Left-handed dagger
... available on turbo squid, the world's leading provider of digital 3d models for visualization, films, television, and games.
turbosquid
$10

no left turn - 3ds
... available on turbo squid, the world's leading provider of digital 3d models for visualization, films, television, and games.
turbosquid
$7

Left Arm Armour
... available on turbo squid, the world's leading provider of digital 3d models for visualization, films, television, and games.
turbosquid
$5

Pass Left Signs
... available on turbo squid, the world's leading provider of digital 3d models for visualization, films, television, and games.
Cover
archibase_planet
free
Cover
...cover
archibase planet
cover place setting
cover n170807 - 3d model for interior 3d visualization.
3ddd
$1
cover
...cover
3ddd
ковер , круглый
cover decor
archibase_planet
free

Cover
...cover
archibase planet
cover place setting setting
servis-cafe1930 - 3d model for interior 3d visualization.
turbosquid
free
Coverings
...rings
turbosquid
free 3d model coverings for download as dwg on turbosquid: 3d models for games, architecture, videos. (1279391)
3d_export
$5
plug cover
...plug cover
3dexport
plug cover
turbosquid
$25
Covers
... available on turbo squid, the world's leading provider of digital 3d models for visualization, films, television, and games.
3d_export
$10
manhole cover
...manhole cover
3dexport
manhole cover gost, stl, step
turbosquid
$5

Street Gas Cover Manhole Cover
... available on turbo squid, the world's leading provider of digital 3d models for visualization, films, television, and games.
3ddd
free
Bed cover
...bed cover
3ddd
постельное белье
very useful bed cover
3d_export
$5
cpu cover
...cpu cover
3dexport
cpu cover, cpu box, sheet metal container
Tool
turbosquid
$21
Tool box with tools
... available on turbo squid, the world's leading provider of digital 3d models for visualization, films, television, and games.
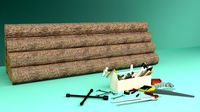
archibase_planet
free
Tools
...tools
archibase planet
tools instruments implements
tools n070114 - 3d model (*.gsm+*.3ds+*.max) for interior 3d visualization.
3d_ocean
$12
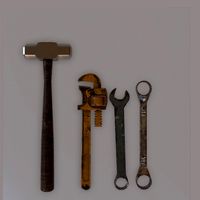
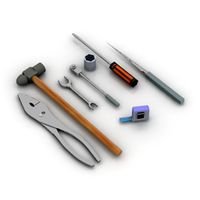
Tools
...tools
3docean
hammer metal old screw tools wrench
maya
turbosquid
$6
Tool Cart / Tool Box
...
royalty free 3d model tool cart / tool box for download as on turbosquid: 3d models for games, architecture, videos. (1241859)
3d_ocean
$15
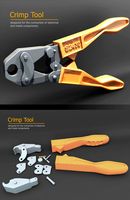
crimp tool
... tool copper cutter crimp crimp tool electrical electrical tools press tools pressing tool tools wire cutter
created in maya 2013
3d_ocean
$5

Tools
...tools
3docean
3d models paint tools work
3d,models,works,paint,art,create,working,
3d_export
free
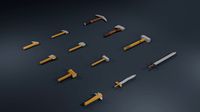
tools
...tools
3dexport
coldsteel
turbosquid
$15
Tools
...turbosquid
royalty free 3d model tools for download as blend on turbosquid: 3d models for games, architecture, videos. (1331352)
3ddd
$1
bar tool
...bar tool
3ddd
барный
bar tool
turbosquid
$35
tools
... available on turbo squid, the world's leading provider of digital 3d models for visualization, films, television, and games.
Side
3ddd
free
Side-by-side холодильник
...side-by-side холодильник
3ddd
холодильник
side-by-side холодильник samsung
turbosquid
free

siding
... available on turbo squid, the world's leading provider of digital 3d models for visualization, films, television, and games.
3ddd
$1
Кресло Side
...ресло side
3ddd
side , eero saarinen
eero saarinen кресло side.
материалы corona render.
turbosquid
$15
Mausoleum Entrances Lined Side By Side
...model mausoleum entrances lined side by side for download as on turbosquid: 3d models for games, architecture, videos. (1696515)
3ddd
$1

Side-by-Side SHARP SJ-F78PEBE
... холодильник
холодильник side-by-side sharp sj-f78pebe, габариты (шxгxв) 89x77x183 см, с материалами
3ddd
$1

Liebherr Refrigerator Side By Side Sbes 7165
... side sbes 7165
3ddd
liebherr , холодильник
liebherr refrigerator side by side sbes 7165
3ddd
$1
Side table
...side table
3ddd
журнальный
classic side table
3ddd
$1

Зеркало Side
...зеркало side
3ddd
винтаж , зеркало
зеркало side
3ddd
$1
Side Table
...side table
3ddd
кофейный , круглый
side table
3ddd
$1
Side table
...side table
3ddd
приставной
bed side table, coffee table
3
turbosquid
$10

Mountain Bike 3 -3 of 3
...model mountain bike 3 (#3 of 3) for download as fbx and blend on turbosquid: 3d models for games, architecture, videos. (1438752)
turbosquid
$6

Rock 3-3
...urbosquid
royalty free 3d model rock 3-3 for download as obj on turbosquid: 3d models for games, architecture, videos. (1628065)
turbosquid
$29

Books 150 pieces 3-3-3
...books 150 pieces 3-3-3 for download as max, obj, fbx, and stl on turbosquid: 3d models for games, architecture, videos. (1384033)
turbosquid
$3

Genesis 3 Clothing 3
... available on turbo squid, the world's leading provider of digital 3d models for visualization, films, television, and games.
3d_export
$5

hinge 3
...hinge 3
3dexport
hinge 3
3ddd
$1

Розетка 3
...розетка 3
3ddd
розетка
розетка 3
turbosquid
$50

is-3
... available on turbo squid, the world's leading provider of digital 3d models for visualization, films, television, and games.
turbosquid
$10

Mountain Bike 3 -2 of 3
...model mountain bike 3 (#2 of 3) for download as fbx and blend on turbosquid: 3d models for games, architecture, videos. (1438750)
turbosquid
$10

Mountain Bike 1 -3 of 3
...model mountain bike 1 (#3 of 3) for download as fbx and blend on turbosquid: 3d models for games, architecture, videos. (1438743)
3d_export
$5

3 CATS
...3 cats
3dexport
3 cats pen holder