Thingiverse
Ender 3 Bed Handle w/ GoPro Mount by jfusco
by Thingiverse
Last crawled date: 3 years, 1 month ago
https://www.thingiverse.com/thing:3016490https://www.thingiverse.com/thing:4647485
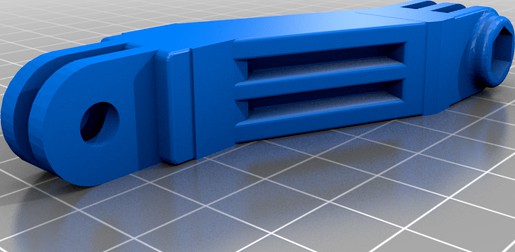
TL/DR: I reworked and mashed a couple of different things together (4647485 and 3016490) to create a bed handle for an Ender 3 (Pro) with a GoPro mount on the side. The mount is very stable, even with extensions.
I installed a Raspberry Pi to control my Ender 3 Pro with the anticipation of using OctoLapse. For some reason, OctoLapse causes my printer to stop extruding after about the third layer so, for now, I'm force to rely on the built-in timelapse function. With a frame-mounted camera it was pointless to record a timelapse because with the print head and the bed beig captured in so many different positions you don't really get the sense of the model building up. It's just too much movement.
Before using Octoprint I was using a bed handle-mounted action cam with a built-in timelapse feature. It worked pretty well except most mounts I tried to use caused it to bounce horribly. For a timelapse that wasn't a big deal but for live viewing it was terrible. I needed to find a new handle and mount to use.
I have been using the handle plapointe6 created (thing 4647485) and liked the handle but the camera mount was one of the bounciest. I tried using the corner GoPro mount scarpenters made (thing 3016490). It was quite functional and sturdy but you could easily shift it on the corner and if I'd tried I bet I could have slid it straight out without undoing the post. The plapointe6 handle is beautifully minimalist and the scarpenters mount is quite solid. My solution: Combine the two.
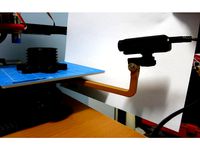
I opened Tinkercad and started by removing the thin camera mount from the handle. I imported the corner GoPro mount and lined everything up with the right mounting hole on the handle and voila! Once I had it installed I found a couple of problems. I installed a set of drawers next to my display and the connection handles were bumping up against it so it couldn't move. Switch to M5 20mm machine screws and you get a nice, low-profile connection. Second problem was that if you centered the camera on the Y rail the screw head bumped into the rail and was just screming print problems. I fired up Tinkercad again and put together an angled extension to raise the camer just a bit to give it clearance. The 25° angle gives it decent but close clearance so I also included one with a 45° angle for a little mor height if you prefer.
Even with extensions the mount is very solid and hardly even wiggles so live viewing with OctoPrint does not involve any nauseating effects. Being attached to the Y axis the relationship from camera to model remains constant providing a nice timelapse even using the recorder built in to OctoPrint.
TL/DR: I reworked and mashed a couple of different things together (4647485 and 3016490) to create a bed handle for an Ender 3 (Pro) with a GoPro mount on the side. The mount is very stable, even with extensions.
I installed a Raspberry Pi to control my Ender 3 Pro with the anticipation of using OctoLapse. For some reason, OctoLapse causes my printer to stop extruding after about the third layer so, for now, I'm force to rely on the built-in timelapse function. With a frame-mounted camera it was pointless to record a timelapse because with the print head and the bed beig captured in so many different positions you don't really get the sense of the model building up. It's just too much movement.
Before using Octoprint I was using a bed handle-mounted action cam with a built-in timelapse feature. It worked pretty well except most mounts I tried to use caused it to bounce horribly. For a timelapse that wasn't a big deal but for live viewing it was terrible. I needed to find a new handle and mount to use.
I have been using the handle plapointe6 created (thing 4647485) and liked the handle but the camera mount was one of the bounciest. I tried using the corner GoPro mount scarpenters made (thing 3016490). It was quite functional and sturdy but you could easily shift it on the corner and if I'd tried I bet I could have slid it straight out without undoing the post. The plapointe6 handle is beautifully minimalist and the scarpenters mount is quite solid. My solution: Combine the two.
I opened Tinkercad and started by removing the thin camera mount from the handle. I imported the corner GoPro mount and lined everything up with the right mounting hole on the handle and voila! Once I had it installed I found a couple of problems. I installed a set of drawers next to my display and the connection handles were bumping up against it so it couldn't move. Switch to M5 20mm machine screws and you get a nice, low-profile connection. Second problem was that if you centered the camera on the Y rail the screw head bumped into the rail and was just screming print problems. I fired up Tinkercad again and put together an angled extension to raise the camer just a bit to give it clearance. The 25° angle gives it decent but close clearance so I also included one with a 45° angle for a little mor height if you prefer.
Even with extensions the mount is very solid and hardly even wiggles so live viewing with OctoPrint does not involve any nauseating effects. Being attached to the Y axis the relationship from camera to model remains constant providing a nice timelapse even using the recorder built in to OctoPrint.
Similar models
thingiverse
free

Ender 3v2 GoPro style camera bed mount by Armo94
...mera it is 0$ :)
this is an example video made with yi action camera and this mount: https://www.youtube.com/watch?v=8ch8hokiw7q.
thingiverse
free
Ender 2 Bed Camera Mount - GoPro by itrdc5
...an be used on any bed screw
example of a low-res timelapse taken with a mobius camera.https://www.youtube.com/watch?v=qifiycesohc
thingiverse
free

Pi Cam Mount Extension
...and this bed mount: https://www.thingiverse.com/thing:3547139
i printed at 65mm/s on ender 3 pro, it took around 45 mins or less.
thingiverse
free

C270 Bed Mount for Ender 3 Lack Enclosure
...ld barely bump the camera and make the timelapse post roll blurry. i just made the bed shift 20 mm less from the forward position
thingiverse
free

Ender 3 Bed Handle by raktron
... to combine the handle with the camera mount has some issues with generating stl files and i won't be using it in the future.
thingiverse
free

Version 2: Stiff Samsung Galaxy S7 mount for Ender 3 (Pro / V2) printing bed -- smartphone mount for timelapses by Schorscheck
...inting bed.
thats why i contructed this one.
the attached timelapse is filmed with the old design and doesnt matches the new pov.
thingiverse
free

Tevo Michelangelo GoPro Style Camera Mount
...t it points towards the middle of the bed.
let me know what you guys think and if you have any suggestions for future revisions.
thingiverse
free

Tripod Mount Offset for Ender 3 Bed Mount by DPS_Design
... see from the pictures that i printed mine in total crap resolution - but it's hidden and therefore doesn't matter to me.
thingiverse
free

Da Vinci 3D printer camera mount for GoPro/SJCAM by oscahie
... 60mm radius. these have been created with this fantastic customizer tool, so you may as well easily create your own custom ones.
thingiverse
free

Ender 3 V2 3in1: Spring guide + handle + Y camera mount by plapointe6
...is not recommended. the case that i use is similar than this one : https://www.thingiverse.com/thing:403712 2020-11-12 - added .step...
Jfusco
thingiverse
free

centering / offset test by jfusco
...et test by jfusco
thingiverse
this is just a cross that you should slice to the center of your bed so you can calculate offsets.
thingiverse
free

Cricut / Silhouette Cameo vinyl roll feeder by jfusco
... build a roll feeder for your vinyl cutter such as those by cricut or silhouette. see materials and assembly.txt for instructions
thingiverse
free

Ducking Jeeps Coins by jfusco
...m) in diameter and 3mm thick.
6/27: added a nice ride coin for non-jeep appreciation.
6/28: added sweet ride and sweet jeep coins
thingiverse
free

2x2 Spray Paint Can Holder by jfusco
... created by the ultimate box generator. i originally wanted to do 3x3 but the ender 3 doesn't -quite- have the build volume.
thingiverse
free

REMIX: River Song's Blaster w/ alignment posts by jfusco
...idn't want to have to think as much about alignment when putting the model together so i added some registration posts/holes.
thingiverse
free

Desktop Storage Drawers for Crafts by jfusco
...surements: x=110mm, y=170mm, z=37mm
the four-drawer stacking stand takes ~40 hours to print at 0.24mm layer height with 5% infill
Gopro
3d_export
$5
gopro
...gopro
3dexport
turbosquid
$10

GOPRO
...
royalty free 3d model gopro for download as ma, obj, and fbx on turbosquid: 3d models for games, architecture, videos. (1702347)
turbosquid
$6

Gopro
...
royalty free 3d model gopro model for download as ma and obj on turbosquid: 3d models for games, architecture, videos. (1676751)
3d_export
$22

GoPro Hero2 Camera GoPro 3D Model
...waterproof hero kitesurf kiteboard surf sport adventures rc mini
gopro hero2 camera gopro 3d model raphaelwolfeye 51627 3dexport
3d_export
$49
gopro hero 9 black
...gopro hero 9 black
3dexport
gopro hero 9 black (eevee)
cg_studio
$149

GoPro HERO3+3d model
...amera
.max .obj .mb .lwo .fbx .c4d .3ds - gopro hero3+ 3d model, royalty free license available, instant download after purchase.
3d_export
$5

Magnetic GoPro Mount
...pro mount
3dexport
cool magnetic mount for gopro. allows you to mount the camera on flat metal surfaces and get exclusive shots.
3d_export
$149

GoPro HERO3 3D Model
...gopro hero3+ hero plus go pro hd shot photo camera photography digital lens optical
gopro hero3 3d model humster3d 95628 3dexport
turbosquid
$250

GoPro Hero4 camera
... 3d model gopro hero4 camera for download as ma, obj, and fbx on turbosquid: 3d models for games, architecture, videos. (1295092)
3d_ocean
$12
Drone phantom with gopro
...mount, mainly intended for aerial cinematography and photography applications . please rate this file if you downloaded it, th...
Ender
3ddd
$1

Enders / Elegance
...enders / elegance
3ddd
обогреватель
уличный газовый обогреватель enders elegance
высота: 2200 мм
3d_export
free

ender 3 frame cavity covers
... of the creality ender 3 - makes it look a bit more attractive it just slides into the open channels of the aluminium framework
turbosquid
$1

pen support for ender 3
...y free 3d model pen support for ender 3 for download as blend on turbosquid: 3d models for games, architecture, videos. (1611282)
3d_ocean
$9

Ender Dragon Minecraft
...ojang obj poly videogames
ender dragon minecraft created with cinema 4d r15 formats included: max 2013 – fbx 2012 – c4d r15 – obj
3d_export
free

Creality ender enclosure webcam mount
...e creality enclosure. sure is better than a tripod. change it up if it helps. i printed pla with 50% infill on my dd ender 3 pro.
3d_export
free

ender 3 enclosure corners
...er corners and 4 upper corners, using 25mmx25mm angled aluminium pieces that gets covered on inside of the frame with plexiglass
3d_export
free

ender 3 3d print bed clips
...ed + normal aluminium bed frame of the creality ender 3 = 6mm (b) these clips are designed for glass plate + aluminium bed = 4mm
3d_export
$5

GRUMPY CAT
...grumpy cat 3dexport grumpy cat to print in ender ...
3d_export
$5

Logs fire
...with one multi material for corona and vray r ender. albedo, normal, uvmap, roughness format jpg 4096x4096 models:...
3d_export
$42

excavator
...is the original size. 0.12 mm printing surface creality ender5 ...
Handle
archibase_planet
free
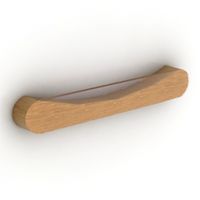
Handle
...handle
archibase planet
handle furniture handle
handle 1 - 3d model (*.gsm+*.3ds) for interior 3d visualization.
archibase_planet
free
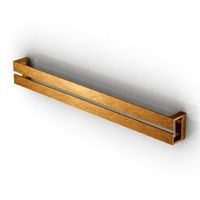
Handle
...handle
archibase planet
handle furniture handle
handle 5 - 3d model (*.gsm+*.3ds) for interior 3d visualization.
archibase_planet
free
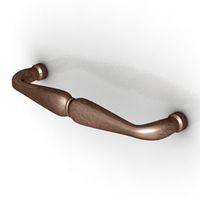
Handle
...handle
archibase planet
handle furniture handle
handle 3 - 3d model (*.gsm+*.3ds) for interior 3d visualization.
archibase_planet
free
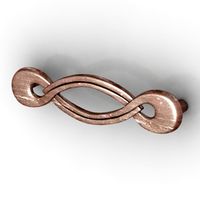
Handle
...handle
archibase planet
handle furniture handle
handle 6 - 3d model (*.gsm+*.3ds) for interior 3d visualization.
archibase_planet
free
Handle
...handle
archibase planet
handle furniture handle
handle 4 - 3d model (*.gsm+*.3ds) for interior 3d visualization.
archibase_planet
free
Handle
...handle
archibase planet
handle furniture handle
handle 2 - 3d model (*.gsm+*.3ds) for interior 3d visualization.
archibase_planet
free
Handle
...handle
archibase planet
handle furniture handle knob
handle 2 n140814 - 3d model (*.gsm+*.3ds) for interior 3d visualization.
archibase_planet
free
Handle
...handle
archibase planet
handle door knob door-handle
handle n110413 - 3d model (*.gsm+*.3ds) for interior 3d visualization.
archibase_planet
free
Handle
...handle
archibase planet
door-handle handle door-knob
handle n070209 - 3d model (*.gsm+*.3ds) for interior 3d visualization.
archibase_planet
free
Handle
...handle
archibase planet
door-handle handle door-knob
handle n270309 - 3d model (*.gsm+*.3ds) for interior 3d visualization.
W
3ddd
$1
chair W
...chair w
3ddd
chair w
3ddd
$1
кресло w
...кресло w
3ddd
капитоне
кресло w
3ddd
$1
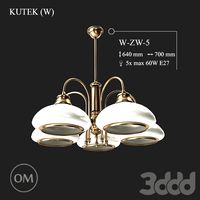
KUTEK (W) W-ZW-5
...kutek (w) w-zw-5
3ddd
kutek
3d модель люстри (w) w-zw-5 фабрики kutek. в архиве: max2012, obj, fbx, mat.(два варианта металла)
3ddd
$1
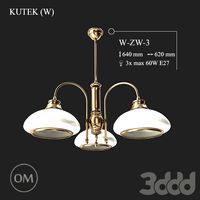
KUTEK (W) W-ZW-3
...kutek (w) w-zw-3
3ddd
kutek
3d модель люстри (w) w-zw-3 фабрики kutek. в архиве: max2012, obj, fbx, mat. (два варианта металла)
3ddd
$1
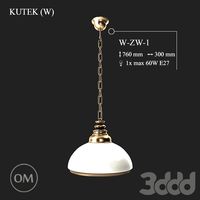
KUTEK (W) W-ZW-1
...kutek (w) w-zw-1
3ddd
kutek
3d модель люстри (w) w-zw-1 фабрики kutek. в архиве: max2012, obj, fbx, mat (два варианта металла).
3ddd
free
aneken W&W
...aneken w&w
3ddd
2 женских манекена, ценники и фолио. материалы и текстуры прилагаются.
design_connected
$9
KTribe W
...ktribe w
designconnected
ktribe w computer generated 3d model. designed by starck, philippe.
design_connected
$16

Troy W
...troy w
designconnected
magis troy w computer generated 3d model. designed by wanders, marcel.
turbosquid
$9
Menu - Benjamin Hubert - W W Carafe
... available on turbo squid, the world's leading provider of digital 3d models for visualization, films, television, and games.
turbosquid
$9
Menu - Benjamin Hubert - W W Carafe
... available on turbo squid, the world's leading provider of digital 3d models for visualization, films, television, and games.
Bed
3ddd
$1

bed
...bed
3ddd
bed , постельное белье
bed
3ddd
$1

bed
...bed
3ddd
bed , постельное белье
bed
3ddd
$1

bed
...bed
3ddd
bed , постельное белье
bed
3ddd
$1

bed
...bed
3ddd
bed , постельное белье
bed
3ddd
$1

bed
...bed
3ddd
bed , постельное белье
bed
3ddd
$1

bed
...bed
3ddd
bed , постельное белье
bed
3ddd
free

bed
...bed
3ddd
bed , постельное белье
bed
3ddd
free

bed
...bed
3ddd
bed , постельное белье
bed
3ddd
$1

Bed
...bed
3ddd
bed , постельное белье , постель
bed
3d_export
$7

bed adairs bed
...rs bed
3dexport
bed adairs bed in modern style. if you want a smoother surface, please turn on turbosmooth in the modifier list.
Mount
3d_export
free

mounting bracket
...mounting plate is the portion of a hinge that attaches to the wood. mounting plates can be used indoors, cabinetry and furniture.
turbosquid
$2

MOUNTING
... available on turbo squid, the world's leading provider of digital 3d models for visualization, films, television, and games.
turbosquid
free

Mounts
... available on turbo squid, the world's leading provider of digital 3d models for visualization, films, television, and games.
turbosquid
free

Mount Fuji
...fuji
turbosquid
free 3d model mount fuji for download as obj on turbosquid: 3d models for games, architecture, videos. (1579977)
3d_export
$5

Headphone mount LR
...headphone mount lr
3dexport
headphone mount l+r
turbosquid
$39

Mount rainier
...quid
royalty free 3d model mount rainier for download as fbx on turbosquid: 3d models for games, architecture, videos. (1492586)
turbosquid
$5

pipe mounting
...quid
royalty free 3d model pipe mounting for download as obj on turbosquid: 3d models for games, architecture, videos. (1293744)
turbosquid
$3

Mounting Tires
...uid
royalty free 3d model mounting tires for download as fbx on turbosquid: 3d models for games, architecture, videos. (1708511)
3d_export
$5
Magnetic GoPro Mount
...pro mount
3dexport
cool magnetic mount for gopro. allows you to mount the camera on flat metal surfaces and get exclusive shots.
turbosquid
$5

Stone Mount
...ty free 3d model stone mount for download as ma, obj, and fbx on turbosquid: 3d models for games, architecture, videos. (1370306)
3
turbosquid
$10

Mountain Bike 3 -3 of 3
...model mountain bike 3 (#3 of 3) for download as fbx and blend on turbosquid: 3d models for games, architecture, videos. (1438752)
turbosquid
$6

Rock 3-3
...urbosquid
royalty free 3d model rock 3-3 for download as obj on turbosquid: 3d models for games, architecture, videos. (1628065)
turbosquid
$29

Books 150 pieces 3-3-3
...books 150 pieces 3-3-3 for download as max, obj, fbx, and stl on turbosquid: 3d models for games, architecture, videos. (1384033)
turbosquid
$3

Genesis 3 Clothing 3
... available on turbo squid, the world's leading provider of digital 3d models for visualization, films, television, and games.
3d_export
$5

hinge 3
...hinge 3
3dexport
hinge 3
3ddd
$1

Розетка 3
...розетка 3
3ddd
розетка
розетка 3
turbosquid
$50

is-3
... available on turbo squid, the world's leading provider of digital 3d models for visualization, films, television, and games.
turbosquid
$10

Mountain Bike 3 -2 of 3
...model mountain bike 3 (#2 of 3) for download as fbx and blend on turbosquid: 3d models for games, architecture, videos. (1438750)
turbosquid
$10

Mountain Bike 1 -3 of 3
...model mountain bike 1 (#3 of 3) for download as fbx and blend on turbosquid: 3d models for games, architecture, videos. (1438743)
3d_export
$5

3 CATS
...3 cats
3dexport
3 cats pen holder