Thingiverse

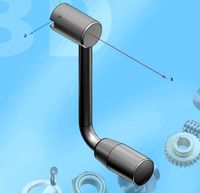
Coil Jig for different rod sizes V3 by peddiparth
by Thingiverse
Last crawled date: 2 years, 12 months ago
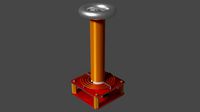
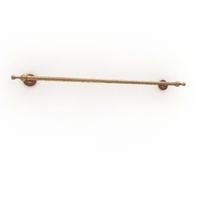
This is a coil Jig design enhancement. You can create coils of Kanthal or Nickle wire easily with this jig.
Insert a M3 machine screw in one of the holes for the wire guage size on one cylinder.
Insert the center smooth rod, and fix it with grub screw on the other cylinder.
Insert wire thru the hole opening next to the rod. Hold the end of wire (that comes out of the cylinder) with your thumb, and rotate it once around the center smooth rod to start the coil.
Insert the protruding center smooth rod thru the center axial hole in the second cylinder, and start rotating it to make a coil.
The machine screw will keep the wire in place while rotating so that you will make a good coil easily.
The faces A, B, C, D are marked on the cylinder in case you are coiling a stiff wire. If you start at A reference mark, it will be your reference to end your coil at A or C reference marks. Twist it to B or D in case of a stiff wire to account for spring back.
The screw holes for the machine screw are not threaded, so they may require some force to get the screws in the first time. They are configured so that the machine screw will press the coil to the center rod for the selected guage wire hole.
Based on my last print, I made some minor improvements for faster printing.
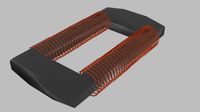
This Jig can be setup to create a uniform spaced spiral coil. Check the pics attached. All you need is an angle head screw in place of a machine screw.
NOTE: I am yet to print and test this design out. You are welcome to try and let me know if any fixes are required.
Insert a M3 machine screw in one of the holes for the wire guage size on one cylinder.
Insert the center smooth rod, and fix it with grub screw on the other cylinder.
Insert wire thru the hole opening next to the rod. Hold the end of wire (that comes out of the cylinder) with your thumb, and rotate it once around the center smooth rod to start the coil.
Insert the protruding center smooth rod thru the center axial hole in the second cylinder, and start rotating it to make a coil.
The machine screw will keep the wire in place while rotating so that you will make a good coil easily.
The faces A, B, C, D are marked on the cylinder in case you are coiling a stiff wire. If you start at A reference mark, it will be your reference to end your coil at A or C reference marks. Twist it to B or D in case of a stiff wire to account for spring back.
The screw holes for the machine screw are not threaded, so they may require some force to get the screws in the first time. They are configured so that the machine screw will press the coil to the center rod for the selected guage wire hole.
Based on my last print, I made some minor improvements for faster printing.
This Jig can be setup to create a uniform spaced spiral coil. Check the pics attached. All you need is an angle head screw in place of a machine screw.
NOTE: I am yet to print and test this design out. You are welcome to try and let me know if any fixes are required.
Similar models
thingiverse
free

Coil Jig for different rod sizes by peddiparth
... wire hole.
note: i am yet to print and test this design out. you are welcome to try and let me know if any fixes are required.
thingiverse
free

Coil Jig for different rod sizes V2 by peddiparth
...ter prints.
note: i am yet to print and test this design out. you are welcome to try and let me know if any fixes are required.
thingiverse
free

Delta Rod Jig by Av8er
...m.
so if you want 280mm on center rods, space the blocks 250mm apart. (280 -15 -15 = 250)
added rod cutting jig to the collection
thingiverse
free

Drawing Machine - thicker walls for rod fix screws by FiX2k
... fix the rods.
added 2mm wall thickness, so you can better fix the rods without breaking the wall (or lose it while printing...)
thingiverse
free

Chainmail wire jig by Anno1066
...ibly long. consider having a spare if you plan to do a lot of wrapping in at once.
https://www.youtube.com/watch?v=gxv7ee9bdme
thingiverse
free

Another coil jig by Spyke2
...and 2 with the diameter fits your coil and the rod. i added some different inserts. have fun with this thing and happy vaping :-)
thingiverse
free

Center mark jig by Vimpelis
... get part precisely inside jig corner.
what you can do is to slightly sand marking edge in case if you print on lower resolution.
thingiverse
free

Magnet Wire Coil Winding Jig by Bartimaeus
...l polish works better for gluing the coils because it can be dissolved with acetone. added a photo showing the bobbin in the jig.
thingiverse
free

Tricklaser Hospital
...stuff which isn't nearly as strong). loctite makes a similar plastic epoxy. you may wish to place a small...
thingiverse
free

Hole Guage
...position. all holes will be connected by the edges and placed in a line. print and drop your screw in to find the correct size.
Peddiparth
thingiverse
free

motor flexible coupler updated with openscad by peddiparth
... coupler updated with openscad by peddiparth
thingiverse
this is a motor coupler design updated with openscad.
make it your own.
thingiverse
free

ThreadedRodSpoolHolder by peddiparth
...nce can not be adjusted, just print the two disks, and secure the disks with nuts on the threaded rod to keep the spool in place.
thingiverse
free

King Cobra tricopter base by peddiparth
... out the "tricopter base for us" design in this version.
i am going to print it solid with 3 outer layers for rigidity.
thingiverse
free

AirConception Nitro 200 button guard by peddiparth
...riend michael swain, but was in inch scale that did not translate well to mm.
i edited the model in openscad to its current form.
thingiverse
free

Shorter belts using a belt tensioner by peddiparth
.... use a the zip tie belt tensioner to substitute the other half of belt with something you pulled from an old printer or scanner.
thingiverse
free

Face Shield PETG for laser cutting by peddiparth
...-rc2https://prusa3d.com/downloads/others/covid19_shield_foil.pdfhttps://prusa3d.com/downloads/others/covid19_shield_foil_long.pdf
thingiverse
free

Side Fan mount for 40mm fans by peddiparth
... for holding the extruder in place.
the hole width for fan is set to 30mm, so it will hold a 40mm fan easily at a 45degree angle.
thingiverse
free

Gear360 SmoothQ Osmo mount by peddiparth
...ee improved derivatives of this design.
openscad file is available for customization.
youtube video: https://youtu.be/r9uqb-gotwy
thingiverse
free

Air Conception Titanium Race frame 2 leg buffers by peddiparth
...amotor with titanium race 2 150 frame and 140 props.
the larger frame pokes into my calf muscles, so this is a buffer i designed.
thingiverse
free

Enlarged Cable Chain Laser End elongated and rotated by peddiparth
...e is attached so that you can elongate the part as much as you want.
if you make any changes, do share them with the community :)
Coil
3d_export
$5
Tesla coil
...tesla coil
3dexport
detailed tesla coil model
archibase_planet
free

Fan coil
...fan coil unit air conditioning daikin conditioner
fan coil daikin n160915 - 3d model (*.gsm+*.3ds) for exterior 3d visualization.
cg_studio
$20

Coiled Rope3d model
...pe lasso coil bustermk2 coiled cord
.max - coiled rope 3d model, royalty free license available, instant download after purchase.
turbosquid
$8

Tesla Coil
...bosquid
royalty free 3d model tesla coil for download as fbx on turbosquid: 3d models for games, architecture, videos. (1458990)
turbosquid
$29

Mosquito Coil
...oyalty free 3d model mosquito coil for download as ma and obj on turbosquid: 3d models for games, architecture, videos. (1263002)
turbosquid
$2

electronic coil
...y free 3d model electronic coil for download as obj and blend on turbosquid: 3d models for games, architecture, videos. (1503485)
turbosquid
$2
ferrite coil
...alty free 3d model ferrite coil for download as blend and obj on turbosquid: 3d models for games, architecture, videos. (1588248)
turbosquid
$15
Tesla Coil
... available on turbo squid, the world's leading provider of digital 3d models for visualization, films, television, and games.
turbosquid
$10

coil gun
... available on turbo squid, the world's leading provider of digital 3d models for visualization, films, television, and games.
turbosquid
$4

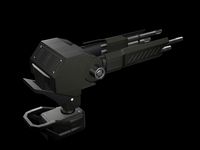
The transition coil
... available on turbo squid, the world's leading provider of digital 3d models for visualization, films, television, and games.
Jig
turbosquid
$25

jig-saw_mid_SM
...uid
royalty free 3d model jig-saw_mid_sm for download as obj on turbosquid: 3d models for games, architecture, videos. (1244761)
turbosquid
$20
jig-saw_low
...osquid
royalty free 3d model jig-saw_low for download as obj on turbosquid: 3d models for games, architecture, videos. (1244760)
turbosquid
$10

jig-saw_hi
...bosquid
royalty free 3d model jig-saw_hi for download as obj on turbosquid: 3d models for games, architecture, videos. (1244757)
turbosquid
$7

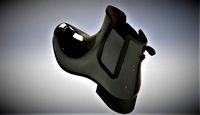
Jig Armchair
...squid
royalty free 3d model jig armchair for download as max on turbosquid: 3d models for games, architecture, videos. (1648936)
turbosquid
$5

Jig Tail
... available on turbo squid, the world's leading provider of digital 3d models for visualization, films, television, and games.
turbosquid
$5
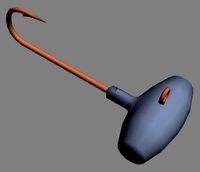
Jig Head
... available on turbo squid, the world's leading provider of digital 3d models for visualization, films, television, and games.
turbosquid
$5

Jig Head
... available on turbo squid, the world's leading provider of digital 3d models for visualization, films, television, and games.
turbosquid
$5
Jig Head
... available on turbo squid, the world's leading provider of digital 3d models for visualization, films, television, and games.
turbosquid
$5
Jig Head
... available on turbo squid, the world's leading provider of digital 3d models for visualization, films, television, and games.
turbosquid
$5

Jig Head
... available on turbo squid, the world's leading provider of digital 3d models for visualization, films, television, and games.
V3
3d_export
$5

Poison-v3
...poison-v3
3dexport
poison-v3
3ddd
$1

Curtain v3
...curtain v3
3ddd
полупрозрачная штора v3
turbosquid
free

v3
... available on turbo squid, the world's leading provider of digital 3d models for visualization, films, television, and games.
3d_export
$5
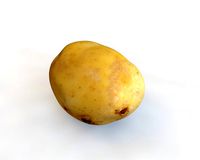
potato v3
...potato v3
3dexport
turbosquid
$69

Skeletor v3
...royalty free 3d model skeletor v3 for download as ztl and obj on turbosquid: 3d models for games, architecture, videos. (1712713)
turbosquid
$49

Zombie v3
...
royalty free 3d model zombie v3 for download as obj and ztl on turbosquid: 3d models for games, architecture, videos. (1342458)
turbosquid
$2

Bitcoin v3
...
royalty free 3d model bitcoin v3 for download as c4d and prj on turbosquid: 3d models for games, architecture, videos. (1182845)
turbosquid
$29
Turret V3
...alty free 3d model turret v3 for download as ma, obj, and fbx on turbosquid: 3d models for games, architecture, videos. (1217498)
turbosquid
$20
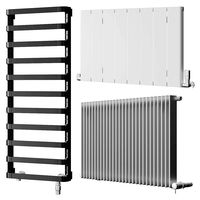
Radiators v3
... free 3d model radiators v3 for download as max, max, and obj on turbosquid: 3d models for games, architecture, videos. (1607437)
turbosquid
$10
Wheel V3S
...e 3d model wheel v3s for download as 3ds, obj, fbx, and blend on turbosquid: 3d models for games, architecture, videos. (1344250)
Rod
archibase_planet
free
Rod
...rod
archibase planet
shank rod
so rod - 3d model (*.gsm+*.3ds) for interior 3d visualization.
archibase_planet
free

Spinning rod
...g rod
archibase planet
spinning rod spinning rod fishing-rod
spinning rod - 3d model (*.gsm+*.3ds) for interior 3d visualization.
3d_export
$5
rod handle
...rod handle
3dexport
rod handle
3ddd
$1
bench with rods
...bench with rods
3ddd
скамейка
bench with rods
3ddd
$1

диван ROD
...диван rod
3ddd
rod , living divani
http://www.livingdivani.it/
3ddd
$1

кресло ROD
...кресло rod
3ddd
rod , living divani
http://www.livingdivani.it/
design_connected
$18

Rod Armchair
...rod armchair
designconnected
living divani rod armchair computer generated 3d model. designed by lissoni, piero.
archive3d
free

Rod 3D Model
...rod 3d model
archive3d
shank rod
so rod - 3d model (*.gsm+*.3ds) for interior 3d visualization.
turbosquid
$15

Fishing rod
...urbosquid
royalty free 3d model fishing rod for download as on turbosquid: 3d models for games, architecture, videos. (1684756)
archive3d
free
Spinning rod 3D Model
...d spinning rod fishing-rod
spinning rod - 3d model (*.gsm+*.3ds) for interior 3d visualization.
Different
turbosquid
free
Different Chair
...id
free 3d model different chair for download as max and fbx on turbosquid: 3d models for games, architecture, videos. (1642013)
turbosquid
free

different rubbish
... available on turbo squid, the world's leading provider of digital 3d models for visualization, films, television, and games.
3d_export
$10

Different 3D Model
...different 3d model
3dexport
different 3d model wintik174 96497 3dexport
3d_export
free
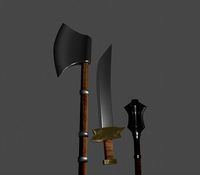
three different type
...three different type
3dexport
three different type: mace, axe, sword
3d_ocean
$10

Different types of gears
... industrial parts machine gears machine parts mechanics parts round shape
different types of machine parts/gears made in blender.
turbosquid
free

Wires in different colours
...ires in different colours for download as blend, fbx, and obj on turbosquid: 3d models for games, architecture, videos. (1652797)
turbosquid
$6
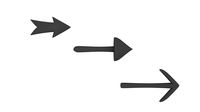
3 Different Arrows
...3d model 3 different arrows for download as 3ds, obj, and fbx on turbosquid: 3d models for games, architecture, videos. (1478401)
turbosquid
$4

Four Different Vases
...odel four different vases for download as obj, fbx, and blend on turbosquid: 3d models for games, architecture, videos. (1484813)
3d_ocean
$3

8 Different Stone
...ures : low poly mesh & hand painting texture ~contain normal map ~different mesh have any problem? feel free to contact me...
turbosquid
$45

Different Food Products
... food products for download as blend, max, fbx, gltf, and obj on turbosquid: 3d models for games, architecture, videos. (1614198)
Sizes
3d_export
$7
shoes size from 5 inch size to 11 inch
...shoes size from 5 inch size to 11 inch
3dexport
shoes design women model sizing from 5 inch to 11 inch
turbosquid
$15

Closet-small size
...
royalty free 3d model closet-small size for download as max on turbosquid: 3d models for games, architecture, videos. (1186088)
turbosquid
$5

Full size Futon
...id
royalty free 3d model full size futon for download as max on turbosquid: 3d models for games, architecture, videos. (1339638)
turbosquid
$4

mid size sword
...d
royalty free 3d model mid size sword for download as blend on turbosquid: 3d models for games, architecture, videos. (1160246)
turbosquid
$3

Mid size hammer
...
royalty free 3d model mid size hammer for download as blend on turbosquid: 3d models for games, architecture, videos. (1160647)
turbosquid
$19
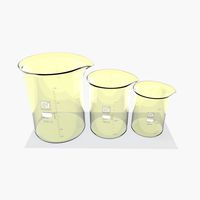
Beaker 3 Sizes
...yalty free 3d model beaker 3 sizes for download as ma and obj on turbosquid: 3d models for games, architecture, videos. (1645955)
turbosquid
$20

Full Sized Bed
...d model full sized bed for download as max, 3ds, fbx, and obj on turbosquid: 3d models for games, architecture, videos. (1547542)
turbosquid
$45
King Size Bed
... available on turbo squid, the world's leading provider of digital 3d models for visualization, films, television, and games.
turbosquid
$15

Queen size bed
... available on turbo squid, the world's leading provider of digital 3d models for visualization, films, television, and games.
turbosquid
$14

Bed - Full Size
... available on turbo squid, the world's leading provider of digital 3d models for visualization, films, television, and games.