Thingiverse
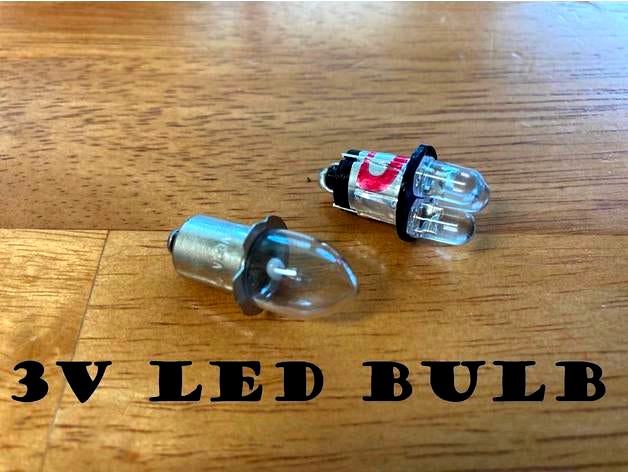
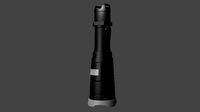
3V LED Flashlight Bulb by davidkbailey
by Thingiverse
Last crawled date: 3 years, 3 months ago
As I have stated before, I love flashlights. It is an addiction. Another one of my addictions is not being able to throw useful things away. So, as the world has transitioned from incandescent flashlights to LED, I have resisted the urge to throw away all of my old incandescent flashlights. They still work, so why should they go to a landfill? They do not work well, however, when compared to the newer LED lights. So, conundrum.
I could spend more than the light is worth to buy a replacement LED bulb. Or, I could make the bulb myself. Enter 3d printing technology and a little ingenuity.
So began my 3V LED bulb project.
NOTE: By using 3V LEDs, this bulb is designed to be used in flashlights that use TWO 1.5V batteries (Battery sizes AAA, AA, C, and D are all 1.5V).
Tools and materials: (I do not know why this shows up as larger text when published)
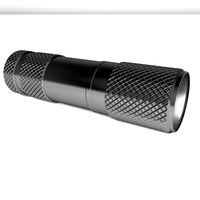
an old incandescent flashlight
a 3D printer and filament
a drill with a 1/16" bit (only if needed)
aluminum tape
wire cutters
soldering iron and solder
3 - 3 volt 5mm LED bulbs of the color of your choosing
Procedure (with corresponding pictures):
Step 1: Download and print the .stl file. Print slowly for a better end result. at 10mm/s, this file take about 45 minutes to print.
Step 2: If the holes for the LED connectors were fused shut on the build plate like mine were, use a 1/16' drill bit to open them again. This is only necessary if the holes are not open fully after printing.
Step 3: Cut two strips from the aluminum tape approximately 3/8" (10mm) wide.
Step 4: Wrap one strip of the tape around the base of the bulb. Trim the tape to keep it from overlapping.
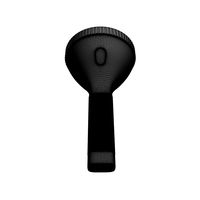
Step 5: Inset the LED bulbs as shown. The longer connector lead should be towards the center of the bulb.
Step 6: Wrap the base of the bulb with the other strip of aluminum tape, sandwiching the negative LED leads between the two layers of aluminum. Trim the tape to prevent overlap. Also, trim the excess length from the LED leads that are now encased in the tape.
Step 7: Bend the tree center LED leads to make them meet in a Y shape at the base of the bulb. Trim if necessary.
Step 8: Solder the Y together. to make the positive bulb connector.
Step 9: Install in your old flashlight.
I hope this brings you as much joy as it did to me, and prevents usable flashlights for ending up in the trash.
I could spend more than the light is worth to buy a replacement LED bulb. Or, I could make the bulb myself. Enter 3d printing technology and a little ingenuity.
So began my 3V LED bulb project.
NOTE: By using 3V LEDs, this bulb is designed to be used in flashlights that use TWO 1.5V batteries (Battery sizes AAA, AA, C, and D are all 1.5V).
Tools and materials: (I do not know why this shows up as larger text when published)
an old incandescent flashlight
a 3D printer and filament
a drill with a 1/16" bit (only if needed)
aluminum tape
wire cutters
soldering iron and solder
3 - 3 volt 5mm LED bulbs of the color of your choosing
Procedure (with corresponding pictures):
Step 1: Download and print the .stl file. Print slowly for a better end result. at 10mm/s, this file take about 45 minutes to print.
Step 2: If the holes for the LED connectors were fused shut on the build plate like mine were, use a 1/16' drill bit to open them again. This is only necessary if the holes are not open fully after printing.
Step 3: Cut two strips from the aluminum tape approximately 3/8" (10mm) wide.
Step 4: Wrap one strip of the tape around the base of the bulb. Trim the tape to keep it from overlapping.
Step 5: Inset the LED bulbs as shown. The longer connector lead should be towards the center of the bulb.
Step 6: Wrap the base of the bulb with the other strip of aluminum tape, sandwiching the negative LED leads between the two layers of aluminum. Trim the tape to prevent overlap. Also, trim the excess length from the LED leads that are now encased in the tape.
Step 7: Bend the tree center LED leads to make them meet in a Y shape at the base of the bulb. Trim if necessary.
Step 8: Solder the Y together. to make the positive bulb connector.
Step 9: Install in your old flashlight.
I hope this brings you as much joy as it did to me, and prevents usable flashlights for ending up in the trash.
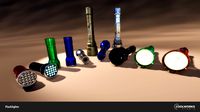
Similar models
thingiverse
free

3 Volt Incandescent Bulb to LED Converter by ZInk
...nvert old incandescent bulb devices (like torches or flashlights) to led it takes about 9 minutes to print each one with support.
thingiverse
free

Fulton MX-991\U Bulb Holder
...tle bit of solder on the flat metal surface of the bulb to create a 'bump' to make contact with the strip. works great..
thingiverse
free

LED strips tool by vomestein
...i forgot to mention that i put a little square piece of plywood and covered it with a piece of aluminum tape to isolate the heat.
grabcad
free

Connector 2PIN LED strip
...connector 2pin led strip
grabcad
https://nerd-corner.com/printed-connector-as-soldering-aid-for-jumper-cables-and-led-strips/
thingiverse
free

10mm Waterproof LED Holder by Dewst3r
...ploaded the step and stl file for the design. i have printed mine in petg but i see no reason why pla wouldn't work for this.
thingiverse
free

Printrbot Simple Metal Lights by Dershum
...o the aluminum handle
check out my blog for more!http://trippingthenerdcurmudgeonly.blogspot.com/2016/01/printrbot-lights_30.html
thingiverse
free

Milwaukee M12 Cordless Flashlight P60 "Drop In" LED module adapter by macsboost
...//www.amazon.com/tuofeng%c2%ae-flashlight-bulb-upgrade-drop/dp/b0058e8hye/ref=pd_cp_hi_0
the second set has tighter tolerances.
thingiverse
free

Connectors for Harbor Freight Flashlight to LED Strip Conversion by benbrandt22
...s #8 size bolt.
i've also included the battery box i designed for this project (seen in the video), as requested by a viewer.
grabcad
free

Bi-pin Xenon Lamp 1231-DI
...bi-pin xenon lamp 1231-di
grabcad
1.5v 300ma incandescent lamp for use in maglite solitaire flashlights
thingiverse
free

LED Light for Creality Ender 3
... led strip light connectors, 10x l shape 2 pin right angle corner connector, 10x strip to strip connectors, 2x dc connector"
Davidkbailey
thingiverse
free

Watch Holder V1
...holder v1 thingiverse remix of the original version from davidkbailey because his version the watch holder itself were too...
thingiverse
free

Rem 597 Modular Mag Holster by Zero9r
...i also remixed after the 597 mag holster by "davidkbaileyquot; but thingaverse is not allowing me to tag it....
3V
3d_export
$20

Venezia 3V 3D Model
...venezia 3v 3d model
3dexport
venezia 3v 3d model maxidasc 60087 3dexport
turbosquid
free

Miniature Motor 3v
... available on turbo squid, the world's leading provider of digital 3d models for visualization, films, television, and games.
3ddd
$1

Piaggio Fly 125 3V
...piaggio fly 125 3v
3ddd
скутер
piaggio fly 125 3v
made using polygonal modeling. based on a true model.
3ddd
free

Dolce Porte / Milan 3V
.../ milan 3v
3ddd
dolce porte , дверь
багетные межкомнатные двери dolce porte серия милан.
3ddd
$1

Dolce Porte / Venezia 3V
..., дверь
багетные межкомнатные двери dolce porte , полотно 2000х800 mm,
в двух вариантах.
turbosquid
$29

La Pavoni PUB 3V-R Espresso Machines
...3v-r espresso machines for download as 3ds, max, obj, and fbx on turbosquid: 3d models for games, architecture, videos. (1263669)
turbosquid
$30

DC - 3V - 6V 5V - 10MM Mini Coreless Motor Planetary Gear Reducer Motor for Robot
... available on turbo squid, the world's leading provider of digital 3d models for visualization, films, television, and games.
3ddd
$1

Двери Barausse
...barausse двери barausse 1750 doge 3d plus 1750 doge 3v plus материалы corona и vray так же в архиве...
3dfindit
free

3V
...3v
3dfind.it
catalog: wmberg
3dfindit
free

3V-M
...3v-m
3dfind.it
catalog: wmberg
Flashlight
3d_export
$5

Flashlight
...flashlight
3dexport
flashlight
3d_ocean
$6
Flashlight
...flashlight
3docean
beam flashlight light
hello! is pleased to present you my new project-flashlight
3d_export
free
Flashlight
...flashlight
3dexport
the most common portable flashlight.
3d_export
$10

flashlight
...flashlight
3dexport
3d model of a flashlight for horror video games or other
3d_export
$15
flashlight
...flashlight
3dexport
low poly model - flashlight, modeling in blender, texturing in substance painter
turbosquid
$2
Flashlight
...squid
royalty free 3d model flashlight for download as blend on turbosquid: 3d models for games, architecture, videos. (1686591)
turbosquid
$1

Flashlight
...squid
royalty free 3d model flashlight for download as blend on turbosquid: 3d models for games, architecture, videos. (1434506)
turbosquid
$10
Flashlights
...ree 3d model flashlights for download as fbx and unitypackage on turbosquid: 3d models for games, architecture, videos. (1286431)
turbosquid
$5

flashlight
...yalty free 3d model flashlight for download as , fbx, and obj on turbosquid: 3d models for games, architecture, videos. (1657266)
turbosquid
free
Flashlight
...
royalty free 3d model flashlight for download as max and obj on turbosquid: 3d models for games, architecture, videos. (1272424)
Bulb
archibase_planet
free

Bulb
...base planet
bulb electric light bulb electric bulb
bulb lamp isle n230814 - 3d model (*.gsm+*.3ds) for interior 3d visualization.
3d_export
$5

bulb
...bulb
3dexport
bulb
archibase_planet
free

Bulb
...bulb
archibase planet
bulb glass-ware
bulb - 3d model for interior 3d visualization.
3d_ocean
$7

Light bulb
...6) polygon. material, lighting and rendering using vray. very easy to use. it is very detailed one. it is modeled in 3ds max 2013
design_connected
$16

Bulb
...bulb
designconnected
&tradition bulb computer generated 3d model. designed by refer, sofie.
3d_export
$5

bulb
... used in game engines (unity/unreal)<br>note the renders are done in keyshot. the model only has separate material assigned
3d_ocean
$6
Energy bulb
...energy bulb
3docean
bulb eco ecological energy bulb lamp light lighting
energy bulb.
archibase_planet
free

Bulb
...bulb
archibase planet
jug pitcher pots and pans
bulb - kitchen accessories - 3d model for interior 3d visualization.
3ddd
$1

BULBING lamp
...ulbing lamp
studio cheha
дизайнер nir chehanowskihttp://www.bulbing-light.com/collections/bulbing/products/bulbing-lamp
turbosquid
$21

Bulb
...lb
turbosquid
royalty free 3d model bulb for download as c4d on turbosquid: 3d models for games, architecture, videos. (1144841)
Led
3d_export
$5

led
...led
3dexport
the led is cut with all the parts.
3ddd
$1

Monacor / PARL56DMX / LED-320RGBW / LED-345RGBW / LED-300RGB
... прожектор
http://www.monacor.dk/
parl56dmx
led-320rgbw
led-345rgbw
led-300rgb
turbosquid
$10

LED
...led
turbosquid
free 3d model led for download as blend on turbosquid: 3d models for games, architecture, videos. (1691856)
3d_export
$5

led lamp
...led lamp
3dexport
led lamp, brightness animation
3ddd
free

leds-c4
...leds-c4
3ddd
leds-c4
современный торшер
3ddd
free

leds-c4
...leds-c4
3ddd
leds-c4
настольный лампа
turbosquid
$19

LED
... available on turbo squid, the world's leading provider of digital 3d models for visualization, films, television, and games.
turbosquid
$12

Led
... available on turbo squid, the world's leading provider of digital 3d models for visualization, films, television, and games.
turbosquid
free

LED
... available on turbo squid, the world's leading provider of digital 3d models for visualization, films, television, and games.
turbosquid
free

LED
... available on turbo squid, the world's leading provider of digital 3d models for visualization, films, television, and games.