Thingiverse
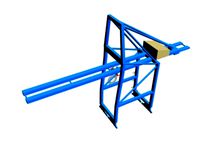
X Gantry Plate for 20mm extrusion by zx81
by Thingiverse
Last crawled date: 3 years, 1 month ago
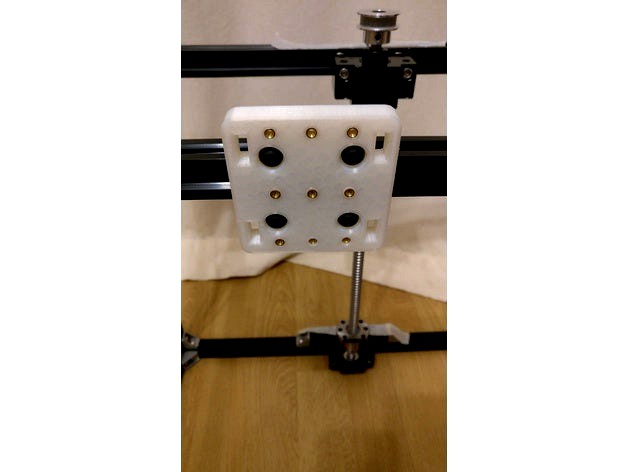
Designing and building my own CoreXY printer.
I'm only using 3 printed parts this is one of them its designed to use m3 heat inserted Threaded inserts.
no adjustment or messing about is needed for use with the mini gantry wheels, just
4x m5 25mm bolts
4x m5 standard hex nuts
4x washers
4x mini V wheels
8x lock nuts
it is important to use lock nuts! as the inner diameter of the locking part of the nut is the perfect size to not lock up the mini wheels! put one either end of the wheel the locking part towards the wheel! (so the last lock nut is backwards)
Drill out the 4 holes with a 5mm drill bit to make sure the bolts fit through without being held by the plastic, the nuts on the rear are used to hold the bold straight and in place, if you screw the bolt through the plastic (which is very easy) it is very probable that it will be at a slight angle! (you don't want that)
there are12mm square holes for use with 10mm GT2 belt nothing fancy just loop it around and use a zip tie
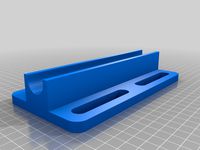
there's also an 30mm spacing adapter which is pretty standard on prusa type printers if you want to mount any existing bowden / extruder mounts.
Hole spacing's are 15mm from the center left and right (or X axis) and 26mm up and down (y axis)
https://youtu.be/fFbzME6J3Ao
I'm only using 3 printed parts this is one of them its designed to use m3 heat inserted Threaded inserts.
no adjustment or messing about is needed for use with the mini gantry wheels, just
4x m5 25mm bolts
4x m5 standard hex nuts
4x washers
4x mini V wheels
8x lock nuts
it is important to use lock nuts! as the inner diameter of the locking part of the nut is the perfect size to not lock up the mini wheels! put one either end of the wheel the locking part towards the wheel! (so the last lock nut is backwards)
Drill out the 4 holes with a 5mm drill bit to make sure the bolts fit through without being held by the plastic, the nuts on the rear are used to hold the bold straight and in place, if you screw the bolt through the plastic (which is very easy) it is very probable that it will be at a slight angle! (you don't want that)
there are12mm square holes for use with 10mm GT2 belt nothing fancy just loop it around and use a zip tie
there's also an 30mm spacing adapter which is pretty standard on prusa type printers if you want to mount any existing bowden / extruder mounts.
Hole spacing's are 15mm from the center left and right (or X axis) and 26mm up and down (y axis)
https://youtu.be/fFbzME6J3Ao
Similar models
thingiverse
free

Y Gantry fo 20mm Extrusion (Core XY) by zx81
...he bolt through the plastic (which is very easy) it is very probable that it will be at a slight angle! (you don't want that)
thingiverse
free

Colin's CoreXY (V-Slot) by zx81
...designs, however my design and their designs are very similar 03-07-2016: added a nema17 mount to attach the motor...
thingiverse
free

Sienci Longmill Mods
...
the laser mount is remixed from andy and chris's onshape catalog, to fit the mounting holes of the laser diode that i built.
thingiverse
free

Lulzbot Mini Side Filament Holder(s) by Stevengineer
...:
m5 x 25mm bolts (2)
m5 lock nuts (2)
m3 x 14mm bolts (2)
m3 lock nuts (2)
left side mount:
m5 x 25mm bolts (2)
m5 lock nuts (2)
thingiverse
free

Modified Z-axis to Mendel90 3D printers. by Gotavi
...d bar.
bom:
these plastic parts
removed screws and nuts
4 pcs bearings 13x6x5 mm
1 pcs m5 lock nut
1 pcs m5x30mm bolt
thingiverse
free

ADIMLab printer replacement X carriage bottom for mounting BMG or Titan with V6 or Volcano with wheel adjustment
...ke a thin m4 nut and bolt, but regardless it won't mount correctly without the added force pressing the wheel into its track.
thingiverse
free

Openbuilds v-slot X axis for Lulzbot TAZ 6 printers by piercet
...head m5 bolts and nuts 30mm (standard bolts will not fit, need the flat ones. ). longer if you plan to add the cable chain pieces
thingiverse
free
PVC Drill Guide
...ying vertical. if it's not, twist the undrilled end of the pipe a little as you drill the next hole to get back to vertical.
thingiverse
free

OnGuard D-lock mount replacement by Masca
...ck mini.
requires 2 50mm m5 bolts and nuts and then i used old tire tubes with holes in either end so the mount doesn't move.
thingiverse
free

Cr-10 z brace kit by Buildituniversity
...s you a few misprints like and share, or better still, you can always tip the channel.https://www.youtube.com/watch?v=tqmtihxdwuw
Zx81
thingiverse
free

Sinclair ZX81 by Amario57
...sinclair zx81 by amario57
thingiverse
model 1:1 computer sinclair zx81
with stickers
thingiverse
free
ZX81 Edge Connector by mcarlson_sb
...it the zx81 (10mm height)
expanded to 23x2 (46 pin)
added channel to outside holes to make bending wire and pulling tight easier.
thingiverse
free

downpipe cover by zx81
...by zx81
thingiverse
broke the old cover trying to access the pipe, can't find a replacement one so designed this.
fits well.
thingiverse
free

ZX81 / Timex Sinclair 1000 Display Stand
...ngs you want!
i have an assortment of matching stands for other computers if you want a consistent look for your display shelves.
thingiverse
free

Bulldog XL Mount by zx81
...r for clearance issues, i've included the sketchup files so you can modify it easily..
the fan bracket needs some improvment.
thingiverse
free

Sinclair ZX81, ZX Spectrum & QL Display Stands by Tom_DD
...128k toastrack
zx spectrum +2/+2ab
zx spectrum +3 with and without gotek (extra 5mm on base to give clearance for rotary knob)
ql
thingiverse
free

RJ4JP Test Fitting by zx81
...y carriage assembly around the drylin bushings.
please be aware this is not designed to be a drop-in replacement lmu10uu bearings
thingiverse
free

Spool Arm for P3Steel by zx81
...all tab with the hole in it and made the arm thicker, the screw now goes through the center of the arm with a m3 nut in the back!
thingiverse
free
X carriage for J head Hotend with inductive proximity sensor E3D / Hexagon by zx81
...ends also, you will have to glue the fan on as there wasn't enough space to put screw holes i might fix this at a later time.
Gantry
turbosquid
$349
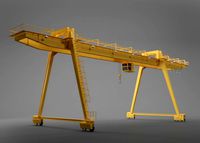
Gantry crane
...alty free 3d model gantry crane for download as ige and sldas on turbosquid: 3d models for games, architecture, videos. (1476278)
3d_export
free
firestone advertising gantry
...rs premises and<br>these advertisement gantries, were very popular in the 30-70's at grand prix races advertising tyres
turbosquid
$30

Derelict Launch Gantry
...alty free 3d model derelict launch gantry for download as fbx on turbosquid: 3d models for games, architecture, videos. (1669952)
turbosquid
$129
Gantry Crane RTG
...e 3d model gantry crane rtg for download as max, obj, and fbx on turbosquid: 3d models for games, architecture, videos. (1491933)
turbosquid
$120
Gantry stacker Assembly
...try stacker assembly for download as sldas, fbx, 3ds, and ige on turbosquid: 3d models for games, architecture, videos. (1648516)
turbosquid
$19

Train Signals Gantry
...l train signals gantry for download as 3ds, max, obj, and fbx on turbosquid: 3d models for games, architecture, videos. (1462242)
turbosquid
$5
STS Gantry Crane
... available on turbo squid, the world's leading provider of digital 3d models for visualization, films, television, and games.
turbosquid
$160

Bulk carrier with gantry crane
...carrier with gantry crane for download as lwo, obj, and blend on turbosquid: 3d models for games, architecture, videos. (1285258)
3d_export
$50

RMG Gantry Crane 3D Model
...t hoist rail rubber tyre tire rtg eot beam portal heigh tonne shipyard port
rmg gantry crane 3d model 5starsmodels 42860 3dexport
3d_export
$29
gantry crane
...istic model that will enhance the detail and realism of any of your rendering projects.<br>file formats: max, obj, fbx, 3ds
20Mm
3d_export
$20

german 20mm flak
...german 20mm flak
3dexport
german 20mm flak
turbosquid
$58
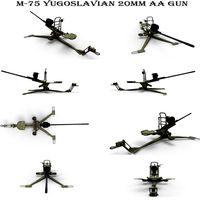
M-75 20mm AA
...squid
royalty free 3d model m-75 20mm aa for download as obj on turbosquid: 3d models for games, architecture, videos. (1174302)
turbosquid
$5

Drill Bit Set 6mm to 20mm
...ill bit set 6mm to 20mm for download as stl, sldpr, and sldas on turbosquid: 3d models for games, architecture, videos. (1257104)
turbosquid
free

Oerlikon 20mm anti-aircraft gun
...mm anti-aircraft gun for download as lwo, obj, fbx, and blend on turbosquid: 3d models for games, architecture, videos. (1430549)
turbosquid
free

20mm Flak 38 Flakveirling (Simple)
... available on turbo squid, the world's leading provider of digital 3d models for visualization, films, television, and games.
turbosquid
$7

Ammo Box WWII US Military 20mm MK3
...mmo box wwii us military 20mm mk3 for download as max and obj on turbosquid: 3d models for games, architecture, videos. (1360607)
cg_studio
$35

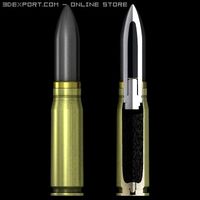
German 20mm MG151/20 Sprgr cartridge with cutaway3d model
...j - german 20mm mg151/20 sprgr cartridge with cutaway 3d model, royalty free license available, instant download after purchase.
cg_studio
$35

German 20mm MG151/20 Pzgr cartridge with cutaway3d model
...obj - german 20mm mg151/20 pzgr cartridge with cutaway 3d model, royalty free license available, instant download after purchase.
3d_export
$35
German 20mm MG15120 cartridge with cutaway 3D Model
...ammunition munition granate panzer airforce luftwaffe
german 20mm mg15120 cartridge with cutaway 3d model emeral_d 21635 3dexport
3d_export
$35
German 20mm MG 15120 cartridge with cutaway 3D Model
...mmunition munition granate panzer airforce luftwaffe
german 20mm mg 15120 cartridge with cutaway 3d model emeral_d 21633 3dexport
Extrusion
turbosquid
free

aluminum extrusion profiles
...free 3d model aluminum extrusion profiles for download as max on turbosquid: 3d models for games, architecture, videos. (1381707)
turbosquid
$5

Cable Cover Extrusion
... available on turbo squid, the world's leading provider of digital 3d models for visualization, films, television, and games.
3d_export
free

30 x 30 extrusion
... x 30 x 40.sldprt<br>30 x 30 x 50.sldprt<br>30 x 30 x 606.sldprt<br>the sketch.sldprt<br>30 x 30 x 40.stl
3d_export
$300
melt-blown fabric extrusion molding machine
...an email to me.<br>designed with solidworks 2017, render with photoview 360<br>**************************************
3d_export
$5

Spaceship - Galaxy Crusher
...with a more ominous twist. it has lots of extrusion and cubes and comes with a whopping 4k texture,...
3d_export
$20
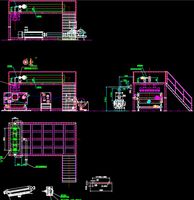
1600 Meltblown cloth production line set drawing CAD
...width of 1600mm. the steel structure frame, feeding host, extrusion screw, heating system, screen changer, metering pump, melting it...
3d_export
$5

one-eyed scary virus
...cinema, the body relief is formed by the standard extrusion noise. the eye texture is...
3d_export
$20

GE TF34 Fan Blade and Nose Cone
...and appropriately sized fillet features are provided.<br>also, a threaded extrusion profile is provided on the fan blade component and...
3d_export
$10
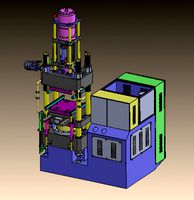
glue injection machine
...injection technology. the ordinary glue injection machine is screw extrusion type, and its instantaneous pressure can reach more than...
3d_export
$1000

bead triangle adhesive laminating machine
...a triangular rubber head with the shape required for extrusion the rear end of the extruder is also provided...
Plate
archibase_planet
free

Plates
...plates
archibase planet
plates and dishes plate
plates - 3d model (*.gsm+*.3ds) for interior 3d visualization.
3d_export
$5

plate
...plate
3dexport
plate
archibase_planet
free
Plates
...plates
archibase planet
plates and dishes plate kitchen ware
plates - 3d model (*.gsm+*.3ds) for interior 3d visualization.
archibase_planet
free
Plates
...plates
archibase planet
plate plates and dishes crockery
plates 2 - 3d model (*.gsm+*.3ds) for interior 3d visualization.
archibase_planet
free

Plate
...plate
archibase planet
dinner-plate plate kitchen ware
plate n070808 - 3d model (*.gsm+*.3ds) for interior 3d visualization.
3d_export
$6

plate
...plate
3dexport
design of plate
3d_export
$5

plate
...plate
3dexport
plate lowpoly
archibase_planet
free
Plates
...plates
archibase planet
plate dish kitchen-ware
plate - 3d model for interior 3d visualization.
3ddd
$1

Plates
...plates
3ddd
полка , тарелка
african plates
archibase_planet
free
Plate
...plate
archibase planet
plate kitchen ware
plate - 3d model (*.gsm+*.3ds) for interior 3d visualization.