Thingiverse
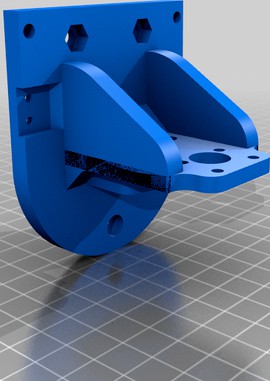
Vertical X Carriage (w/ eccentric nut)
by Thingiverse
Last crawled date: 4 years, 2 months ago
New Vertical X-Carriage with Eccentric Nut
Are you frustrated with your x carriage always wobbling, no matter how well you adjust it??
I present you my new and improved vertical carriage for Tevo Tarantula or any 2040 extrusion.
Test printed at 100mm/s. It's possible to see the infill trough the wall because I didn't use enough walls. But there is little to no ghost/ringing at all. That was the first time I printed at this speed and achieved this quality.
Check also my Y-Carriage!!https://www.thingiverse.com/thing:3999541
List of features and improvements:
2 V solid wheels on top to better distribute the weight
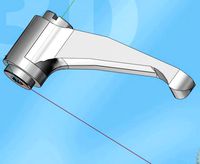
Eccentric nut on bottom wheel, allowing fine adjustments
BLTouch is mounted behind the hot end, this way it remains aligned on X axis and your only concern is the Y axis offset. If you have your sensor mounted on the side, you've realized it's impossible to probe the entire bed, printers usually don't have enough room on X axis, the same is not true for the Y axis. With my design the sensor will be able to probe every millimeter of the bed.
Only 3 parts to print. Simple and easy, no supports required
Minimalist and light weight
Requires few hardware and most of them comes with the printer
Works with radial fang mount
List of hardware:
3 v solid wheels (come with printer)
3 M5 x 30mm bolts (come with printer). One bolt must be no longer than 30mm or it will hit the BLTouch (or just print a spacer or use any spacer or washer you have handy), the other 2 might be longer if you want.
3 M5 nuts (come with printer)
2 nylon spacers (come with printer)
2 M4 nuts. You can use the t-nuts
2 M4 x 12mm at least. It's OK to use longer, but do not use shorter.
M5 Washers for fine alignment might be helpful (come with printer)
Printing tips:
The endstop bumper doesn't need to be super strong. So, print it as you deem appropriated.
Print the belt bracket and the main body as strong as possible. I used 4 walls/top/bottom layers. Use a lot of infill too, in my case 80%.
No part needs support, but if you want to add some on the rectangular gap on the BLTouch mount, it won't hurt. Everything depends on how well you can print bridges.
Assembling tips:
First assemble the bottom wheel, here is the sequence: M5 x 30mm bolt, 2 washers, v solid wheel, eccentric nut, main body, washer (optional) and M5 nut.
Second assemble the endstop and BLTouch, if you are using one.
Now assemble the rest as you prefer.
I assembled everything to the main body, by last I inserted the 2 top wheels, holding the carriage in place and finally the belt bracket.
Sequence of the 2 top wheels: M5 x 30mm bolt (or longer), v solid wheels, washer, nylon spacer, main body, M5 nut.
BLTouch Sensor Offset
X = 0
Y = 28
I'm sorry for not posting pictures for better illustrate the assembly process. I was so excited to assemble and test this carriage that I've just forgotten about the pictures.
Just let me know if you have any question or some hard time trying to assemble it and I'll do my best to help you. But I believe you'll be fine, this project is pretty straight forward, no secrets! :)
If you decide to print it and install, please take pictures and share with me. Let's help the community.
UPDATE 12/02/2019
XCARRIAGE_Belt Bracket_v2 = Thicker to increase strength, however I don't know if it's necessary, I printed the first one for my self and it's holding on for now.
XCARRIAGE_Body_v2 = Distance between BLTouch and hotend increased for those using silicone sock on the hotend. If you print the first version, the silicone sock will touch the sensor, and it's better to leave a gap between them to dissipate the heat.
Consider posting a make!
Are you frustrated with your x carriage always wobbling, no matter how well you adjust it??
I present you my new and improved vertical carriage for Tevo Tarantula or any 2040 extrusion.
Test printed at 100mm/s. It's possible to see the infill trough the wall because I didn't use enough walls. But there is little to no ghost/ringing at all. That was the first time I printed at this speed and achieved this quality.
Check also my Y-Carriage!!https://www.thingiverse.com/thing:3999541
List of features and improvements:
2 V solid wheels on top to better distribute the weight
Eccentric nut on bottom wheel, allowing fine adjustments
BLTouch is mounted behind the hot end, this way it remains aligned on X axis and your only concern is the Y axis offset. If you have your sensor mounted on the side, you've realized it's impossible to probe the entire bed, printers usually don't have enough room on X axis, the same is not true for the Y axis. With my design the sensor will be able to probe every millimeter of the bed.
Only 3 parts to print. Simple and easy, no supports required
Minimalist and light weight
Requires few hardware and most of them comes with the printer
Works with radial fang mount
List of hardware:
3 v solid wheels (come with printer)
3 M5 x 30mm bolts (come with printer). One bolt must be no longer than 30mm or it will hit the BLTouch (or just print a spacer or use any spacer or washer you have handy), the other 2 might be longer if you want.
3 M5 nuts (come with printer)
2 nylon spacers (come with printer)
2 M4 nuts. You can use the t-nuts
2 M4 x 12mm at least. It's OK to use longer, but do not use shorter.
M5 Washers for fine alignment might be helpful (come with printer)
Printing tips:
The endstop bumper doesn't need to be super strong. So, print it as you deem appropriated.
Print the belt bracket and the main body as strong as possible. I used 4 walls/top/bottom layers. Use a lot of infill too, in my case 80%.
No part needs support, but if you want to add some on the rectangular gap on the BLTouch mount, it won't hurt. Everything depends on how well you can print bridges.
Assembling tips:
First assemble the bottom wheel, here is the sequence: M5 x 30mm bolt, 2 washers, v solid wheel, eccentric nut, main body, washer (optional) and M5 nut.
Second assemble the endstop and BLTouch, if you are using one.
Now assemble the rest as you prefer.
I assembled everything to the main body, by last I inserted the 2 top wheels, holding the carriage in place and finally the belt bracket.
Sequence of the 2 top wheels: M5 x 30mm bolt (or longer), v solid wheels, washer, nylon spacer, main body, M5 nut.
BLTouch Sensor Offset
X = 0
Y = 28
I'm sorry for not posting pictures for better illustrate the assembly process. I was so excited to assemble and test this carriage that I've just forgotten about the pictures.
Just let me know if you have any question or some hard time trying to assemble it and I'll do my best to help you. But I believe you'll be fine, this project is pretty straight forward, no secrets! :)
If you decide to print it and install, please take pictures and share with me. Let's help the community.
UPDATE 12/02/2019
XCARRIAGE_Belt Bracket_v2 = Thicker to increase strength, however I don't know if it's necessary, I printed the first one for my self and it's holding on for now.
XCARRIAGE_Body_v2 = Distance between BLTouch and hotend increased for those using silicone sock on the hotend. If you print the first version, the silicone sock will touch the sensor, and it's better to leave a gap between them to dissipate the heat.
Consider posting a make!
Similar models
thingiverse
free

Vertical X Carriage
...he same, the x carriage will not affect it.
check two tests i made after this upgrade and judge by yourself!
i hope you enjoy it!
thingiverse
free

X carriage compatible with BLTouch sensor for Sigma3D Printer by drmaestro
...e used by sigma3d printer. also includes 2 different spacers, which are required to adjust the position of the sensor's tip.
thingiverse
free

Remix Of Nikodem Bartnik Dremel CNC Z-Carriage for Mini V-Wheel Support
..., wheel (with bearings), second washer and a second eccentric nut.
then through the backing plate, and secured using nylock nuts.
thingiverse
free

3D Printed z axis by kandoit
...y wheels are higher so you can file a little out to make the creality wheels fit snug in the v-slot or fit eccentric spacer nuts
thingiverse
free

flsun3D x carriage wheel tightener by TMesple
...other 2 wheels are used in factory design, the tightener go over the nut.
the two parts are tightened using a m5 screw and a nut.
thingiverse
free

Openbuilds v-slot X axis for Lulzbot TAZ 6 printers by piercet
...head m5 bolts and nuts 30mm (standard bolts will not fit, need the flat ones. ). longer if you plan to add the cable chain pieces
thingiverse
free

east3D gecko coreXY Z-wheel-carriage by delukart
...slight resistance ) finaly tighten the carriages to the z stage.
(i do advise to relevel and retighten the z belts at this time.)
thingiverse
free

2020 profile 3 wheel gantry for 24mm wheels
...hese for a ton of applications where 2020 profile is needed.
if it is too tight for your profile type, just print at 102% scale.
thingiverse
free

Y guide - MGN12H linear rails (RedBot) by NickRimmer
...s, for aluminium profile
4 pcs - m5 square nuts
4 pcs - m5 washers
to mount each of rail i used 4pcs of m3x10 screws with t-nuts.
thingiverse
free

Bondtech BMG MK3S and MK3 Bear X Axis BLTOUCH NO SENSOR
...t height between the sensor tip and the nozzle, i've provided the step file.
the offset of the bltouch is 30mm on the x axis.
Eccentric
3d_export
$7

Eccentric Press - Glass Mosaic
...al sizes. unit's millimeters. includes all scene, lighting, cameras, materials and textures. many file formats are available.
turbosquid
$10

Pipes 4in x 6in Eccentric Reducer
... available on turbo squid, the world's leading provider of digital 3d models for visualization, films, television, and games.
turbosquid
$10

Pipes 4in x 10in Eccentric Reducer
... available on turbo squid, the world's leading provider of digital 3d models for visualization, films, television, and games.
turbosquid
$10
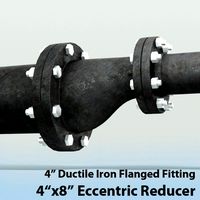
Pipes 4in x 8in Eccentric Reducer
... available on turbo squid, the world's leading provider of digital 3d models for visualization, films, television, and games.
3d_export
$20

glass table eccentric shapes
...dels and materials have logical names all textures/materials included dimensions: table width: 1196mm depth: 1303mm height: 440mm
3d_export
$8
tool replacement gearbox
...tool replacement gearbox 3dexport eccentric lifting mechanism, you can process according to available...
3d_export
$10
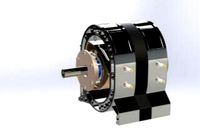
Wankel engine
...is a type of internal combustion engine using an eccentric rotary design to convert pressure into rotating...
3d_export
$15
Flos spun lamp 3D Model
...spun lamp 3d model 3dexport lamp flos spun modern eccentric new interior design room desk table light black white...
3d_export
$15
Flos spun lamp 3D Model
...spun lamp 3d model 3dexport lamp flos spun modern eccentric new interior design room desk table light black white...
3d_export
$23
Flos spun lamp pack 3D Model
...lamp pack 3d model 3dexport lamp flos spun modern eccentric new interior design room desk table light black white...
Carriage
archibase_planet
free

Carriage
...arriage
archibase planet
perambulator baby carriage pram
carriage n250908 - 3d model (*.gsm+*.3ds) for interior 3d visualization.
3d_export
free

carriage
...carriage
3dexport
old fashion carriage model, more files here:
turbosquid
$140

Carriage
...urbosquid
royalty free 3d model carriage for download as max on turbosquid: 3d models for games, architecture, videos. (1482052)
turbosquid
$25

Carriage
...urbosquid
royalty free 3d model carriage for download as max on turbosquid: 3d models for games, architecture, videos. (1285944)
3d_export
free

carriage
...carriage
3dexport
game cart
3d_ocean
$15

Barrel Carriage
...ieval oak old transport wheels wine wood
this model contains a barrel and a carriage. it is a medieval type of wood oak carriage.
turbosquid
$40

Carriage
...ty free 3d model carriage for download as obj, fbx, and blend on turbosquid: 3d models for games, architecture, videos. (1290094)
turbosquid
free

Carriage
...yalty free 3d model carriage for download as ma, obj, and fbx on turbosquid: 3d models for games, architecture, videos. (1239157)
3d_export
$5

Medieval carriage
...medieval carriage
3dexport
medieval carriage in fairy style
turbosquid
$58

Carriage
...d model carriage with scene for download as max, obj, and fbx on turbosquid: 3d models for games, architecture, videos. (1276262)
Nut
3d_export
free
nut
...nut
3dexport
low poly
turbosquid
$12

nut
...
royalty free 3d model nut for download as max, obj, and fbx on turbosquid: 3d models for games, architecture, videos. (1175191)
3d_export
$5
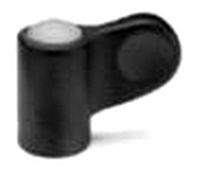
nut handle
...nut handle
3dexport
nut handle
3d_export
$5
nut anchor
...nut anchor
3dexport
nut anchor
3d_export
$5
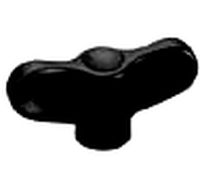
wing nut
...wing nut
3dexport
wing nut
3d_export
$5
butterfly nut
...butterfly nut
3dexport
butterfly nut
3d_export
$5
special nut
...special nut
3dexport
special nut
3d_export
$5

nut hook
...nut hook
3dexport
nut hook
3d_export
$5

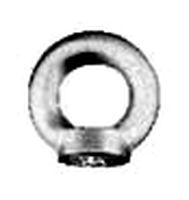
nut ring
...nut ring
3dexport
nut ring
3ddd
$1
nut model
...nut model
3ddd
орех
nuts model
W
3ddd
$1
chair W
...chair w
3ddd
chair w
3ddd
$1

кресло w
...кресло w
3ddd
капитоне
кресло w
3ddd
$1
KUTEK (W) W-ZW-5
...kutek (w) w-zw-5
3ddd
kutek
3d модель люстри (w) w-zw-5 фабрики kutek. в архиве: max2012, obj, fbx, mat.(два варианта металла)
3ddd
$1
KUTEK (W) W-ZW-3
...kutek (w) w-zw-3
3ddd
kutek
3d модель люстри (w) w-zw-3 фабрики kutek. в архиве: max2012, obj, fbx, mat. (два варианта металла)
3ddd
$1
KUTEK (W) W-ZW-1
...kutek (w) w-zw-1
3ddd
kutek
3d модель люстри (w) w-zw-1 фабрики kutek. в архиве: max2012, obj, fbx, mat (два варианта металла).
3ddd
free
aneken W&W
...aneken w&w
3ddd
2 женских манекена, ценники и фолио. материалы и текстуры прилагаются.
design_connected
$9
KTribe W
...ktribe w
designconnected
ktribe w computer generated 3d model. designed by starck, philippe.
design_connected
$16

Troy W
...troy w
designconnected
magis troy w computer generated 3d model. designed by wanders, marcel.
turbosquid
$9

Menu - Benjamin Hubert - W W Carafe
... available on turbo squid, the world's leading provider of digital 3d models for visualization, films, television, and games.
turbosquid
$9

Menu - Benjamin Hubert - W W Carafe
... available on turbo squid, the world's leading provider of digital 3d models for visualization, films, television, and games.
Vertical
3ddd
$1
Vertical curtain
...vertical curtain
3ddd
роллеты
vertical curtain
modern curtain
design_connected
$11
Mr.Tubes Vertical
...mr.tubes vertical
designconnected
tonone mr.tubes vertical computer generated 3d model.
3ddd
free
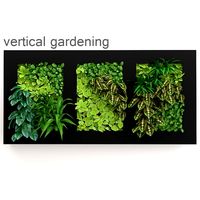
Vertical gardening
... фитомодуль , фитостена
vertical gardening
2000x1000x165
vizpark
$5

Einstein Vertical
...tical is a set of 3d brick textures for modern buildings, including mulit-textures and 4k tileable textures with material layers.
turbosquid
$5

brazier vertical
... free 3d model brazier vertical for download as sldas and ige on turbosquid: 3d models for games, architecture, videos. (1647570)
turbosquid
$18
Vertical blinds
...ee 3d model vertical blinds for download as max, obj, and fbx on turbosquid: 3d models for games, architecture, videos. (1604868)
3d_export
$40

vertical stirling engine
...vertical stirling engine
3dexport
vertical stirling engine
turbosquid
$6
vertical fence
...d model vertical fence for download as c4d, 3ds, dxf, and obj on turbosquid: 3d models for games, architecture, videos. (1571631)
turbosquid
$50

Vertical Garden
... available on turbo squid, the world's leading provider of digital 3d models for visualization, films, television, and games.
turbosquid
$20

vertical flag
... available on turbo squid, the world's leading provider of digital 3d models for visualization, films, television, and games.