Thingiverse
tinkerMicroscope MK1 by tinkerheart
by Thingiverse
Last crawled date: 3 years, 3 months ago
Obviously, it is possible to buy a very nice microscope by throwing a lot of money at a shop, and it is also possible to improvise a microscope using some cheap acrylic lenses and cardboard.
With this project I want to see how far I can get with 3d-printed parts, while allowing myself to use cheap microscope RMS lenses and cheap electrical components. What is cheap? A matter of taste, but I try to limit myself to lenses costing less than USD 10 and other components costing a few USD at most. You can see the parts list below – for some of the items you get more than one unit , I suggest you take that as a suggestion that you build more than one microscope, you can probably find someone who can use one, perhaps even someone who’ll build it with you ;)
You can forgo the camera mount and use the tinkerMicroscope as a regular microscope, but it has been designed to be used with a digital camera to turn it into a digital microscope. For many people the best camera they own is in their smartphone, so I’ve designed the camera mounting solution with this in mind. That said, you should be able to mount most cheap USB webcams to the mounting plate with a bit of ingenuity. Please share your camera mounting solutions with the rest of us!
With a bit of luck you can find old microscopes which are being sold for parts and grab their lenses – chances are that they have RMS threads – if they do not then perhaps you can adjust the MechanicalTube_lowerPart to fit your lenses.
Features
Compatible with many microscope objectives with RMS threads
Sliding and rotating specimen stage
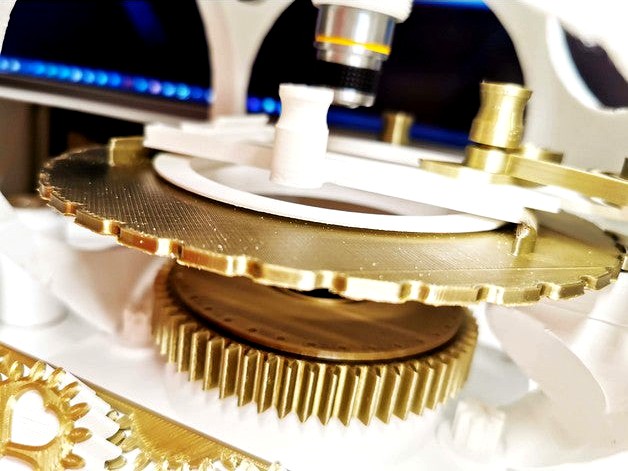
Focal plane adjustable using a worm gear
Dimmable LED light source
Mechanical iris for adjusting how much light reaches the specimen
Mechanical tube length of 160mm
I plan on expanding on the capabilities of the tinkerMicroscope in the future, some ideas include:
Dark field microscopy
Polarized light microscopy
Fluorescence microscopy
Objective turret
The tinkerMicroscope already has a socket for connecting an external light source and an extra knob on the front for adjusting the intensity of this light source, also two currently unused threaded pins on the base.
When will all this be done? I make no promises, but you are most welcome to make your own versions.
Printing advice
I printed my own tinkerScope using inexpensive PLA on a Prusa MK3S. Springs may benefit from being printed in PETG, but I’ve not had any problems with my PLA springs. Most parts can be printed without supports, with notable exceptions being the Base and MechanicalIris_gearLarge, both of which should be printed with supports on the build plate only (no internal supports apart from the ones already designed into the Base. The Body can be printed without support but may require a bit of polishing after printing.
Threaded parts should be printed at a layer height of 0.2mm or less. Most parts can be printed with 3 perimenters and 10% or more infill. Springs, screws and nuts should be printed with 100% infill.
The MechancialTube_upperPart and MechanicalTube_zScrew are the most difficult parts to get exactly right, as the mechanical tube needs to be able to slide up and down to adjust the focus. Do not try to force the zScrew to turn as it may break. If the fit between your MechancialTube_upperPart and MechanicalTube_zScrew ends up being too loose, then the mechanical tube may sway to a side, you can try to counteract this by placing one or more Head_spacer between the Head and the Body. Getting the Mechanical Iris to work can also take a bit of work, make sure that it works perfectly before you glue it.
How to build your very own tinkerScope
Please watch this movie: https://youtu.be/IL0DcrnIoWQ
Printed parts
Will cost you approximately one 1kg spool of PLA, a bit more or less depending on how much infill you use.
1 x Base
1 x Base_front
2 x Base_knob
2 x Base_plug
3 x Base_nut
0 x Base_funnel (optional)
1 x Body
1 x Head
4 x Head_nut
0 x Head_spacer (optional)
2 x CameraMount_slide
2 x CameraMount_screw
1 x CameraMount_plate
1 x CameraMount_connector
2 x CameraMount_nut
1 x OcularMount_core
4 x OcularMount_threadedPlate
4 x OcularMount_screw
1 x MechanicalTube_upperPart
1 x MechanicalTube_lowerPart
1 x MechanicalTube_zScrew
2 x MechanicalTube_screw
1 x MechanicalTube_nut
1 x MechanicalTube_clampUnthreaded
1 x MechanicalTube_clampThreaded
1 x SlidingStage_y
1 x SlidingStage_x
1 x SlidingStage_spring
1 x SlidingStage_finger
1 x SlidingStage_nut1
1 x SlidingStage_nut2
1 x SlidingStage_nut3
1 x RotatingStage_main
1 x RotatingStage_mount
4 x RotatingStage_mountNut
1 x RotatingStage_ring
1 x RotatingStage_spring
2 x RotatingStage_nut
1 x RotatingStage_cap
1 x MechanicalIris_cap
1 x MechanicalIris_gearLarge
8 x MechanicalIris_gearSmall
8 x MechanicalIris_leaf
1 x LightSource_core
1 x LightSource_bottom
1 x LightSource_stripHolder
1 x LightSource_stripCap
Other parts
Please visit tinkerheart.eu/tinkermicroscope/ for the complete bill of materials.
With this project I want to see how far I can get with 3d-printed parts, while allowing myself to use cheap microscope RMS lenses and cheap electrical components. What is cheap? A matter of taste, but I try to limit myself to lenses costing less than USD 10 and other components costing a few USD at most. You can see the parts list below – for some of the items you get more than one unit , I suggest you take that as a suggestion that you build more than one microscope, you can probably find someone who can use one, perhaps even someone who’ll build it with you ;)
You can forgo the camera mount and use the tinkerMicroscope as a regular microscope, but it has been designed to be used with a digital camera to turn it into a digital microscope. For many people the best camera they own is in their smartphone, so I’ve designed the camera mounting solution with this in mind. That said, you should be able to mount most cheap USB webcams to the mounting plate with a bit of ingenuity. Please share your camera mounting solutions with the rest of us!
With a bit of luck you can find old microscopes which are being sold for parts and grab their lenses – chances are that they have RMS threads – if they do not then perhaps you can adjust the MechanicalTube_lowerPart to fit your lenses.
Features
Compatible with many microscope objectives with RMS threads
Sliding and rotating specimen stage
Focal plane adjustable using a worm gear
Dimmable LED light source
Mechanical iris for adjusting how much light reaches the specimen
Mechanical tube length of 160mm
I plan on expanding on the capabilities of the tinkerMicroscope in the future, some ideas include:
Dark field microscopy
Polarized light microscopy
Fluorescence microscopy
Objective turret
The tinkerMicroscope already has a socket for connecting an external light source and an extra knob on the front for adjusting the intensity of this light source, also two currently unused threaded pins on the base.
When will all this be done? I make no promises, but you are most welcome to make your own versions.
Printing advice
I printed my own tinkerScope using inexpensive PLA on a Prusa MK3S. Springs may benefit from being printed in PETG, but I’ve not had any problems with my PLA springs. Most parts can be printed without supports, with notable exceptions being the Base and MechanicalIris_gearLarge, both of which should be printed with supports on the build plate only (no internal supports apart from the ones already designed into the Base. The Body can be printed without support but may require a bit of polishing after printing.
Threaded parts should be printed at a layer height of 0.2mm or less. Most parts can be printed with 3 perimenters and 10% or more infill. Springs, screws and nuts should be printed with 100% infill.
The MechancialTube_upperPart and MechanicalTube_zScrew are the most difficult parts to get exactly right, as the mechanical tube needs to be able to slide up and down to adjust the focus. Do not try to force the zScrew to turn as it may break. If the fit between your MechancialTube_upperPart and MechanicalTube_zScrew ends up being too loose, then the mechanical tube may sway to a side, you can try to counteract this by placing one or more Head_spacer between the Head and the Body. Getting the Mechanical Iris to work can also take a bit of work, make sure that it works perfectly before you glue it.
How to build your very own tinkerScope
Please watch this movie: https://youtu.be/IL0DcrnIoWQ
Printed parts
Will cost you approximately one 1kg spool of PLA, a bit more or less depending on how much infill you use.
1 x Base
1 x Base_front
2 x Base_knob
2 x Base_plug
3 x Base_nut
0 x Base_funnel (optional)
1 x Body
1 x Head
4 x Head_nut
0 x Head_spacer (optional)
2 x CameraMount_slide
2 x CameraMount_screw
1 x CameraMount_plate
1 x CameraMount_connector
2 x CameraMount_nut
1 x OcularMount_core
4 x OcularMount_threadedPlate
4 x OcularMount_screw
1 x MechanicalTube_upperPart
1 x MechanicalTube_lowerPart
1 x MechanicalTube_zScrew
2 x MechanicalTube_screw
1 x MechanicalTube_nut
1 x MechanicalTube_clampUnthreaded
1 x MechanicalTube_clampThreaded
1 x SlidingStage_y
1 x SlidingStage_x
1 x SlidingStage_spring
1 x SlidingStage_finger
1 x SlidingStage_nut1
1 x SlidingStage_nut2
1 x SlidingStage_nut3
1 x RotatingStage_main
1 x RotatingStage_mount
4 x RotatingStage_mountNut
1 x RotatingStage_ring
1 x RotatingStage_spring
2 x RotatingStage_nut
1 x RotatingStage_cap
1 x MechanicalIris_cap
1 x MechanicalIris_gearLarge
8 x MechanicalIris_gearSmall
8 x MechanicalIris_leaf
1 x LightSource_core
1 x LightSource_bottom
1 x LightSource_stripHolder
1 x LightSource_stripCap
Other parts
Please visit tinkerheart.eu/tinkermicroscope/ for the complete bill of materials.
Similar models
thingiverse
free

BrickScope: RMS threaded 8x10 stud brick
...rs the optical axis midway between the 4th and 5th stud, but the alignment during design was approximate, so may be slightly off.
thingiverse
free

Microscope Webcam Mount by destroyer2012
...although be warned it's a bit of a tight fit. i guess you can make the cameramountbottom scaled up a bit to solve that issue.
thingiverse
free

PS Eye lens mount by S1m0n32002
....
also, the mounting holes will probably get occluded during printing, they should be 1mm in diameter to fit the original screws.
thingiverse
free

Smartphone Microscope by Conpi158
...- 3 x led's
1 x switch
1 x resistance (you have to calculate)
1 x 9 v batterie
thingiverse
free
1X Microscope Camera Adapter C-Mount for Leica DM Microscopes by rdp837
...cameras (you may need to work out how to fit additional lenses in there though) or change it to fit your favourite camera system.
thingiverse
free

Microscope to Micro Four Thirds Adapter by MasterFX
....
i attached two sample images with min. and max. zoom. they are uncropped. it is almost full illuminated without reduction lens.
thingiverse
free

RMS to M42 adapter by ejmfoto
...to convert rms thread (20 mm) into m42 thread. for using microscope objectives in m42-mount cameras, adapters or extension tubes.
thingiverse
free

Macro camera m12 lens adapter by svogl
...odules
update:
i cut the m12 thread as well which should improve printing and added reinforcement blobs for stability and looks
thingiverse
free

NX Mini Mount Adapters by skaughtisch
...m tape) to short the three contacts on the right side of the camera. this lets the camera body know there's a lens attached.
thingiverse
free

Wyze Cam V3 indoor/outdoor adjustable wall mount by jplasencia
...ecommend printing the enclosure for additional protection.
additional parts:
1) 1/4-20 x by 1 1/2" hex bolt
2) 1/4-20 nuts
Tinkerheart
thingiverse
free

Christmas baubles by tinkerheart
...christmas baubles by tinkerheart
thingiverse
a collection of christmas baubles.
thingiverse
free

Phone stand / holder for smartphones by tinkerheart
...phone stand / holder for smartphones by tinkerheart
thingiverse
a simple smartphone stand.
thingiverse
free

Direct drive BMG extruder for Prusa Mini clone by tinkerheart
...inter works with this modification.
firmware (provided as is, not tested much) can be found here:http://tinkerheart.eu/prusamini/
thingiverse
free

Direct drive BMG extruder for Prusa Mini clone, updated version by tinkerheart
...inter works with this modification.
firmware (provided as is, not tested much) can be found here:http://tinkerheart.eu/prusamini/
thingiverse
free

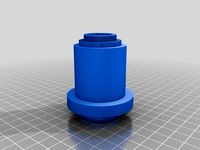
tinkerVortex mk1, DIY vortex mixer for eppendorf tubes by tinkerheart
... vortexplug
1 x vortexshell
other parts:
please visit http://tinkerheart.eu/tinkervortex-mk1/ for the complete bill of materials.
thingiverse
free

tinkerStirrer MK1, DIY high performance magnetic stirrer by tinkerheart
...tps://youtu.be/umn0ur9iaja
other parts:
please visit http://tinkerheart.eu/tinkerstirrer_mk1/ for the complete bill of materials.
thingiverse
free

tinkerCentrifuge MK1, DIY tabletop centrifuge for eppendorf tubes by tinkerheart
...cer
1 x centrifugeshell
other parts:
please visit http://tinkerheart.eu/tinkercentrifuge-mk1/ for the complete bill of materials.
thingiverse
free

tinkerStirrer MK1 light, DIY good but cheap'ish magnetic stirrer by tinkerheart
...cer
2 x stirrershell
other parts:
please visit http://tinkerheart.eu/tinkerstirrer-mk1-light/ for the complete bill of materials.
thingiverse
free

tinkerInduction MK1, DIY induction heater for demonstrating induction by tinkerheart
...deo. no information contained in this video shall create any expressed or implied warranty or guarantee of any particular result.
Mk1
turbosquid
$25

Cutlass MK1
...urbosquid
royalty free 3d model cutlass mk1 for download as on turbosquid: 3d models for games, architecture, videos. (1387253)
3d_export
$5

Escort MK1
...escort mk1
3dexport
turbosquid
$14
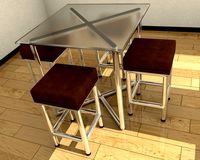
Table Mk1
... available on turbo squid, the world's leading provider of digital 3d models for visualization, films, television, and games.
turbosquid
$10
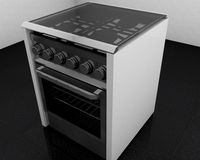
Stove Mk1
... available on turbo squid, the world's leading provider of digital 3d models for visualization, films, television, and games.
3d_export
$99

Maserati 3500GT mk1
...maserati 3500gt mk1
3dexport
turbosquid
free

VW Golf MK1
...osquid
free 3d model vw golf mk1 for download as c4d and obj on turbosquid: 3d models for games, architecture, videos. (1707225)
turbosquid
$100

Hawker Fury MK1
... available on turbo squid, the world's leading provider of digital 3d models for visualization, films, television, and games.
turbosquid
$100

Hawker Fury MK1
... available on turbo squid, the world's leading provider of digital 3d models for visualization, films, television, and games.
turbosquid
$100

Hawker Fury MK1
... available on turbo squid, the world's leading provider of digital 3d models for visualization, films, television, and games.
turbosquid
$39
Nazi UFO Mk1
... available on turbo squid, the world's leading provider of digital 3d models for visualization, films, television, and games.