Thingiverse
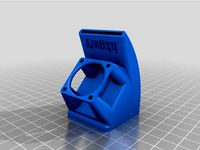
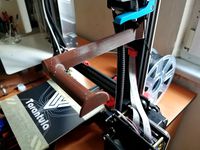
Tevo Black Widow spring bushing & glass plate corner bracket by Jupacreations
by Thingiverse
Last crawled date: 3 years ago
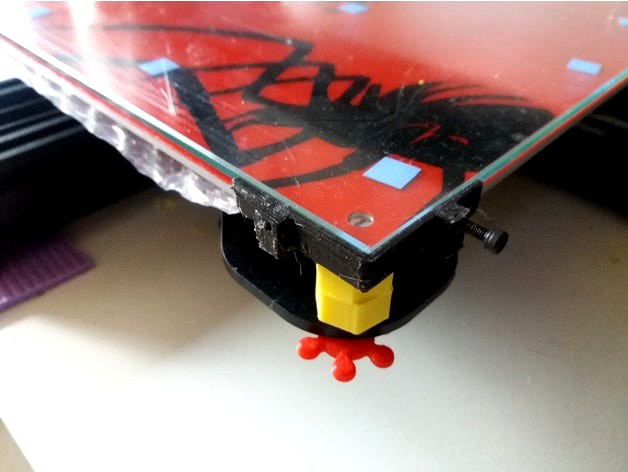
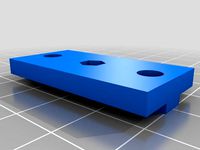
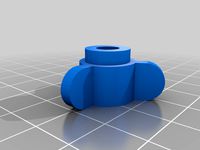
To prevent the top of the springs to dig into the heatbed and to align the springs you can use these bushings. The bushing uses a 3 mm nut inside which can be /pulled/pressed in.
Update 5-11-2017
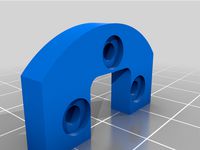
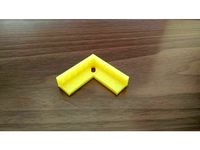
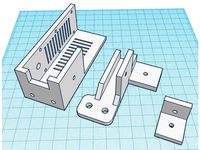
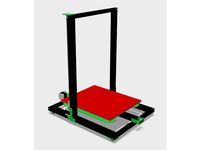
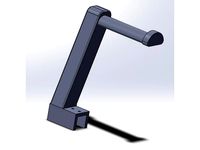
Added adjustable corner bracket for holding the glassplate.
If glassplate is smaller use M3 screws to clamp.
If glassplate is larger then adjust the corner brackets outwards.
The cornerbrackets are clamped by the first mounted hexagon bushing.
Update 20-02-2017
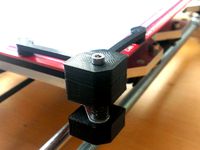
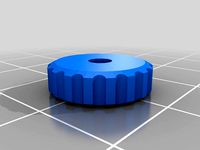
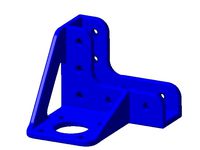
Added V2 version which has hex outside for easier fixation.
Use and specs are the same.
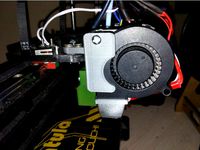
Order of mounting.......
Put the original long 3 mm screw through heatbed at one corner.
Turn heatbed washer with nut on the screw but leave a 1 mm gap between bushing and heatbed bottom.
place spring
place second spring bushing (no M3 nut!)
slide at each corner the screw spring combination through the hole of the X crossbar.
secure the bottom of the screw with a heatbed adjusting screw.
when all four corners are mounted secure the top bushing full against the heat bed bottom.
Level the heat bed.
Parts need to be printed in 0.2 mm layer with 0.4 mm nozzle.
Update 5-11-2017
Added adjustable corner bracket for holding the glassplate.
If glassplate is smaller use M3 screws to clamp.
If glassplate is larger then adjust the corner brackets outwards.
The cornerbrackets are clamped by the first mounted hexagon bushing.
Update 20-02-2017
Added V2 version which has hex outside for easier fixation.
Use and specs are the same.
Order of mounting.......
Put the original long 3 mm screw through heatbed at one corner.
Turn heatbed washer with nut on the screw but leave a 1 mm gap between bushing and heatbed bottom.
place spring
place second spring bushing (no M3 nut!)
slide at each corner the screw spring combination through the hole of the X crossbar.
secure the bottom of the screw with a heatbed adjusting screw.
when all four corners are mounted secure the top bushing full against the heat bed bottom.
Level the heat bed.
Parts need to be printed in 0.2 mm layer with 0.4 mm nozzle.
Similar models
thingiverse
free
Corner brackets - heatbed / glass plate by eivind
... or tighten the m3 screws to lower or raise the corners.
this part could easily be customized to fit larger or smaller springs.
grabcad
free

Heated Bed Support for a 3D Printer
...the spring can easlily be obtained via aliexpress or ebay. the heated bed can now be adjusted from the top by means of the screw.
thingiverse
free
Variable Height BLTOUCH Ender3 Bracket
...ket.
thread screws though holes in support, through the springs into nuts.
then it can be varied in height by winding the screws.
thingiverse
free
Glass/ Mirror L Corner Bracket for Heatbed by Electroniacs
...r heat beds that have a ~3mm screw.
the force from the spring keeps the bracket in place but for extra support you can use a nut.
thingiverse
free

Anet A8 Bed Level Adjustment by 3DJimPrice
...d 3mm nut.
slide over spring and spring bush
fit through carriage and fit thumb adjuster with either original nut or nylock nuts.
thingiverse
free
2020 Heated Bed Mount by Squid116
...3 nyloc nut.
designed to be used with an aluminium plate on top, to mount the heated bed to a 2020 rail using a m3 bolt + spring.
thingiverse
free
Print bed levelers for V-slot frame (v2) by anthem
... and insert the free end of the screw through the hole in the mounting bracket, then apply mounting tape and stick your bed down.
thingiverse
free

Wanhao i3 Larger Spring Holder by acessford101
...ill soften pla.
will need 8 of these if using abs, or if using pla use 4, on on the bottom of each corder above the bottom plate.
thingiverse
free

6DOF Robot arm by ThatNewMaker_101
...on the bracket and then screw in the servo with m4 screws and nuts.
attach the gripper to the last servo with m3 screws and nuts.
thingiverse
free

KOSSEL ADJUSTER by WAIT24
...mounted on the frame and used for height adjustment of the heating bed.
in addition to this part, screw, nut, spring is required.
Jupacreations
thingiverse
free

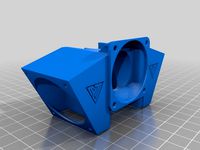
Tevo Black Widow Cobra Fanduct E3D V6 by Jupacreations
...or vulcano
print with 0.4 mm nozzle and support on heatbed enabled..
needs 1 x m4 screw and 1 x m4 nut to mount to the x-plate.
thingiverse
free

Infill & calibration square 40 mm X 0,4 mm by Jupacreations
...od quality and first layer bonding is quickly observed and changed on the go.
designed for 0.4 mm nozzle and 0.2 mm layer heigth.
thingiverse
free

Tevo Black Widow Titan E3D V6 cooler by Jupacreations
...onflict from http://www.thingiverse.com/thing:2073181
and black widow titan mounting basehttp://www.thingiverse.com/thing:2020700
thingiverse
free
Tevo Black Widow horizontal drag chain brackets by Jupacreations
... 23% infill but pla or abs will do too.
1-2-2017
updated for left hand side version (controlbox on the left) marked with l.
enjoy
thingiverse
free

Tevo Black Widow Cobra Titan Fanduct E3D V6 standard and Vulcano by Jupacreations
...17 motor to have the nozzle to line up in the center of the output. if you use thinner pancake nema 17 motors this will not fit.
thingiverse
free

Tevo Black Widow Controlbox vertical mounting to profile by Jupacreations
...power cable
zipties 3 mm width (10) to cable up the wires
1meter 14 awg silicone cable red/black
1 x angled usb a/b adapter cable
thingiverse
free

Jupa Creations (REMIX) - Updated TEVO Black Widow 40 mm cooler E3D V6 Regular & Vulcano by Usurpra
...separated the stl file to three. is designed by jupacreations http://www.thingiverse.com/thing:2043652 to make it easier to just download and...
thingiverse
free

BFPTouch - Poor's man BLtouch. A simple, cheap, neat, precise, compact and reliable any surface Z Proble for bed leveling. by brunofporto
...features some key features (this list is based on jupacreations design description!): it can be used on all bed...
Widow
turbosquid
$19

widows
...
turbosquid
royalty free 3d model widows for download as max on turbosquid: 3d models for games, architecture, videos. (1203233)
3ddd
$1

Henge Black Widow
...henge black widow
3ddd
henge , black widow
henge black widow
3d_ocean
$6
Black Widow
...pider venon widow
elegant,realistic and high quality black widow 3d model. perfect for cartoon scenes, animations or still image.
3ddd
$1

black Widow
...black widow
3ddd
мебель для ванной комнаты «black widow» моделил по фото.
форматы: max 2012, fbx с материалами и текстурами.
turbosquid
$10

Widow Voxel
...ee 3d model widow voxel for download as ma, max, obj, and fbx on turbosquid: 3d models for games, architecture, videos. (1362423)
turbosquid
$18

Black Widow
...del black widow for download as 3ds, fbx, blend, dae, and stl on turbosquid: 3d models for games, architecture, videos. (1318971)
turbosquid
$79

Northern Black Widow
...oyalty free 3d model northern black widow for download as max on turbosquid: 3d models for games, architecture, videos. (1232214)
3d_export
$80

black widow monster
... rigged verts:568731 polygons:852965 created in blender and rendered in cycles comes in blend 3ds max collada fbx and obj formats
turbosquid
$45

Spider- Black-Widow
... available on turbo squid, the world's leading provider of digital 3d models for visualization, films, television, and games.
turbosquid
$20
Black Widow Spider
... available on turbo squid, the world's leading provider of digital 3d models for visualization, films, television, and games.
Tevo
thingiverse
free

TEVO Logo by limwenyao
...verse
tevo logo - for customizing your builds to look cooler with the tevo logo! pdf version is editable with adobe illustrator.
thingiverse
free
Tevo Tornado e3d Tevo Flash Style fan Mount by DemolitionX
...an mount by demolitionx
thingiverse
just messing around and made a tevo flash style fan mount for the e3d v6 on the tevo tornado
thingiverse
free
BODEN TUBE CLAMP FOR TEVO TARANTULA PRO AND TEVO TORNADO
... and tevo tornado
thingiverse
bodwen tube clamp. printable adjustable tension clamp for tevo tarantula pro and tornado extruder.
thingiverse
free
TEVO Tornado Model by JMDesigns
...tevo tornado model by jmdesigns
thingiverse
tevo tornado model
thingiverse
free
Tevo Tarantula FanDuct by hkgary_g
...tevo tarantula fanduct by hkgary_g
thingiverse
fanduct for tevo tarantula
thingiverse
free
FAN TEVO TARANTULA by llprokall
...fan tevo tarantula by llprokall
thingiverse
fan tevo tarantula
thingiverse
free
Tevo Tarantula filament by Xbertus
...tevo tarantula filament by xbertus
thingiverse
suport for filamente tevo tarantula
thingiverse
free
TEVO Top Brackets by _Godoy_
...tevo top brackets by _godoy_
thingiverse
top brackets for tevo tarantula
thingiverse
free
Tevo Tarantula Spool Holder
...tevo tarantula spool holder
thingiverse
strong spool holder for tevo tarantula
thingiverse
free

tevo tarantula spacer by poundskinnyboy
...tevo tarantula spacer by poundskinnyboy
thingiverse
it's a tevo tarantula spacer
Bushing
3d_ocean
$9
Bush
...bush
3docean
bush pink plant white
a bush with white pink leaves
archibase_planet
free
Bush
...bush
archibase planet
bush plant shrub
bush n300813 - 3d model (*.gsm+*.3ds) for exterior 3d visualization.
archibase_planet
free
Bush
...bush
archibase planet
bush plant shrub
bush n180614 - 3d model (*.gsm+*.3ds) for exterior 3d visualization.
archibase_planet
free
Bush
...bush
archibase planet
bush plant shrub
bush 5 - 3d model (*.gsm+*.3ds) for exterior 3d visualization.
archibase_planet
free
Bush
...bush
archibase planet
bush plant shrub
bush 2 - 3d model (*.gsm+*.3ds) for exterior 3d visualization.
archibase_planet
free
Bush
...bush
archibase planet
bush plant shrub
bush 4 - 3d model (*.gsm+*.3ds) for exterior 3d visualization.
archibase_planet
free

Bush
...bush
archibase planet
bush plant shrub
bush 1 - 3d model (*.gsm+*.3ds) for exterior 3d visualization.
archibase_planet
free

Bush
...bush
archibase planet
bush plant shrub
bush 3 - 3d model (*.gsm+*.3ds) for exterior 3d visualization.
archibase_planet
free

Bush
...bush
archibase planet
bush plant stones shrub
bush stones n230814 - 3d model (*.gsm+*.3ds) for exterior 3d visualization.
archibase_planet
free

Bush
...bush
archibase planet
bush grass plant shrub
bush and grass n230714 - 3d model (*.gsm+*.3ds) for exterior 3d visualization.
Spring
3d_export
free

spring
...spring
3dexport
spring
3ddd
$1
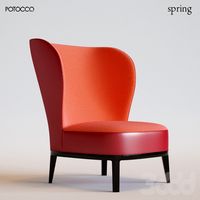
Spring
... , spring
кресло spring фабрики potocco (италия)
длина 84
ширина 79
высота 100
design_connected
$16
Spring
...spring
designconnected
cappellini spring chairs computer generated 3d model. designed by erwan bouroullec.
3ddd
$1
Еmmemobili Spring
...еmmemobili spring
3ddd
еmmemobili , spring
кресло еmmemobili spring
design_connected
$11

Spring
...spring
designconnected
de padova spring chairs computer generated 3d model. designed by damian williamson.
turbosquid
$5

Spring
...
turbosquid
royalty free 3d model spring for download as skp on turbosquid: 3d models for games, architecture, videos. (1148583)
turbosquid
$1
Spring
...
turbosquid
royalty free 3d model spring for download as fbx on turbosquid: 3d models for games, architecture, videos. (1351471)
3ddd
$1
Еmmemobili Spring
...mobili spring
3ddd
emmemobili , spring
кресло еmmemobili spring, вариант в мягкой обивке
3d_export
$5

Ball spring
...ball spring
3dexport
ball spring
3ddd
$1
Смеситель SPRING
... fir italia , смеситель
смеситель spring, две модели, производитель fir italia!
Bracket
archibase_planet
free

Bracket
...bracket
archibase planet
bracket corbel holder
bracket 1 - 3d model (*.gsm+*.3ds) for interior 3d visualization.
archibase_planet
free

Bracket
...bracket
archibase planet
bracket corbel console
bracket 5 - 3d model (*.gsm+*.3ds) for interior 3d visualization.
archibase_planet
free

Bracket
...bracket
archibase planet
corbel holder bracket
bracket 6 - 3d model (*.gsm+*.3ds) for interior 3d visualization.
archibase_planet
free

Bracket
...bracket
archibase planet
bracket corbel console
bracket 8 - 3d model (*.gsm+*.3ds) for interior 3d visualization.
archibase_planet
free

Bracket
...bracket
archibase planet
bracket corbel holder
bracket n280911 - 3d model (*.gsm+*.3ds) for interior 3d visualization.
archibase_planet
free

Bracket
...bracket
archibase planet
holder corbel bracket
bracket 9 - 3d model (*.gsm+*.3ds) for interior 3d visualization.
archibase_planet
free

Bracket
...bracket
archibase planet
corbel holder bracket
bracket 10 - 3d model (*.gsm+*.3ds) for interior 3d visualization.
archibase_planet
free

Bracket
...bracket
archibase planet
corbel console bracket
bracket 11 - 3d model (*.gsm+*.3ds) for interior 3d visualization.
archibase_planet
free

Bracket
...bracket
archibase planet
holder console bracket
bracket 12 - 3d model (*.gsm+*.3ds) for interior 3d visualization.
archibase_planet
free

Bracket
...bracket
archibase planet
bracket corbel holder
bracket 13 - 3d model (*.gsm+*.3ds) for interior 3d visualization.
Corner
archibase_planet
free
Corner
...corner
archibase planet
nook corner
corner n030708 - 3d model (*.gsm+*.3ds) for interior 3d visualization.
archibase_planet
free
Corner
...corner
archibase planet
corner post rack
fp corner wh - 3d model (*.gsm+*.3ds) for interior 3d visualization.
3ddd
$1
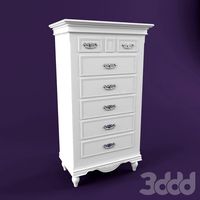
Country Corner
...country corner , комод , прованс
country corner
3ddd
$1
Corner 8140
... corner
corner 8140 - 16,5 x 17,4 (cm)
corner 8141 - 16,5 x 29,5 (cm)
corner 8142 - 16,5 x 41,5 (cm)
corner 8143 - 28 x 28 (cm)
archibase_planet
free
Corner
...corner
archibase planet
seat easy chair furniture
havanna corner - 3d model (*.gsm+*.3ds) for interior 3d visualization.
3ddd
$1

Country corner
... country corner , romance
рамка country corner, romance,
артикул cc0141
3ddd
$1

Country corner
...country corner
3ddd
country corner , журнальный
country corner pbth размеры 169*69*49
3d_export
$5

Corner
...corner
3dexport
3ddd
$1
Table-Corner
...table-corner
3ddd
круглый
table,corner
3ddd
$1
Table,Corner
...table,corner
3ddd
журнальный
table,corner
Plate
archibase_planet
free
Plates
...plates
archibase planet
plates and dishes plate
plates - 3d model (*.gsm+*.3ds) for interior 3d visualization.
3d_export
$5

plate
...plate
3dexport
plate
archibase_planet
free
Plates
...plates
archibase planet
plates and dishes plate kitchen ware
plates - 3d model (*.gsm+*.3ds) for interior 3d visualization.
archibase_planet
free
Plates
...plates
archibase planet
plate plates and dishes crockery
plates 2 - 3d model (*.gsm+*.3ds) for interior 3d visualization.
archibase_planet
free
Plate
...plate
archibase planet
dinner-plate plate kitchen ware
plate n070808 - 3d model (*.gsm+*.3ds) for interior 3d visualization.
3d_export
$6

plate
...plate
3dexport
design of plate
3d_export
$5
plate
...plate
3dexport
plate lowpoly
archibase_planet
free
Plates
...plates
archibase planet
plate dish kitchen-ware
plate - 3d model for interior 3d visualization.
3ddd
$1
Plates
...plates
3ddd
полка , тарелка
african plates
archibase_planet
free
Plate
...plate
archibase planet
plate kitchen ware
plate - 3d model (*.gsm+*.3ds) for interior 3d visualization.
Black
turbosquid
$25
Black Mamba black snake
...ck mamba black snake for download as blend, stl, fbx, and obj on turbosquid: 3d models for games, architecture, videos. (1672843)
turbosquid
$3

Black
...turbosquid
royalty free 3d model black for download as blend on turbosquid: 3d models for games, architecture, videos. (1278842)
3d_export
$5
Black Piano
...black piano
3dexport
black piano
3d_export
$5

Black Oven
...black oven
3dexport
black oven
3ddd
$1
Black curtain
...black curtain
3ddd
black curtain
3d_export
$5

Black coffe
...black coffe
3dexport
sweet black coffe
3d_export
$5
Black Sofa
...black sofa
3dexport
black velvet sofa
3d_export
$5
Black Chair
...black chair
3dexport
black velvet chair
3d_export
free
black desk
...black desk
3dexport
black desk for bedroom
3d_export
free
Black Chair
...black chair
3dexport
black velvet chair
Glass
archibase_planet
free
Glasses
...glasses
archibase planet
glass wine-glass liqueur-glass
glasses- 3d model for interior 3d visualization.
archibase_planet
free
Glass
...archibase planet
glass cocktail glass tall wine glass martini glass
glass - 3d model (*.gsm+*.3ds) for interior 3d visualization.
archibase_planet
free
Glass
...glass
archibase planet
glass wine-glass glass-ware
glass n030209 - 3d model (*.gsm+*.3ds) for interior 3d visualization.
archibase_planet
free

Glass
...glass
archibase planet
glass-ware glass glass ware
glass n141109 - 3d model (*.gsm+*.3ds) for interior 3d visualization.
3d_ocean
$2
Glass
...liquid container low-poly glass nice glass obj r15 water glass
3d model of a beautiful glass. created the model in cinema 4d r15.
archibase_planet
free
Glass
...glass
archibase planet
glass tall wine glass wine-glass
glass n300514 - 3d model (*.gsm+*.3ds) for interior 3d visualization.
archibase_planet
free

Glass
...glass
archibase planet
glass wine-glass tall wine glass
glass n091210 - 3d model (*.gsm+*.3ds) for interior 3d visualization.
archibase_planet
free
Glass
...glass
archibase planet
glass tall wine glass glass-ware
glass n081011 - 3d model (*.gsm+*.3ds) for interior 3d visualization.
3d_ocean
$9
glasses
...glasses
3docean
glasses
max glasses v-ray
archibase_planet
free
Glass
...glass
archibase planet
glass-ware glass
glass - 3d model (*.gsm+*.3ds) for interior 3d visualization.