Thingiverse
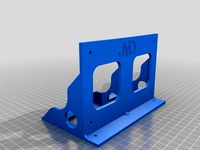
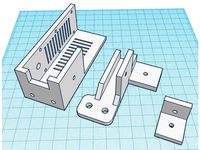
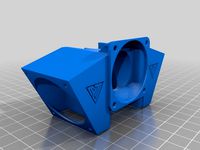
Tevo Black Widow Controlbox vertical mounting to profile by Jupacreations
by Thingiverse
Last crawled date: 3 years, 1 month ago
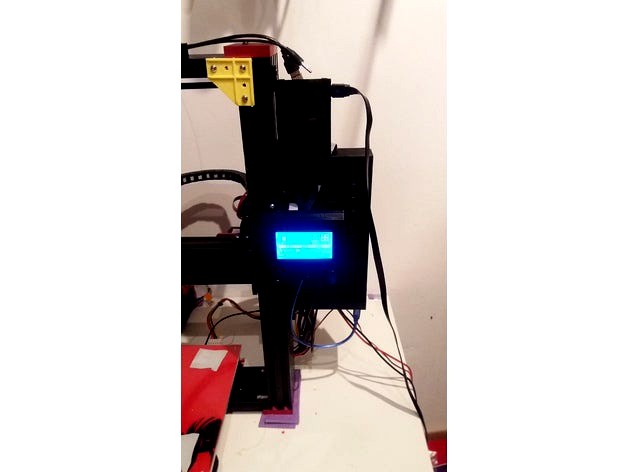
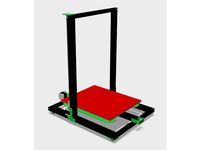
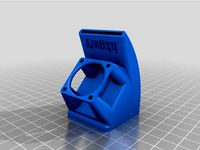
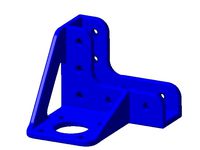
The original Black Widow control box is large and in some appliications not user friendly.
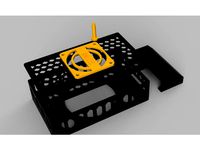
I took the PSU as a seperate part and placed it elsewhere (underneath the printer table). The MKS GEN V1.4 and the PSU are connected by 12 AWG silicone wire and XT60 connectors to make them easy disconnectable. Mounting bracket is included.
The MKS GEN V1.4 mainboard is equipped with an angled USB adapter cable where the end is hot glued in the controlbox.
The original 120 mm control box fan is reused and part of the construction and cools the MKS GEN v1.4 adequat. The 24 volt fan is stepped down by a 24 to 12 volt DC/DC converter. Cables and other wires can be tightend to the box by zipties. 6 bridges can be used.
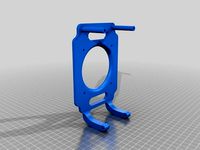
The controlpanel can be moved at the required location on the vertical profile.
SD card is still accessable.
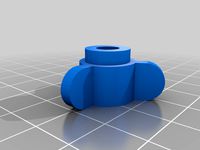
If you use a raspberry Pi there is a holder for it too.
Can be printed in your beloved filament except Flex/TPU
Nozzle size used 0.4 mm at 0.2 mm layerheigth.
Infill 25 %
Controlbox is a 16 hour print!
Hardware needed
M4 x 10mm hex screws (8) for profile mounting
M4 T nuts (8) for profile mounting
M3 x 35 MM hex screws (4) for fan
XT60 connector (1 pair - male/female) for 24 volt power cable
Zipties 3 mm width (10) to cable up the wires
1meter 14 AWG silicone cable red/black
1 x angled USB A/B adapter cable
I took the PSU as a seperate part and placed it elsewhere (underneath the printer table). The MKS GEN V1.4 and the PSU are connected by 12 AWG silicone wire and XT60 connectors to make them easy disconnectable. Mounting bracket is included.
The MKS GEN V1.4 mainboard is equipped with an angled USB adapter cable where the end is hot glued in the controlbox.
The original 120 mm control box fan is reused and part of the construction and cools the MKS GEN v1.4 adequat. The 24 volt fan is stepped down by a 24 to 12 volt DC/DC converter. Cables and other wires can be tightend to the box by zipties. 6 bridges can be used.
The controlpanel can be moved at the required location on the vertical profile.
SD card is still accessable.
If you use a raspberry Pi there is a holder for it too.
Can be printed in your beloved filament except Flex/TPU
Nozzle size used 0.4 mm at 0.2 mm layerheigth.
Infill 25 %
Controlbox is a 16 hour print!
Hardware needed
M4 x 10mm hex screws (8) for profile mounting
M4 T nuts (8) for profile mounting
M3 x 35 MM hex screws (4) for fan
XT60 connector (1 pair - male/female) for 24 volt power cable
Zipties 3 mm width (10) to cable up the wires
1meter 14 AWG silicone cable red/black
1 x angled USB A/B adapter cable
Similar models
thingiverse
free

MKS Gen V1.3 & V1.4 Driver Cooling Duct by admodesi
...om the psu. see photos. this is part number 1 of 3 for a modification to the control box i have called the "ov3t flip".
thingiverse
free
MKS GEN 1.4 Box 1 Fan by NedalLive
...mks gen 1.4 box 1 fan by nedallive
thingiverse
case for mks base gen v1.4 with 1 fan 40mm
thingiverse
free

MKS Gen V1.4 Case by vader7071
... intended to be mounted. the case can have (2) 40mm fans mounted on the side for ventilation. wires feed in the top and bottom.
thingiverse
free
MKS Gen V1.4 Case and ready for a 60mm Fan by BigFunkyMan
...mks gen v1.4 case and ready for a 60mm fan by bigfunkyman
thingiverse
a case for the mks gen v1.4 board :)
thingiverse
free

Box Mks Gen L for 2020 profile by Johltzar
...n be mounted vertically or horizontally.
you can use this box for skr 1.1 too ,board have same dimensions
16/08/2018
fix usb hole
thingiverse
free

MKS GEN v1.4 2020 Mount by hpz937
...mks gen v1.4 2020 mount by hpz937
thingiverse
mount for mks gen v1.4 to fit folgertech i3 2020.
thingiverse
free
MKS Gen V1.4 fliptop case by Crappysammy
...mks gen v1.4 fliptop case by crappysammy
thingiverse
a case for mks gen v1.4 board. supports 80mm fan
thingiverse
free
Mount mks gen v1.4 on prusa i3 steel by mrdetrout13
...mount mks gen v1.4 on prusa i3 steel by mrdetrout13
thingiverse
mount mks gen v1.4 on prusa i3 steel
thingiverse
free

prusa i4 MKS Base V1.4 box fan 80x80 mm by evol
...prusa i4 mks base v1.4 box fan 80x80 mm by evol
thingiverse
box for mks base v1.4 in prusa i4
thingiverse
free
MKS GEN 1.4 Tevo Black Widow Holder by JMDesigns
...mks gen 1.4 tevo black widow holder by jmdesigns
thingiverse
mks gen 1.4 tevo black widow holder
Jupacreations
thingiverse
free

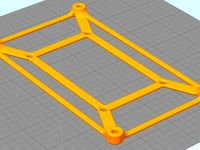
Tevo Black Widow Cobra Fanduct E3D V6 by Jupacreations
...or vulcano
print with 0.4 mm nozzle and support on heatbed enabled..
needs 1 x m4 screw and 1 x m4 nut to mount to the x-plate.
thingiverse
free

Infill & calibration square 40 mm X 0,4 mm by Jupacreations
...od quality and first layer bonding is quickly observed and changed on the go.
designed for 0.4 mm nozzle and 0.2 mm layer heigth.
thingiverse
free

Tevo Black Widow Titan E3D V6 cooler by Jupacreations
...onflict from http://www.thingiverse.com/thing:2073181
and black widow titan mounting basehttp://www.thingiverse.com/thing:2020700
thingiverse
free
Tevo Black Widow horizontal drag chain brackets by Jupacreations
... 23% infill but pla or abs will do too.
1-2-2017
updated for left hand side version (controlbox on the left) marked with l.
enjoy
thingiverse
free

Tevo Black Widow Cobra Titan Fanduct E3D V6 standard and Vulcano by Jupacreations
...17 motor to have the nozzle to line up in the center of the output. if you use thinner pancake nema 17 motors this will not fit.
thingiverse
free

Tevo Black Widow spring bushing & glass plate corner bracket by Jupacreations
...he top bushing full against the heat bed bottom.
level the heat bed.
parts need to be printed in 0.2 mm layer with 0.4 mm nozzle.
thingiverse
free

Jupa Creations (REMIX) - Updated TEVO Black Widow 40 mm cooler E3D V6 Regular & Vulcano by Usurpra
...separated the stl file to three. is designed by jupacreations http://www.thingiverse.com/thing:2043652 to make it easier to just download and...
thingiverse
free

BFPTouch - Poor's man BLtouch. A simple, cheap, neat, precise, compact and reliable any surface Z Proble for bed leveling. by brunofporto
...features some key features (this list is based on jupacreations design description!): it can be used on all bed...
Controlbox
thingiverse
free
beefy controlbox stand creality cr10s
...beefy controlbox stand creality cr10s
thingiverse
beefy controlbox stand for cr10s, more air underneath so more possible cooling
thingiverse
free

Controlbox mount - Undershelf by Webberen
...so, by popular demand..
follow me on youtube #makerspace #by #webberen - https://www.youtube.com/channel/ucvrmglbdrkyqq4ij4tx8tqw
thingiverse
free

Ender3 ControlBox for display 12864 with spheric cut for SD card
...box for display 12864 with spheric cut for sd card
thingiverse
ender3 controlbox for display 12864 with spheric cut for sd card.
thingiverse
free

Matrix Controlbox Solderlab by X-PROJECT
...matrix controlbox solderlab by x-project
thingiverse
solderlab control + ac/dc + in-output
thingiverse
free

CR-10 Cat Controlbox by BurgerAssman
...cr-10 cat controlbox by burgerassman
thingiverse
a pair of ears and a cute cat face, for night prints.
thingiverse
free

CR10 2kg Spool Holder for controlbox REMIX for Mamorubot spools by hutchyx
...emix for mamorubot spools by hutchyx
thingiverse
remix of "cr10 2kg spool holder for controlbox" for mamorubot spools.
thingiverse
free

Tevo Tornado ControlBox Holder by MikeyDubbs519
...d one that would print fast.
this was a great way to learn more about fusion 360
*note: the one uploaded does not have text on it
thingiverse
free

CR-10 Controlbox Stand with Non-slip Pads and Fan Mod
...he inner power supply as well. this may expose the internal live connections with potentially lethal power. use at your own risk.
thingiverse
free

CR-10 Controlbox Feet Support by Angel3D
...rposes.
in case you make use of this support feet, it would be nice if you add your makes and comments in here at thingivers.com.
thingiverse
free

Controlbox for 7 x 14 mini lathe. by erniepike
...th this mod you will have room for a micrometer carriage stop even up to the face or a er colett, and very close to a face plate.
Widow
turbosquid
$19

widows
...
turbosquid
royalty free 3d model widows for download as max on turbosquid: 3d models for games, architecture, videos. (1203233)
3ddd
$1

Henge Black Widow
...henge black widow
3ddd
henge , black widow
henge black widow
3d_ocean
$6
Black Widow
...pider venon widow
elegant,realistic and high quality black widow 3d model. perfect for cartoon scenes, animations or still image.
3ddd
$1

black Widow
...black widow
3ddd
мебель для ванной комнаты «black widow» моделил по фото.
форматы: max 2012, fbx с материалами и текстурами.
turbosquid
$10

Widow Voxel
...ee 3d model widow voxel for download as ma, max, obj, and fbx on turbosquid: 3d models for games, architecture, videos. (1362423)
turbosquid
$18

Black Widow
...del black widow for download as 3ds, fbx, blend, dae, and stl on turbosquid: 3d models for games, architecture, videos. (1318971)
turbosquid
$79

Northern Black Widow
...oyalty free 3d model northern black widow for download as max on turbosquid: 3d models for games, architecture, videos. (1232214)
3d_export
$80

black widow monster
... rigged verts:568731 polygons:852965 created in blender and rendered in cycles comes in blend 3ds max collada fbx and obj formats
turbosquid
$45

Spider- Black-Widow
... available on turbo squid, the world's leading provider of digital 3d models for visualization, films, television, and games.
turbosquid
$20
Black Widow Spider
... available on turbo squid, the world's leading provider of digital 3d models for visualization, films, television, and games.
Tevo
thingiverse
free

TEVO Logo by limwenyao
...verse
tevo logo - for customizing your builds to look cooler with the tevo logo! pdf version is editable with adobe illustrator.
thingiverse
free
Tevo Tornado e3d Tevo Flash Style fan Mount by DemolitionX
...an mount by demolitionx
thingiverse
just messing around and made a tevo flash style fan mount for the e3d v6 on the tevo tornado
thingiverse
free
BODEN TUBE CLAMP FOR TEVO TARANTULA PRO AND TEVO TORNADO
... and tevo tornado
thingiverse
bodwen tube clamp. printable adjustable tension clamp for tevo tarantula pro and tornado extruder.
thingiverse
free
TEVO Tornado Model by JMDesigns
...tevo tornado model by jmdesigns
thingiverse
tevo tornado model
thingiverse
free
Tevo Tarantula FanDuct by hkgary_g
...tevo tarantula fanduct by hkgary_g
thingiverse
fanduct for tevo tarantula
thingiverse
free
FAN TEVO TARANTULA by llprokall
...fan tevo tarantula by llprokall
thingiverse
fan tevo tarantula
thingiverse
free
Tevo Tarantula filament by Xbertus
...tevo tarantula filament by xbertus
thingiverse
suport for filamente tevo tarantula
thingiverse
free
TEVO Top Brackets by _Godoy_
...tevo top brackets by _godoy_
thingiverse
top brackets for tevo tarantula
thingiverse
free
Tevo Tarantula Spool Holder
...tevo tarantula spool holder
thingiverse
strong spool holder for tevo tarantula
thingiverse
free

tevo tarantula spacer by poundskinnyboy
...tevo tarantula spacer by poundskinnyboy
thingiverse
it's a tevo tarantula spacer
Profile
3ddd
$1

Profile
... лофт , профиль , свип
описание ниже
3d_export
$5
profile anchor
...profile anchor
3dexport
profile anchor
3d_export
$5
profile fastener
...profile fastener
3dexport
profile fastener
3ddd
$1

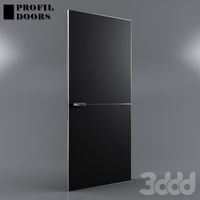
Profil Doors
...
3ddd
profil doors , дверь
двери и наличник profil doors модели 7х и 15х, цвет капучино.
3ddd
$1
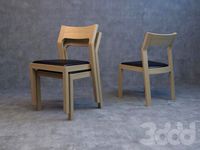
Profile chair
...rofile
http://www.casefurniture.co.uk/contemporary-furniture-products/contemporary-chairs-benches-stools/profile-chair/
3ddd
$1
Profil Doors
...dd
двери , profildoors
дверь profil doors
серия - vg
модель - 4vg
цвет - чёрный матовый
3d_export
$5
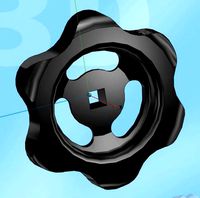
profile hand wheel
...profile hand wheel
3dexport
profile hand wheel
3d_export
$5
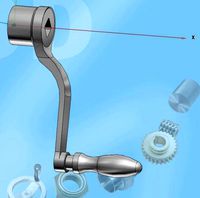
profile rotation handle
...profile rotation handle
3dexport
profile rotation handle
3d_ocean
$6
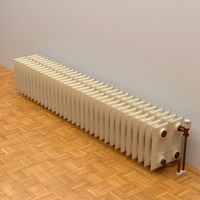
Low Profile Radiator
...low profile radiator
3docean
heat heater hot pipe radiator temperature thermostat warm
a low profile version of the radiator
3d_export
$10
Aluminum profile 3D Model
...aluminum profile 3d model
3dexport
aluminum profile window sample corner
aluminum profile 3d model 3dstocker 27361 3dexport
Vertical
3ddd
$1
Vertical curtain
...vertical curtain
3ddd
роллеты
vertical curtain
modern curtain
design_connected
$11
Mr.Tubes Vertical
...mr.tubes vertical
designconnected
tonone mr.tubes vertical computer generated 3d model.
3ddd
free
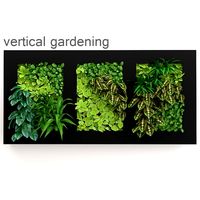
Vertical gardening
... фитомодуль , фитостена
vertical gardening
2000x1000x165
vizpark
$5
Einstein Vertical
...tical is a set of 3d brick textures for modern buildings, including mulit-textures and 4k tileable textures with material layers.
turbosquid
$5

brazier vertical
... free 3d model brazier vertical for download as sldas and ige on turbosquid: 3d models for games, architecture, videos. (1647570)
turbosquid
$18
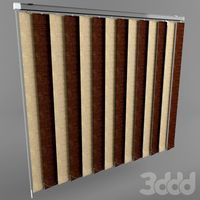
Vertical blinds
...ee 3d model vertical blinds for download as max, obj, and fbx on turbosquid: 3d models for games, architecture, videos. (1604868)
3d_export
$40

vertical stirling engine
...vertical stirling engine
3dexport
vertical stirling engine
turbosquid
$6
vertical fence
...d model vertical fence for download as c4d, 3ds, dxf, and obj on turbosquid: 3d models for games, architecture, videos. (1571631)
turbosquid
$50

Vertical Garden
... available on turbo squid, the world's leading provider of digital 3d models for visualization, films, television, and games.
turbosquid
$20

vertical flag
... available on turbo squid, the world's leading provider of digital 3d models for visualization, films, television, and games.
Black
turbosquid
$25
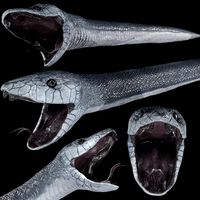
Black Mamba black snake
...ck mamba black snake for download as blend, stl, fbx, and obj on turbosquid: 3d models for games, architecture, videos. (1672843)
turbosquid
$3

Black
...turbosquid
royalty free 3d model black for download as blend on turbosquid: 3d models for games, architecture, videos. (1278842)
3d_export
$5
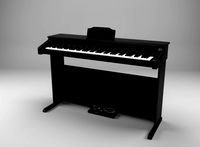
Black Piano
...black piano
3dexport
black piano
3d_export
$5

Black Oven
...black oven
3dexport
black oven
3ddd
$1
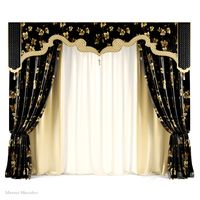
Black curtain
...black curtain
3ddd
black curtain
3d_export
$5

Black coffe
...black coffe
3dexport
sweet black coffe
3d_export
$5
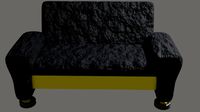
Black Sofa
...black sofa
3dexport
black velvet sofa
3d_export
$5
Black Chair
...black chair
3dexport
black velvet chair
3d_export
free
black desk
...black desk
3dexport
black desk for bedroom
3d_export
free
Black Chair
...black chair
3dexport
black velvet chair
Mounting
3d_export
free

mounting bracket
...mounting plate is the portion of a hinge that attaches to the wood. mounting plates can be used indoors, cabinetry and furniture.
turbosquid
$2

MOUNTING
... available on turbo squid, the world's leading provider of digital 3d models for visualization, films, television, and games.
turbosquid
free

Mounts
... available on turbo squid, the world's leading provider of digital 3d models for visualization, films, television, and games.
turbosquid
free

Mount Fuji
...fuji
turbosquid
free 3d model mount fuji for download as obj on turbosquid: 3d models for games, architecture, videos. (1579977)
3d_export
$5

Headphone mount LR
...headphone mount lr
3dexport
headphone mount l+r
turbosquid
$39

Mount rainier
...quid
royalty free 3d model mount rainier for download as fbx on turbosquid: 3d models for games, architecture, videos. (1492586)
turbosquid
$5

pipe mounting
...quid
royalty free 3d model pipe mounting for download as obj on turbosquid: 3d models for games, architecture, videos. (1293744)
turbosquid
$3

Mounting Tires
...uid
royalty free 3d model mounting tires for download as fbx on turbosquid: 3d models for games, architecture, videos. (1708511)
3d_export
$5

Magnetic GoPro Mount
...pro mount
3dexport
cool magnetic mount for gopro. allows you to mount the camera on flat metal surfaces and get exclusive shots.
turbosquid
$5

Stone Mount
...ty free 3d model stone mount for download as ma, obj, and fbx on turbosquid: 3d models for games, architecture, videos. (1370306)