Thingiverse
Safe Distance Sign - Confused by Lyl3
by Thingiverse
Last crawled date: 4 years, 1 month ago
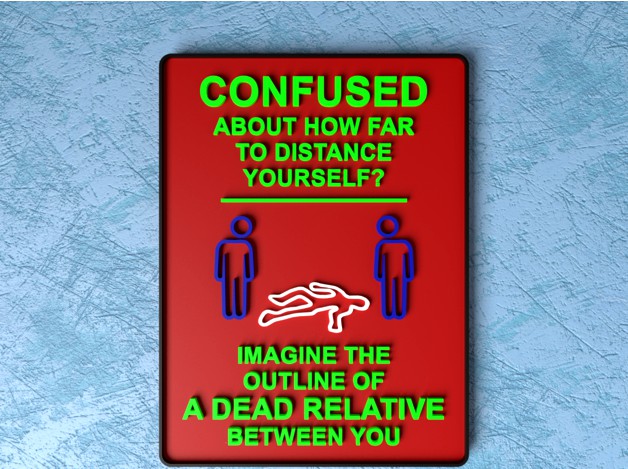
This is a sign that reads "CONFUSED ABOUT HOW FAR TO DISTANCE YOURSELF? IMAGINE THE OUTLINE OF A DEAD RELATIVE BETWEEN YOU". It visually indicates the safe distance for reducing the risk of transmission of airborne pathogens. It's obviously designed to raise awareness during the Coronavirus / Covid-19 pandemic, but it could be used to raise awareness for any airborne pathogen that causes a potentially fatal infectious disease.
The sign is 150 mm x 200 mm and there are two holes in the back for holding 6mm x 1.75mm magnets (the holes are 6.5 mm x 1.4 mm).
Customizer Options
There is a customizer for it so that you can create your own sign, selecting from a range of sign sizes and from a range of magnet hole sizes, or nail hole sizes. Additionally you can choose from two layout variations available in the customizer: one with the pictogram on the top and one with the pictogram in the middle. Each of the parts (base, border, text, body outline, & people) can be created as separate STLs to allow printing with a multi-extruder printer. You can also independently set the heights of each part so that you can print a 5-color sign with a single extruder.
Multiple Colors with a Single Extruder
The signs can be printed in multiple colors with a single extruder by pausing the printer mid-print and and then swapping in a spool of different colored filament.
Most printers support the M600 G-code command, so you may be able to add in pauses using your slicer program. You may find the Colorprint tool useful if your printer supports the M600 command, but your slicer doesn't support adding pauses: https://www.prusaprinters.org/color-print/ . If your printer doesn't support the M600 command, you will have to pause the print manually using the control panel.
The included STL has a 2 mm thick base, the body outline is 0.4 mm on top of the base, and all the other details are an additional 0.4 mm. So you can print it dual color by pausing after the layer at 2 mm is finished and swapping in the filament. And if you want a third color, you can pause it after the layer at 2.4 mm is finished and swap in the third color.
After switching filament colors, the nozzle may not be primed and the first bit printed may be under-extruded, so to compensate for this, I always add in a little cylindrical tower and get the slicer to start the layers on that tower. For Cura, the settings that control this are Layer Start X and Layer Start Y, which are in the Travel section. I put the cylinder above the top right corner and set Layer Start X and Layer Start Y to a high number like 500. The customizer will add this automatically by default if you're creating a model with all the parts.
For the best looking sign, you'll want the top infill area of the faceplate part of the model to be a single continuous solid print from one corner to the other, instead of going around the areas where the letters will be added in later layers. To accomplish this in Cura, set the Skin Expand Distance to a high number like 10.
Similar models
thingiverse
free

Safe Distance Sign - Together by Lyl3
...ere the letters will be added in later layers. to accomplish this in cura, set the skin expand distance to a high number like 10.
thingiverse
free

Customizable Plant Tags by Lyl3
...o my designs page and see them all.
if you see some thing that you like , please click the like button and turn that heart red .
thingiverse
free

XT60 Caps by OsiViper
...using a pause command or filament change (varies from machine to machine).
tested prints with pla, nylon and both of them worked.
thingiverse
free

Customizable Christmas Name Ornament by Lyl3
...o my designs page and see them all.
if you see some thing that you like , please click the like button and turn that heart red .
thingiverse
free

STOP Sign by lolitstony
...ter pauses and you can change fillament)
sorry for the poor stl orientation, however, the picture is an accurate representation .
thingiverse
free

NyanCat - Optimized for M600 filament swap multicolor printing by thatjoshguy
...bed, but can be printed at almost any size as long as you only adjust the x and y axis (or adjust color swap layers accordingly).
thingiverse
free

Monoprice Select Mini Filament Spool Spinner by ahutton1972
...-code command in the g-code file at the appropriate layers. use your slicer to figure out which layers are right for your print.
thingiverse
free
Waste Segregation labels by c2v4
...e (or any other color) during that pause. more info about this technique you can find here: multi-color prints on single extruder
thingiverse
free

New York Mets Coaster by tfinzel
...
https://www.prusaprinters.org/color-print/
i've added a smaller version and they are labeled with the prefix "sm".
thingiverse
free

Star Trek Badge pin and two-color for M600 by gqx
...hange the color before the bridge part and once again to insert a pin. start with primary color and print it upside down, pin up.
Lyl3
thingiverse
free

PlantTag stabilized by Crissidanic
...stabilized by crissidanic thingiverse i stabelized the planttag by lyl3 ...
thingiverse
free

Customizable Hexagon Monogram Coasters by Lyl3
...o my designs page and see them all.
if you see some thing that you like , please click the like button and turn that heart red .
thingiverse
free

Customizable Round Rod Hooks by Lyl3
...o my designs page and see them all.
if you see some thing that you like , please click the like button and turn that heart red .
thingiverse
free

FlashForge Creator Pro Spool Holder by Lyl3
...hogonal to the spindle.
the freecad file that i used to create the model is also included in case you want to make modifications.
thingiverse
free

Lego_Prénom by yannsa
...la 3d je fait mon premier post. merci a lyl3 pour la...
thingiverse
free

Customizable Engraved Rings by Lyl3
...o my designs page and see them all.
if you see some thing that you like , please click the like button and turn that heart red .
thingiverse
free

One Euro Tokens with Hidden Internal Lithophanes by Lyl3
... that the lithophane prints correctly. you'll need to print with a light colored filament to allow the light to pass through.
thingiverse
free

Customizable Flexible Christmas Tree by Lyl3
...o my designs page and see them all.
if you see some thing that you like , please click the like button and turn that heart red .
thingiverse
free

Customizable Tiny Secret Books by Lyl3
...o my designs page and see them all.
if you see some thing that you like , please click the like button and turn that heart red .
thingiverse
free
Customizable Plant Tags by Lyl3
...o my designs page and see them all.
if you see some thing that you like , please click the like button and turn that heart red .
Confused
turbosquid
$29

Confused Angel
...d model confused angel for download as max, obj, fbx, and stl on turbosquid: 3d models for games, architecture, videos. (1348549)
3d_export
$12

Emoji 066 Confused
...; x 7.69" x 7.69"<br>- model parts: 4<br>- material count: 1<br>- xform: yes<br>- boxtrick: yes
3d_ocean
$1

Barriere Fence
...l colors can be easily modified. - no part-name confusion when importing several models into a scene. - no cleaning up necessa...
3d_export
$10

modern bed
...l plugin needed to open scene. - no cleaning up necessary, just drop model into your scene and start rendering. hope you like it!
3d_export
$10

pulse oximeter
... scene management. - no part-name confusion when importing several models into a scene. - no special plugin needed to open scene.
3d_export
$6

ice cream cart
...l plugin needed to open scene. - no cleaning up necessary, just drop model into your scene and start rendering. hope you like it!
3d_export
$60

GIAT AMX-10 RC
...or wheeled gun. the amx-10 rc should not be confused with the amx-10p; they share automotive components but otherwise...
3d_export
$59

jeep
...ene and start rendering. -no special plugin needed to open the scene. 3d model formats: - obj - lxo - lwo - fbx - dxf - c4d - max
3d_export
$10
piston
... rendering. -no special plugin needed to open the scene. 3d model formats: - obj - lxo - lwo - fbx - dxf satisfaction guarranteed
3d_export
$10
optic cross
... scene management. - no part-name confusion when importing several models into a scene. - no special plugin needed to open scene.
Safe
archibase_planet
free
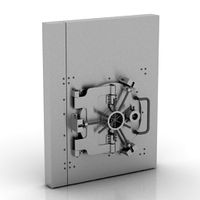
Safe
...safe
archibase planet
safe safe deposit strongbox
safe deposit n100214 - 3d model (*.gsm+*.3ds) for interior 3d visualization.
archibase_planet
free
Safe
...safe
archibase planet
safe
safe n310512 - 3d model (*.3ds) for interior 3d visualization.
3d_export
free

Safe
...safe
3dexport
safe<br>safe deposit<br>vault
3d_export
free

safe
...safe
3dexport
safe for your project
archibase_planet
free
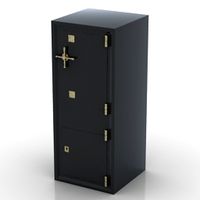
Safe
...safe
archibase planet
safe strongbox
safe n250413 - 3d model (*.gsm+*.3ds) for interior 3d visualization.
turbosquid
$17

safe
...afe
turbosquid
royalty free 3d model safe for download as max on turbosquid: 3d models for games, architecture, videos. (229334)
turbosquid
$10
Safe
...fe
turbosquid
royalty free 3d model safe for download as obj on turbosquid: 3d models for games, architecture, videos. (1195573)
turbosquid
$5

Safe
...
royalty free 3d model safe for download as 3ds, obj, and fbx on turbosquid: 3d models for games, architecture, videos. (1210345)
turbosquid
$29

Safe
...alty free 3d model safe for download as 3ds, max, obj, and fbx on turbosquid: 3d models for games, architecture, videos. (978165)
turbosquid
$5

Safe
...lty free 3d model safe for download as c4d, fbx, obj, and stl on turbosquid: 3d models for games, architecture, videos. (1683742)
Distance
turbosquid
$29

Laser Distance Measurer
... available on turbo squid, the world's leading provider of digital 3d models for visualization, films, television, and games.
3d_export
$20

Rostelecom distance control 3D Model
...телеком пульт ростелекома octane д/у дистанционный дистанционное
rostelecom distance control 3d model vladimirgrad 95260 3dexport
turbosquid
$12

Stanley Laser Distance Measurer
... available on turbo squid, the world's leading provider of digital 3d models for visualization, films, television, and games.
3d_export
$10

variable distance mechanism
... you can email to me.<br>designed with solidworks 2017, render with keyshot<br>**************************************
3d_export
$19

social distancing model for coronavirus
...social distancing model for coronavirus
3dexport
3d ads to spread awareness and take action on covid-19
3d_export
$19

social distancing model for coronavirus
...social distancing model for coronavirus
3dexport
3d ads to spread awareness and take action on covid-19
3d_export
$19

social distancing model for coronavirus
...social distancing model for coronavirus
3dexport
3d ads to spread awareness and take action on covid-19
3d_export
$19

social distancing model for coronavirus
...social distancing model for coronavirus
3dexport
3d ads to spread awareness and take action on covid-19
3d_export
$19

social distancing model for coronavirus
...social distancing model for coronavirus
3dexport
3d ads to spread awareness and take action on covid-19
3d_export
$19

social distancing model for coronavirus
...social distancing model for coronavirus
3dexport
3d ads to spread awareness and take action on covid-19
Sign
archibase_planet
free

Sign
...sign
archibase planet
signboard sign mask
restroom sign - 3d model for interior 3d visualization.
turbosquid
$1

Street Signs Stop Sign
...alty free 3d model street signs stop sign for download as fbx on turbosquid: 3d models for games, architecture, videos. (1672592)
turbosquid
free
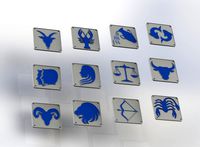
Signs for the zodiac signs pack
...signs pack for download as 3ds, obj, wrl, fbx, stl, and sldpr on turbosquid: 3d models for games, architecture, videos. (1194807)
3d_ocean
$9
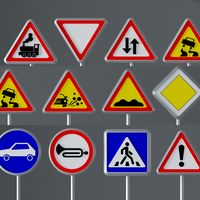
Road Signs
...road signs
3docean
outdoor road signs signpost waymark
road signs 3d models.
3d_export
$5

Biohazard sign
...biohazard sign
3dexport
biohazard sign
3ddd
$1
SUBWAY SIGN
...subway sign
3ddd
subway sign
3d_export
$5

road sign
...road sign
3dexport
road sign with the texture of a cyclist.
turbosquid
$45

Sign
... available on turbo squid, the world's leading provider of digital 3d models for visualization, films, television, and games.
turbosquid
$10

Sign
... available on turbo squid, the world's leading provider of digital 3d models for visualization, films, television, and games.
turbosquid
$5

sign
... available on turbo squid, the world's leading provider of digital 3d models for visualization, films, television, and games.