Thingiverse

Old Version Mini Talon Convertible Landing Gear by Mochanic
by Thingiverse
Last crawled date: 3 years, 1 month ago
THERE IS A NEWER VERSION OF THIS HERE: https://www.thingiverse.com/thing:3155583
(No longer need the collar or steering horn)
READ THE NOTES/UPDATES SECTION BELOW BEFORE DOWNLOADING THIS!!!
Even if you do not wish to install landing gear right away you can still mount the front skid and install the blank plate which performs exactly the same as MarkQ's original front skid. Then when you are ready for landing gear you can easily slide the servo/wheel mount into the slot, plug in the servo and bolt on the rear gear and go. Takes less than 3 minutes to convert from skids to wheels!
Parts Needed:
Used for front nose gear:https://www.banggood.com/DIY-60-Level-Tail-Wheel-Bracket-Assembly-for-RC-airplane-p-908726.html
Used for rear gear:https://www.banggood.com/2mm-Aluminum-Landing-Gear-Set-For-25-40-Class-Electric-RC-Airplane-p-1151154.html
2 MR128ZZ bearings for front shaft: (FastEddy is my favorite eBay seller for quality bearing in the USA shipped fast!)https://www.ebay.com/sch/i.html?_from=R40&_trksid=m570.l1313&_nkw=MR128ZZ&_sacat=0
1 Emax ES08 metal gear servo. (analog or digital):https://www.banggood.com/EMAX-ES08MA-II-12g-Mini-Metal-Gear-Analog-Servo-for-RC-Model-p-935479.html
ORhttps://www.banggood.com/Wholesale-Emax-ES08MDII-Metal-Digital-Micro-Servo-p-68600.html
I am not specifying the control linkage since there are so many options for this. You probably already have something that will work laying around.
FRONT:
The black control arm that comes with the front gear linked above will get the length cut down past the slot and you will need to drill a hole for the servo linkage. (I am working on a new design that will make this easier and not require the steel collar, check back and read the notes section for further details.)
REAR:
There's 2 choices for attaching the rear gear to the belly mount. In my case I used the hexagon nut mount with hexagon nuts with .360" flat to flat (23/64" wrench size).
OR
Choose the drill (#7/.201") and tap (1/4-20) version. DO NOT GO ANY BIGGER, remember this is not a solid piece! (another reason to have at least 4 vertical shells!)
In both cases, USE NYLON SCREWS to hold gear to belly mount! This will allow them to break in a severe landing rather than ripping the gear off the plane!
You will need to drill 2 new holes slightly larger than your nylon screws, and 2.75" apart on your aluminum gear (1.375" from center) See notes below if your screw heads head the curved part of the gear
Gluing pieces to fuselage:
Once you have everything fitted and are satisfied, use either E6000, or Uhu Por to glue the front skid and rear belly mounts into place. Once this is done you may then cut the foam out to fit the servo for the front gear. If you choose to make the front gear permanent I suggest you also glue the servo house to the foam to help strengthen this area and prevent tear out on a rough landing.
Note: I changed out the wheels that came with my gear for larger wheels since I use a grass runway.
Please let me know if I missed anything... There is a lot going on to remember!
https://youtu.be/qJZGLSQbhl0
Similar models
thingiverse
free

Skyhunter 1.8m Servo Horn Protector by edwardchew
...icehttps://www.banggood.com/2x-emax-es08ma-ii-12g-mini-metal-gear-analog-servo-for-rc-model-p-1065375.html?p=dg23031123036201501p
thingiverse
free

My Twin Dream MTD Landing Gear by Mochanic
... use a grass runway.
please let me know if i missed anything... there is a lot going on to remember!
https://youtu.be/qjzglsqbhl0
thingiverse
free

Tricopter LR 267 Servo Mechanism by Mentor4
...900kv-3-6s-or-2400kv-3-4s-brushless-motor-for-rc-drone-fpv-racing-p-1455704.html?rmmds=myorder&id=519231&cur_warehouse=cz
grabcad
free

Emax ES08AII
...emax es08aii
grabcad
emax es08a ii mini plastic gear analog servo 1.8kg/sec for rc models
thingiverse
free
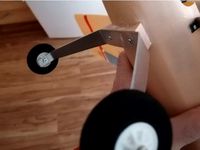
Taildragger landing gear by eried
...c-glider-airplane-p-973300.html?rmmds=myorder&id=516401&cur_warehouse=cn&p=b701157141617201611a&custlinkid=860631
thingiverse
free

Flite Test Mini Guinea Front and Rear Landing Gear (Fixed)
...section of the wire in a vice or something similar when mounted, wiggle the part onto the wire, making...
3dwarehouse
free

Emax ES08A II Mini Analog Servo
...emax es08a ii mini analog servo
3dwarehouse
rc components; servo; analog; mini
thingiverse
free
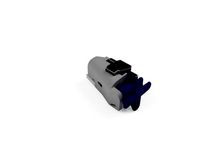
RC Quadplane Tilt Mechanism by MAGA_GodBlessTrump2020
...ightly above the servo gear, and a 0.2mm extrusion on the tilt head against the body ensures it offloads the servo during flight.
thingiverse
free
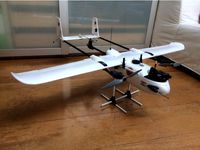
VTOL Y3 Mini Skyhunter tilt rotor parts by aticof
...//www.banggood.com/es/5-pairs-xt30-2mm-golden-male-female-non-slip-plug-interface-connector-p-1237676.html?p=x80605659227201407zi
thingiverse
free

WLToys 144001 Front Bumper for Xinlehong 1/16 Body by jdalbeck
... wheel wells and the back of the shell a bit. the rear lights inserted nicely into the triangle spaces on the above body mounts.
Mochanic
thingiverse
free

MTD Servo Housing by Mochanic
...o your mtd (my twin dream) or if you broke one in a crash.
exactly the same as the original.
recommend abs or petg
.20mm
supports
thingiverse
free

Prusa MK* LCD Knob by Mochanic
...pprox. .236" once printed. make sure you scrape the edge of the hole, most likely it will have a small lip (elephant foot).
thingiverse
free

Mini Talon Belly Cover by Mochanic
... to glue it on.
if you are looking to fit landing gear to the mini talon use this link: https://www.thingiverse.com/thing:2981809
thingiverse
free

Pitlab GPS Case by Mochanic
...es you to desolder the angled header pins from the gps sensor and resolder in new straight pins to the bottom side of the sensor.
thingiverse
free

MT Cradle iNav FC Mount by osgibson
...inav fc mount by osgibson thingiverse a remix of mochanic#39;s mini talon cradle for a standard 30.5mm fc stack...
thingiverse
free

My Twin Dream FC Mount by Mochanic
...l. (the mtd flies nose up about 2.3 degrees, so this was taken into account during design.)
all screw holes are for m3 hardware.
thingiverse
free

Mini Talon Flush Hatch Latch by Mochanic
...g anywhere, so i did not use additional rods on the rear plate)
my hatch will be spray painted all black once i get to that point
thingiverse
free

Mini Talon Flight Controller Mounts by Mochanic
...een uploaded at this time, but i am working on it)
let me know if you guys would like for me to add other mounting plate options.
thingiverse
free

FPV Joystick Housing for RC Radio by Mochanic
...;) i used curved lexan cutting scissors. if you do not trim the bottom skirt, it will hit the housing when moving the joystick.
thingiverse
free

My Twin Dream MTD Landing Gear by Mochanic
... use a grass runway.
please let me know if i missed anything... there is a lot going on to remember!
https://youtu.be/qjzglsqbhl0
Talon
turbosquid
$8

Talon Knife
...y free 3d model talon knife for download as obj, ipt, and iam on turbosquid: 3d models for games, architecture, videos. (1348946)
turbosquid
$4

Spire of Talons
... available on turbo squid, the world's leading provider of digital 3d models for visualization, films, television, and games.
3d_export
$17

Northrop T-38 Talon
...northrop t-38 talon
3dexport
northrop t-38 talon
3d_export
free
1998 Eagle Talon TSi Turbo
...1998 eagle talon tsi turbo
3dexport
1998 eagle talon tsi turbo
turbosquid
$15

HS-12 Talon
... available on turbo squid, the world's leading provider of digital 3d models for visualization, films, television, and games.
3d_export
$110
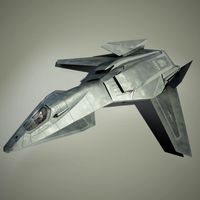
Stealth Talon 3D Model
...force lightning raptorrocket gun offensive counter us homeland security concept
stealth talon 3d model rendersteel 72513 3dexport
3d_export
$10
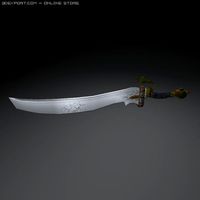
Talon Sword 3D Model
...del
3dexport
sword melee game model low poly video fantasy rpg warrior blade mmo
talon sword 3d model project_zero 32037 3dexport
turbosquid
free

ME3 talon t7 heavy pistol
...l me3 talon t7 heavy pistol for download as obj, fbx, and dae on turbosquid: 3d models for games, architecture, videos. (1402804)
3d_export
$20

eagle talon tsi turbo
...s.<br>car textures:png - 2k resolution other available formats: obj, 3ds, fbx, stl, max. polycount: 34484 poly / 30158 tris
3d_export
$10

Eagle 3D Emblem 3D Model
...3d emblem 3d model 3dexport 3d logo eagle emblem talon car eagle 3d emblem 3d model gdesigns 36617...
Landing
3d_export
free

land
...land
3dexport
3d_export
$20

land rover
...land rover
3dexport
land rover
3d_export
$65
landing
...landing
3dexport
simple rendering of the scene file
3ddd
free

Land Bond
... тумба
land bond-авторская коллекция мебели жана франсуа роле.сделана из натуральной древесины.
3ddd
$1
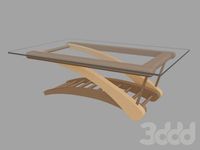
Land Bond
...land bond
3ddd
land bond-авторская коллекция мебели жана франсуа роле.
3ddd
$1

Land Bond
...land bond
3ddd
land bond-авторская коллекция мебели жана франсуа роле
3ddd
free
dream land / sicilia
...dream land / sicilia
3ddd
dream land
dream land sicilia
3ddd
$1
Dream Land / Монтсеррат
...dream land / монтсеррат
3ddd
dream land , капитоне
производитель: dream land
design_connected
$29

Land Sofa
...land sofa
designconnected
alivar land sofa computer generated 3d model. designed by bavuso, giuseppe.
design_connected
$27

Land Meridiana
...land meridiana
designconnected
bonaldo land meridiana computer generated 3d model. designed by crs bonaldo.
Gear
3d_ocean
$4

Gears
...gears
3docean
gear gears iron
4 different size of gears
3d_export
$5
gear
...gear
3dexport
gear
3d_export
free
Gears
...gears
3dexport
gears
3d_export
$5
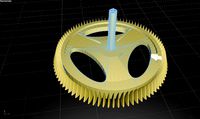
gear
...gear
3dexport
a simple model of gear
3d_export
$5

gear
...gear
3dexport
gear for transmission , case machine
3d_ocean
$3

Gears
...nical parts process steampunk vehicle wheel work
10 different gear models volume 01-10 files: .3ds .c4d .obj note: you need vray
3d_ocean
$1

Spur Gear
...spur gear
3docean
decoration gear
a typical spur gear
3d_ocean
$4
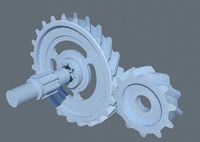
Gear wheels
...gear wheels
3docean
engine engineering gear gears industry machinery mechanical toothwheel wheel
pair of gear wheels : animated.
turbosquid
$9
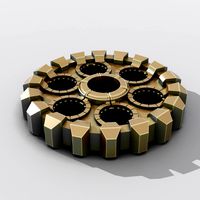
Gear
...gear
turbosquid
royalty free 3d model gear for download as on turbosquid: 3d models for games, architecture, videos. (1712328)
turbosquid
$2
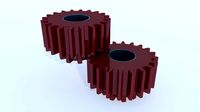
Gears
...rs
turbosquid
royalty free 3d model gears for download as ma on turbosquid: 3d models for games, architecture, videos. (1166710)
Mini
turbosquid
$10
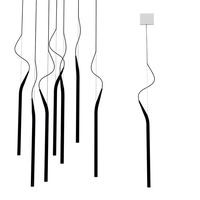
Mini Mini Luceplan
...
royalty free 3d model mini mini luceplan for download as max on turbosquid: 3d models for games, architecture, videos. (1227359)
3d_ocean
$39
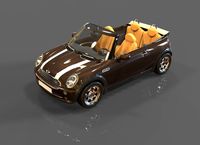
Mini Cooper
...mini cooper
3docean
cabrioler cooper mini
mini cooper cabrioler
3d_export
$30

Mini lathe
...mini lathe
3dexport
mini lathe
3d_export
$5

mini mouse
...mini mouse
3dexport
mini mouse
3d_export
$5
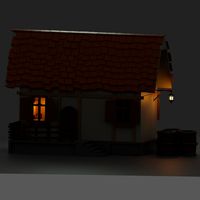
mini house
...mini house
3dexport
mini house
3d_export
free

Mini Mecha
...mini mecha
3dexport
concept of mini mecha
3d_ocean
$20
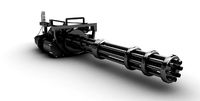
Mini Gun
...mini gun
3docean
gatling gun gun machine gun mini gun weapon
model of a mini gatling gun.
3ddd
free

Herve mini
... кофейный , herve
http://www.mobiliavenanti.it/ru/products/hervè-mini
3d_export
$5
mini wall
...mini wall
3dexport
mini wall for living room
3d_export
$5

mini bank
...mini bank
3dexport
mini bank 3d model
Convertible
turbosquid
free
pallet converter
...d
royalty free 3d model pallet converter for download as rfa on turbosquid: 3d models for games, architecture, videos. (1285733)
3d_ocean
$85

Convertible Porsche
...agon
3d model of convertible porsche .object are grouped.rendering scene with,materials are include and detailed, with all files.
turbosquid
$5

GPU Converter
...yalty free 3d model gpu converter for download as 3ds and max on turbosquid: 3d models for games, architecture, videos. (1355494)
turbosquid
$14

Convert Sofa
... 3d model convert sofa for download as max, 3ds, fbx, and obj on turbosquid: 3d models for games, architecture, videos. (1546663)
3d_export
$15

pontiac gto convertible
...pontiac gto convertible
3dexport
pontiac gto convertible 3d model.
turbosquid
$10

Converter station
... available on turbo squid, the world's leading provider of digital 3d models for visualization, films, television, and games.
3d_ocean
$89

Audi A5 Convertible
...erman german interior interior luxury luxury sport sport vehicle vehicle
audi a5 convertible – high detailed model with interior.
3d_ocean
$55

Convertible Car
...d model of convertible car .objects are grouped.rendering scene with texture,materials are included and detailed, with all files.
3d_ocean
$89

Audi S5 Convertible
... german interior interior luxury luxury s5 s5 sport sport vehicle vehicle
audi s5 convertible – high detailed model with interior
design_connected
$27

Nomade Convertible Sofa
...ade convertible sofa
designconnected
ligne roset nomade convertible sofa computer generated 3d model. designed by gomez, didier.
Old
turbosquid
$17
Old
...old
turbosquid
royalty free 3d model old for download as on turbosquid: 3d models for games, architecture, videos. (1646242)
3d_ocean
$9

Old phone
...old phone
3docean
classic old phone phone
classic old phone
3d_ocean
$15

Old telephone
...old telephone
3docean
old phone telephone
old telephone v-ray render
3d_ocean
$3
Old Ambry
...old ambry
3docean
ambry furniture highpoly old
old ambry made in high detail.
3ddd
free

Old England
...nd
3ddd
old england , смеситель
двухрычажный смеситель old england. производство италия.
3d_export
$20

the old man
...the old man
3dexport
the old man.
3d_export
$5
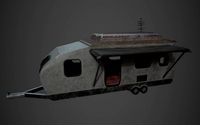
an old trailer
...an old trailer
3dexport
an old trailer
3d_export
$5

old tv
...old tv
3dexport
old tv
3d_export
$5

old iron
...old iron
3dexport
old iron
3d_export
$5
Old TV
...old tv
3dexport
old tv
Version
3ddd
$1

Diamond version
...nd , version , ванна
visionnaire - diamond bath
turbosquid
$50
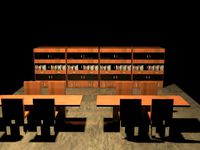
LibraryMini Version
...free 3d model librarymini version for download as max and jpg on turbosquid: 3d models for games, architecture, videos. (1617724)
design_connected
$34

Barocco Version 01
...barocco version 01
designconnected
zanotta barocco version 01 computer generated 3d model. designed by progetti, emaf.
design_connected
$27

Barocco Version 02
...barocco version 02
designconnected
zanotta barocco version 02 computer generated 3d model. designed by progetti, emaf.
turbosquid
free
![Door [2 versions]](/t/13243146.jpg)
Door [2 versions]
...rbosquid
free 3d model door [2 versions] for download as fbx on turbosquid: 3d models for games, architecture, videos. (1223985)
turbosquid
$2
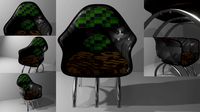
seat version 0.1
...
royalty free 3d model seat version 0.1 for download as blend on turbosquid: 3d models for games, architecture, videos. (1432653)
turbosquid
$12
Chip Version 03
...lty free 3d model chip version 03 for download as c4d and fbx on turbosquid: 3d models for games, architecture, videos. (1241145)
3d_export
$10

magnolia grandiflora mature version
...magnolia grandiflora mature version
3dexport
magnolia grandiflora mature version
3d_export
$8

room assets and voxel version
...room assets and voxel version
3dexport
room assets and voxel version
turbosquid
$35
Zil Civilian version
... model zil civilian version for download as cgf, fbx, and obj on turbosquid: 3d models for games, architecture, videos. (1639420)
