Thingiverse

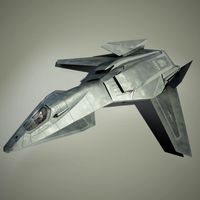
Mini Talon Flush Hatch Latch by Mochanic
by Thingiverse
Last crawled date: 3 years, 1 month ago
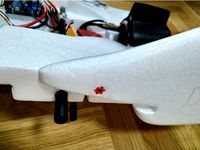
Made a few changes to make things a little easier, and I extended the length of the latch and the depth of the latch catch to make it more reliable. This is now designed to sit flush, not on top of the hatch. (You need to remove the glued on wooden pieces as they are no longer used. Also you will need to carefully cut some of the foam so that the printed parts fit as the pictures show.)
Rather than using bamboo or wooden dowels, I used 3mm carbon fiber rod/tube for the front pins, and also for the latch handle. (I made the holes smaller so that you can drill them out to whatever you like)
After printing, test that the latch slides smoothly in the housing if not use fine sandpaper to clean up the edges of the latch. Now go ahead and CA glue the latch housing together, but do not put the latch in place yet. Once the glue is completely dry install the spring into the latch then insert the latch into the housing. Now put a single drop of CA down into the hole of the latch where the carbon fiber handle goes, then push the latch all the way in and insert a short piece of carbon fiber rod into the latch hole.
You will need the spring out of a pen or mechanical pencil
Note, the rear latch catch plate has holes incase you want to drill into the foam and glue in additional support rods (flush) for extra security. (Mine was glued with Uhu Por, and I am 100% confident it's not going anywhere, so I did not use additional rods on the rear plate)
My hatch will be spray painted all black once I get to that point
Similar models
thingiverse
free
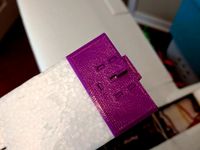
Mini Talon Canopy Latch by jwellman
...to the strike plate.
finish the strike plate off with some 3mm bamboo skewers to add extra rigidity. make sure they sit flush.
thingiverse
free
Vertical stabilizer holder for FX-61 by drGrujic
... in.
i wanted removable vertical stabilizer and this is one of possible solutions to avoid gluing it permanently to the fuselage.
thingiverse
free

vertical tail fin for the Blade 230s by nrk2of3
...the mounting holes. they are now just a little small than 5/64 but would work without drilling. drilling 5/64 makes them perfect.
thingiverse
free

Strike plate by tmdavis3
...olt was hitting the plate too high to catch. my modifications now allow the bolt to catch in the strike plate and it works great.
thingiverse
free

Epic 262 - 229 Rear Antenna and GPS Mount by rdennisak
...to the carbon fiber top plate with ca glue. that makes it a lot more stable since there is nothing to anchor it down at the rear.
thingiverse
free

TalonClaw - Ram Rod with Carbon Fiber Rod MKII
...ition.
i also sanded the carbon fiber rod a bit to make the surface rough for were i glued the printed parts on using a glue gun.
thingiverse
free

Durafly Tundra RC Airplane Tail Strut Supports by Mr_Dabrudda
... clamp overnight and let the glue dry.
drill a small hole in the plastic on each side of the tail and insert the provided screws.
thingiverse
free

Volantex Ranger 2000 camera mounting platform by yarona
...
all the pla parts were glued together with ca glue.
the fixed mount for a video transmitter is glued to the plane with hot glue.
thingiverse
free

Mini Talon Hatch Latch by NorCAL3D
...ed for bamboo skewers, but i highly recommend .125" carbon or fiberglass and resize the holes with a drill bit as necessary.
thingiverse
free
RC strut adapter at 45 degree by malukk
...nce the first one is attached, now you can slide the second one down and into the foam, if you are building with foam, of course.
Mochanic
thingiverse
free

MTD Servo Housing by Mochanic
...o your mtd (my twin dream) or if you broke one in a crash.
exactly the same as the original.
recommend abs or petg
.20mm
supports
thingiverse
free

Prusa MK* LCD Knob by Mochanic
...pprox. .236" once printed. make sure you scrape the edge of the hole, most likely it will have a small lip (elephant foot).
thingiverse
free

Mini Talon Belly Cover by Mochanic
... to glue it on.
if you are looking to fit landing gear to the mini talon use this link: https://www.thingiverse.com/thing:2981809
thingiverse
free

Pitlab GPS Case by Mochanic
...es you to desolder the angled header pins from the gps sensor and resolder in new straight pins to the bottom side of the sensor.
thingiverse
free

MT Cradle iNav FC Mount by osgibson
...inav fc mount by osgibson thingiverse a remix of mochanic#39;s mini talon cradle for a standard 30.5mm fc stack...
thingiverse
free

My Twin Dream FC Mount by Mochanic
...l. (the mtd flies nose up about 2.3 degrees, so this was taken into account during design.)
all screw holes are for m3 hardware.
thingiverse
free

Mini Talon Flight Controller Mounts by Mochanic
...een uploaded at this time, but i am working on it)
let me know if you guys would like for me to add other mounting plate options.
thingiverse
free

FPV Joystick Housing for RC Radio by Mochanic
...;) i used curved lexan cutting scissors. if you do not trim the bottom skirt, it will hit the housing when moving the joystick.
thingiverse
free

My Twin Dream MTD Landing Gear by Mochanic
... use a grass runway.
please let me know if i missed anything... there is a lot going on to remember!
https://youtu.be/qjzglsqbhl0
Talon
turbosquid
$8

Talon Knife
...y free 3d model talon knife for download as obj, ipt, and iam on turbosquid: 3d models for games, architecture, videos. (1348946)
turbosquid
$4

Spire of Talons
... available on turbo squid, the world's leading provider of digital 3d models for visualization, films, television, and games.
3d_export
$17
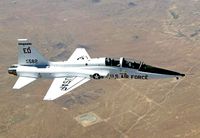
Northrop T-38 Talon
...northrop t-38 talon
3dexport
northrop t-38 talon
3d_export
free

1998 Eagle Talon TSi Turbo
...1998 eagle talon tsi turbo
3dexport
1998 eagle talon tsi turbo
turbosquid
$15

HS-12 Talon
... available on turbo squid, the world's leading provider of digital 3d models for visualization, films, television, and games.
3d_export
$110
Stealth Talon 3D Model
...force lightning raptorrocket gun offensive counter us homeland security concept
stealth talon 3d model rendersteel 72513 3dexport
3d_export
$10
Talon Sword 3D Model
...del
3dexport
sword melee game model low poly video fantasy rpg warrior blade mmo
talon sword 3d model project_zero 32037 3dexport
turbosquid
free

ME3 talon t7 heavy pistol
...l me3 talon t7 heavy pistol for download as obj, fbx, and dae on turbosquid: 3d models for games, architecture, videos. (1402804)
3d_export
$20

eagle talon tsi turbo
...s.<br>car textures:png - 2k resolution other available formats: obj, 3ds, fbx, stl, max. polycount: 34484 poly / 30158 tris
3d_export
$10

Eagle 3D Emblem 3D Model
...3d emblem 3d model 3dexport 3d logo eagle emblem talon car eagle 3d emblem 3d model gdesigns 36617...
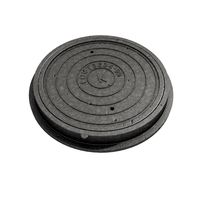
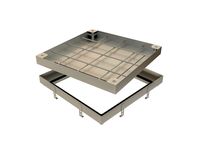
Hatch
3d_export
$5
hatch
...hatch
3dexport
hatch canalizatton 3d model in formats fbx, obj, blend + materials.
turbosquid
$29

Hatch
... available on turbo squid, the world's leading provider of digital 3d models for visualization, films, television, and games.
turbosquid
$29

Hatch
... available on turbo squid, the world's leading provider of digital 3d models for visualization, films, television, and games.
turbosquid
$29
Hatch
... available on turbo squid, the world's leading provider of digital 3d models for visualization, films, television, and games.
turbosquid
$25

Hatch
... available on turbo squid, the world's leading provider of digital 3d models for visualization, films, television, and games.
turbosquid
$25
Hatch
... available on turbo squid, the world's leading provider of digital 3d models for visualization, films, television, and games.
turbosquid
$1
Hatch
... available on turbo squid, the world's leading provider of digital 3d models for visualization, films, television, and games.
turbosquid
$3
Roof Hatch
...bosquid
royalty free 3d model roof hatch for download as obj on turbosquid: 3d models for games, architecture, videos. (1689690)
turbosquid
$29

Metal Hatch
...
royalty free 3d model metal hatch for download as ma and fbx on turbosquid: 3d models for games, architecture, videos. (1365087)
turbosquid
$28
Floor Hatch
...ty free 3d model wall hatch for download as max, fbx, and obj on turbosquid: 3d models for games, architecture, videos. (1669707)
Latch
3d_export
$10
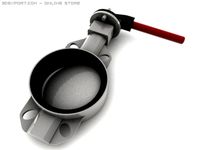
Latch 3D Model
...latch 3d model
3dexport
latch
latch 3d model mur 20257 3dexport
3d_export
$10

Latch 3D Model
...latch 3d model
3dexport
latch
latch 3d model mur 20259 3dexport
turbosquid
$14

oil latch
... available on turbo squid, the world's leading provider of digital 3d models for visualization, films, television, and games.
turbosquid
free

Door Latch-Lock
... available on turbo squid, the world's leading provider of digital 3d models for visualization, films, television, and games.
cg_studio
$8

Hotel Room Door Handle Latch Sign3d model
...fbx .dae .c4d .3ds - hotel room door handle latch sign 3d model, royalty free license available, instant download after purchase.
turbosquid
$12

Vertical Pull-Action Latch Toggle Clamp
...tch toggle clamp for download as ma, max, blend, fbx, and obj on turbosquid: 3d models for games, architecture, videos. (1544855)
turbosquid
$50
Screwdriver Latch Type CSC Torx compatible with Straumann
...sc torx compatible with straumann for download as obj and stl on turbosquid: 3d models for games, architecture, videos. (1370064)
cg_studio
$8
Hotel Door Handle Latch with Roomcard Reader Left and Right3d model
... door handle latch with roomcard reader left and right 3d model, royalty free license available, instant download after purchase.
3d_export
$20

Flight case 3D Model
...case 3d model 3dexport flight case ball corner batterfly latch music gear rig transportation flight case 3d model apeclone...
3d_export
$20

Safe 3D Model
...padlock dial money vault bank deposit gold treasure bolt latch tool safe 3d model tartino 1997...
Flush
turbosquid
$2
Flush
...sh
turbosquid
royalty free 3d model flush for download as ma on turbosquid: 3d models for games, architecture, videos. (1450777)
turbosquid
$22
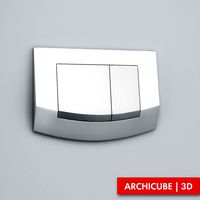
Flush button
... available on turbo squid, the world's leading provider of digital 3d models for visualization, films, television, and games.
turbosquid
$20

Flush Button
... available on turbo squid, the world's leading provider of digital 3d models for visualization, films, television, and games.
turbosquid
$20

Flush Button
... available on turbo squid, the world's leading provider of digital 3d models for visualization, films, television, and games.
turbosquid
$20

Flush button
... available on turbo squid, the world's leading provider of digital 3d models for visualization, films, television, and games.
turbosquid
free
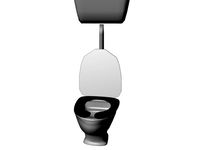
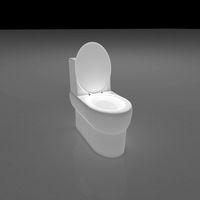
Flush Toilet
... available on turbo squid, the world's leading provider of digital 3d models for visualization, films, television, and games.
archibase_planet
free

Keys flush
...ch push-button switch switch
keys flush geberit sigma 10 sigma 50 n050411 - 3d model (*.gsm+*.3ds) for interior 3d visualization.
turbosquid
$10

Flush Kitchen
...ensions for download as 3ds, max, dxf, obj, c4d, fbx, and stl on turbosquid: 3d models for games, architecture, videos. (1495253)
turbosquid
$7

retro semi flush
...model retro semi flush for download as max, max, fbx, and obj on turbosquid: 3d models for games, architecture, videos. (1574620)
turbosquid
$5

FLUSH ARTEFACTO TABLE
... flush artefacto table for download as max, fbx, obj, and 3ds on turbosquid: 3d models for games, architecture, videos. (1676851)
Mini
turbosquid
$10

Mini Mini Luceplan
...
royalty free 3d model mini mini luceplan for download as max on turbosquid: 3d models for games, architecture, videos. (1227359)
3d_ocean
$39

Mini Cooper
...mini cooper
3docean
cabrioler cooper mini
mini cooper cabrioler
3d_export
$30

Mini lathe
...mini lathe
3dexport
mini lathe
3d_export
$5

mini mouse
...mini mouse
3dexport
mini mouse
3d_export
$5

mini house
...mini house
3dexport
mini house
3d_export
free

Mini Mecha
...mini mecha
3dexport
concept of mini mecha
3d_ocean
$20

Mini Gun
...mini gun
3docean
gatling gun gun machine gun mini gun weapon
model of a mini gatling gun.
3ddd
free

Herve mini
... кофейный , herve
http://www.mobiliavenanti.it/ru/products/hervè-mini
3d_export
$5

mini wall
...mini wall
3dexport
mini wall for living room
3d_export
$5

mini bank
...mini bank
3dexport
mini bank 3d model