Thingiverse
Neopixel Strip Matrix Crystal Lamp by AlbertGBarber
by Thingiverse
Last crawled date: 3 years, 1 month ago
Description
(Scroll down for video)
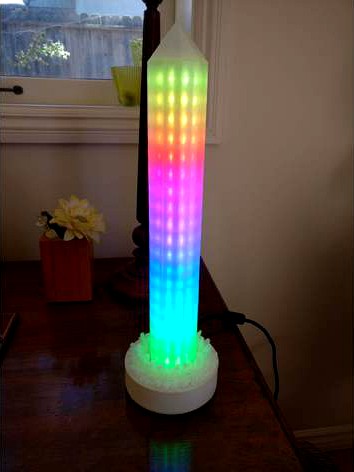
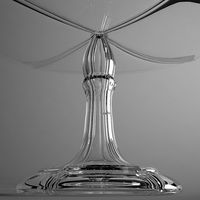
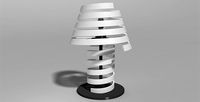
This is a lamp that uses Neopixel strips in a matrix layout. It uses the same base parts as my other Neopixel lamp. The strips are arranged into a 19 x 10 matrix that wraps around the lamp. Overall, it is a little more advanced than my other lamp; I would recommend building it only if you are comfortable with soldering and Neopixels. You can change the cover that goes over the matrix. Right now I have two covers, a crystalline one, and a simple tube. I may add more in the future, you are also welcome to create your own.
Printing / Assembly
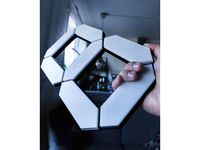
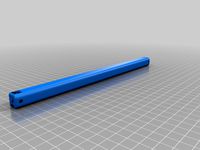
Print the shaft cover parts in clear PLA / ABS. White might also work, but I've not tested it. If you're printing the crystal cover, pick either V1 or V2 of the crystal base to print (see pics)
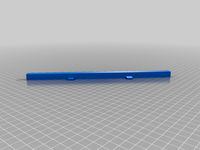
Like my other lamp, mechanical assembly should be straight-forward, everything pretty much stacks together. Follow the drawing pdf. The drawing shows both covers, but you only need to print one type. Note that the cover sections need to be glued together. You do not need to glue the led strip shaft sections together, but I recommend it. Do not glue the cover to the strip shaft, it should be a press-fit.
Electronics
(see my other lamp for info about the base electronics)
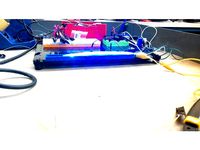
The Neopixel strip I used for the lamp are available here : https://tinyurl.com/yazsvwk8 , although any ws2812b strip will work as long as it's about 10mm wide. The lamp uses a little over 3.1m of strip.
To mount the strips you, cut the main strip into sections, and then stick them on each side of the lamp shaft. You will have to choose how to arrange the strips, either zig-zag (the strip sections data lines alternate direction for each side) or straight (the sections all face the same way, the DIN pads are all on the same end of the shaft). I choose to mount mine in a straight config, running data wires inside the shaft between each section. The strips should have adhesive backing, but mine weren't very sticky so I had to tack them down with hot glue.
If you don't know about wiring Neopixels, read this to get started: https://learn.adafruit.com/adafruit-neopixel-uberguide/the-magic-of-neopixels
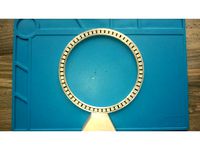
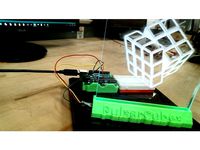
The shafts include wire holes for 22Ga stranded wire. This allows you to provide each strip section with live, ground, and data. I choose to inject power at every section and combine the wires onto a central power board (see pics). To cut down on clutter, you could inject every other section.
Code
As with my other lamp, my code is still a WIP, but I will post it when it is more finished. For now, you may have to write code yourself, but you can find some things by googling. I recommend checking out the Adafruit guide above, or the fast_LED library for driving the pixels. Another resource is https://www.tweaking4all.com/hardware/arduino/adruino-led-strip-effects/.
(Scroll down for video)
This is a lamp that uses Neopixel strips in a matrix layout. It uses the same base parts as my other Neopixel lamp. The strips are arranged into a 19 x 10 matrix that wraps around the lamp. Overall, it is a little more advanced than my other lamp; I would recommend building it only if you are comfortable with soldering and Neopixels. You can change the cover that goes over the matrix. Right now I have two covers, a crystalline one, and a simple tube. I may add more in the future, you are also welcome to create your own.
Printing / Assembly
Print the shaft cover parts in clear PLA / ABS. White might also work, but I've not tested it. If you're printing the crystal cover, pick either V1 or V2 of the crystal base to print (see pics)
Like my other lamp, mechanical assembly should be straight-forward, everything pretty much stacks together. Follow the drawing pdf. The drawing shows both covers, but you only need to print one type. Note that the cover sections need to be glued together. You do not need to glue the led strip shaft sections together, but I recommend it. Do not glue the cover to the strip shaft, it should be a press-fit.
Electronics
(see my other lamp for info about the base electronics)
The Neopixel strip I used for the lamp are available here : https://tinyurl.com/yazsvwk8 , although any ws2812b strip will work as long as it's about 10mm wide. The lamp uses a little over 3.1m of strip.
To mount the strips you, cut the main strip into sections, and then stick them on each side of the lamp shaft. You will have to choose how to arrange the strips, either zig-zag (the strip sections data lines alternate direction for each side) or straight (the sections all face the same way, the DIN pads are all on the same end of the shaft). I choose to mount mine in a straight config, running data wires inside the shaft between each section. The strips should have adhesive backing, but mine weren't very sticky so I had to tack them down with hot glue.
If you don't know about wiring Neopixels, read this to get started: https://learn.adafruit.com/adafruit-neopixel-uberguide/the-magic-of-neopixels
The shafts include wire holes for 22Ga stranded wire. This allows you to provide each strip section with live, ground, and data. I choose to inject power at every section and combine the wires onto a central power board (see pics). To cut down on clutter, you could inject every other section.
Code
As with my other lamp, my code is still a WIP, but I will post it when it is more finished. For now, you may have to write code yourself, but you can find some things by googling. I recommend checking out the Adafruit guide above, or the fast_LED library for driving the pixels. Another resource is https://www.tweaking4all.com/hardware/arduino/adruino-led-strip-effects/.
Similar models
thingiverse
free

Modular Neopixel Ring Lamp by AlbertGBarber
...led library for driving the pixels. another resource is https://www.tweaking4all.com/hardware/arduino/adruino-led-strip-effects/.
thingiverse
free

8x8 neopixel matrix enclosure
...in the images.
the top is intended to be a diffuser, i find "clear" pla or petg works well if printed with 100% infill.
thingiverse
free

Strain relief for Neopixel strip with silicone cover by Udders
...k for all neopixels with silicone cover.
once printed, just slide over solder connections and fill holes with hot glue to secure.
thingiverse
free
Huge Seven Segment Display by engineerish
...per segment) wires to connect them all arduino or similar to drive it assembly instructions 1) glue (at least...
thingiverse
free

Illuminated Cufflinks by flyinggorilla
...of boards to choose from.
the cap and pin didnt need a glue (yet), they are that tight that i squeezed them with pliers together.
thingiverse
free

Irregular Neopixel matrix by Aart
.../m neopixel strip. parametric openscad design.
controlled by an arduino micro using the adafruit neomatrix / neopixel libraries.
thingiverse
free

Printed LED Desk lamp by Promocable
...he wires from the led strips
final assemble screwing the printed parts together
done -> profit
i apologize for my englisch. :/
thingiverse
free

Voronoy Lamp by Grogo666
... button is 6mm :https://www.adafruit.com/product/367
i can share the code (derivated from the neopixels example code) if you like
thingiverse
free

LED Strip Corners (WS2812B) by drwatson6
...ace.
i used petg because it's a little more heat resistant for soldering on. it's also a little more flexible.
good luck!
thingiverse
free

ZMR250 LED Neopixel Stick Holder by d12r
...it fits for the adafruit neopixel stick or other similar rgb led strips. if you need any modifications, you...
Albertgbarber
thingiverse
free

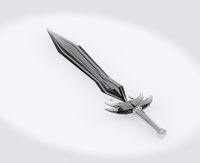
Neopixel RGB LED Sword Prop by AlbertGBarber
...e-uploaded here for redundancy. you can find them in a more organized form here: https://github.com/albertgbarber/led-short-sword
thingiverse
free

Comet Fidget Spinner by AlbertGBarber
...s. uses standard 608zz shielded 8x22x7 bearings. center bearing should be press-fit, but outer bearings might need a dab of glue.
thingiverse
free
Modular Neopixel Ring Lamp by AlbertGBarber
...led library for driving the pixels. another resource is https://www.tweaking4all.com/hardware/arduino/adruino-led-strip-effects/.
thingiverse
free

Simple Dremel Flex holder
...not test it yet when cutting things. kudos to albertgbarber for this great idea, check out the original design...
thingiverse
free

Dremel Flex Shaft Storage Rack (pegboard compatible) with extra tool storage by AlbertGBarber
...ea.com/us/en/catalog/products/20271892/ ( "cart bracket.stl" ). it should also work on any 0.875" diameter shaft.
thingiverse
free

Transformable Dremel table saw / disc sander / shaper by AlbertGBarber
...jury or improper use of the table. remember to be cautious; do not try to push the table,
or the flex shaft past it's limits.
Neopixel
thingiverse
free

NeoPixel Mount
...neopixel mount
thingiverse
geeetech a10m neopixel mount
thingiverse
free
neopixel clock by arradan
...neopixel clock by arradan
thingiverse
this is frame for neopixel clock with 60 led neopixel ring.
thingiverse
free
neopixel cover
...neopixel cover
thingiverse
a basic cover made for neopixel's using clear pla filament
thingiverse
free
Neopixel Cover
...neopixel cover
thingiverse
neopixel cover i made for a knight rider light bar build made in freecad.
thingiverse
free
Joseph Neopixel by ShimmyJ
...joseph neopixel by shimmyj
thingiverse
neopixel shifts colors
thingiverse
free
3DX Neopixel Project
...3dx neopixel project
thingiverse
a design for a neopixel based off of arduino.
thingiverse
free

Neopixel Triplet by reed
...neopixel triplet by reed
thingiverse
holds three single pieces of a neopixel ribbon.
thingiverse
free

3dx neopixel by 21smithe
...3dx neopixel by 21smithe
thingiverse
print, then glue neopixels to the print. plug in the code and go
thingiverse
free
NeoPixel Star by fvan84
...neopixel star by fvan84
thingiverse
a star shape piece to fit 5 neopixel sticks
thingiverse
free

Funny Neopixel glasses
...funny neopixel glasses
thingiverse
tested with arduino uno and adafruit neopixel library :-) d=50mm
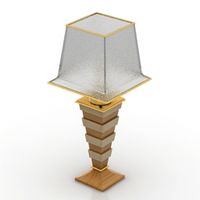
Matrix
3ddd
$1

Matrix
...matrix
3ddd
lumina , matrix
модель светильника matrix
3ddd
$1

Lumina Matrix
... lumina , matrix
светильник matrix doppia от фабрики lumina
3ddd
$1
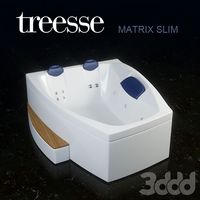
MATRIX SLIM
...reesse , ванна , джакузи
treesse - matrix sleem
3ddd
$1

Люстра Lumina - Matrix
...люстра lumina - matrix
3ddd
lumina , matrix
люстра lumina - matrix
3ddd
$1

mebel MATRIX
...mebel matrix
3ddd
коллекция мебели matrix, линейка мебельной фабрики bfm. производство польша.
3ddd
$1
Светильник Lumina Matrix
...к lumina matrix
3ddd
lumina , matrix
светильник lumina matrix - максимальная детализация
design_connected
free

Matrix Terra
...matrix terra
designconnected
free 3d model of matrix terra by lumina italia designed by kaufman, yaacov.
design_connected
$11
Matrix 8
...matrix 8
designconnected
lumina italia matrix 8 computer generated 3d model. designed by kaufman, yaacov.
3ddd
$1
MATRIX by MAURO FADEL
...iproducts.com/it/prodotti/96755/matrix-poltroncina-a-slitta-con-braccioli-matrix-poltroncina-a-slitta-la-cividina.html#
3ddd
$1
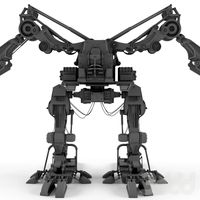
APU Matrix Robot
...apu matrix robot
3ddd
робот
apu matrix robot
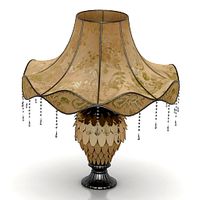
Crystal
3d_ocean
$5
Crystals
...formations crystals formation formations
few models of separate crystals and two crystal formations. low poly but photorealistic.
3d_ocean
$5
Crystal
...crystal
3docean
crystal glass
crystal,glass
3ddd
$1

Crystal chandelier
...crystal chandelier
3ddd
crystal chandelier , crystal
crystal chandelier
3d_ocean
$4
Crystal Sword
...ystal blade crystal sword floating floating blade glass glass sword sword
an animated low poly sword with floating crystal blade.
3ddd
$1

Crystal Lux
...crystal lux
3ddd
crystal lux
страна-производитель: италия
бренд: crystal lux
3ddd
$1
Crystal Lux
...crystal lux
3ddd
crystal lux
страна-производитель: италия
бренд: crystal lux
turbosquid
free

Crystal
...crystal
turbosquid
free 3d model crystal for download as obj on turbosquid: 3d models for games, architecture, videos. (1312776)
3d_export
$5

desert with crystals
...desert with crystals
3dexport
desert with crystals
turbosquid
$30

Crystal
...turbosquid
royalty free 3d model crystal for download as fbx on turbosquid: 3d models for games, architecture, videos. (1450556)
turbosquid
$8

Crystalls
...rbosquid
royalty free 3d model crystalls for download as fbx on turbosquid: 3d models for games, architecture, videos. (1469917)
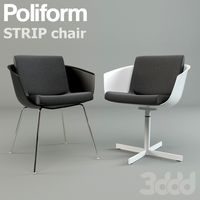
Strip
design_connected
$16
Strip
...strip
designconnected
poliform strip chairs computer generated 3d model. designed by carlo colombo.
3ddd
free
Strip Tease
...strip tease
3ddd
strip , tease
кресло strip tease
3d_export
$5
stripping machine
...stripping machine
3dexport
stripping machine
3ddd
$1
Casamania Strip
...strip
стул casamania strip.
дизайнер: fabio novembre.
материал: полиэтилен.
размеры: ширина 59 см, глубина 62 см, высота 93,5 см.
design_connected
$16

Strip leather
...strip leather
designconnected
poliform strip leather chairs computer generated 3d model. designed by carlo colombo.
design_connected
$4
Strip Chair
...strip chair
designconnected
castelijn strip chair chairs computer generated 3d model. designed by gijs bakker.
design_connected
$16
Strip Chair
...
designconnected
photo-realistic 3d models of the strip chair from henge for 3d architectural and interior design presentations.
3d_export
$5

led strip
...led strip
3dexport
led strip modelled in inventor.<br>it includes .obj and .fbx model in real-world scale.
3ddd
$1
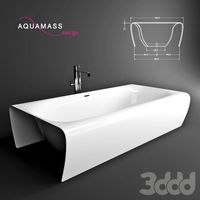
Ванна aquamass strip
... ванна
http://www.aquamass.com/en/so-creative-so-design/strip/strip
в архиве есть файл 2011 версии
3ddd
free
Strip Chair
...actured by poliform (www.poliform.it).
dimension in cm: 60w_57d_72h
uvw mapped, free texture folder.
file formats: fbx and obj.
Lamp
archibase_planet
free
Lamp
...lamp
archibase planet
lamp reading lamp table lamp
lamp - 3d model (*.gsm+*.3ds) for interior 3d visualization.
archibase_planet
free
Lamp
...lamp
archibase planet
lamp reading lamp table lamp
lamp - 3d model (*.gsm+*.3ds) for interior 3d visualization.
archibase_planet
free

Lamp
...lamp
archibase planet
lamp table lamp reading lamp
lamp - 3d model (*.gsm+*.3ds) for interior 3d visualization.
archibase_planet
free

Lamp
...lamp
archibase planet
lamp table lamp reading lamp
lamp - 3d model (*.gsm+*.3ds) for interior 3d visualization.
archibase_planet
free

Lamp
...lamp
archibase planet
lamp reading lamp table lamp
lamp - 3d model (*.gsm+*.3ds) for interior 3d visualization.
archibase_planet
free
Lamp
...lamp
archibase planet
lamp reading lamp table lamp
lamp - 3d model (*.gsm+*.3ds) for interior 3d visualization.
archibase_planet
free
Lamp
...lamp
archibase planet
lamp table lamp reading lamp
lamp - 3d model (*.gsm+*.3ds) for interior 3d visualization.
archibase_planet
free

Lamp
...lamp
archibase planet
lamp table lamp reading lamp
lamp - 3d model (*.gsm+*.3ds) for interior 3d visualization.
archibase_planet
free
Lamp
...lamp
archibase planet
lamp reading lamp table lamp lantern
lamp - 3d model (*.3ds) for interior 3d visualization.
3d_ocean
$6
Lamp
...lamp
3docean
lamp
a high quality lamp.