Thingiverse
Moxon Vise assembly kit by JouniL
by Thingiverse
Last crawled date: 3 years, 4 months ago
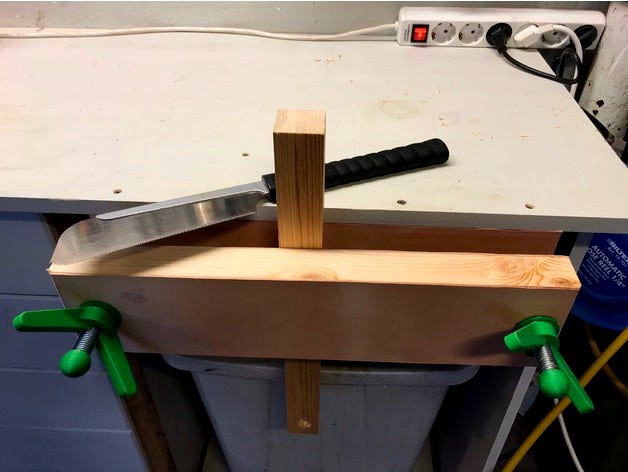
This is a simple old skool Moxon vise kit for metric M16 threaded rods and nuts.
I printed the parts with the following Cura settings on my Ender 3:
Layer height: 0.2
Shell: Wall line count: 4 (important!, these parts need to be sturdy)
Infill density: 65%
Build plate adhesion: Brim
Supports: YES
Material: PLA
When printing the washers you don't need a brim and you should set the infill to 100%
You need:
Two M16 metric threaded rods. Approx 20-30 cm long.
Six M16 metric nuts
Two identical wooden blocks (one front and one backing block) for you vise. Preferably some kind of hardwood.
Instructions:
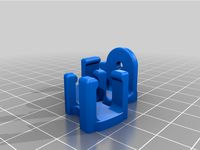
Glue one M16 nut to to each of the Vise Handles. I prefer epoxy glue for this task.
Drill two 16mm holes (left and right) through both blocks while perfectly aligned. Approx 30 mm from each side perfectly centered.
Enlarge the holes on the front block in the horisontal direction, you are gonna need the wiggle room. Do not enlarge it in the vertical direction.
Insert one M16 rod into each hole of the back block
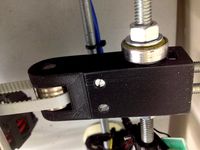
Insert a M16 nut in to each of the fixtures and screw them on the M16 rods on the backside of the backing block
Fasten the fixtures with four screws to the backside of the back block. Do nut use tapered screws since you will crack the plastic.
Fasten one nut and one washer to each of the rods against the fixture and tighten them carefully, do not overdo this since its plastic after all.
Fasten the backing block to your bench using your prefered method.
Insert the front block through the two fixed M16 rods
Screw one handle and one washer to each of the M16 rods
Screw one end cap to each of the M16 rods.
Done
I printed the parts with the following Cura settings on my Ender 3:
Layer height: 0.2
Shell: Wall line count: 4 (important!, these parts need to be sturdy)
Infill density: 65%
Build plate adhesion: Brim
Supports: YES
Material: PLA
When printing the washers you don't need a brim and you should set the infill to 100%
You need:
Two M16 metric threaded rods. Approx 20-30 cm long.
Six M16 metric nuts
Two identical wooden blocks (one front and one backing block) for you vise. Preferably some kind of hardwood.
Instructions:
Glue one M16 nut to to each of the Vise Handles. I prefer epoxy glue for this task.
Drill two 16mm holes (left and right) through both blocks while perfectly aligned. Approx 30 mm from each side perfectly centered.
Enlarge the holes on the front block in the horisontal direction, you are gonna need the wiggle room. Do not enlarge it in the vertical direction.
Insert one M16 rod into each hole of the back block
Insert a M16 nut in to each of the fixtures and screw them on the M16 rods on the backside of the backing block
Fasten the fixtures with four screws to the backside of the back block. Do nut use tapered screws since you will crack the plastic.
Fasten one nut and one washer to each of the rods against the fixture and tighten them carefully, do not overdo this since its plastic after all.
Fasten the backing block to your bench using your prefered method.
Insert the front block through the two fixed M16 rods
Screw one handle and one washer to each of the M16 rods
Screw one end cap to each of the M16 rods.
Done
Similar models
thingiverse
free

Nut block for 8mm threaded rod
...ore than 8mm long.
the threaded insert version uses three m365 threaded inserts. they are 6mm long with an outer diameter of 5mm.
grabcad
free

3DP Hole Test Block
...al fasteners: nuts, bolts, screws, threaded rod, etc :-)
https://ctmprojectsblog.wordpress.com/2017/06/13/3d-printed-turret-vise/
thingiverse
free

Keystone keys by grimsk
...t least one washer between each key.
if you have same usb as i have, you could print keystone_usb_kingston_datatravelerse9 too.
thingiverse
free

Tronxy X5SA series Rod Block by Sandrate
...ut+ 1 m4 bolt for fixing the rod to the block and two t-nut with bolt for attaching the block to the 2020 profile (for each rod).
grabcad
free

Moxon Vise for Joinery
...wo-screw moxon vise used for joinery. the jaws are black walnut. the screws a precision acme thread with cast iron hand wheels.
thingiverse
free

Eclips3D modified A9,A10,A11,A12 Y axis rod holders by Av8er
... change to the rear holders is that i enlarged the rod hole to mach the front. if you use them you may not need to use any shims.
thingiverse
free
Clamp holder for a 3018 CNC milling / engraving machine by 3D-Muc
... and one clamping block.
saw off the head of the long m5 screw and glue the threaded rods with loctite thread lock into the nuts.
thingiverse
free

door handle by carlosrhrh_81
....
it is necessary to print two for each door.
a metric 6 hex nut will be inserted in one, and in the other a metric 6 hex screw.
thingiverse
free

Tronxy X5 - Bed Stabilization Synchronization 3 Stages by daspasstschon
...
!!!take your time and patience for alligning the parts. a gentle movement makes fine prints!!!
german: der text kommt spaeter.
thingiverse
free
Belt Tensioner - Idle Pulley for Prusa Mendel I2 by Chris918
... old 608 bearing idler on the frame's threaded rod. it is acting as a washer on one side between the nut and the tensioner ;)
Jounil
thingiverse
free

Ender3/Pro calibration pattern by JouniL
...o print it.
i've included the fusion 360 file and also a step version of it if you wish to adapt it to your own needs.
enjoy!
thingiverse
free

Threaded dust hose (50mm) adapter DeWalt745 by JouniL
... image). if you still have a hard time to fit it into the dw745 you can try to scale it down to 99% or 98% in your slicer.
enjoy!
thingiverse
free

Mini planting/seeding pot for peat briquettes by JouniL
...nted 8 of these at a time in different colours to keep track my plants.
inner diameter: 38 mm
outer diameter: 40 mm
height: 45 mm
Moxon
thingiverse
free
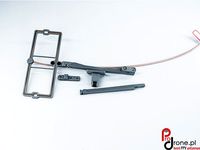
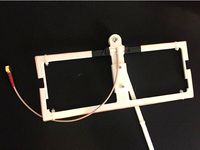
Antenna holder for Jumper T16 folding handle by reageve
...t16 folding handle by reageve thingiverse antenna holder (e.g. moxon see https://www.thingiverse.com/thing:2124434) for jumper's t16 upgraded foldable handle. print...
thingiverse
free
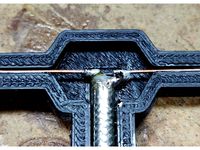
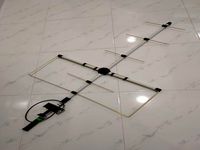
Moxon 915MHz antenna for Crossfire / R9 by lloo
...ry lost messages i got.
the dimensions were based on measurements i got with this calculator http://tippete.net/cgi-bin/moxgen.pl
thingiverse
free
Mounts for prodrone Moxon (868, 900, 915 and 1.2GHz) by prodrone
...mhz-915mhz-5.5dbi-tx-mounting/197
if you like our designs, please like our fb page:https://www.facebook.com/prodronepl/
thanks :)
thingiverse
free
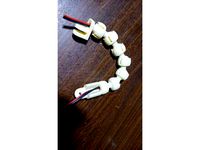
Ball Link flexible holder for antennas, lamps, cameras etc. by AndreyPrikupets
...a starting and ending segments specific for holder of moxon antenna. the top segment is printed from two parts...
thingiverse
free
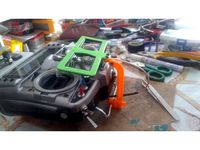
R9M Moxon Antenna with foldable support by FreeFlight
...he inner conductor of commercial tv/sat antenna wire. strip the tv antenna wire in order to find it.
used some m3 screws and nuts
thingiverse
free
Moxon antenna (adjustuble fine tunning) by celiktse
...here should be 15.9mm clearence between mirror and chasis for 433 mhz. this is already indicated on antenna if you see carefully.
thingiverse
free
M1GEO/G8OCV Moxon Antenna with 9W2FLP Accessories
...older to hold the smartphone for the purpose of satellite tracking.
hertzarmstrongmarconi
malaysiaamateurradiotransmitterssociety
thingiverse
free

868/915mhz Moxon antenna, tune verifyed by Ibcrazy
...ines
atleast 3 bottom and 3 top layers
filter out tiny gaps disabled
brim if you have poor bed adhesion
print in pla or petg only
thingiverse
free

Moxon Mx 3 elements 868 - 915 MHz dual band antenna for TBS crossfire, QLRS and other LRS. 9XR pro mount.
...tbs crossfire, qlrs and other lrs. 9xr pro mount.
calculator excel http://www.qlrs.000space.com/moxon_mx/moxonmx_calculator.xlsx.
Vise
3d_ocean
$16
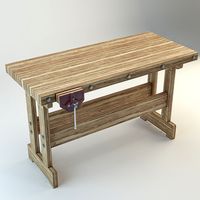
Mechanic's Workbench
...bolts garage gripe jaw mechanic nuts rough table tool vise wood wooden woodworking work workbench general this is the...
3d_ocean
$17

Bench Vice
...vice benchvice garage metal rusty scratch tool tools vice vise model of a bench vice made in cinema 4d....
3ddd
$1

Vise Bookends
...e , книгодержатель
металический держатель для книг в виде тисков от restoration hardware
3ddd
free
Bench Vise Clamp Tabletop
...bench vise clamp tabletop
3ddd
тиски
bench vise clamp tabletop
3ddd
$1

Кнопка слива Viega
...кнопка слива viega
3ddd
viega , кнопка слива
кнопка слива viega vising for style 12.
3d_export
$40
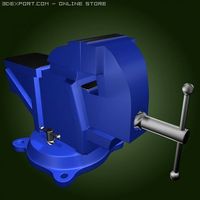
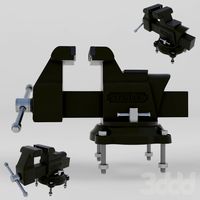
Bench vise 3D Model
...vise 3d model
3dexport
bench vise tools clamp workbench tool industrial work carpenter
bench vise 3d model rophaaa 22183 3dexport
3d_export
$80
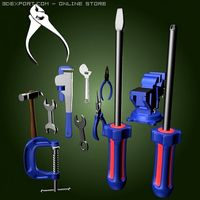
Tools 3D Model
...tools 3d model 3dexport bench vise tools clamp workbench tool industrial work carpenter screw driver...
3d_export
$15

Vise 3D Model
...vise 3d model
3dexport
vise
vise 3d model gaj15 61442 3dexport
3d_export
$5

vise
...y tool for fitter workshop. the rotary clamp body can be rotated to make the workpiece rotate to the appropriate working position
3d_export
$6

Machine vise
...machine vise
3dexport
machine vise
Kit
3d_ocean
$5

Streets and highways construction kit
...make city streets. roads has the pavement. models low poly and ready to use in games. texture size in render images 2048×2048,...
3d_ocean
$29

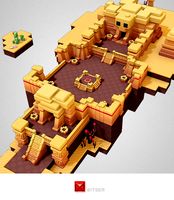
Proto Cemetery Set
...they are meant to be used as a construction kit for rapid game prototyping. the blocks are real world...
3d_export
$12

Grapes Single Fruit Bunches and Model Kit 3D Model
...
grapes single fruit bunches and model kit 3d model download .c4d .max .obj .fbx .ma .lwo .3ds .3dm .stl martin3d 108952 3dexport
3d_export
$15

Drum Stand 3D Model
...holder snare rim hardware modern orchestra music band drumkit kit rack drum stand 3d model download .c4d .max .obj...
3d_export
$10

Wizard kit 3D Model
...at broom glasses spell globe
wizard kit 3d model download .c4d .max .obj .fbx .ma .lwo .3ds .3dm .stl emadnabil27 109521 3dexport
3d_ocean
$35
Prototyper Desert Set
...they are meant to be used as a construction kit for rapid game prototyping. the blocks are real world...
3ddd
$1
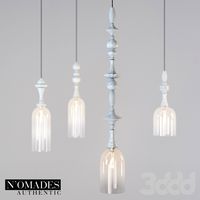
Nomades Authentic Ceilin Lights
...decorative porcelain, glass or wooden elements - an electrification kit khaki, black or transparent, according tot the models -...
archive3d
free

Drum 3D Model
...drum 3d model archive3d drum musical instrument tambour drum kit drum conga n310116 - 3d model (*.gsm+*.3ds) for interior...
cg_studio
$30

Scifi Interior Construction Kit (Basic)3d model
...bx .dae .3ds - scifi interior construction kit (basic) 3d model, royalty free license available, instant download after purchase.
cg_studio
$25
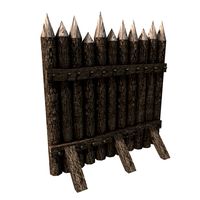
Stockade construction kit3d model
...ds .obj .mb .max .fbx .c4d - stockade construction kit 3d model, royalty free license available, instant download after purchase.
Assembly
3d_export
$15

Ratchet Socket Wrench 3D Model
... nut torque tighten spanner screw extension hex assemble mechanic craftsman
ratchet socket wrench 3d model firdz3d 88311 3dexport
3ddd
$1

IKEA SODERHAMN
...ene, polyester hollow fibre wadding
armrest cover/ three-seat section cover:
40% polyester, 16% cotton, 40% modacrylic, 4% nylon
3d_ocean
$15

Robot
...robot 3docean 3d arm assembly factory-robot hydraulic-machine industrial-robot max mechanical model nano sci-fi worker-robot...
3d_ocean
$2

Jigsaw Puzzle
...s puzzle tiles toy
simple jigsaw puzzle model. modeled nicely in 3ds max and include mulitiple format (.obj, .max, .3ds and.fbx).
3d_export
$10

Kids tricycle 3D Model
...3d model 3dexport kids vehicle tricucle cycle bicycle 3d assembly solidworks kids tricycle 3d model download .c4d .max .obj...
3ddd
$1

IKEA SMYG
...ikea smyg
3ddd
ikea
assembled size
width: 195 mm
cord length: 250 cm
3ddd
$1
Nomades Authentic Ceilin Lights
... khaki, black or transparent, according tot the models
- the heights are adaptable and the chandeliers can be assembled together.
3ddd
$1
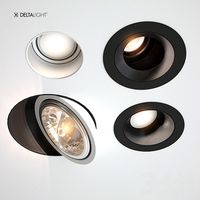
Встраиваемые светильники delta light 5 видов 02
...светильники delta light 5 видов 02 3ddd delta light http://www.deltalight.com/en/products/detail/imax-50-401-60-00 http://www.deltalight.com/en/products/detail/tweeter-trimless-111-206-21-11 http://www.deltalight.com/en/products/light/diro/diro-st-ok?form=searchform&reference;_nr=&location;=1&fixation;=1&assembly=2&new;=0&type;=light®ion;=int http://www.deltalight.com/en/products/light/imax/imax-wallwash?form=searchform&reference;_nr=&location;=1&fixation;=1&assembly;=2&new;=0&type;=light®ion;=int http://www.deltalight.com/en/products/detail/downforce-r-202-42-23 ...
3ddd
$1
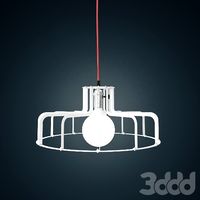
Spider Light
...t is easy to transport, easy to assemble and had enough structural strength, but at the same time was endowed with colorful form.
3ddd
$1

Carl HansenSon CH410 Peter's Chair
...in the war years quality furniture was hard to find - so he made his own. dimensions: 42 cm (width), 32 cm (depth), 47 cm (height