Thingiverse
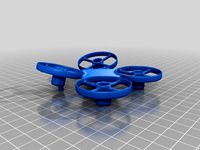
GATETRIX V1 / LIGHTRIX V1 modular gate system for Tiny Whoop by gerdfranz
by Thingiverse
Last crawled date: 3 years ago
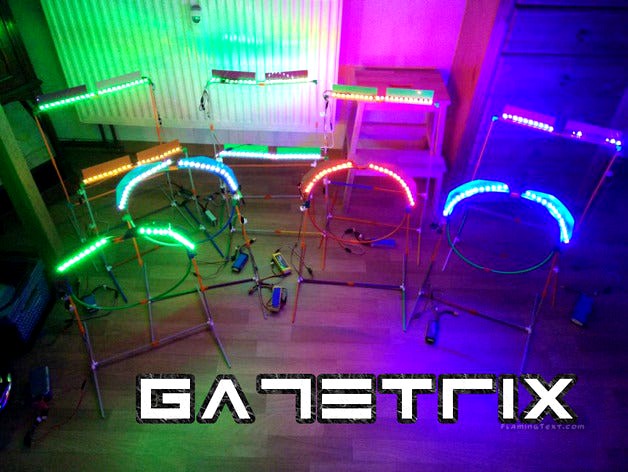
GATETRIX / LIGHTRIX - 3D printed modular Tiny Whoop gate System
RELEASE VERSION
Update 26.11.2016:
Added two new pieces, which are supposed to give your gate structure more stability:
connector_straight_circle_legs_stronger_version.stl
base_stand_connector_for_use_with_rods_stronger_version.stl
Also released GATETRIX V2 (a different/new design concept)http://www.thingiverse.com/thing:1917733
Update 19.11.2016:
Created new Version of the straight rod extender (with a little hinge). Helps securing the extenders when mounting them upside down. The length has also been slightly modified (it's a bit smaller now). I suggest to use the new Version from now on. A V2 for the circle extender is available too.
Gatetrix V2 is coming soon.
21.08.2016: RELEASE VERSION - The System state no longer is "work in progress". Many tests have been made and the system now is considered as a release version.
I would be pleased to see your gate creations in the make section.
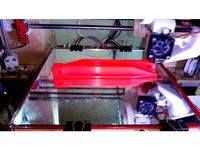
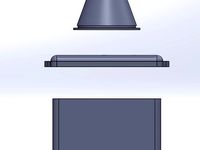
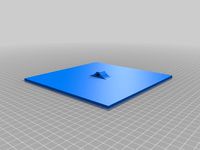
Developed for easy and quick printing. Optimized for 200x200mm print surface. Only a few parts need support structures (Rod extenders and the flag base connector). All (almost) connectors can be printed without Support. Just be sure to place the pieces correctly onto the print bed. You printer should be able to print bridges quite well (however, the gaps which have to be filled are quite small (aprox. 5mm).
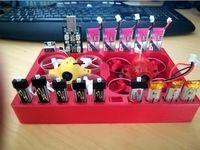
At the moment there are about 30 different pieces available. You can send me further ideas via PM. For construction of standard shape gates (square/circle), there are only a few different rods/connectors needed. The other pieces are optional for creative people to build more complex gate structures. I've built a 1,80m (aprox. 6ft) high gate structure (check out the pictures).
Update 07.08.2016:
Since all connector parts have been redesign (longer connector pieces and getting narrower towards the inside, it's easier to fit the rods and connectors together. I heard from many People that the 4.98mm Version fits the best, but you should try it yourself. Different Printer, different precision/fitting.
Printer calibration/Print settings:
The parts need to fit snugly, for keeping the gates together but also providing a easy disassembly.
The usage of different filament colors (altough it's the same material) results in divergent fits. Idealy all parts are printed with the same filament type/color and the same print settings.
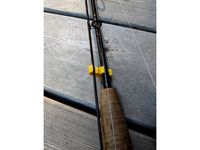
The bright filament colors are visible best (white, grey, etc. ). I recommend the usage of PETG. It's strong an flexible and therefore you can be a bit more rough during assembly and it won't brake so easily. Also it is possible to build round shaped gates with rods only, due to their certain flexibility (check out the pictures).
All here shown parts were aprox. 1100g filament and were printed in about 48 hours (0.3mm layer height, 2 shells, 3 top/bottom layers, 20% infill ... rods can be printed without infill, it's quicker but also not as tough and will cost you the flexibility).
The system is modular and extendable. It's quickly assembled and disassembled. It can be stored place saving. Due to the modular plug/connector system you can get creative by creating your own obstacles/gates/whatever.
The gates are visible very good with white/grey color filament by themselves. With the extenders the visibility gets even better of course and you get the ability to mount modular LED Systems (check out the pictures).
Have fun
Update History:
22.08.2016:
With just one new connector piece (flag_base_connector_for_use_with_rods) and already existing pieces, we get awesome huge (80-100cm) illuminated flags!
21.08.2016:
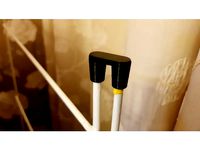
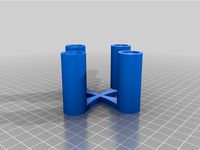
Added a new connector which enables you to use straight rods as base/legs (base_stand_connector_for_use_with_rods.stl). The 19cm base connector is ok for small gates, but if getting bigger the gate will fall, therefore this improvement. Works great, because the connectors for the leg rods are angled slightly, so there's tension created which gives the gates perfect stability.
Added a new Version of the cable router for easier routing cables, when working with a LED System.
Removed some obsolete parts.
07.08.2016:
Redesigned all connector pieces (extended the connectors by 3mm and the inside is now getting narrower towards the inside (1,5° angle). This should give you a good and snug fit.
05.08.2016: Redesigned the straight connector. The new one (V2) is a little bit longer (had issues with to loose fitting rods pushing each other out of place) and the most important thing: The inside of the connectors is slightly angled (getting narrower towards the middle). This improvements addresses the fitting tolerance issue which printers have (with different Filaments). So with the new connectors alls of my rods from almost 7 different Filament Colors fit together well. I've also added a V3 straight connector which is supposed to be used with very flexible Filaments like Ninjaflex which eleminates the tolerance issue completely. The shells simply are a little bit thicker.
Also added a variety of connectors with additional angled connectors, which for example can be used to connect gate shapes with different heights for more stability and to create a tunnel type gate (check out the pictures).
I also discovered that it's possible to form a gate only consisting of rods (see the pictures). So with Filaments which have a flexible property (not Flex Filament), you can simply bend the gate to the desired shape. PETG works great. ABS should work to. PLA should be to brittle for this.
Enjoy!
03.08.2016: Added new shape rod (eighth circle) with extender element. Needs 8 pieces for a whole circle and is quite bigger than the quarter circle Version. Also added another connector (straight connector with leg hole and additional connector (angled). Also added another cable router with a bigger hole.
27.07.2016: Added 5 new connector pieces (straight connector with leg hole and additional connectors)
(The following was written on the first release and should be obsolete due to the new connector design. I'll leave it however to let people be aware of the possible fitting issues and how to resolve them)
Originally the pieces where developed for the 5.00mm rod version. Then I went out of filament and had to use a different color (same material).
The result was, that the rods didn't fit snugly into the connectors anymore with the 5.0mm version rods. Therefore I made 6 further variants (4.97mm, 4.98mm, 4.99mm, 5.01mm, 5.02mm, 5.03mm). The 4.98mm variant was perfect with the other filament color.
You possibly can adjust the result by altering the flow factor as well.
In all cases you should be sure your printer is calibrated correctly (Extruder/Jerk/Acceleration) and make a test print with a straight connector and the 6 rod variants, so you can tell which one fits the best.
RELEASE VERSION
Update 26.11.2016:
Added two new pieces, which are supposed to give your gate structure more stability:
connector_straight_circle_legs_stronger_version.stl
base_stand_connector_for_use_with_rods_stronger_version.stl
Also released GATETRIX V2 (a different/new design concept)http://www.thingiverse.com/thing:1917733
Update 19.11.2016:
Created new Version of the straight rod extender (with a little hinge). Helps securing the extenders when mounting them upside down. The length has also been slightly modified (it's a bit smaller now). I suggest to use the new Version from now on. A V2 for the circle extender is available too.
Gatetrix V2 is coming soon.
21.08.2016: RELEASE VERSION - The System state no longer is "work in progress". Many tests have been made and the system now is considered as a release version.
I would be pleased to see your gate creations in the make section.
Developed for easy and quick printing. Optimized for 200x200mm print surface. Only a few parts need support structures (Rod extenders and the flag base connector). All (almost) connectors can be printed without Support. Just be sure to place the pieces correctly onto the print bed. You printer should be able to print bridges quite well (however, the gaps which have to be filled are quite small (aprox. 5mm).
At the moment there are about 30 different pieces available. You can send me further ideas via PM. For construction of standard shape gates (square/circle), there are only a few different rods/connectors needed. The other pieces are optional for creative people to build more complex gate structures. I've built a 1,80m (aprox. 6ft) high gate structure (check out the pictures).
Update 07.08.2016:
Since all connector parts have been redesign (longer connector pieces and getting narrower towards the inside, it's easier to fit the rods and connectors together. I heard from many People that the 4.98mm Version fits the best, but you should try it yourself. Different Printer, different precision/fitting.
Printer calibration/Print settings:
The parts need to fit snugly, for keeping the gates together but also providing a easy disassembly.
The usage of different filament colors (altough it's the same material) results in divergent fits. Idealy all parts are printed with the same filament type/color and the same print settings.
The bright filament colors are visible best (white, grey, etc. ). I recommend the usage of PETG. It's strong an flexible and therefore you can be a bit more rough during assembly and it won't brake so easily. Also it is possible to build round shaped gates with rods only, due to their certain flexibility (check out the pictures).
All here shown parts were aprox. 1100g filament and were printed in about 48 hours (0.3mm layer height, 2 shells, 3 top/bottom layers, 20% infill ... rods can be printed without infill, it's quicker but also not as tough and will cost you the flexibility).
The system is modular and extendable. It's quickly assembled and disassembled. It can be stored place saving. Due to the modular plug/connector system you can get creative by creating your own obstacles/gates/whatever.
The gates are visible very good with white/grey color filament by themselves. With the extenders the visibility gets even better of course and you get the ability to mount modular LED Systems (check out the pictures).
Have fun
Update History:
22.08.2016:
With just one new connector piece (flag_base_connector_for_use_with_rods) and already existing pieces, we get awesome huge (80-100cm) illuminated flags!
21.08.2016:
Added a new connector which enables you to use straight rods as base/legs (base_stand_connector_for_use_with_rods.stl). The 19cm base connector is ok for small gates, but if getting bigger the gate will fall, therefore this improvement. Works great, because the connectors for the leg rods are angled slightly, so there's tension created which gives the gates perfect stability.
Added a new Version of the cable router for easier routing cables, when working with a LED System.
Removed some obsolete parts.
07.08.2016:
Redesigned all connector pieces (extended the connectors by 3mm and the inside is now getting narrower towards the inside (1,5° angle). This should give you a good and snug fit.
05.08.2016: Redesigned the straight connector. The new one (V2) is a little bit longer (had issues with to loose fitting rods pushing each other out of place) and the most important thing: The inside of the connectors is slightly angled (getting narrower towards the middle). This improvements addresses the fitting tolerance issue which printers have (with different Filaments). So with the new connectors alls of my rods from almost 7 different Filament Colors fit together well. I've also added a V3 straight connector which is supposed to be used with very flexible Filaments like Ninjaflex which eleminates the tolerance issue completely. The shells simply are a little bit thicker.
Also added a variety of connectors with additional angled connectors, which for example can be used to connect gate shapes with different heights for more stability and to create a tunnel type gate (check out the pictures).
I also discovered that it's possible to form a gate only consisting of rods (see the pictures). So with Filaments which have a flexible property (not Flex Filament), you can simply bend the gate to the desired shape. PETG works great. ABS should work to. PLA should be to brittle for this.
Enjoy!
03.08.2016: Added new shape rod (eighth circle) with extender element. Needs 8 pieces for a whole circle and is quite bigger than the quarter circle Version. Also added another connector (straight connector with leg hole and additional connector (angled). Also added another cable router with a bigger hole.
27.07.2016: Added 5 new connector pieces (straight connector with leg hole and additional connectors)
(The following was written on the first release and should be obsolete due to the new connector design. I'll leave it however to let people be aware of the possible fitting issues and how to resolve them)
Originally the pieces where developed for the 5.00mm rod version. Then I went out of filament and had to use a different color (same material).
The result was, that the rods didn't fit snugly into the connectors anymore with the 5.0mm version rods. Therefore I made 6 further variants (4.97mm, 4.98mm, 4.99mm, 5.01mm, 5.02mm, 5.03mm). The 4.98mm variant was perfect with the other filament color.
You possibly can adjust the result by altering the flow factor as well.
In all cases you should be sure your printer is calibrated correctly (Extruder/Jerk/Acceleration) and make a test print with a straight connector and the 6 rod variants, so you can tell which one fits the best.
Similar models
thingiverse
free

Rock Climbing Stick Clip Extended Length w Threads by MonkeySlug
...made a custom thread which fits this pole perfectly.
print this in abs if you can, the added flexibility helps the draw pop out.
thingiverse
free

GATETRIX V2 - Mini/Micro Quad illuminated Gate System by gerdfranz
...etty simple. just don't make the led strip to short.
further connection pieces will be designed, if there's demand.
enjoy
thingiverse
free
Customizable Fishing Rod Clips (v2) by benjamenjohnson
...asier to pop the rod tip in and out.
updated 20190828: made the rendering in customizer look nicer and theoretically sped it up.
thingiverse
free

tiny whoop gates by MadeByNozzle
..., we suggest you print these ~3% lager so it is easier to connect to the pieces. you can use hot glue to make the gate permanent.
thingiverse
free

Spider-Man PS4 Bust - Advanced Suit by HappyMoon
... fit the whole front spider on the model but the shape should also make it a little easier to print as one piece.
happy printing!
thingiverse
free

Filament Park for 4mm OD PTFE Tube - Pushfit Connectors by jcatx
...f some filament if it turns out your connector is not compatible. this 1 port version is threaded the same as the 4 port version.
thingiverse
free

Purge tray for Weedo X40 by jwnoordijk
...nted using a flexible filament, but these ware-out rather quickly. better to get a 1mm sheet of teflon to cut the pieces out off.
thingiverse
free

Yet Another Ender 3 Filament Roller by sirxaph
... you can use to hold the filament in place while switching filament
edit 2018-11-04 - added a version that fits slightly tighter.
thingiverse
free

Brio Compatible Turntable - Minor Mods by MixedGears
...r kids or they are not very gentle with stuff i would recommend printing the bigger parts where 3 connectors are joined together.
thingiverse
free
Clothes Horse Connector by MIKEYMCC
...g with 40% infill 0.2mm layer height.
update: added another version that should be stronger if you're worried about strength.
Gerdfranz
thingiverse
free

Alcon Dailies Contact Lenses / Kontaktlinsen Reservoir by gerdfranz
...or contact lenses from the brand dailies (alcon).
platzsparender kontaktlinsen aufbewahrungsständer für dailies linsen von alcon.
thingiverse
free

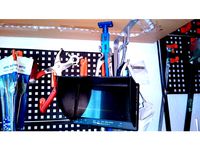
Eachine LCD5802S 5802 FPV Monitor stand (sturdy) by gerdfranz
...stand (sturdy) by gerdfranz
thingiverse
a sturdy tiltable monitor stand version for the eachine lcd5802s 5802 (fpv) lcd-monitor.
thingiverse
free
Netsports Forza Gate Replacement Peg / Tent by gerdfranz
...well known forza gates in the fpv scene.
also usable for any other "peg" application like tents. this is really strong.
thingiverse
free

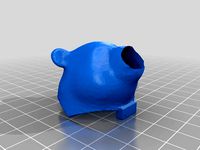
GoPro Lens Protector for semi flexible/rigid materials (REAL Bioflex) by gerdfranz
... materials (real bioflex) by gerdfranz
thingiverse
fits perfectly onto a gopro 3 and has a lug for extra securing the protector.
thingiverse
free

Xiaomi Yi Lens protector for semi rigid/flexible material (REAL Bioflex) by gerdfranz
...material (real bioflex) by gerdfranz
thingiverse
fits perfectly onto a xiaomi yi and has a lug for extra securing the protector.
thingiverse
free
Eachine LCD5802S 5802 FPV Monitor "hanger" by gerdfranz
...d work for others as well.
i made this to spare some space on my workbench and it also is very handy with the pan/tilt mechanism.
thingiverse
free

Eachine LCD5802S 5802 FPV Monitor stand (compact) by gerdfranz
...r me and fits perfect in the provided protection bag.
(print the stand element 2 times and connect them with the connector piece)
thingiverse
free
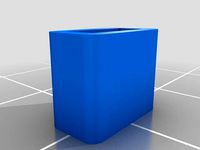
JST 2.00mm Battery cap (for flexible filament) Hubsan Tiny Whoop and others by gerdfranz
...pty batterys for the 1s type micro quads like the hubsan and other derivatives with 2.0mm jst connector.
for ninjaflex filaments.
thingiverse
free
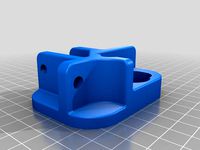
MBL Lindinger.at Fliegerstuhl Scharnier/Verbinder (rechts) by gerdfranz
... und 45mm) benötigt.
https://www.lindinger.at/de/zubehoer-und-mehr/werbeartikel/mbl-pilotenstuhl-comfort-lindinger-camping-sessel
thingiverse
free

Jumper T-Lite Switch Protector + Back cover (TPU) by gerdfranz
...,2mm layer height
3 perimeters
70% infill (from 15mm, below 30%infill)
no support needed
printed with extrudr.eu medium tpu (98a)
Whoop
thingiverse
free
whoop by MichaelJFPV
...whoop by michaeljfpv
thingiverse
whoop
thingiverse
free
Tiny Whoop holder for 2 whoops by d2000
...tiny whoop holder for 2 whoops by d2000
thingiverse
tiny whoop holder for 2 whoop mini drones and battery
thingiverse
free
Whoop frame by Brassekongo
...whoop frame by brassekongo
thingiverse
a tiny whoop frame
thingiverse
free

Whoop frame by Brassekongo
...whoop frame by brassekongo
thingiverse
my first whoop frame.
thingiverse
free
WHOOPS 4
...
whoops is another
big cinewhoop as addon for hyperlite tooth fairy race frame 4"
first flight https://youtu.be/xm9afwiiass
thingiverse
free
Tiny Whoop 65mm by binaryfpv
...tiny whoop 65mm by binaryfpv
thingiverse
tiny whoop 65mm
thingiverse
free
V-Tail Whoop by Mystereon
...v-tail whoop by mystereon
thingiverse
v-tail whoop .. wip
thingiverse
free
Tiny Whoop Case by 3DRCStore
...tiny whoop case by 3drcstore
thingiverse
tiny whoop case for transport.
thingiverse
free
Tiny Whoop Calibration Base
...tiny whoop calibration base
thingiverse
a base usefull to calibrate your tiny whoop
thingiverse
free
Tiny Whoop Gate by Imozeb
...tiny whoop gate by imozeb
thingiverse
custom tiny whoop gate. requires hot glue for assembly.
Tiny
turbosquid
$3

Tiny Mushroom
...squid
royalty free 3d model tiny mushroom for download as ma on turbosquid: 3d models for games, architecture, videos. (1562284)
turbosquid
$2
Tiny Tank
...osquid
royalty free 3d model tiny tank for download as blend on turbosquid: 3d models for games, architecture, videos. (1542044)
turbosquid
$3

Tiny Knife
...
royalty free 3d model tiny knife for download as max and fbx on turbosquid: 3d models for games, architecture, videos. (1358937)
3d_export
$5

Tiny house
...tiny house
3dexport
https://www.dock4all.com/
3d_export
free

Tiny Toy
...tiny toy
3dexport
turbosquid
$30

Tiny Tank
...lty free 3d model tiny tank for download as max, obj, and fbx on turbosquid: 3d models for games, architecture, videos. (1608730)
turbosquid
$20

Tiny houses
...lty free 3d model tiny house for download as ma, fbx, and obj on turbosquid: 3d models for games, architecture, videos. (1642651)
turbosquid
$100

Tiny boy
... available on turbo squid, the world's leading provider of digital 3d models for visualization, films, television, and games.
turbosquid
$50

Tiny Man
... available on turbo squid, the world's leading provider of digital 3d models for visualization, films, television, and games.
turbosquid
$39

Tiny House
... available on turbo squid, the world's leading provider of digital 3d models for visualization, films, television, and games.
Gate
archibase_planet
free
Gate
...gate
archibase planet
gate gates garage gate
gate 1 - 3d model (*.gsm+*.3ds) for exterior 3d visualization.
archibase_planet
free
Gate
...gate
archibase planet
gate garage gate gates
gate 2 - 3d model (*.gsm+*.3ds) for exterior 3d visualization.
archibase_planet
free
Gate
...gate
archibase planet
gate garage gate gates
gate garage n050214 - 3d model (*.gsm+*.3ds) for interior 3d visualization.
archibase_planet
free
Gates
...gates
archibase planet
gates gate
gates - 3d model (*.gsm+*.3ds) for interior 3d visualization.
archibase_planet
free

Gate
...gate
archibase planet
gate gates barrier
gate - 3d model (*.gsm+*.3ds) for exterior 3d visualization.
archibase_planet
free
Gate
...gate
archibase planet
gate gates barrier
gate n210114 - 3d model (*.3ds) for exterior 3d visualization.
archibase_planet
free
Gate
...gate
archibase planet
gate gates barrier
gate n180914 - 3d model (*.gsm+*.3ds) for exterior 3d visualization.
archibase_planet
free

Gate
...gate
archibase planet
gate gates fence
gate n050814 - 3d model (*.gsm+*.3ds) for exterior 3d visualization.
archibase_planet
free
Gates
...gates
archibase planet
gate gates fencing
gates n120708 - 3d model (*.gsm+*.3ds) for interior 3d visualization.
archibase_planet
free

Gates
...gates
archibase planet
gate gates fencing
gates n140708 - 3d model (*.gsm+*.3ds) for interior 3d visualization.
V1
turbosquid
$35

v1
... available on turbo squid, the world's leading provider of digital 3d models for visualization, films, television, and games.
3d_export
$10

street tree v1
...street tree v1
3dexport
street tree v1
3d_export
$5
potato v1
...potato v1
3dexport
turbosquid
$20

Kitchen V1
...bosquid
royalty free 3d model kitchen v1 for download as max on turbosquid: 3d models for games, architecture, videos. (1153622)
turbosquid
$12
sofa v1
...turbosquid
royalty free 3d model sofa v1 for download as max on turbosquid: 3d models for games, architecture, videos. (1283267)
turbosquid
$3

Chair V1
...urbosquid
royalty free 3d model chair v1 for download as fbx on turbosquid: 3d models for games, architecture, videos. (1486093)
turbosquid
$15

Cupboard v1
...royalty free 3d model cupboard v1 for download as max and fbx on turbosquid: 3d models for games, architecture, videos. (1444568)
3d_export
$5
tram v1
...tram v1
3dexport
3d_export
$8
lumber car v1
...lumber car v1
3dexport
lumber car v1 printable, low poly model.
turbosquid
$20

DELTALIGHT v1
...free 3d model deltalight v1 for download as max, max, and obj on turbosquid: 3d models for games, architecture, videos. (1630928)
Modular
3ddd
$1
MODULAR
...modular
3ddd
modular , врезной свет
modular потолочные светильники
3ddd
$1
Modular Spock
...modular spock
3ddd
modular
modular spock
3ddd
$1
MODULAR / Spock
...modular / spock
3ddd
modular
modular/spock
design_connected
$7

Modular
...modular
designconnected
emmemobili modular shelves and storage computer generated 3d model. designed by ferruccio laviani.
3ddd
$1
Modular spock
...modular spock
3ddd
modular
spock wall led
turbosquid
$25
Modular sofa Angelo Cappellini Modular
...a angelo cappellini modular for download as max, fbx, and obj on turbosquid: 3d models for games, architecture, videos. (1570923)
turbosquid
$15
Modular sofa Angelo Cappellini Modular
...a angelo cappellini modular for download as max, fbx, and obj on turbosquid: 3d models for games, architecture, videos. (1570304)
3ddd
$1
Modular 2FLAT2C
...modular 2flat2c
3ddd
modular
modularhttp://www.supermodular.com/
3d_export
free
Modular walls
...modular walls
3dexport
modular walls for playing without materials and textures
3ddd
$1
Modular / Lighting Juliette
...modular / lighting juliette
3ddd
modular
modular lighting juliette
System
archibase_planet
free

System
...m
archibase planet
fire alarm system fire alarm box
security light system - 3d model (*.gsm+*.3ds) for interior 3d visualization.
archibase_planet
free

Spider system
...stem spider glass system
spider system to fix glass stefano galli n050912 - 3d model (*.gsm+*.3ds) for interior 3d visualization.
3ddd
$1

Euforia System
...euforia system
3ddd
euforia
euforia system
3d_export
$50

Roof system Truss system 3D Model
...oof system truss system 3d model
3dexport
roof system truss truss stage
roof system truss system 3d model aleksbel 38970 3dexport
3ddd
$1

DVD System
...dvd system
3ddd
dvd , schneider
dvd system
design_connected
free

Seating system
...seating system
designconnected
free 3d model of seating system
3d_export
$5

solar system
...solar system
3dexport
solar system in c4d, with 8k nasa textures
3ddd
$1

Quanta System
...quanta system
3ddd
медицина
quanta system.
лазерное оборудование для медицинских центров
3d_export
$15

solar system
...nd the other the sun, the earth and the moon, the latter has an animation with camera movement included, the files are in spanish
3d_export
$14

missile system
...missile system
3dexport