Thingiverse
Filament dry box v2 with scale by Satellietje
by Thingiverse
Last crawled date: 3 years, 4 months ago
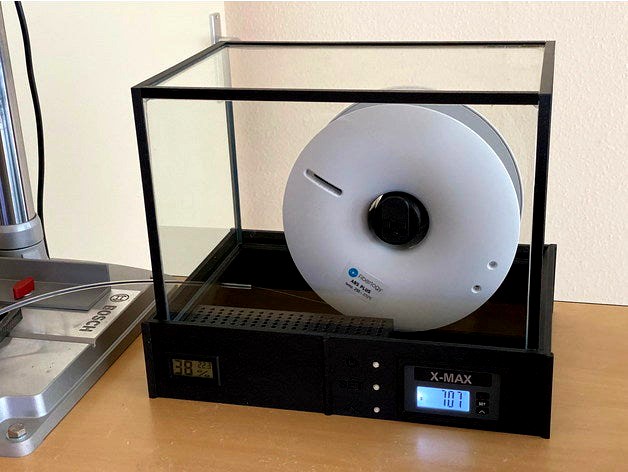
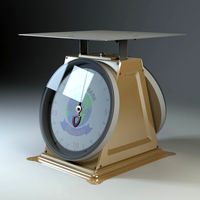
Filament dry box v2 with scale.
On the front panel of the Polaroid scale there are three buttons, these don't work fine if you use them often. That's why I drew a version with buttons near the panel.
How to assemble:
First print all parts.
Assemble the scale. Solder 50 cm thin wires to the scale, do this close to the holder (see picture)
Use the battery parts of the polaroid box, solder 50 cm long thin wires to it.
Pass all wires to the panel but leave space for the parts to glue together.
Glue the two parts of the box together with contact adhesive (then no more air will come through)
Place the draught strip.
Push the filament holder in the holes, pull the wires lightly at the same time, so they don't get stuck.
Place the 4 decorative strips over the seams
Glue the black strips around the glass container.
Assemble the rest
Update:
There are now 2 desiccant trays. If you use the Droogmiddelbak laag.stl, you do not have to remove the tray when you change the Filamentrol
Required:
1 x Polaroid Filament holder & scale PL-0001-00 (There are two colors (white and black) I used the white one)
1 x Glass container outside dimensions H20 x W20 x D30 Max thickness glass 4 mm (For sale in the Netherlands at Hornbach)
1 x Hygro / Thermometer Type M109594
1 x 2 Meter draught strip, 9 mm wide
2 x Bolt M4 x 23
2 x Bolt M5 x 23
2 x Bolt M5 x 16
4 x Bolt M3 x 20
1 x Screw 3 mm x 14 mm
2 x bearing 16 x 5 x 5 mm
3 x Micro switch SKRGAED010 (AliExpress)
4 colors very thin copper wire
2 Cm long 5-10 mm heat shrink tube with glue 1:3
1 Bag 400 Gram Moisture
Contact glue
Show me what you made when it's put together.
Similar models
thingiverse
free

Filament dry box with scale by Satellietje
...ong 5-10 mm heat shrink tube with glue 1:3
1 bag 400 gram moisture
contact glue
show me what you made when it's put together.
thingiverse
free
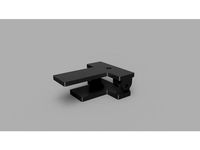
Tiltable Camera Mount by Geldar0124
...crew 10mm
4 x m5 nut
1 x 1/4" to 3/8" reducer bushing screw
1 x 1/4'' male to 1/4'' male threaded screw
grabcad
free

Tiltable Camera Mount
...crew 10mm
4 x m5 nut
1 x 1/4" to 3/8" reducer bushing screw
1 x 1/4'' male to 1/4'' male threaded screw
thingiverse
free

Filament Dry Box - Made from an ammo can box
...s shown.
be sure to add a container of desiccant in your new dry box. i use this to store and print nylon based filaments. enjoy.
thingiverse
free

Novelty Chess and Draughts Set
..., so you may wish to scale down to 65-75%. no supports are needed, but assembly is required for the board and some of the pieces.
thingiverse
free

Teddy Bear Dolls Shoulder Joint by unisys
...filament.
insert full disk into body of teddy bear, assembled grip into hand.
insert grip into full disk until "click".
thingiverse
free

The box! by caltadaniel
...s with cyanoacrylate glue. the pin in the hinge is a piece of copper wire. i have printed all the parts in pla @ 0.4 mm per layer
thingiverse
free

Ender 3 Filament Spool Holder Adapter Sidemount v01 by gartnix
... filament spool holder adapter sidemount v01 by gartnix
thingiverse
m5 10mm bolt x 2
m5 t nut x 2
m5 8mm bolt x 2
m5 hex nut x 2
thingiverse
free

Dry Box PVC or Rod Holder by 3Deth
...m out. it creates an airtight seal, but you could add something between as a gasket of sorts if you don't feel that yours is.
thingiverse
free

Rubbermaid 21 Cup Dry Box Spool Holder by Bradm10000
...
then feed filament through some ptfe tube in side
print
1 x screw
1 x nut
2 x mount
2 x bearing holder
requires
2 x 608 bearings
Satellietje
thingiverse
free

Olaf by Satellietje
...giverse
is intended for printers with one extruder
start with white
after 1 mm change with black
after 1.6 mm change with orange
thingiverse
free

Drill bt holder by Satellietje
...drill bt holder by satellietje
thingiverse
drill bit holder to hang.
thingiverse
free

Xiaomi gateway holder by Satellietje
...xiaomi gateway holder by satellietje
thingiverse
holder voor chinese xiaomi gateway
thingiverse
free

LG Remote control holder by Satellietje
...lg remote control holder by satellietje
thingiverse
lg remote control holder
thingiverse
free
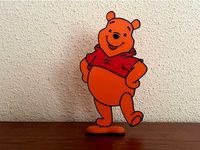
Winnie the Pooh by Satellietje
...ietje
thingiverse
is intended for printers with one extruder
start with orange
after 1.0 mm change red
after 1.4 mm change black
thingiverse
free

Merry Christmas (Dutch text) by Satellietje
...merry christmas (dutch text) by satellietje
thingiverse
fijne kerst tekst op sneeuwlaagje
thingiverse
free

Camera holder for Prusa Mini by Satellietje
...camera holder for prusa mini by satellietje
thingiverse
holder for the prusa mini raspberry pi camera
thingiverse
free
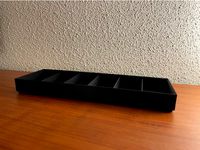
Stackable organizer by Satellietje
... mm
you can stack the bins on top of each other.
perfect for small parts.
stackable withhttps://www.thingiverse.com/thing:4537076
thingiverse
free

Mickey bookmark by Satellietje
...th black
from layer 14 white
from layer 19 black
in the slicer you can specify when filament change (see prusa slic3r screenshot)
thingiverse
free

Oral-B toothbrush holder by Satellietje
...oral-b toothbrush holder by satellietje
thingiverse
oral-b toothbrush holder.
the holder is tapered, just like the original.
Dry
3d_export
$5

hair-dry
...hair-dry
3dexport
hair-dry wahl 5439-024 super dry professional 2000 watts styling hair dryer- black
design_connected
$16
Dry-Dock
...dry-dock
designconnected
restoration hardware dry-dock computer generated 3d model.
archive3d
free

Dry 3D Model
...el
archive3d
drying unit radiator towel dry
towel dry - 3d model for interior 3d visualization.
turbosquid
$9
Dry Sprey
...urbosquid
royalty free 3d model dry sprey for download as ma on turbosquid: 3d models for games, architecture, videos. (1661017)
turbosquid
$1

Dry Persimmon
...quid
royalty free 3d model dry persimmon for download as max on turbosquid: 3d models for games, architecture, videos. (1449030)
turbosquid
$1

Dry Persimmon
...quid
royalty free 3d model dry persimmon for download as max on turbosquid: 3d models for games, architecture, videos. (1448712)
turbosquid
free

drying rack
...osquid
royalty free 3d model drying rack for download as max on turbosquid: 3d models for games, architecture, videos. (1614082)
turbosquid
$7

Dry plant
...
royalty free 3d model dry plant for download as max and fbx on turbosquid: 3d models for games, architecture, videos. (1273449)
turbosquid
$37

pineapple dry
... available on turbo squid, the world's leading provider of digital 3d models for visualization, films, television, and games.
turbosquid
$30

Dry Reed_001
... available on turbo squid, the world's leading provider of digital 3d models for visualization, films, television, and games.
V2
3d_export
free

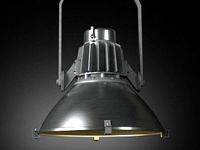
Lamp v2
...lamp v2
3dexport
lamp v2 with solar panel
3d_export
$5

hammerhead v2
...hammerhead v2
3dexport
razer hammerhead v2 headphones, modeled in cinema 4d, render in corona
3d_export
$5

manometer v2
...manometer v2
3dexport
3d_export
$5

potato v2
...potato v2
3dexport
turbosquid
$52

Lifebuoys v2
...squid
royalty free 3d model lifebuoys v2 for download as fbx on turbosquid: 3d models for games, architecture, videos. (1560870)
turbosquid
$2

Mask v2
...turbosquid
royalty free 3d model mask v2 for download as stl on turbosquid: 3d models for games, architecture, videos. (1527741)
turbosquid
free

Flashlight V2
...d
free 3d model flashlight v2 for download as , obj, and fbx on turbosquid: 3d models for games, architecture, videos. (1663559)
turbosquid
$29

Thanos v2
...
royalty free 3d model thanos v2 for download as ztl and obj on turbosquid: 3d models for games, architecture, videos. (1651077)
turbosquid
$29

Titan v2
...d
royalty free 3d model titan v2 for download as ztl and obj on turbosquid: 3d models for games, architecture, videos. (1540228)
turbosquid
$29

Frieza v2
...
royalty free 3d model frieza v2 for download as ztl and obj on turbosquid: 3d models for games, architecture, videos. (1701238)
Filament
3ddd
$1

Filament Cage
...filament cage
3ddd
лофт , filament cage
модель бра, делалась по фото!
turbosquid
$3

FILAMENT COUNTER
...d
royalty free 3d model filament counter for download as stl on turbosquid: 3d models for games, architecture, videos. (1563049)
3d_export
$5

Filament lamp 3D Model
...filament lamp 3d model
3dexport
filament lamp 3d model kevin 54161 3dexport
3d_export
$5

Filament bulb candle 3D Model
...filament bulb candle 3d model
3dexport
filament bulb-candle
filament bulb candle 3d model kevin 54163 3dexport
3d_export
$5

Filament led light bulb
...filament led light bulb
3dexport
realistic 3d model of filament light bulb with v-ray materials.
3d_export
$5

Filament led light bulb
...filament led light bulb
3dexport
realistic 3d model of filament light bulb with v-ray materials.
3d_export
$5

Filament led light bulb
...filament led light bulb
3dexport
realistic 3d model of filament light bulb with v-ray materials.
3d_export
$5

Filament led light bulb
...filament led light bulb
3dexport
realistic 3d model of filament light bulb with v-ray materials.
3d_export
$5

Filament led light bulb
...filament led light bulb
3dexport
realistic 3d model of filament light bulb with v-ray materials.
3ddd
$1

Factory filament metal shade
...factory filament metal shade
3ddd
restoration hardware
restoration hardware. 20th c. factory filament metal shade.
Box
archibase_planet
free

Box
...box
archibase planet
box carton cardboard box
box 2 - 3d model (*.3ds) for interior 3d visualization.
archibase_planet
free

Box
...box
archibase planet
carton cardboard box box
box 1 - 3d model (*.3ds) for interior 3d visualization.
3d_export
$6

box
...box
3dexport
box
3d_export
$5

Box
...box
3dexport
box
3d_export
$5

box
...box
3dexport
box
3d_export
$5

box
...box
3dexport
box
archibase_planet
free

Box
...box
archibase planet
box box for paper notebook pencil
box - 3d model (*.gsm+*.3ds) for interior 3d visualization.
archibase_planet
free

Box
...box
archibase planet
box carton cardboard box
box n170111 - 3d model (*.gsm+*.3ds) for interior 3d visualization.
archibase_planet
free

Box
...box
archibase planet
box carton cardboard box
box n050411 - 3d model (*.gsm+*.3ds) for interior 3d visualization.
archibase_planet
free

Boxes
...boxes
archibase planet
boxes box case bin
boxes n281213 - 3d model (*.gsm+*.3ds+*.max) for interior 3d visualization.
Scale
turbosquid
$20
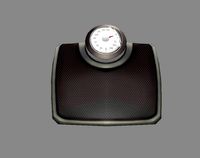
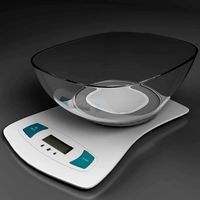
Weight scale or Bathroom Scale
...ght scale or bathroom scale for download as max, fbx, and obj on turbosquid: 3d models for games, architecture, videos. (1664576)
turbosquid
$19

Scale
...e
turbosquid
royalty free 3d model scale for download as fbx on turbosquid: 3d models for games, architecture, videos. (1411722)
turbosquid
$5
Scales
...s
turbosquid
royalty free 3d model scales for download as ma on turbosquid: 3d models for games, architecture, videos. (1393439)
turbosquid
$40

Scale
... available on turbo squid, the world's leading provider of digital 3d models for visualization, films, television, and games.
turbosquid
$17
Scales
... available on turbo squid, the world's leading provider of digital 3d models for visualization, films, television, and games.
turbosquid
$12

Scale
... available on turbo squid, the world's leading provider of digital 3d models for visualization, films, television, and games.
turbosquid
free
Scale
... available on turbo squid, the world's leading provider of digital 3d models for visualization, films, television, and games.
3d_export
$7

of scales
...s have a flat point of support. the samples are rendered in the standard cinema 4d renderer. enjoy your use and creative success.
3d_export
$5
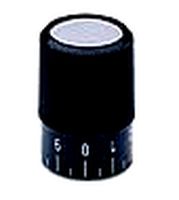
scale knob
...scale knob
3dexport
scale knob
3d_export
$20
cartoon weight scale or bathroom scale
...cartoon weight scale or bathroom scale
3dexport
texture size:512px number of texture:1 texture format: png