Thingiverse
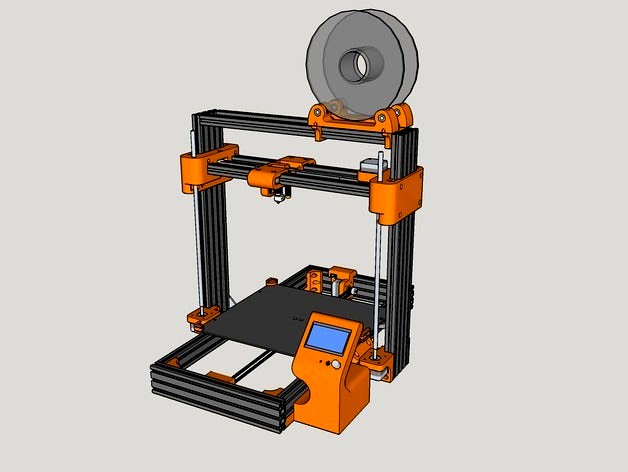
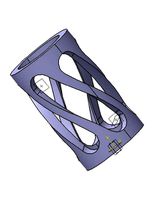
Cobblebot Vanguard Replacement Parts VOS by Tinkering_On_Steroids
by Thingiverse
Last crawled date: 3 years ago
So started to design the very first replacement part und I'm somehow "optimistic", that more will follow.
Update 07.12.2015:
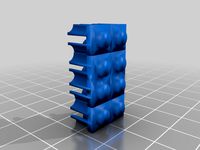
Uploaded the z-sliders to fix a lot of issues with the original design. Files are zslider_left6.stl and zslider_right6.stl. Both need to be printed with support structures. recommended settings are 25% infill and 0.2 mm resolution.
Update 08.12.2015:
Had to update zslider_left6.stl to zslider_left7.stl as there where some issues with the pocket for the x-endstop switch (diameter for screws to small, length to short).
Update 14.12.2015:
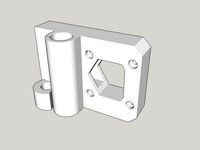
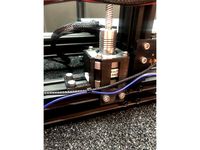
Added xcarrier_main13.stl and xcarrier_helock13.stl. Provides mount for single hotend, fan and proximity sensor (LJ12A3-4-Z/BY).
Update 16.12.2015:
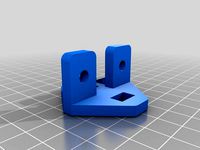
Added corner brackets for the bed-frame. The files are bedframe_bracketA.stl and bedframe_bracketB.stl (mirrored). You need two of each.
Update 17.12.2015:
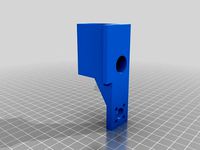
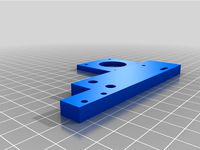
Added mount for z-axis stepper motor. The file is zstepper_mount.stl.
Update 18.12.2015 (a):
Added a part to mount the bed-frame to the x-axis rails at the bottom in a squared angle. The file is bedframe_crossmount.stl. You need two of them.
Update 18.12.2015 (b):
Added a second version of the right z-slider, because 3rd-party brass-nuts are slightly smaller then the original brass nut that comes from cobblebot.
Please note that you need either the one OR the other:
zslider_right6.stl ...is for the original brass-nut that comes from cobblebot
zslider_right_3rdparty.stl ...is for slightly smaller ones, purchased from 3rd party
Update 19.12.2015 (a):
Added a replacement part for mount of y-idler. The file is yidler17.stl.
Update 19.12.2015 (b):
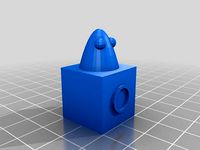
Added a replacement part for joint mounting of the y-stepper motor and the y-endstop.
Note: for easier and cleaner wiring, the both electronic parts where put together and shall be mounted at the back side of the printer (idler to the front).
The file is ymount19.stl
Sidenote:
Some of the STLs have a quite challenging geometrie that requires support structures.
I decided to design them by myself and not to use the slicer function as slicer seems to create far to much unnecessary supports and give a hard time to clean them off.
Those additional STLs are available but nut yet published as it is unclear if there is someone interested in.
Please leave a short commend in case that you want to see them also published.
Update 20.12.2015:
Updated ymount19.stl to ymount20.stl and bedframe_crossmount.stl to bedframe_crossmount20.stl for minor fixes that showed up during installation.
For the ymount, the screw-holes where moved by 1mm for easier installation.
The bedframe-crossmount has been 'slimed down' as the corners collided with cobblebot "5 Point Connecturs" during installation.
Update 21.12.2015:
Added a replacement part to mount the thoothed belt to the bottom of the print bed.
The file is bedbeltclamp21.stl
Update 22.12.2015:
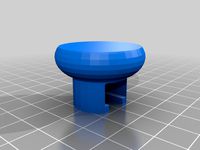
Added an spool holder that goes on top of the upper x-rails.
The file is spoolhldr22.stl
Update 22.12.2015:
Added bars in size 10x2x200 mm. They fit in empty slots of the aluminum extrusions and can be used to hide wiring inside those slots.
The file is slots.stl
Update 04.01.2015:
Made a different design for the spool holder as it turned out that the first version had to much rolling resistance and didn't worked well. The new design uses ball bearings for smooth rolling. The spool width can be adjusted as needed.
The ball bearings are 22 mm OD, 8 mm ID and 7 mm width. There are 4 of those ball bearings required. Further more you need 4 M8 x 30 mm screws and 4 M8 nuts. The files are spoolbb_slide_25.stl and spoolbb_rail_25.stl. Two of each are required.
Update 08.01.2016:
Changed the design to dual z-motor support to eliminate x-gantry sagging. This requires the 3D printed parts zmount_right30.stl and zmount_left30.stl and updated versions of the left and right zsliders, zslider_left30.stl and zslider_right30.stl.
Of course you need also a second set of lead screw, bras nut, stepper motor and motor/screw coupler. From the tests I can confirm that this mage a huge step forward into print quality and is worth the effort!
Update 06.02.2016:
Added a housing for controller and LCD display. Filename is controller30.stl.
Recommanded infill is 10% with support structures enabled.
#
Update 07.12.2015:
Uploaded the z-sliders to fix a lot of issues with the original design. Files are zslider_left6.stl and zslider_right6.stl. Both need to be printed with support structures. recommended settings are 25% infill and 0.2 mm resolution.
Update 08.12.2015:
Had to update zslider_left6.stl to zslider_left7.stl as there where some issues with the pocket for the x-endstop switch (diameter for screws to small, length to short).
Update 14.12.2015:
Added xcarrier_main13.stl and xcarrier_helock13.stl. Provides mount for single hotend, fan and proximity sensor (LJ12A3-4-Z/BY).
Update 16.12.2015:
Added corner brackets for the bed-frame. The files are bedframe_bracketA.stl and bedframe_bracketB.stl (mirrored). You need two of each.
Update 17.12.2015:
Added mount for z-axis stepper motor. The file is zstepper_mount.stl.
Update 18.12.2015 (a):
Added a part to mount the bed-frame to the x-axis rails at the bottom in a squared angle. The file is bedframe_crossmount.stl. You need two of them.
Update 18.12.2015 (b):
Added a second version of the right z-slider, because 3rd-party brass-nuts are slightly smaller then the original brass nut that comes from cobblebot.
Please note that you need either the one OR the other:
zslider_right6.stl ...is for the original brass-nut that comes from cobblebot
zslider_right_3rdparty.stl ...is for slightly smaller ones, purchased from 3rd party
Update 19.12.2015 (a):
Added a replacement part for mount of y-idler. The file is yidler17.stl.
Update 19.12.2015 (b):
Added a replacement part for joint mounting of the y-stepper motor and the y-endstop.
Note: for easier and cleaner wiring, the both electronic parts where put together and shall be mounted at the back side of the printer (idler to the front).
The file is ymount19.stl
Sidenote:
Some of the STLs have a quite challenging geometrie that requires support structures.
I decided to design them by myself and not to use the slicer function as slicer seems to create far to much unnecessary supports and give a hard time to clean them off.
Those additional STLs are available but nut yet published as it is unclear if there is someone interested in.
Please leave a short commend in case that you want to see them also published.
Update 20.12.2015:
Updated ymount19.stl to ymount20.stl and bedframe_crossmount.stl to bedframe_crossmount20.stl for minor fixes that showed up during installation.
For the ymount, the screw-holes where moved by 1mm for easier installation.
The bedframe-crossmount has been 'slimed down' as the corners collided with cobblebot "5 Point Connecturs" during installation.
Update 21.12.2015:
Added a replacement part to mount the thoothed belt to the bottom of the print bed.
The file is bedbeltclamp21.stl
Update 22.12.2015:
Added an spool holder that goes on top of the upper x-rails.
The file is spoolhldr22.stl
Update 22.12.2015:
Added bars in size 10x2x200 mm. They fit in empty slots of the aluminum extrusions and can be used to hide wiring inside those slots.
The file is slots.stl
Update 04.01.2015:
Made a different design for the spool holder as it turned out that the first version had to much rolling resistance and didn't worked well. The new design uses ball bearings for smooth rolling. The spool width can be adjusted as needed.
The ball bearings are 22 mm OD, 8 mm ID and 7 mm width. There are 4 of those ball bearings required. Further more you need 4 M8 x 30 mm screws and 4 M8 nuts. The files are spoolbb_slide_25.stl and spoolbb_rail_25.stl. Two of each are required.
Update 08.01.2016:
Changed the design to dual z-motor support to eliminate x-gantry sagging. This requires the 3D printed parts zmount_right30.stl and zmount_left30.stl and updated versions of the left and right zsliders, zslider_left30.stl and zslider_right30.stl.
Of course you need also a second set of lead screw, bras nut, stepper motor and motor/screw coupler. From the tests I can confirm that this mage a huge step forward into print quality and is worth the effort!
Update 06.02.2016:
Added a housing for controller and LCD display. Filename is controller30.stl.
Recommanded infill is 10% with support structures enabled.
#
Similar models
thingiverse
free
HyperCube Z Nut Mounts various brass nuts by Tech2C
...epper motor
z_nut_mount_b for this integrated lead-screw stepper motor
z_nut_mount_c for this integrated lead-screw stepper motor
thingiverse
free
Monoprice Select Mini dual z motor adapters by mfink70
... and needs.
update: 2/17/18
added a mount that will use 6mm linear bearings for those that have a 6mm rod for their z stabilizer.
thingiverse
free

Tevo Tarantula inverted z-axis stepper motor mount by deenine
... z nut mount because there is not enough space between nut and motor/coupler. included.
printable of abs or pla without supports.
thingiverse
free

Cobblebot Little Monster Spool Holder by Phelps3D
... part with the washer and then nut. you can adjust it to the tension you desire so the spool will easily turn on the clamp parts.
thingiverse
free
RepRap Prusa i3 X and Z Carriage with Delrin Nut Support by aaroncm
...ith the top mounts.
(22/05/16) made stuff a bit better and added z top and z bottom parts.
(24/05/16) fixed holes for delrin nut.
thingiverse
free

Anycubic Mega Zero Stepper Motor Mount for Flexible Z Couplers by djos_1475
...crews:
1st stepper motor:
2x 20mm m4 screws
2x 16mm m3 screws
2nd stepper motor:
2x 12mm m4 screws
2x m4 t-nuts
2x 16mm m3 screws
thingiverse
free
Adjustable Z Stepper mount for 40mm profile by KORSiRO
...y korsiro
thingiverse
hello all !
this is an adjustable z stepper mount for 40 mm profile
to fix it you need m5 nuts + m5 screws
thingiverse
free

Ender 3 Spool Holder (large), fitting as original replacement
... a size of up to 150 mm, which is enough for 2 normal sized filament spools.
no supports needed, except for the printed nut part.
thingiverse
free

Ender 3 / Pro / V2 Dual Z axis motor mount with T-nut by Flapstaart
...mount
2x m3x8 for stepper motor at the far end of the mount
printed using 0.2mm layer height and a 0.6mm nozzle without supports.
thingiverse
free
Voxelab Aquila Dual Extruder Mods - Mounting Plate, Filament Guide, & Spool Holder by Jameswis
...:
-608zz bearing
-1 5mm x 15mm screw (or longer)
-1 5mm nut for screw
-2 3mm x 10mm screws for mounting
-2 3mm nuts for mounting.
Cobblebot
thingiverse
free

Cobblebot rises by NucleoBLAST
...cobblebot rises by nucleoblast
thingiverse
the pieces of the new cobblebot revolution.
thingiverse
free

Cobblebot LCD Box by Linax
... i got from cobblebot didnt fit the lcd so i designed a box for it.
can be monted on the bottom 60mm or on any of the 20mm rails.
thingiverse
free

Cobblebot X-Axis by t3pnarcosis
...ted a smaller version of the cobblebot x block. still has a strong design at about half the size, no need to use shims or spacer.
thingiverse
free

COBBLEBOT Z MOUNT by Andreascha78
...h on z axis on the cobblebot, and relocates the lead screw bushing closer to the frame.
results may vary according to your setup.
thingiverse
free

Cobblebot Roller Bearing Shims or Washers by Mapembert
...d on assembly here:http://suburbnerd.blogspot.com/2015/11/cobblebot-roller-bearing-fix-with-3-d.html
https://youtu.be/_95jtjwnvda
thingiverse
free

cobblebot cable mangement m5 by cyde
... basic, but can be used anywhere a m5 bolt can be used.
scad files provided so people can tinker.
can be printed with no support.
thingiverse
free

Cobblebot Indicator holder by t3pnarcosis
...cobblebot indicator holder by t3pnarcosis
thingiverse
i used this with a harbor freight indicator to help level out my bed.
thingiverse
free

Cobblebot Proximity Sensor Mount by mbarry8859
...mple to mount my blue tip prox sensor to my cobblebot v2. there are others out there, but i wanted one that fit a little better.
thingiverse
free

Cobblebot Endstop by cyde
...bolt needed to the 20x20 frame
and 2 m3 bolt/nuts to attach the endstop board.
its quick and dirty but works (mounted both ways).
thingiverse
free

Arduino Holder for CobbleBot Vanguard by ThorMJ
...posts that go through the arduino are tapered; if you slice at 0.2 or 0.3, the arduino will lock in place when you press it down.
Steroids
thingiverse
free

SHARKZ with steroids by MuuSer
...sharkz with steroids by muuser
thingiverse
picture tells more than thousands of words...
added improved one...
thingiverse
free

Warrior on steroid sword by Helix6187
... grim dark futur.
i made them for the fisty and knighty boy of one of my friend.
please share your print if you ever print them.
thingiverse
free

bench, benchy's steroid addicted cousin
...ed hydroplane cousin.
might need some support for the spoiler, i need to make a few changes to the model so it can print without.
thingiverse
free

cnc1419 "on steroids"
... but with the aluminium mount, i can now machine quite a bit faster, ( up to 500mm/min with an 5mm 4-flute endmill in aluminium).
thingiverse
free

Printrbot on Steroids by LXDickman
...r fixed (no more hole in the gear mesh, thicker at the set screw), be careful on the shells on the large gear(hollow teeth= bad))
thingiverse
free

SATSANA ON STEROIDS - BONDTECH - BMG - DIRECT DRIVE -EXTRUDER by MrSonyx3DPrint
...e details
capricorn tube length on my ender 3 with stock hotend is 92mm
feel free to ask me any questions about it.
happy printig
thingiverse
free

Cobblebot Vanguard Remix on Steroids
...t app--the free web version is quite limited in the tools that are available, and the precision isn't as tight as other apps.
thingiverse
free

PrintrPlate - Printrbot Full Build Tray (On Steroids) by sponnet
...way from the corners of your build platform , to avoid bumping into clipses at the corners of your glass plate if you have one...
thingiverse
free

Thunderbolt Starfury variant by Mike1701
...thunderbolt starfury variant by mike1701 thingiverse a starfury on steroids it can even go planetside! (grabbed from 3d warehouse...
thingiverse
free

Mount for Eachine Pro58 module for Eachine VR D2 goggles
...thingiverse you can read more about the upgrade on: http://lll.mk/fpv/eachine-pro58-boxed-goggles-on-steroids ...
Vanguard
3ddd
$1

Vanguard Furniture
... furniture , vanguard furniture
vanguard furniture
3ddd
$1
оттоманка Vanguard
...оттоманка vanguard
3ddd
оттоманка
w158c-ot lorenzo ottoman
turbosquid
$33

Vanguard III Satellite
... available on turbo squid, the world's leading provider of digital 3d models for visualization, films, television, and games.
turbosquid
$32
Vanguard II Satellite
... available on turbo squid, the world's leading provider of digital 3d models for visualization, films, television, and games.
3d_export
$42

Vanguard III Satellite 3D Model
... navy satellite optical sensors weather relay transmitter space orbit
vanguard iii satellite 3d model visualmotion 85062 3dexport
3d_export
$41

Vanguard I Satellite 3D Model
...rocket navy satellite solar panel weather relay transmitter space orbit
vanguard i satellite 3d model visualmotion 85060 3dexport
3d_export
$41

Vanguard II Satellite 3D Model
...lite solar panel optical sensors weather relay transmitter space orbit
vanguard ii satellite 3d model visualmotion 85061 3dexport
turbosquid
$4

Vanguard Coltrane Side Table
...ree 3d model vanguard coltrane side table for download as max on turbosquid: 3d models for games, architecture, videos. (1296487)
turbosquid
$62

Stellar Vanguard Space Fighter
...vanguard space fighter for download as 3ds, obj, c4d, and vue on turbosquid: 3d models for games, architecture, videos. (1297893)
turbosquid
$15

Vanguard Marcelus Four Drawer Chest
...model vanguard marcelus four drawer chest for download as max on turbosquid: 3d models for games, architecture, videos. (1576728)
Tinkering
thingiverse
free
TINKER CAP
...tinker cap
thingiverse
cap
thingiverse
free
Tinker obj elise
...tinker obj elise
thingiverse
tinker obj em lyon
thingiverse
free

Tinker Bot by DreadForgeMiniatures
...tinker bot by dreadforgeminiatures
thingiverse
tinker bot from dfm november 2019 pack.
thingiverse
free
Tinker Cad frame by nurcool99
...tinker cad frame by nurcool99
thingiverse
this is like a 3d picture of tinker cad
thingiverse
free

Tinker Sign by Mocha22
...tinker sign by mocha22
thingiverse
xxx
thingiverse
free
Tinker Thing by arrexender
...tinker thing by arrexender
thingiverse
this is a test model.
thingiverse
free

tinker toys by kpcampbell07
...tinker toys by kpcampbell07
thingiverse
made by ry
thingiverse
free

A tinker Toy by kpcampbell07
...a tinker toy by kpcampbell07
thingiverse
made by ry
thingiverse
free
Beet-Tinker by alithecat
...beet-tinker by alithecat
thingiverse
tinkercad sample - beetroot
thingiverse
free
Tinker CRAB by earnason
...tinker crab by earnason
thingiverse
crab designed in tinkercad
Vos
turbosquid
$10

Quinlan Vos's Lightsaber
... available on turbo squid, the world's leading provider of digital 3d models for visualization, films, television, and games.
turbosquid
$25

roderick-vos-ara-armchair
... available on turbo squid, the world's leading provider of digital 3d models for visualization, films, television, and games.
3ddd
$1

the Sozu faucet by Roderick Vos
...карты bercon noise которую можно свободно скачать вот здесьhttp://www.ylilammi.com/2014/05/berconmaps-for-3dsmax-2015/
turbosquid
$25

VO-XMvKas 5x2,5+as2,5 mm2.max
... available on turbo squid, the world's leading provider of digital 3d models for visualization, films, television, and games.
turbosquid
$25

VO-XMvKas 5x1,5+as1,5 mm2.max
... available on turbo squid, the world's leading provider of digital 3d models for visualization, films, television, and games.
turbosquid
$25

VO-XMvKas 4x2,5+as2,5 mm2.max
... available on turbo squid, the world's leading provider of digital 3d models for visualization, films, television, and games.
turbosquid
$25

VO-XMvKas 4x1,5+as1,5 mm2.max
... available on turbo squid, the world's leading provider of digital 3d models for visualization, films, television, and games.
turbosquid
$25

VO-XMvKas 2x1,5+as1,5 mm2.max
... available on turbo squid, the world's leading provider of digital 3d models for visualization, films, television, and games.
turbosquid
$25

VO-YLKmb 0,6 1kV 2x6mm2 Lead cable
... available on turbo squid, the world's leading provider of digital 3d models for visualization, films, television, and games.
turbosquid
$25
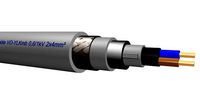
VO-YLKmb 0,6 1kV 2x4mm2 Lead cable.max
... available on turbo squid, the world's leading provider of digital 3d models for visualization, films, television, and games.
Replacement
3d_export
$12

replaceable bristle
...replaceable bristle
3dexport
this is 3d printable replaceable bristle toothbrush.
3d_export
$34
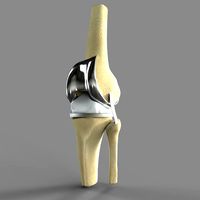
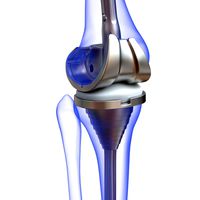
Knee Replacement
...h meets the lower leg. ... during a total knee replacement, the end of the femur bone is removed and replaced with a metal shell.
3d_export
$44
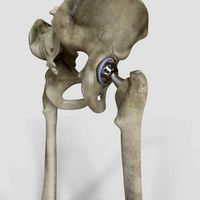
Hip Replacement
...omponents. the damaged femoral head is removed and replaced with a metal stem that is placed into the hollow center of the femur.
turbosquid
$59

Hip replacement
...el hip replacement for download as ma, c4d, lwo, lxo, and obj on turbosquid: 3d models for games, architecture, videos. (1520195)
turbosquid
$10

Module replacment station
...alty free 3d model module replacment station for download as on turbosquid: 3d models for games, architecture, videos. (1271271)
3d_export
$8
tool replacement gearbox
...tool replacement gearbox
3dexport
eccentric lifting mechanism, you can process according to available drawings.
turbosquid
$7

Globe Oil Atomizer Replacement Housing
... oil atomizer replacement housing for download as ige and stl on turbosquid: 3d models for games, architecture, videos. (1253839)
turbosquid
free

SLICE Ceramic Scapel (Replaceable Blade)
... (replaceable blade) for download as obj, fbx, blend, and dae on turbosquid: 3d models for games, architecture, videos. (1363525)
3d_export
$19
Knee Replacement Implant
...ntimeter<br>__________________________<br>poly count :<br>polygon count - 217440<br>vertex count - 108776
turbosquid
$19

(Project) Bad odor filtering sytem with support rail and pulley that assure a comfortable gel filter element replacement.
... available on turbo squid, the world's leading provider of digital 3d models for visualization, films, television, and games.
Parts
3d_export
$5

Parts
...parts
3dexport
parts
3d_export
$5
Part
...part
3dexport
part
3d_export
$5

Part
...part
3dexport
machine part
3d_export
$65

Part
...part
3dexport
simple rendering of the scene file
3d_export
$65

Part
...part
3dexport
simple rendering of the scene file
3d_export
$30

fan part
...fan part
3dexport
this is a part of fan of pedastal
3d_export
$10
machine parts
...machine parts
3dexport
3d part modeling work ,contact for 3d work
turbosquid
$59

Mechanical Part
...id
royalty free 3d model mechanical part for download as c4d on turbosquid: 3d models for games, architecture, videos. (1410833)
turbosquid
$17
Road parts
...bosquid
royalty free 3d model road parts for download as 3ds on turbosquid: 3d models for games, architecture, videos. (1192967)
turbosquid
$9

Cutter Parts
...squid
royalty free 3d model cutter parts for download as stl on turbosquid: 3d models for games, architecture, videos. (1220010)