Thingiverse
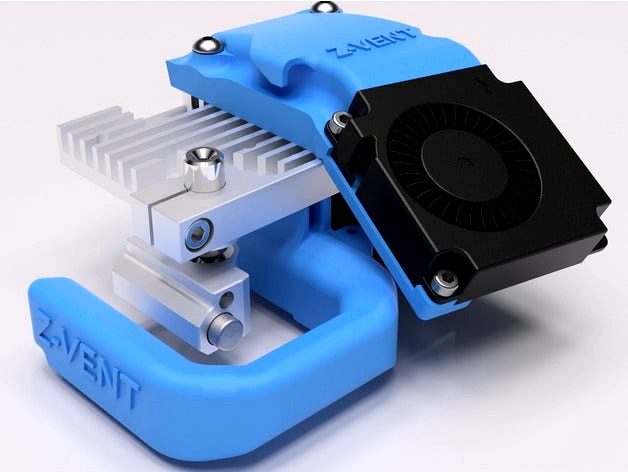
Z-VENT - Comprehensive ventilation upgrade for Zortrax M200 by liftbag
by Thingiverse
Last crawled date: 3 years ago
This is the final upgrade of my ventilation system for the Zortrax M200.
It represents the development of previous projects published at the following links:
Zortrax M200 dual airflow radial fan duct.
Zortrax M200 radial fan shroud for extruder heatsink.
If you need a better ventilation system for your zcory plus hotend, take a look at [EDIT 07/03/2018] at the bottom of this summary.
Warning
As many have experienced, the Zortrax M200 has a bad management of the hotend temperature and is not able to provide for transients that cause a sudden temperature drop, such as the sudden switch to 100% of the fan. This upgrade substantially worsens this negative feature of the M200. It is therefore highly recommended to insulate the heating block with high temperature silicone compound, cotton coats or Teflon tape for high temperatures.
Introduction
As many people know, the M200/300 hotend throat cooling system is the bottleneck that often prevents you from printing materials like PLA or TPU. And again, the extrusion area ventilation is too low to get good results with PLA and related. It is also strongly asymmetric.
As far as throat cooling is concerned, it must be said that the best results are obtained by using a more effective heatsink, or a better thermal barrier, or both. Anyway, increasing the ventilation of the heatsink is a good help, at least, a starting point.
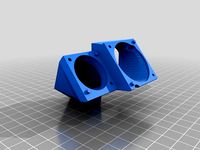
Regarding the cooling of the extrusion area, there are already many projects that duplicate the ventilation, both with two and with a single axial fan. But the axial fans exert a very low pressure which nullifies the possibility of making a substantial air volume.
The most practicable solution therefore results in the adoption of centrifugal fans, which exert 5 to 7 times the pressure of an equivalent axial fan.
Goal
The goal of improving the final appearance of objects printed with pla had already been achieved with my previous projects. The goal of this project is to improve the shape of the shrouds to eliminate any interference with the chassis in the prints at maximum extension.
Pros and cons
Pros
Bottom shroud is far from touching any point on the printer. If you slightly lower the positioning of the front cover right magnet, the upper shroud is also free to move completely in the printing area.
The lower shroud is lighter and the two opposed air flows are almost perfectly symmetrical.
It is well raised in the rear area, to avoid contact with the bed connector.
Cons
The lower shroud blows slightly heated air from under the heatsink, compared to the previous version.
It is mandatory to use some support for the bottom shroud, while the first versions could be printed without supports.
Printing tips
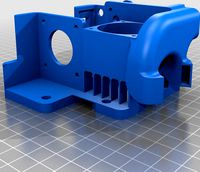
Upper shroud
The upper shroud can be printed without supports without changing the default orientation on bed, although some (easy to remove) support helps.
If you don't use supports, pay attention to the distance from the raft or from the bed. You must have a good adhesion to prevent the piece from collapsing during printing.
Almost any rigid material can be used, with the exclusion of PLA, which does not guarantee the necessary structural rigidity at the usual operating temperatures. In any case, materials that allow easy bridging are definitely preferable if you do not use supports. Use at least two perimeters if you can. I use Simplify3D with my Zortrax, converting the gcode to zcode with Ztool. I set four perimeters in order to have a good full thickness on the walls of the holes.
Lower shroud
You have to support all the rear raised area. Don't put any support inside the U shaped air duct. Supports in the inlet opening are easily removable and thus recommended.
A heat-resistant material is highly recommended. Imho the best material for this application is the PBT. If you print pla only and don't exceed 250 degrees at the extruder, maybe z-abs or z-ultrat are good alternatives. Same considerations made for the upper shroud about the number of perimeters to be set.
Requirements
Upper Z-VENT
1x
radial fan 40x40x10.
3x M3x12mm button head or socket head cap screws.
3x M2.5x6mm screws (no flat head type) or 3x 2.2x6mm self tapping screws (no flat head).
Lower Z-VENT
1x
radial fan 40x40x10.
2x M3x20mm socket head cap screws.
3x M2.5x6mm screws (no flat head type) or 2.2x6mm self tapping screws (no flat head).
General
Soldering iron, tin solder and wire stripper (to adjust the lenght of the fans wire).
M2.5 tap cutting tool if you choose the M2.5 screws to lock the fan.
You cannot use the powerful Delta 4010 radial fans as they are irremediably damaged if they are powered directly by the pre-set connectors in the printing head.
Don't use this Delta 4010 radial fan.
Mountings
Fans adaptation (See the images below)
You have to shorten the long cable supplied with the fans. Cut the wire at 260mm from the head of the connector.
Peel no more than one mm of sheath from the copper wire and tin the bare wires.
Remove the round sticker under the fan so as to expose the wire welds.
Desolder the original wire.
Tin the wire previously cut to the right size, respecting the polarities.
Reapply the sticker.
Shrouds adaptation
Use a lighter to eliminate any visible oozes and webs from the inlet openings of the conveyors.
Tap M2.5 the small holes if you want to use the metric M2.5 screws to lock the fans.
Install the fans on the shrouds
Lock the radial fan in the housing provided on the upper shroud with the three screws and insert the wire into the guide.
Lock the radial fan in the housing provided on the lower shroud using three screws and insert the wire into the left guide.
Install the new shrouds
Remove the printing head cap and disconnect the red and blue fans connectors.
Remove the upper axial fan completely (four screws).
Remove the lower axial fan and his stock shroud (three screws).
Install the upper shroud using the two M3x12mm screws, inserting the cable through the channel on the corner of the extrusion head and connecting it to the red connector.
Install the lower shroud with the two M3x20mm screws.
insert the cable through the channel on the corner of the extrusion head and connect it to the blue connector.
close the head cap and perform a fan test from firmware choices.
[EDIT 3/5/2018]
Z-VENT_V11.1.stl added. New lighter version. The fan is screwed from bottom to top with three screws.
[EDIT 3/6/2018]
Sorry, but due to an oversight, the cable guide of the upper Z-VENT collides with the right hand bars-lock block. The Z-VENT_upper_V7.2_aliex.stl has a different cable guide. In addition, it mounts on the heatsink with no. 3 M3x12 screws instead of two.
It replaces the previous version.
[EDIT 3/12/2018]
Z-VENT_V10.stl removed.
[EDIT 4/3/2018]
V11_Z-Temp_spacer.stl added. To be used with Z-temp hotend. You need no.2 M3x25mm screws to lock the z-vent and this spacer to the heatsink.
[EDIT 04/10/2018]
Z-VENT_V12.3.1.stl and V12.3.1_Z-Temp_spacer.stl added.
Please note, this version is incompatible with the original heating block.
I designed it for the reduced volume heating block that I currently use. There is some possibility that it can be used with the zcory hotend (V1, V2 and plus), but I have not personally verified it.
This conveyor exerts a well-centered and greater ventilation compared to the V11.1 as you can see here: https://www.youtube.com/watch?v=yq5bJbjFceI
In addition, it could hit the rear bed connector in very large prints.
[EDIT 06/09/2018]
Z-VENT_V12.3.2.stl added. This is a slightly modified version where the two rear ventilation openings have been spaced 2 mm from the heating block.
In addition, I have included the design of a heating block (Z-HOT_MS) suitable for the original V2 hotend or the Micro Swiss upgrade. The heating block is not tested, but it should be ok.
[EDIT 07/03/2018]
Z-VENT3010_ZC+.stl and Z-STORM_ZC+.stl added.
Please note: Z-STORM, witch is a dual 3010 ventilation system, is not compatible at all with the Zortrax M200, since it's not able to handle the temperature drop caused by the powerful ventilation. Only those few in the world who have replaced the motherboard with a higher performance one can use it.
These three outlets shrouds are compatible with the Zcory+ hotend. You cannot use it with the original heating block, unless you remove 3mm from the front and 2mm from the back, helping with a milling machine, or with an iron saw and file.
I switched to 3010 radial fans for this latest version. They are smaller and better performing than 4010. You can grab them here:
radial fan 30x30x10@12V. You need to prolong the power cord to be able to wire it.
It represents the development of previous projects published at the following links:
Zortrax M200 dual airflow radial fan duct.
Zortrax M200 radial fan shroud for extruder heatsink.
If you need a better ventilation system for your zcory plus hotend, take a look at [EDIT 07/03/2018] at the bottom of this summary.
Warning
As many have experienced, the Zortrax M200 has a bad management of the hotend temperature and is not able to provide for transients that cause a sudden temperature drop, such as the sudden switch to 100% of the fan. This upgrade substantially worsens this negative feature of the M200. It is therefore highly recommended to insulate the heating block with high temperature silicone compound, cotton coats or Teflon tape for high temperatures.
Introduction
As many people know, the M200/300 hotend throat cooling system is the bottleneck that often prevents you from printing materials like PLA or TPU. And again, the extrusion area ventilation is too low to get good results with PLA and related. It is also strongly asymmetric.
As far as throat cooling is concerned, it must be said that the best results are obtained by using a more effective heatsink, or a better thermal barrier, or both. Anyway, increasing the ventilation of the heatsink is a good help, at least, a starting point.
Regarding the cooling of the extrusion area, there are already many projects that duplicate the ventilation, both with two and with a single axial fan. But the axial fans exert a very low pressure which nullifies the possibility of making a substantial air volume.
The most practicable solution therefore results in the adoption of centrifugal fans, which exert 5 to 7 times the pressure of an equivalent axial fan.
Goal
The goal of improving the final appearance of objects printed with pla had already been achieved with my previous projects. The goal of this project is to improve the shape of the shrouds to eliminate any interference with the chassis in the prints at maximum extension.
Pros and cons
Pros
Bottom shroud is far from touching any point on the printer. If you slightly lower the positioning of the front cover right magnet, the upper shroud is also free to move completely in the printing area.
The lower shroud is lighter and the two opposed air flows are almost perfectly symmetrical.
It is well raised in the rear area, to avoid contact with the bed connector.
Cons
The lower shroud blows slightly heated air from under the heatsink, compared to the previous version.
It is mandatory to use some support for the bottom shroud, while the first versions could be printed without supports.
Printing tips
Upper shroud
The upper shroud can be printed without supports without changing the default orientation on bed, although some (easy to remove) support helps.
If you don't use supports, pay attention to the distance from the raft or from the bed. You must have a good adhesion to prevent the piece from collapsing during printing.
Almost any rigid material can be used, with the exclusion of PLA, which does not guarantee the necessary structural rigidity at the usual operating temperatures. In any case, materials that allow easy bridging are definitely preferable if you do not use supports. Use at least two perimeters if you can. I use Simplify3D with my Zortrax, converting the gcode to zcode with Ztool. I set four perimeters in order to have a good full thickness on the walls of the holes.
Lower shroud
You have to support all the rear raised area. Don't put any support inside the U shaped air duct. Supports in the inlet opening are easily removable and thus recommended.
A heat-resistant material is highly recommended. Imho the best material for this application is the PBT. If you print pla only and don't exceed 250 degrees at the extruder, maybe z-abs or z-ultrat are good alternatives. Same considerations made for the upper shroud about the number of perimeters to be set.
Requirements
Upper Z-VENT
1x
radial fan 40x40x10.
3x M3x12mm button head or socket head cap screws.
3x M2.5x6mm screws (no flat head type) or 3x 2.2x6mm self tapping screws (no flat head).
Lower Z-VENT
1x
radial fan 40x40x10.
2x M3x20mm socket head cap screws.
3x M2.5x6mm screws (no flat head type) or 2.2x6mm self tapping screws (no flat head).
General
Soldering iron, tin solder and wire stripper (to adjust the lenght of the fans wire).
M2.5 tap cutting tool if you choose the M2.5 screws to lock the fan.
You cannot use the powerful Delta 4010 radial fans as they are irremediably damaged if they are powered directly by the pre-set connectors in the printing head.
Don't use this Delta 4010 radial fan.
Mountings
Fans adaptation (See the images below)
You have to shorten the long cable supplied with the fans. Cut the wire at 260mm from the head of the connector.
Peel no more than one mm of sheath from the copper wire and tin the bare wires.
Remove the round sticker under the fan so as to expose the wire welds.
Desolder the original wire.
Tin the wire previously cut to the right size, respecting the polarities.
Reapply the sticker.
Shrouds adaptation
Use a lighter to eliminate any visible oozes and webs from the inlet openings of the conveyors.
Tap M2.5 the small holes if you want to use the metric M2.5 screws to lock the fans.
Install the fans on the shrouds
Lock the radial fan in the housing provided on the upper shroud with the three screws and insert the wire into the guide.
Lock the radial fan in the housing provided on the lower shroud using three screws and insert the wire into the left guide.
Install the new shrouds
Remove the printing head cap and disconnect the red and blue fans connectors.
Remove the upper axial fan completely (four screws).
Remove the lower axial fan and his stock shroud (three screws).
Install the upper shroud using the two M3x12mm screws, inserting the cable through the channel on the corner of the extrusion head and connecting it to the red connector.
Install the lower shroud with the two M3x20mm screws.
insert the cable through the channel on the corner of the extrusion head and connect it to the blue connector.
close the head cap and perform a fan test from firmware choices.
[EDIT 3/5/2018]
Z-VENT_V11.1.stl added. New lighter version. The fan is screwed from bottom to top with three screws.
[EDIT 3/6/2018]
Sorry, but due to an oversight, the cable guide of the upper Z-VENT collides with the right hand bars-lock block. The Z-VENT_upper_V7.2_aliex.stl has a different cable guide. In addition, it mounts on the heatsink with no. 3 M3x12 screws instead of two.
It replaces the previous version.
[EDIT 3/12/2018]
Z-VENT_V10.stl removed.
[EDIT 4/3/2018]
V11_Z-Temp_spacer.stl added. To be used with Z-temp hotend. You need no.2 M3x25mm screws to lock the z-vent and this spacer to the heatsink.
[EDIT 04/10/2018]
Z-VENT_V12.3.1.stl and V12.3.1_Z-Temp_spacer.stl added.
Please note, this version is incompatible with the original heating block.
I designed it for the reduced volume heating block that I currently use. There is some possibility that it can be used with the zcory hotend (V1, V2 and plus), but I have not personally verified it.
This conveyor exerts a well-centered and greater ventilation compared to the V11.1 as you can see here: https://www.youtube.com/watch?v=yq5bJbjFceI
In addition, it could hit the rear bed connector in very large prints.
[EDIT 06/09/2018]
Z-VENT_V12.3.2.stl added. This is a slightly modified version where the two rear ventilation openings have been spaced 2 mm from the heating block.
In addition, I have included the design of a heating block (Z-HOT_MS) suitable for the original V2 hotend or the Micro Swiss upgrade. The heating block is not tested, but it should be ok.
[EDIT 07/03/2018]
Z-VENT3010_ZC+.stl and Z-STORM_ZC+.stl added.
Please note: Z-STORM, witch is a dual 3010 ventilation system, is not compatible at all with the Zortrax M200, since it's not able to handle the temperature drop caused by the powerful ventilation. Only those few in the world who have replaced the motherboard with a higher performance one can use it.
These three outlets shrouds are compatible with the Zcory+ hotend. You cannot use it with the original heating block, unless you remove 3mm from the front and 2mm from the back, helping with a milling machine, or with an iron saw and file.
I switched to 3010 radial fans for this latest version. They are smaller and better performing than 4010. You can grab them here:
radial fan 30x30x10@12V. You need to prolong the power cord to be able to wire it.
Similar models
thingiverse
free

Zortrax M200 Noctua Lower Fan Distance by SelTec
... fan.
it should give you the same total height as the original distance piece, fan and fan shroud.
on my printer this is ~23.1mm.
thingiverse
free
Anycubic Chiron direct drive modification (almost all factory parts: extruder, v5 hotend, 4010 fan, 5015 radial fan)) by ggrzyk
...ble heat block in heatsink
mount pcb board
mount 4010 fan
connect all wires to pcb board
mount 5015 radial fan with two m4 screws
thingiverse
free

V6 Extruder Heatsink Fan Duct for 5015 Centrifugal Fan by jammi
...o the shroud and the shroud itself snaps onto the heatsink.
print as-is, or with supports. bridging worked fine for me, but ymmv.
thingiverse
free

Kingroon KP3 Hotend Fan Shroud by AttilaSVK
...ake off the washers!
print from abs or asa for maximum temperature resistance, although the top will be cooled by the hotend fan.
thingiverse
free

Hefesto BMG direct V6 volcano creality by Blackvim
...er cooling and lower noise
easy access to the nozzle
easy change of heater block (you only have to remove the fan duct, 3 screws)
thingiverse
free
E3Dv6 Shroud mounted fan ducts - 40mm heatsink and 30mm print fans by bugr
...usted up or down on the heat sink but add some aluminium foil tape to area above heat block if needs to be lower for your setup.
thingiverse
free

Kossel Pro - improved cooling - 40x40 axial fan by j3stef
...work for any printer with the specified hotend or similar ones. this version works with 40x40 mm axial fans...
cults
free

Z Screw & Z Nut
...z screw & z nut
cults
printed on zortrax m200 3d printer.
thingiverse
free

divorced fan shroud for Hictop by styk
...30mm bolt with a 1 mm thick washer. the space between the shroud and extruder mounting block has clearance for that possibility.
thingiverse
free

Hexagon Fan Shroud by gyronictonic
...by gyronictonic thingiverse fan shroud for the hexagon hotend, similar to the e3d hotend. uses a 25 x 25...
Liftbag
thingiverse
free

Zortrax M200 knob by liftbag
...zortrax m200 knob by liftbag
thingiverse
a larger knob.
thingiverse
free

Zortrax M200 ducted fan by liftbag
...ucted fan by liftbag
thingiverse
redesigned from my previous taller design in order to be used with the stock hotend (v1 or v2).
thingiverse
free

Atas Defiance 265 tiny landing skids by liftbag
...atas defiance 265 tiny landing skids by liftbag
thingiverse
small size and low weight landing skids.
thingiverse
free

Atas Defiance 265 top protective shield. by liftbag
...nce 265 top protective shield. by liftbag
thingiverse
a lightweight shield to protect your receiver or other electronic devices.
thingiverse
free

RunCam HD 20° mount for RD290 mini hex by liftbag
...runcam hd 20° mount for rd290 mini hex by liftbag
thingiverse
easy fit on pre-existing holes.
thingiverse
free

Mini CC3D 30.5mm adapter by liftbag
...mount the mini cc3d on standard 30.5 holes pattern.
for those who do not like to use the double-sided tape directly on the frame.
thingiverse
free

Zortrax M200 V4 ribbon cable body holder by liftbag
...zortrax m200 v4 ribbon cable body holder by liftbag
thingiverse
a support that not bend the ribbon cable as the stock bands.
thingiverse
free

Zortrax M200 V4 clip filament to ribbon cable by liftbag
...zortrax m200 v4 clip filament to ribbon cable by liftbag
thingiverse
just another filament guide clip to ribbon cable.
thingiverse
free

Atas Defiance 265 - 5mm camera raiser by liftbag
...i-holder to raise the flight controller deck of 5mm.
this gives more battery choice.
35mm spacers are required to use this thing.
thingiverse
free

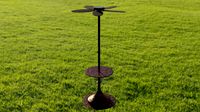
Water bottle stand by liftbag
...s of 80 mm diameter.
it must be printed in tpu or rubbery filaments.
maybe good results can be obtained with taulman3d pctpe too.
Zortrax
thingiverse
free

Zortrax M200
...zortrax m200
thingiverse
pipe holder for zortrax m200 and m300
thingiverse
free

Zortrax button by SaintBrieucFactory
...zortrax button by saintbrieucfactory
thingiverse
zortrax button
thingiverse
free

Zortrax M200 Clip
...zortrax m200 clip
thingiverse
zortrax m200 clip
thingiverse
free

porte-clef ZORTRAX by steftroisd
...porte-clef zortrax by steftroisd
thingiverse
porte-clef zortrax
thingiverse
free

Zortrax door-knob by snakehessman
...zortrax door-knob by snakehessman
thingiverse
zortrax door-knob
thingiverse
free

Zortrax Tool Holder by Terranova
...zortrax tool holder by terranova
thingiverse
this is a holder for the tools of the zortrax m200.
have fun!
thingiverse
free

Hinge for Zortrax M200 by snakehessman
...hinge for zortrax m200 by snakehessman
thingiverse
hinge for zortrax m200 with laser-cut doors!
thingiverse
free

Zortrax M300 Hinge by honeybeeprints
...acement hinge for the zortrax m300 printer.
at the time of creation, zortrax does not sell replacement hinges for their printers.
thingiverse
free

filament holder for zortrax by albo86
...filament holder for zortrax by albo86
thingiverse
a simple filament holder for zortrax spool
--working in progress--
thingiverse
free

Zortrax Carabiner with separator by palawanisland
...ortrax carabiner with separator by palawanisland
thingiverse
zortrax carabiner with separator, so that key wont fall out easily.
M200
turbosquid
$2

M200
... available on turbo squid, the world's leading provider of digital 3d models for visualization, films, television, and games.
turbosquid
$19

Cheytac M200
...squid
royalty free 3d model cheytac m200 for download as fbx on turbosquid: 3d models for games, architecture, videos. (1537657)
turbosquid
$4

CheyTac M200
...oyalty free 3d model cheytac m200 for download as c4d and fbx on turbosquid: 3d models for games, architecture, videos. (1259577)
turbosquid
$49

Microlab M200
... available on turbo squid, the world's leading provider of digital 3d models for visualization, films, television, and games.
turbosquid
$20

M200 Intervention
... available on turbo squid, the world's leading provider of digital 3d models for visualization, films, television, and games.
3d_export
$5

cheytac m200
...cheytac m200
3dexport
low poly sniper rifle (11k poly)
turbosquid
$5

cheytac m200 intervension
... available on turbo squid, the world's leading provider of digital 3d models for visualization, films, television, and games.
3d_ocean
$25

CheyTac M200 Intervention Sniper Rifle
...n different format (obj, fbx, max and 3ds ) along with its textures and uv layouts. it is low poly and is available along with...
3d_export
$10

CheyTac
...cheytac 3dexport fbx cheytac m200 ...
3d_export
$19

cheytac m200 intervention sniper rifle
...500 yd (2,286 m), one of the longest ranges of all modern-day sniper rifles. it is based on the edm arms windrunner. (<br>)
Comprehensive
3d_ocean
$190
321 Comprehensive Building Materials Pack for C4D
...on description: this is all-in-one library of my building material series which contains 10 libraries. this comprehensive libr...
3d_export
$5

Carved ornamental 016
...for furniture facades or on the mirror frame... more comprehensive model allows you to use it in their projects,...
3d_export
$5

Carved ornamental 015
...for furniture facades or on the mirror frame... more comprehensive model allows you to use it in their projects,...
3d_export
$5

Carved ornamental 014
...for furniture facades or on the mirror frame... more comprehensive model allows you to use it in their projects,...
3d_ocean
$89

Chevrolet Tahoe 2010
...industry’s best-selling full-size suv . the new tahoe is comprehensivey redesigned and delivers a sharper, more precise driving feel,...
3d_export
$12
Carved ornamental 002
...used as a decorative element for furniture facades. more comprehensive model allows you to use it in their projects,...
3d_export
$6

Carved ornamental 003
...used as a decorative element for furniture facades. more comprehensive model allows you to use it in their projects,...
3d_export
free

Carved ornamental 001
...used as a decorative element for furniture facades. more comprehensive model allows you to use it in their projects,...
3d_ocean
$9

TRON Disks
...proud to introduce a low- poly rendition of the comprehensive identity disks of all the characters. set includes tron’s,...
3d_export
$5

Carved ornamental 005
...used as a decorative element for furniture facades. more comprehensive model allows you to use it in their projects,...
Ventilation
3d_export
$5

ventilation
...ventilation
3dexport
5 types of ventilation
3d_export
$10

ventilation
...ventilation
3dexport
5 types of ventilation and engineer communication
3d_ocean
$5

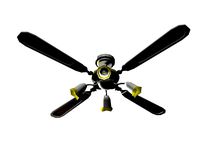
Ventilator
...pliance blower desk detailed electric electro fan hvac oscillating realistic table ventilator
high poly, very detailed ventilator
3d_export
$25

ventilator
...ventilator
3dexport
turbosquid
$20
Ventilator
... free 3d model ventilator for download as blend, fbx, and obj on turbosquid: 3d models for games, architecture, videos. (1612370)
turbosquid
$43

Ventilator
... available on turbo squid, the world's leading provider of digital 3d models for visualization, films, television, and games.
turbosquid
$25
ventilation
... available on turbo squid, the world's leading provider of digital 3d models for visualization, films, television, and games.
turbosquid
$4
Ventilator
... available on turbo squid, the world's leading provider of digital 3d models for visualization, films, television, and games.
3d_export
$5
ventilation and columns
...ventilation and columns
3dexport
ventilation and columns.<br>3 types of ventilation<br>2 types of columns
archive3d
free
Ventilators 3D Model
...ventilators 3d model archive3d ventilation ventilation equipment...
Vent
archibase_planet
free
Vent
...vent
archibase planet
aeration venting home equipment
diffuser vent - 3d model for interior 3d visualization.
archibase_planet
free
Vent
...vent
archibase planet
cooker hood cooking hood
vent - 3d model for interior 3d visualization.
archibase_planet
free
Vent
...vent
archibase planet
cooker hood cooking hood
vent atlantica - 3d model for interior 3d visualization.
archibase_planet
free
Vent
...vent
archibase planet
cooker hood cooking hood
vent half frame - 3d model for interior 3d visualization.
archibase_planet
free
Vent
...vent
archibase planet
cooker hood cooking hood
vent - 3d model (*.gsm+*.3ds) for interior 3d visualization.
archibase_planet
free
Vent
...vent
archibase planet
cooker hood cooking hood kitchen equipment
vent - 3d model for interior 3d visualization.
archibase_planet
free
Vent
...vent
archibase planet
damper diffuser air gate
vent grate n100807 - 3d model for interior 3d visualization.
archibase_planet
free
Vent
...vent
archibase planet
cooker hood cooking hood
vent - 3d model (*.gsm+*.3ds) for interior 3d visualization.
turbosquid
$10

Vent
...nt
turbosquid
royalty free 3d model vent for download as fbx on turbosquid: 3d models for games, architecture, videos. (1143454)
turbosquid
$2
Vent
...nt
turbosquid
royalty free 3d model vent for download as obj on turbosquid: 3d models for games, architecture, videos. (1323956)
Upgrade
turbosquid
$15

Upgraded Glock
...e 3d model upgraded glock for download as obj, fbx, and blend on turbosquid: 3d models for games, architecture, videos. (1185950)
3ddd
$1

Calligaris / UPGRADE
...calligaris / upgrade
3ddd
calligaris
c материалом
3d_export
free

cz upgrade
...cz upgrade
3dexport
https://www.buymeacoffee.com/mestrezen3d https://linktr.ee/mestrezen3
turbosquid
$80

Custer Tank upgrade
... available on turbo squid, the world's leading provider of digital 3d models for visualization, films, television, and games.
turbosquid
$39

Domestos 1 upgrade
... available on turbo squid, the world's leading provider of digital 3d models for visualization, films, television, and games.
3d_export
$10

Upgraded tea cup
...upgraded tea cup
3dexport
a cup with an unusual design and a unique shape for a more enjoyable tea experience
3d_export
$8

dixy outlander classic style upgraded poplar wood lounge chair
...utlander classic style upgraded poplar wood lounge chair
3dexport
dixy outlander classic style upgraded poplar wood lounge chair
turbosquid
free

AK-12 + Upgrades low-poly 3D model
...ow-poly 3d model for download as fbx, blend, and unitypackage on turbosquid: 3d models for games, architecture, videos. (1501145)
evermotion
$700

Upgrade from V-ray 1.5 to 3.5 for 3ds max
...here is no need to purchase a new dongle - your current dongles will be reprogrammed to carry v-ray 3. evermotion 3d models shop.
evermotion
$300

Upgrade from V-Ray 2.0 to V-ray 3.5 for 3ds Max
... interface (gui) for editing settings on one machine and one render node for rendering on one machine. evermotion 3d models shop.
Z
3d_export
$5

nissan z
...nissan z
3dexport
nissan z
3ddd
$1

Vase Z
...vase z
3ddd
vase z
3ddd
$1

полотенцесушить Z
...полотенцесушить z
3ddd
полотенцесушитель
полотенцесушить z
design_connected
free

Z-Chair
...z-chair
designconnected
free 3d model of z-chair designed by karman, aleksei.
design_connected
$11

Z Lamp
...z lamp
designconnected
phillips z lamp computer generated 3d model. designed by kalff, louis.
3d_export
$5

Dragon balls z
...dragon balls z
3dexport
dragon ball z
turbosquid
$20

Fighter Z
...
turbosquid
royalty free 3d model fighter z for download as on turbosquid: 3d models for games, architecture, videos. (1292563)
turbosquid
$9

Pen Z
...pen z
turbosquid
free 3d model pen z for download as obj on turbosquid: 3d models for games, architecture, videos. (1686775)
turbosquid
free

z chair
...z chair
turbosquid
free 3d model z chair for download as max on turbosquid: 3d models for games, architecture, videos. (1410230)
turbosquid
$5

Letter Z
...urbosquid
royalty free 3d model letter z for download as max on turbosquid: 3d models for games, architecture, videos. (1408540)