Thingiverse
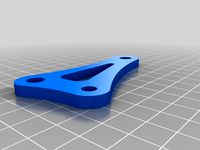
Z-Axis & X Gantry Mounts for Acme Nut Blocks by AikenJG
by Thingiverse
Last crawled date: 3 years, 1 month ago
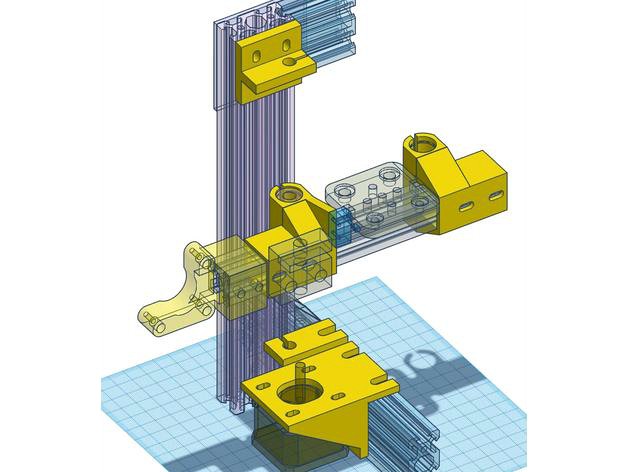
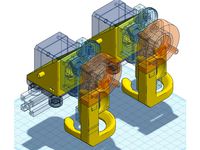
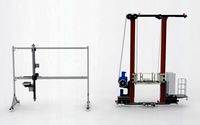
I had a lot of issues with z-banding on my AM8, and having spent more than I could really afford on good quality 8*8 lead screws and hardened steel guide rods I couldn't just give up and switch to linear guides + belts. I figured the best way to get good Z was to get the vertical elements as tight to the gantry and to the frame uprights as I possibly could. I also wanted to squeeze more Z out of the frame - I was losing 40-odd mm with my old setup. This rig together with the titan X carriage got me that extra & sorted the regular screw-induced z-banding.
If you try this setup out for yourself, there are a few things to note:
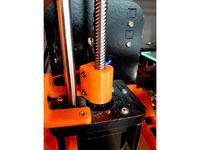
1) Ignore the lower screw-hole in the motor & lower smooth-rod holders - they were an early idea that didn't work as well as I hoped. You only need to use the ones in the top surfaces the the fillets and metal components keep the parts in the correct alignment.
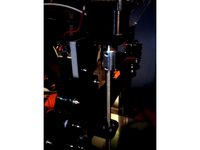
2) Use decent rods. 8mm smooth rods tend be straight, or not, but 8*8's can weeble-wobble all over the place as the solid centre is c.6mm, and soft metal makes that worse. It's worth the extra.
3) Check the coupler centres. I went through conniptions trying to find out why the bottom of the screws wobbled, & changed out both couplers twice. Turns out all 4 of the first 2 pairs had the 8mm hole slightly off centre! ... The last pair were both good.
4) Get everything absolutely vertical. The way to start is with the smooth rods - I made the top mount the base point so set those firmly in place first, then lock down the bottom, then the motor mount, then the acme nut. The secret is check, check and when you're really really bored of checking, do it again. All 4 vertical rods on mine are within 0.1mm variance to each other over a 400mm length which is acceptable.
The parts are all 100% infill so they can be cinched down tight with 8mm flanged-button m5's into hammer-nuts; material isn't important as long as it's stiff enough not to flex as you tighten down the screws and during printing.
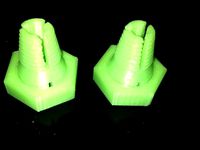
NB: The bottom Z rod bracket needs to be printed x1 as-is, and x1 mirrored (most slicers can do that). It's not that critical though - 2 of the same will work fine just not look so tidy.
If you try this setup out for yourself, there are a few things to note:
1) Ignore the lower screw-hole in the motor & lower smooth-rod holders - they were an early idea that didn't work as well as I hoped. You only need to use the ones in the top surfaces the the fillets and metal components keep the parts in the correct alignment.
2) Use decent rods. 8mm smooth rods tend be straight, or not, but 8*8's can weeble-wobble all over the place as the solid centre is c.6mm, and soft metal makes that worse. It's worth the extra.
3) Check the coupler centres. I went through conniptions trying to find out why the bottom of the screws wobbled, & changed out both couplers twice. Turns out all 4 of the first 2 pairs had the 8mm hole slightly off centre! ... The last pair were both good.
4) Get everything absolutely vertical. The way to start is with the smooth rods - I made the top mount the base point so set those firmly in place first, then lock down the bottom, then the motor mount, then the acme nut. The secret is check, check and when you're really really bored of checking, do it again. All 4 vertical rods on mine are within 0.1mm variance to each other over a 400mm length which is acceptable.
The parts are all 100% infill so they can be cinched down tight with 8mm flanged-button m5's into hammer-nuts; material isn't important as long as it's stiff enough not to flex as you tighten down the screws and during printing.
NB: The bottom Z rod bracket needs to be printed x1 as-is, and x1 mirrored (most slicers can do that). It's not that critical though - 2 of the same will work fine just not look so tidy.
Similar models
thingiverse
free
Monoprice MP Select Mini Flexible Z Coupler by fishhf
...up like shape at the bottom of the rod to support the rod vertically, while allowing it to
slide.
no nuts, screws, straps needed.
thingiverse
free

Nema 17 spacer 8mm for Geeetech I3 by NitzscheModellbau
... m3 nuts (oldham coupler)
8 pcs m3x6mm headless pin screws (oldham coupler)
the shaft of the nema17 was cut to a length of 10mm.
thingiverse
free
5mm to 8mm Z axis shaft coupler by mrice
...ible shaft couplers on z axis rods, for 5mm motor shafts and 8mm threaded rods. use two m3x10mm screws and nuts to tighten down.
grabcad
free

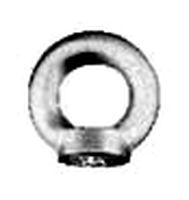
8mm Acme rod nut (T8 Lead Screw Nut)
...8mm acme rod nut (t8 lead screw nut)
grabcad
model of a 8mm acme rod nut that i purchased from ebay.
thingiverse
free
Simple Z axis Couplers by FablabMoebius
...tl.
[update 03/09/15] : fixed the screw axis closer to the body for a stronger grip on motor shaft & acme rod (all versions).
thingiverse
free
Printrbot Simple Maker 1405 Z Axis Stabilizer by slovenian6474
...race and bottom right is with brace.
you may want to check your max z height as the y carriage can hit it if you go up too far.
grabcad
free

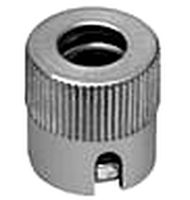
8mm Acme rod nut
...8mm acme rod nut
grabcad
amce nut
model of a 8mm acme rod nut that i purchased from ebay.
thingiverse
free
Z motor Coupler A8 by thxraph
...o hammer it in place, make sure your printer can print somewhat decently.
i hope it helps, let me know if it fixed your z-wobble!
thingiverse
free
Selfcentering Z Coupler by bernbout
...d to cut both the coupler and the 8mm nut to decrease the height. works great now.
the 5mm nut is from the original great design.
thingiverse
free
Z Motor Mount SPACER - Tevo Tarantula - Z wobble fix by paul0
... get minimum wobble.
subscribe to my channel for my channel with fusion 360 tutorials:https://www.youtube.com/watch?v=4a2qvezsy5u
Aikenjg
thingiverse
free
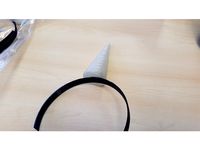
Unicorn Headband by AikenJG
...boring horse...
printed in green glow-in-the-dark pla for extra magicness, with the band in cpe for cope-with-anything toughness.
thingiverse
free
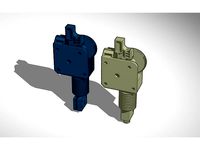
Titan with E3Dv6 Volcano by AikenJG
...
there are 2 orientations - with the heater cart to the front, and to the back - which will hopefully save someone a bit of time.
thingiverse
free
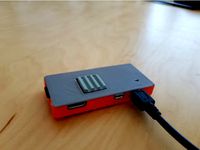
Rear half of case of Pi Zero with hole for heatsink by AikenJG
...ry to upload but there might be someone somewhere that needs a square hole for a heatsink, but doesn't like using cad apps...
thingiverse
free

Seatback bag / cargo hook clip-on body by AikenJG
... gap had to be fractionally smaller than the rod, requiring a little give in the material - i used petg. your mileage may vary...
thingiverse
free
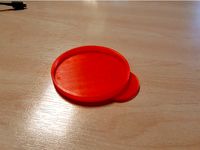
Can Lid by AikenJG
...ithout it exploding to pieces. plus, in translucent orange, they're the best looking half-used-dog-food-tin covers around! :)
thingiverse
free
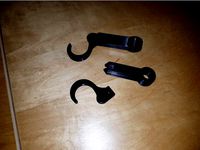
Seatback bag / cargo hooks by AikenJG
... if you print with 4+ walls. i added a curved not straight gusset to the hook to avoid leaving a dent in the piping of the seats.
thingiverse
free
Titan E3Dv6 & Volcano fan mounts by AikenJG
...m if your bed adhesion is marginal but as i use printbite at 75°c for petg i get pretty solid hold even rattling along at 50mm/s.
thingiverse
free

Titan X-carriage with piezo Z-probe by AikenJG
...al walls and under the screw post. i may revisit this with a fillet running up to the post but tbh it's not really necessary.
thingiverse
free
Hypercube Hotend Mount for Chimera and BLTouch by AikenJG
...ost similar tubing. i've clipped the tubes about 4cm above the top of the hotend clamp and that seems to do the trick nicely.
Acme
turbosquid
$29

acme earthquake pills
... acme earthquake pills for download as 3ds, obj, c4d, and fbx on turbosquid: 3d models for games, architecture, videos. (1173449)
3d_export
$10

Web camera Acme 3D Model
...web camera acme 3d model
3dexport
web camera acme 3d model art-v 21974 3dexport
turbosquid
$29

Acme Furniture model Hallie
...free 3d model acme furniture model hallie for download as max on turbosquid: 3d models for games, architecture, videos. (1365308)
3d_export
$5
acme hamilton chair
...es a swivel feature as well as height and tilt adjustment. smooth-rolling wheels on the bottom help you move it around with ease.
turbosquid
$7
ACME Bage End Table. IKEA GLADOM
...3d model acme bage end table. ikea gladom for download as obj on turbosquid: 3d models for games, architecture, videos. (1666181)
turbosquid
$37
Acme Genesis Ms 25 PBR Version
...e genesis ms 25 pbr version for download as max, obj, and fbx on turbosquid: 3d models for games, architecture, videos. (1155489)
turbosquid
$37
Acme Genesis Ms 25 Vray Version
... genesis ms 25 vray version for download as max, obj, and fbx on turbosquid: 3d models for games, architecture, videos. (1155433)
turbosquid
$25
Dietz Acme Inspector Kerosene Lamp 1923
...erosene lamp 1923 for download as 3ds, obj, fbx, 3dm, and dwg on turbosquid: 3d models for games, architecture, videos. (1442774)
archive3d
free

Sofa 3D Model
...sofa 3d model archive3d couch sofa settee sofa acme furniture n271210 - 3d model (*.3ds) for interior 3d...
3d_export
$10
lacole serving cart
...2021.12.28 viruses: clean, tested by prunescene! preview: yes tags: acme furniture, lacole, serving, cart, тележка, сервис, для ресторана, стекло,...
Gantry
turbosquid
$349
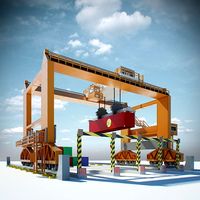
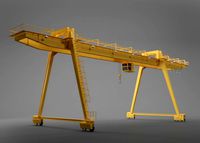
Gantry crane
...alty free 3d model gantry crane for download as ige and sldas on turbosquid: 3d models for games, architecture, videos. (1476278)
3d_export
free
firestone advertising gantry
...rs premises and<br>these advertisement gantries, were very popular in the 30-70's at grand prix races advertising tyres
turbosquid
$30
Derelict Launch Gantry
...alty free 3d model derelict launch gantry for download as fbx on turbosquid: 3d models for games, architecture, videos. (1669952)
turbosquid
$129
Gantry Crane RTG
...e 3d model gantry crane rtg for download as max, obj, and fbx on turbosquid: 3d models for games, architecture, videos. (1491933)
turbosquid
$120
Gantry stacker Assembly
...try stacker assembly for download as sldas, fbx, 3ds, and ige on turbosquid: 3d models for games, architecture, videos. (1648516)
turbosquid
$19
Train Signals Gantry
...l train signals gantry for download as 3ds, max, obj, and fbx on turbosquid: 3d models for games, architecture, videos. (1462242)
turbosquid
$5
STS Gantry Crane
... available on turbo squid, the world's leading provider of digital 3d models for visualization, films, television, and games.
turbosquid
$160

Bulk carrier with gantry crane
...carrier with gantry crane for download as lwo, obj, and blend on turbosquid: 3d models for games, architecture, videos. (1285258)
3d_export
$50
RMG Gantry Crane 3D Model
...t hoist rail rubber tyre tire rtg eot beam portal heigh tonne shipyard port
rmg gantry crane 3d model 5starsmodels 42860 3dexport
3d_export
$29
gantry crane
...istic model that will enhance the detail and realism of any of your rendering projects.<br>file formats: max, obj, fbx, 3ds
Axis
3ddd
$1

Мария Axis
...
3ddd
кухня , классическая , axis
модель кухни.
3d_export
$22

Axis robot 6-axis robotic arm
...ing parts drawings, standard parts purchased parts list, can be produced directly according to the drawings, welcome to download!
3ddd
free

Versatile Axis
...ddd
nexus , плитка
http://bvtileandstone.com/ceramic-porcelain/versatile-axis/
3d_export
$19

robot 2 axis
...robot 2 axis
3dexport
robot 2 axis
turbosquid
$40

Axis R5F
... available on turbo squid, the world's leading provider of digital 3d models for visualization, films, television, and games.
turbosquid
$40

Axis S5F
... available on turbo squid, the world's leading provider of digital 3d models for visualization, films, television, and games.
turbosquid
$30

Axis Athlon
... available on turbo squid, the world's leading provider of digital 3d models for visualization, films, television, and games.
turbosquid
$10

Linear Axis
... available on turbo squid, the world's leading provider of digital 3d models for visualization, films, television, and games.
3d_export
$15

drawing axis
...drawing axis
3dexport
simple rendering of the scene file
3ddd
$1

versatile axis ARC
...versatile axis arc
3ddd
versatile , плитка
versatile axis arc red dot design award
Z
3d_export
$5

nissan z
...nissan z
3dexport
nissan z
3ddd
$1

Vase Z
...vase z
3ddd
vase z
3ddd
$1

полотенцесушить Z
...полотенцесушить z
3ddd
полотенцесушитель
полотенцесушить z
design_connected
free

Z-Chair
...z-chair
designconnected
free 3d model of z-chair designed by karman, aleksei.
design_connected
$11

Z Lamp
...z lamp
designconnected
phillips z lamp computer generated 3d model. designed by kalff, louis.
3d_export
$5

Dragon balls z
...dragon balls z
3dexport
dragon ball z
turbosquid
$20

Fighter Z
...
turbosquid
royalty free 3d model fighter z for download as on turbosquid: 3d models for games, architecture, videos. (1292563)
turbosquid
$9

Pen Z
...pen z
turbosquid
free 3d model pen z for download as obj on turbosquid: 3d models for games, architecture, videos. (1686775)
turbosquid
free

z chair
...z chair
turbosquid
free 3d model z chair for download as max on turbosquid: 3d models for games, architecture, videos. (1410230)
turbosquid
$5

Letter Z
...urbosquid
royalty free 3d model letter z for download as max on turbosquid: 3d models for games, architecture, videos. (1408540)
Blocks
archibase_planet
free

Blocks
...blocks
archibase planet
blocks bricks toy
toy blocks - 3d model (*.gsm+*.3ds) for interior 3d visualization.
3d_export
$5

Block
...block
3dexport
3d_export
$10

The guillotine and the block
...the guillotine and the block
3dexport
the guillotine and the block autocad 2013
3d_ocean
$8
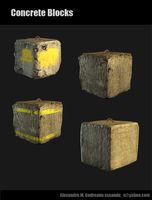
Concrete Blocks
... blocks, barriers or cover for characters during a fire fight. each one has its own diffuse map, specular and normal map in tg...
archibase_planet
free
Glass block
...glass block
archibase planet
glass block brick
glass block n211009 - 3d model (*.gsm+*.3ds) for interior 3d visualization.
3d_export
$99

city block
...city block
3dexport
city block 3d model. include max, obj and fbx files.
3d_ocean
$3
Concrete Blocks Textures
...res
3docean
block blocks concrete seamless wall walls
a couple of seamless textures with two differents sizes of concrete blocks.
3d_export
$5

plummer block
...plummer block
3dexport
this is an 3d model of plummer block assembly where seven parts are required to assemble this.
design_connected
$16

Block 2
...block 2
designconnected
henry pilcher block 2 computer generated 3d model. designed by pilcher, henry.
3d_export
$7

concrete blocks on pallets
...concrete blocks on pallets
3dexport
concrete blocks on pallets, 3 types of blocks. there are all the necessary textures.
Nut
3d_export
free
nut
...nut
3dexport
low poly
turbosquid
$13
Nut
...
royalty free 3d model nut for download as max, obj, and fbx on turbosquid: 3d models for games, architecture, videos. (1227126)
turbosquid
$12

nut
...
royalty free 3d model nut for download as max, obj, and fbx on turbosquid: 3d models for games, architecture, videos. (1175191)
3d_export
$5
nut handle
...nut handle
3dexport
nut handle
3d_export
$5
nut anchor
...nut anchor
3dexport
nut anchor
3d_export
$5
wing nut
...wing nut
3dexport
wing nut
3d_export
$5
butterfly nut
...butterfly nut
3dexport
butterfly nut
3d_export
$5
special nut
...special nut
3dexport
special nut
3d_export
$5

nut hook
...nut hook
3dexport
nut hook
3d_export
$5

nut ring
...nut ring
3dexport
nut ring
Mounts
3d_export
free

mounting bracket
...the part of a hinge, handle or latch that mounts the hardware to a cabinet. mounting plates make it...
turbosquid
$2

MOUNTING
... available on turbo squid, the world's leading provider of digital 3d models for visualization, films, television, and games.
turbosquid
free

Mounts
... available on turbo squid, the world's leading provider of digital 3d models for visualization, films, television, and games.
turbosquid
free

Mount Fuji
...fuji
turbosquid
free 3d model mount fuji for download as obj on turbosquid: 3d models for games, architecture, videos. (1579977)
3d_export
$5

Headphone mount LR
...headphone mount lr
3dexport
headphone mount l+r
turbosquid
$39

Mount rainier
...quid
royalty free 3d model mount rainier for download as fbx on turbosquid: 3d models for games, architecture, videos. (1492586)
turbosquid
$5

pipe mounting
...quid
royalty free 3d model pipe mounting for download as obj on turbosquid: 3d models for games, architecture, videos. (1293744)
turbosquid
$3

Mounting Tires
...uid
royalty free 3d model mounting tires for download as fbx on turbosquid: 3d models for games, architecture, videos. (1708511)
3d_export
$5

Magnetic GoPro Mount
...pro mount
3dexport
cool magnetic mount for gopro. allows you to mount the camera on flat metal surfaces and get exclusive shots.
turbosquid
$5

Stone Mount
...ty free 3d model stone mount for download as ma, obj, and fbx on turbosquid: 3d models for games, architecture, videos. (1370306)