Thingiverse

Wooden Filament Coaster Set by cribblekris
by Thingiverse
Last crawled date: 3 years ago
Here is a set of 4 coasters designs, an 8-piece and a 4-piece tray. There is also a blank coaster into which you can insert your own DXF and extrude to 1.6mm from the inside bottom surface. Send me a message for a link.
This was designed to print with a 0.8mm nozzle and woodfill pla with no more than 40 percent wood shavings.
Printing Settings:
Wood PLA expands a bit on heating. It is also slightly abrasive. You can finetune coasting and priming settings to reduce blobbing and stringing etc. Its prone to stick to the nozzle exterior when a new extrusion starts, which is why I suggest making use of a copper plated nozzle. Tune your retraction settings with a stringing test. https://www.thingiverse.com/thing:2219103
For this print:
Initial layer height is 0.3mm – 0.4mm
Layer height is 0.2mm
Line width 0.8mm
Wall thickness 2.4mm
Enable ‘Filter out tiny gaps” setting.
Make your print surface hot, about 60 degrees.
Do not print the outer walls first.
Play around with your speed settings. Some people say print slower to create better adhesion. In this model I print between 35mm/s for initial and top layers to 40mm/s for infills and walls, and you can probably go faster after your initial layers.
Wall line count is 4.
Bottom layer count is 2.
Top Layer count is 3
Infill Pattern is Zig Zag
Infill line distance is 1.6mm. You can reduce this, but this keeps the coaster nice and firm. Its only two layers.
Top and bottom layer pattern is Zig Zag. Concentric might give you a smoother finish and reduced print times, but the concentric pattern increases the risk of filament adhesion to your nozzle.
Enable ironing with 10% flow, Speed at 30mm/s, 0.4mm inset, Zig Zag. Here you can try concentric, but I find Zig Zag always give the best result.
Initial Layer Flow 115%
Print temperature at 205, but you can increase this to about 210 for the initial layer. You can also extrude at different temperatures at different levels for a color variation.
Acceleration is 900mm/s’ and Jerk is 10mm/s.
Enable retractions, and here you must adjust it according to the extruder you have. I am using a direct extruder, so I only retract about 3mm, at 35mm/s.
Enable Combing mode for all.
Enable Z hop when retracted.
Print with a brim, at least 4 lines wide.
I suggest drying your filament at 60 degrees for a few hours before starting.
Works best with a rough steel print surface.
Set your print up to print items one at a time.
4 coasters will take you 6 hours with these settings, but you can print up to 9 at a time on a 300 x 300. The 4-piece coaster tray will take 2 hours and 20 mins, and the 8-piece will take 3 hours and 15 minutes. Turn ironing off for a dramatic decrease in print time.
Similar models
thingiverse
free

Sign Language Symbol For Interpreter
...t using a 0.4mm nozzle took 40 hours. i did not try to print it with the 0.8mm nozzle.
the fusion 360 design files are included.
thingiverse
free

Jumper Feeder for Betta fish
...el speed: 30
z-hop when retracted: enabled
cooling fan: 100%
support pattern: zig zag
support density: 15%
filament brand
priline
thingiverse
free

First Layer Zig-Zag Calibration by franzbischoff
...ggest using lower speeds to print this file, as the intention is to look at it an judge if the layer is being correctly extruded.
thingiverse
free

Parametric Compliant Plug by BenjaminHab
...ing initial layer flow to 110%) and using a concentric pattern on the initial layer (cura setting: bottom pattern initial layer).
thingiverse
free

Monstera Leaf Coasters by akroutKing
...ction minimum travel: 1mm
combing mode: not in skin
attribution:
monstera leaf svg by funny.foxy.spb:monstera vectors by vecteezy
thingiverse
free

Quick Zig-Zag Test by roepke414
...
this will also allow you to see the flow out of your nozzle! just watch it closely with a flashlight.
great for troubleshooting!
3dwarehouse
free

Zig Zag Pattern Tile
...zig zag pattern tile
3dwarehouse
tile pattern with zig zag grooves.
thingiverse
free

CYBERTRUNK USB/PHONE STATION
...el speed: 30
z-hop when retracted: enabled
cooling fan: 100%
support pattern: zig zag
support density: 15%
filament brand
priline
cg_trader
$7

Large Zig Zag Pattern Rug Set
...large zig zag pattern rug set
cg trader
large zig zag pattern rug set. longest edge about 2.3 meters. includes high res textures
thingiverse
free

hyper tough rotary tool wall mount by lellelel
...nfill concentric, 10 bottom layers with zig zag infill for those, then whatever temps and speeds your material and printer prefer
Cribblekris
thingiverse
free

Octagon lattice Large by cribblekris
...s is half the time in layers 0.03mm with siraya tech fast grey or clear v2
scale to fit your platform. good for testing accuracy.
thingiverse
free

Laptop Stand by cribblekris
...0 print bed. if you have wobble issues, you will need to print this slower (about 45mms) or you need to stabilize your gantries.
thingiverse
free

Separate Spool Holder using original Artillery Sidewinder X1 Hardware by cribblekris
...on a remix with a filament guide to attach a tube and connector, leading it to the runout sensor with its own housing on the top.
Coaster
3ddd
$1

Coaster Slauson
...coaster slauson
3ddd
coaster slauson
3ddd
$1

Coaster Scotland
...coaster scotland
3ddd
комод
комод coaster scotland
3ddd
$1

Coaster Scotland
...coaster scotland
3ddd
письменный
шкаф coaster scotland
3ddd
$1

Coaster Scotland
...coaster scotland
3ddd
шкаф
шкаф coaster scotland
3ddd
$1

Coaster Scotland
...coaster scotland
3ddd
письменный
стол coaster scotland
turbosquid
$29

coaster
... available on turbo squid, the world's leading provider of digital 3d models for visualization, films, television, and games.
turbosquid
$19

Coasters
... available on turbo squid, the world's leading provider of digital 3d models for visualization, films, television, and games.
turbosquid
$2

coaster
...e 3d model coaster 3d model for download as max, fbx, and obj on turbosquid: 3d models for games, architecture, videos. (1648217)
turbosquid
$1

Coaster
... 3d model coaster for download as max, 3ds, dwg, dxf, and obj on turbosquid: 3d models for games, architecture, videos. (1592347)
turbosquid
$1

Coasters
...3d model coasters for download as max, 3ds, dxf, fbx, and obj on turbosquid: 3d models for games, architecture, videos. (1633632)
Filament
3ddd
$1
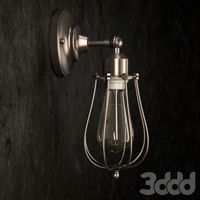
Filament Cage
...filament cage
3ddd
лофт , filament cage
модель бра, делалась по фото!
turbosquid
$3
FILAMENT COUNTER
...d
royalty free 3d model filament counter for download as stl on turbosquid: 3d models for games, architecture, videos. (1563049)
3d_export
$5

Filament lamp 3D Model
...filament lamp 3d model
3dexport
filament lamp 3d model kevin 54161 3dexport
3d_export
$5

Filament bulb candle 3D Model
...filament bulb candle 3d model
3dexport
filament bulb-candle
filament bulb candle 3d model kevin 54163 3dexport
3d_export
$5

Filament led light bulb
...filament led light bulb
3dexport
realistic 3d model of filament light bulb with v-ray materials.
3d_export
$5

Filament led light bulb
...filament led light bulb
3dexport
realistic 3d model of filament light bulb with v-ray materials.
3d_export
$5

Filament led light bulb
...filament led light bulb
3dexport
realistic 3d model of filament light bulb with v-ray materials.
3d_export
$5
Filament led light bulb
...filament led light bulb
3dexport
realistic 3d model of filament light bulb with v-ray materials.
3d_export
$5

Filament led light bulb
...filament led light bulb
3dexport
realistic 3d model of filament light bulb with v-ray materials.
3ddd
$1

Factory filament metal shade
...factory filament metal shade
3ddd
restoration hardware
restoration hardware. 20th c. factory filament metal shade.
Wooden
3d_ocean
$5

Wooden crate
...wooden crate
3docean
crate wooden
a lowpoly wooden crate .
3ddd
$1
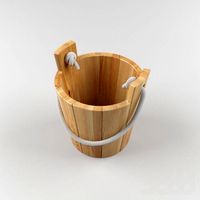
Wooden bucket
...wooden bucket
3ddd
wooden bucket , ведро
wooden bucket
3d_ocean
$2

Wooden Cup
...ional wooden
this is a wooden cup made by blender v2.74 2 files included : wooden-cup.blend, wooden-cup.obj thank you for looking
3d_ocean
$5

Wooden table
...wooden table
3docean
furniture wooden table
a lowpoly wooden table .
3d_ocean
$4

wooden pallet
...wooden pallet
3docean
load transportation wood wooden pallet
wooden pallet
3d_ocean
$8

Wooden fence
...wooden fence
3docean
fence wooden
a high quality wooden fence with high resolution texture
3d_ocean
$5

Wooden bridge
...wooden bridge
3docean
bridge wooden
a high quality wooden bridge with high resolution texture .
3d_ocean
$2

Wooden Cross
...wooden cross
3docean
chapel christmas church cross jesus wooden
wooden hand cross
3d_export
$15

wooden fort
...wooden fort
3dexport
wooden hamlet
3d_export
$8

wooden house
...wooden house
3dexport
wooden house
Set
archibase_planet
free

Setting
...setting
archibase planet
setting cover place setting
setting - 3d model (*.gsm+*.3ds) for interior 3d visualization.
archibase_planet
free
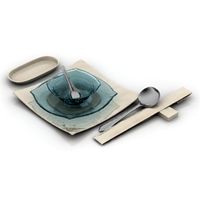
Setting
...setting
archibase planet
setting place setting cover
setting - 3d model (*.gsm+*.3ds) for interior 3d visualization.
archibase_planet
free
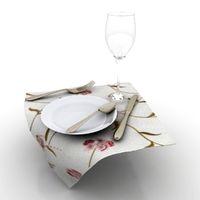
Setting
...setting
archibase planet
setting place setting cover
setting - 3d model (*.gsm+*.3ds) for interior 3d visualization.
3d_export
$8

decorative set mens set
...decorative set mens set
3dexport
decorative set men's set
archibase_planet
free
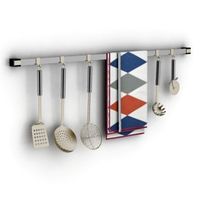
Set
...anet
set kitchen ware kitchen set kitchen tools
set kitchen tools n281114 - 3d model (*.gsm+*.3ds) for interior 3d visualization.
archibase_planet
free
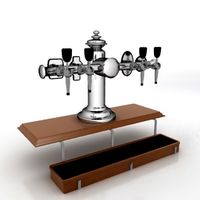
Set
...set
archibase planet
beer set bar equipment
beer set - 3d model for interior 3d visualization.
archibase_planet
free
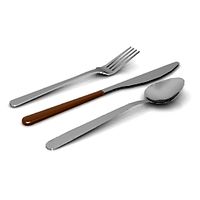
Set
...set
archibase planet
cover place setting
set - 3d model (*.gsm+*.3ds) for interior 3d visualization.
archibase_planet
free
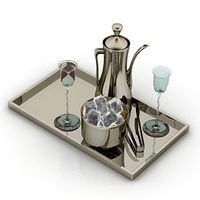
Set
...set
archibase planet
kitchen set kitchen ware
set - 3d model (*.gsm+*.3ds) for interior 3d visualization.
archibase_planet
free
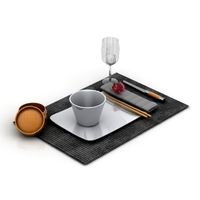
Set
...set
archibase planet
set cup glass kitchen ware
set - 3d model (*.gsm+*.3ds) for interior 3d visualization.
archibase_planet
free
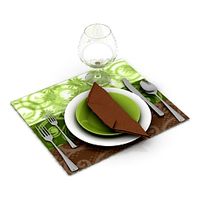
Set
...set
archibase planet
flatware cover place setting
set n311210 - 3d model (*.gsm+*.3ds) for interior 3d visualization.
