Thingiverse
Weather in a Bottle by Timothy3001
by Thingiverse
Last crawled date: 3 years ago
Description
A neat looking device to show the upcoming weather conditions in a glance. See it in action: https://youtu.be/bg2oKUqHIMQ
The forecast shows the weather condition in 4 hours and displays it every minute.
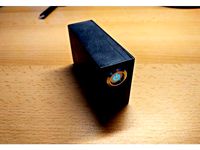
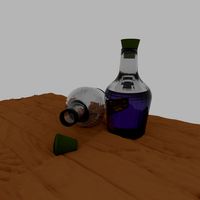
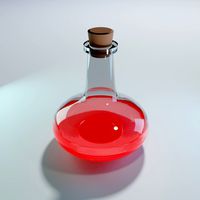
Storm glass
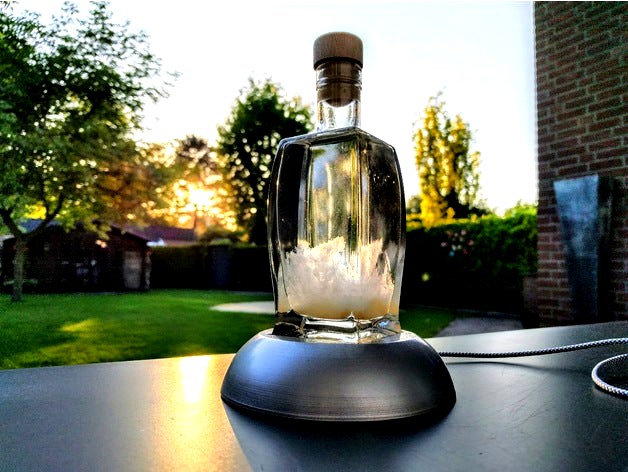
This funny looking bottle contains a fluid, which is usually used in so called 'storm glasses'. Storm glasses were used to predict the weather. The prediction is displayed in certain formations of the crystals. Though, scientists found out that the prediction is not really accurate and the formation of the crystals actually depends on the temperature. (See https://en.wikipedia.org/wiki/Storm_glass for more information)
Make it actually useful
The prediction of the storm glass obviously only works barely and thus I decided to upgrade it by building a special stand that enlightens the storm glass in certain patterns, which actually present the upcoming weather conditions.
For that I used 4 WS2812B LEDs, an ESP8266, a weather service and a DC-DC converter to run the glass off of 5V USB.
LED patterns
The weather data gets updated every hour. That's because the weather service only allows 50 requests per day. (see https://developer.accuweather.com/ )
The LEDs currently present the weather conditions 4 hours ahead but this is customizable you just need to tinker a little bit in the code.
The display works in two sequences:
The first sequence shows the temperature change. A deep red or blue lighting means that the temperature in 4 hours will be 5°C or more hotter (red) or colder (blue) than the current temperature.
A light color means that it will be less than 5°C hotter or colder in 4 hours.
The second sequence actually shows the weather condition like rain, storm, sunny weather and so on.
Patterns temperature
Much colder
Much hotter
Little warmer
Little colder
Patterns weather condition
Clear sky
Partly cloudy
Cloudy
Shower rain
Rainy
Storm
Snow
Fog
Unfortunately the visualization is kinda hard to do, so I hope you get the idea behind the patterns. Fog, Snow and Cloudy look quite equal, though there are differences.
Build one
Storm glass
What you'll need
Obviously you need a bottle. It has to have a square foot (around 50mm x 50mm) (or change the attached Fusion 360 file to make it fit other bottles)
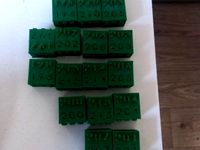
For the storm glass you need a certain mixture. I used the recipe provided by the YouTuber "NightHawkInLight" (thank you by the way). You find a good video tutorial of him here: https://www.youtube.com/watch?v=Trz1diBkAR0
NOTE: I kind of changed the mixture because the crystals were rather small and not connecting to each other. In the video he is using 50% vodka. The original recipe though (by FitzRoy) includes more alcohol. I found the original recipe on the German wikipedia.
To change the mixture, i just poured out some of it and added pure alcohol by guessing. It kinda worked out though and I get larger crystals now.
3D print
What you'll need
You need to print the stand and the cover once. Plus, you need one brass inlet (4mm outer diameter, 3mm inner) and a M3 screw. You just use some soldering iron, to melt it into place.
NOTE: You could also modify the attached Fusion 360 file and make the diameter of the shaft 3mm wide so that you can screw in a M3 screw directly.
SECOND NOTE: I made some corrections to the actual model after I printed it. I got my first attempt working, though it's not perfect. For example the shaft broke off while putting it together. I tried to make it a bit more robust, don't know if that works. I used hot glue to fix mine.
THIRD NOTE: The cover was a little bit too wide in my first attempt, so I made it smaller. Hopefully it will fit now.
If you encounter problems with the print, you could also edit the Fusion 360 file attached or message me.
Print notes
I'd recommend to print the stand as suggested in the STL file, with lots of support to have a nice surface finish.
Finish surface (optional)
To finish the print, I applied lots of sanding and filler. Afterwards I sprayed on silver bronze paint and as last step clear coating.
Electronics
What you'll need
ESP8266 (e.g. ESP-01)
4 WS2812B LEDs (I cut 4 off a strip)
Some kind of DC-DC converter, I used a simple LM317T
Micro-USB adapter (female)
NOTE: I used a rather big Micro-USB adapter so that I needed to cut pieces off of it. I'd recommend using the following adapter: https://goo.gl/S1siUQ
Setup
Basically you just need to power the ESP and connect the data pin of the WS2812B to Pin 0 of the ESP. If you've worked a little with ESPs, you probably know, what to do. Otherwise, message me!
In addition: you wanna hot glue the adapter into the outlet hole. You can try pulling it through from the other side, otherwise sand the hole a little wider and glue it in place.
Software
Github repository: https://goo.gl/3U6s7g
There are still some things to improve and to add. Currently it's working good for me, but might be a little hard for you to set up.
I planned to add 2-3 more features to make it easier to use but currently I'm not really motivated. If you plan on building one and have trouble or wishes, contact me and I'll hurry!
What you'll need
Visual Studio Code
PlatformIO
ESP-01 Programmer
Build the software
Just download VSC and install the PlatformIO plugin. You might have to configure things to get it working and actually flashing to your ESP though. But I figured that you can find lots of information about PlatformIO and common mistakes on the internet nowadays.
Configuration
The weather data comes from accuweather. You have to get an API key first though. Open the file WeatherDisplayService.h and enter your api key.
When the storm glass boots, it will check for a valid wifi configuration. If no access point is available, it will open an AP so you can configure a wifi connection.
In addition to that you need to configure the location of the weather data. For that you need a so called "Location key". To find the location key, just go to https://www.accuweather.com and search for your town. The URL should look like the following. In this example I picked New York as town: https://www.accuweather.com/de/us/new-york-ny/10007/weather-forecast/349727. The last bit is the important one: 349727 is the location key for New York.
After you have saved the configuration, the ESP should reboot, connect to your wifi and display the upcoming weather.
Feel free to change the code to use different intervals for example. I hope the code is self-explanatory.
Happy DIY-ing!
A neat looking device to show the upcoming weather conditions in a glance. See it in action: https://youtu.be/bg2oKUqHIMQ
The forecast shows the weather condition in 4 hours and displays it every minute.
Storm glass
This funny looking bottle contains a fluid, which is usually used in so called 'storm glasses'. Storm glasses were used to predict the weather. The prediction is displayed in certain formations of the crystals. Though, scientists found out that the prediction is not really accurate and the formation of the crystals actually depends on the temperature. (See https://en.wikipedia.org/wiki/Storm_glass for more information)
Make it actually useful
The prediction of the storm glass obviously only works barely and thus I decided to upgrade it by building a special stand that enlightens the storm glass in certain patterns, which actually present the upcoming weather conditions.
For that I used 4 WS2812B LEDs, an ESP8266, a weather service and a DC-DC converter to run the glass off of 5V USB.
LED patterns
The weather data gets updated every hour. That's because the weather service only allows 50 requests per day. (see https://developer.accuweather.com/ )
The LEDs currently present the weather conditions 4 hours ahead but this is customizable you just need to tinker a little bit in the code.
The display works in two sequences:
The first sequence shows the temperature change. A deep red or blue lighting means that the temperature in 4 hours will be 5°C or more hotter (red) or colder (blue) than the current temperature.
A light color means that it will be less than 5°C hotter or colder in 4 hours.
The second sequence actually shows the weather condition like rain, storm, sunny weather and so on.
Patterns temperature
Much colder
Much hotter
Little warmer
Little colder
Patterns weather condition
Clear sky
Partly cloudy
Cloudy
Shower rain
Rainy
Storm
Snow
Fog
Unfortunately the visualization is kinda hard to do, so I hope you get the idea behind the patterns. Fog, Snow and Cloudy look quite equal, though there are differences.
Build one
Storm glass
What you'll need
Obviously you need a bottle. It has to have a square foot (around 50mm x 50mm) (or change the attached Fusion 360 file to make it fit other bottles)
For the storm glass you need a certain mixture. I used the recipe provided by the YouTuber "NightHawkInLight" (thank you by the way). You find a good video tutorial of him here: https://www.youtube.com/watch?v=Trz1diBkAR0
NOTE: I kind of changed the mixture because the crystals were rather small and not connecting to each other. In the video he is using 50% vodka. The original recipe though (by FitzRoy) includes more alcohol. I found the original recipe on the German wikipedia.
To change the mixture, i just poured out some of it and added pure alcohol by guessing. It kinda worked out though and I get larger crystals now.
3D print
What you'll need
You need to print the stand and the cover once. Plus, you need one brass inlet (4mm outer diameter, 3mm inner) and a M3 screw. You just use some soldering iron, to melt it into place.
NOTE: You could also modify the attached Fusion 360 file and make the diameter of the shaft 3mm wide so that you can screw in a M3 screw directly.
SECOND NOTE: I made some corrections to the actual model after I printed it. I got my first attempt working, though it's not perfect. For example the shaft broke off while putting it together. I tried to make it a bit more robust, don't know if that works. I used hot glue to fix mine.
THIRD NOTE: The cover was a little bit too wide in my first attempt, so I made it smaller. Hopefully it will fit now.
If you encounter problems with the print, you could also edit the Fusion 360 file attached or message me.
Print notes
I'd recommend to print the stand as suggested in the STL file, with lots of support to have a nice surface finish.
Finish surface (optional)
To finish the print, I applied lots of sanding and filler. Afterwards I sprayed on silver bronze paint and as last step clear coating.
Electronics
What you'll need
ESP8266 (e.g. ESP-01)
4 WS2812B LEDs (I cut 4 off a strip)
Some kind of DC-DC converter, I used a simple LM317T
Micro-USB adapter (female)
NOTE: I used a rather big Micro-USB adapter so that I needed to cut pieces off of it. I'd recommend using the following adapter: https://goo.gl/S1siUQ
Setup
Basically you just need to power the ESP and connect the data pin of the WS2812B to Pin 0 of the ESP. If you've worked a little with ESPs, you probably know, what to do. Otherwise, message me!
In addition: you wanna hot glue the adapter into the outlet hole. You can try pulling it through from the other side, otherwise sand the hole a little wider and glue it in place.
Software
Github repository: https://goo.gl/3U6s7g
There are still some things to improve and to add. Currently it's working good for me, but might be a little hard for you to set up.
I planned to add 2-3 more features to make it easier to use but currently I'm not really motivated. If you plan on building one and have trouble or wishes, contact me and I'll hurry!
What you'll need
Visual Studio Code
PlatformIO
ESP-01 Programmer
Build the software
Just download VSC and install the PlatformIO plugin. You might have to configure things to get it working and actually flashing to your ESP though. But I figured that you can find lots of information about PlatformIO and common mistakes on the internet nowadays.
Configuration
The weather data comes from accuweather. You have to get an API key first though. Open the file WeatherDisplayService.h and enter your api key.
When the storm glass boots, it will check for a valid wifi configuration. If no access point is available, it will open an AP so you can configure a wifi connection.
In addition to that you need to configure the location of the weather data. For that you need a so called "Location key". To find the location key, just go to https://www.accuweather.com and search for your town. The URL should look like the following. In this example I picked New York as town: https://www.accuweather.com/de/us/new-york-ny/10007/weather-forecast/349727. The last bit is the important one: 349727 is the location key for New York.
After you have saved the configuration, the ESP should reboot, connect to your wifi and display the upcoming weather.
Feel free to change the code to use different intervals for example. I hope the code is self-explanatory.
Happy DIY-ing!
Similar models
thingiverse
free

Weather Dice! by ignoblegnome
...loudy, green as rain, and black as moon & star, i predict cloudy weather with rain later in the day, clearing in the evening.
thingiverse
free
Basic Stryfe Mockup by Mrheathpants
...he actual stryfe isn't symmetric, so it's only so useful. it may be useful to someone for something though, so here it is
thingiverse
free
Car Window wedges
... two so you'll need to print a couple.
you just slip these between the glass and door and they will securely hold the window.
thingiverse
free
Formbot Trex2 Y motor mount and tensioner by notnyt
...e are some of the parts i've used
https://www.amazon.com/gp/product/b072c9831q/
https://www.amazon.com/gp/product/b078stsgsx/
thingiverse
free
temperature test by SvenH96
...em
after printing leave a comment with your best temperature and type of printer so other people can compare to there own results
grabcad
free

mind storming assemply.
...mind storming assemply.
grabcad
i wish you'll like it guys.
free time working.
#kingin
thingiverse
free
Camera mount extender for Prusa MK3 by Mososokruppe
...art of the extender.
in my pictures, i am using a different camera case, though i plan to switch to the one from the source file.
thingiverse
free
Drum Key by lanceman
...e up with this one. i can already see a remix in the works, though. it needs a hole in the handle for a key ring. it is a key!
thingiverse
free
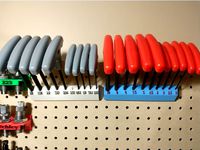
Hex Key with handles Pegboard holder
...tric one (blue) in the picture has a little bit of lift going on, needed to relevel the printer bed again, but works just fine :)
thingiverse
free

Ender 3 Magnetic Bed Alignment Clips
...otches into it to match up, and it's all fine. so if you're considering installing them on the pro, just be aware of that
Timothy3001
thingiverse
free
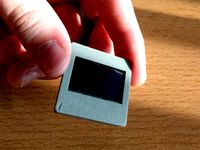
OLED Display Bezel Remix by Timothy3001
...he original thing and is tight, so no screws or anything needed.
thanks to andrewfromoz: http://www.thingiverse.com/thing:1031999
thingiverse
free
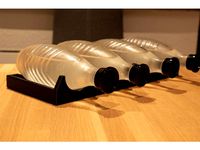
Soda Stream Bottle Rack by Timothy3001
... grippy stuff and glue it underneath.
if you want to connect two bottle holders you need to print two connectors.
happy printing!
thingiverse
free

Evil Grin Box by Timothy3001
...ecked your simulation before you start your print.
oh and maybe you find a way to use it as a prank box. let me know if you do :p
thingiverse
free
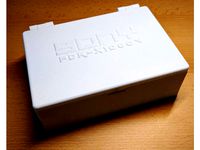
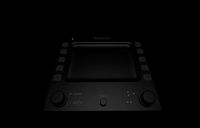
Sony FDR-X1000V Box by Timothy3001
...a heated screwdriver.
i also added felt-like stuff so that the cam and all the other stuff is better protected during transport.
thingiverse
free
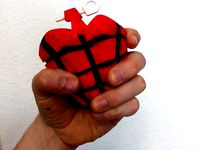
Heartgrenade (Green Day) by Timothy3001
...te nice and i hope you gonna enjoy it too.
by the way: this also has a second use as i found out: it's a great fridge magnet!
thingiverse
free
ESP8266 Project Box with Battery (18650, charger, On/Off-Button) by Timothy3001
...74665101
i connected the power of the led in the switch via a transistor with the esp so i can control the light programmatically
thingiverse
free
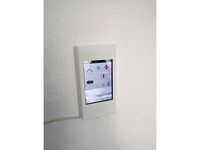
iPod Touch 4th gen wall mount by Timothy3001
...rews. not because of scratching (the heads of the screws should remain in the sinks) but to make the ipod sit tight in the mount.
Weather
turbosquid
$10

weather radar
...yalty free 3d model weather radar for download as c4d and fbx on turbosquid: 3d models for games, architecture, videos. (1664322)
turbosquid
$2
Weather radar
...lty free 3d model weather radar for download as obj and blend on turbosquid: 3d models for games, architecture, videos. (1281545)
turbosquid
$49
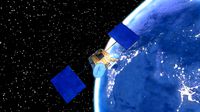
weather satellite
... 3d model weather satellite for download as max, obj, and fbx on turbosquid: 3d models for games, architecture, videos. (1691555)
turbosquid
$2

Saucepan Weathered
... model saucepan weathered for download as blend, fbx, and obj on turbosquid: 3d models for games, architecture, videos. (1678359)
turbosquid
$39
Weathered Wheelbarrow
... available on turbo squid, the world's leading provider of digital 3d models for visualization, films, television, and games.
turbosquid
$29

weather shelter
... available on turbo squid, the world's leading provider of digital 3d models for visualization, films, television, and games.
turbosquid
$25

Weather Vane
... available on turbo squid, the world's leading provider of digital 3d models for visualization, films, television, and games.
turbosquid
$10

Boxer Weather
... available on turbo squid, the world's leading provider of digital 3d models for visualization, films, television, and games.
turbosquid
$3

weather vane
... available on turbo squid, the world's leading provider of digital 3d models for visualization, films, television, and games.
turbosquid
$2
Weathered Pillar
... available on turbo squid, the world's leading provider of digital 3d models for visualization, films, television, and games.
Bottle
3d_ocean
$2

Bottle
...bottle
3docean
bottle glass bottle
so realistic glass bottle
archibase_planet
free
Bottle
...bottle
archibase planet
bottle litre bottle glass-ware
bottle - 3d model for interior 3d visualization.
archibase_planet
free
Bottle
...bottle
archibase planet
bottle glass bottle flask
bottle - 3d model (*.gsm+*.3ds) for interior 3d visualization.
3d_export
$5
bottles
...bottles
3dexport
bottles
archibase_planet
free
Bottle
...bottle
archibase planet
bottle wine bottle of wine
bottle n121211 - 3d model (*.gsm+*.3ds) for interior 3d visualization.
archibase_planet
free
Bottle
...bottle
archibase planet
bottle bottles kitchen ware
bottle n120213 - 3d model (*.gsm+*.3ds) for interior 3d visualization.
archibase_planet
free
Bottle
...bottle
archibase planet
small bottle bottle vial phial
bottle n060411 - 3d model (*.3ds) for interior 3d visualization.
3d_export
$5
bottle
...bottle
3dexport
bottle with liquid.
archibase_planet
free
Bottle
...bottle
archibase planet
bottle glass
bottle - 3d model for interior 3d visualization.
archibase_planet
free
Bottle
...ibase planet
bottle bottle of port alcohol
bottle of crimean port n090211 - 3d model (*.gsm+*.3ds) for interior 3d visualization.