Thingiverse

Waving Mechanism for Stage Prop, Decoration, Moving Sign, etc. by SteveJohnsen
by Thingiverse
Last crawled date: 3 years, 4 months ago
This is designed to mechanically produce a waving motion, driven by an electric motor. It is designed for a stage prop that has a cartoon figure in a window who is waving out the window. The design is for a specific purpose, but it could be used for other purposes, such as Halloween or Christmas decorations, or for moving signage.
If printing with FDM, for stronger pieces print in the orientation in which the object files are oriented in the object file. This will best utilize the filament flow and layering.
Each assembly requires two arm connectors to be printed.
There are three lengths of pivot brackets, which control the throw or width of the waving arc; the shorter the bracket, the longer the arc.
The arm connectors are designed to hold the rod, which is a segment of a wire coat hanger, but allow for easy removal of the rod or repositioning of how far the rod is inserted into the connector. This is helpful for adjusting the length of the rod or the distance between the two arm connectors, which determines the position of the waving motion.
The axle is a standard 8D nail (U.S.). It passes through the pivot bracket, prop arm, pivot backer, and into the window frame. Drill a hole that is nearly the diameter of the nail that you are using. 1/8" is slightly too wide for a standard 8D nail. The nail should fit in the hole snuggly, but not so tight that you have to hammer it in. If the nail is pounded in and you ever need to take apart the assembly, it is difficult to remove the nail axle without damaging the pivot bracket. Also, be careful not to insert the nail too far; this will cause the mechanism to bind due to excessive friction. The prop arm should pivot freely, but not be sloppy. The 8D nail can be cleaned up and be made smoother by removing any machining/stamping marks or burrs near the head of the nail.
The motor arm piece is designed for a specific "D" shaft motor that I happened to have. Since there are many different styles and dimensions of motor shafts, you may need to modify this piece to fit your motor shaft. The speed of the waving motion is determined by the RPMs of your motor; the range of most human waving would be ~30 to 120 RPM. Since there are no gears, the ratio of RPMs-to-waving cycles is 1:1.
Lightly sand the clip posts on the motor arm and pivot bracket that clip into the arm connecters so that they are smooth and so that the arm connectors spin freely. This is not essential, but it will reduce a bit of friction and a minor amount of strain on the motor.
The pivot backing is designed to glue to the back of the prop arm and provide additional support to keep the prop arm perpendicular to the axle. The four holes in the pivot backing are to allow additional gluing strength; I am planning on putting a glob of hot glue in each hole to form a tack weld of sorts.
The pivot bracket is also intended to be glued to the prop arm. There are two screw holes on the side of the pivot bracket so that it can be screwed to support/stiffening material on the prop arm. If screwing the bracket to the support material that is already fixed or glued to the prop arm, there is no need to glue the bracket itself to the prop arm. The two screws will hold sufficiently in most cases. The pieces can also be taped instead of glued if not waving at high speed.
The design is scalable. You will, however, need to modify the hole in the motor arm to fit your motor's shaft, after you have scaled the model. You may also need to do some modification to the connector arms so that they clip nicely to the connecting rod that you plan to use. When scaling, obviously you will need to scale each individual piece to the same scale.
BTW, in case you are wondering, the photo with the actual assembly is only an ugly mock-up arm that I quickly cut out of core board for prototyping. :D
Similar models
thingiverse
free

Nema 34 cover with connector
...ed on the top.
to mach the exact screw holes i used a picture and imported that in sketchup, scaled it and used that as template.
thingiverse
free

Yazzo Shafted Motor Horn by WilliamAAdams
... to be gentle when tightening.
the default sizes are an 11mm "arm" and a 5mm motor shaft and m3 hole for the set screw.
thingiverse
free

Another Water Pump!!!!! by martins1359
...bit small so will need to be pressed onto the motor shaft. leave a comment for any ideas for future projects or any improvements.
thingiverse
free

Adjustable Z Endstop by bruckj
...op for the x-axis so i have included a bracket for mounting the switch to the rod.
2016-01-23 update: cleaned up sketchup file.
thingiverse
free

Stepper Shaft Adapter by ahmlol
...rod and two machine-screws as tighteners for the shaft.
comment your improvement ideas or contact me if you need the cad-files :)
thingiverse
free

EMAX Nighthawk 250 arm protector with T-Motor mn2206 mounting holes by FrostFPV
...made for the t-motor mn2206 but it's pretty easy to drill holes for other motors, i can make one without the holes if needed.
thingiverse
free

KNex Axle Drive Connector by reichwec
... reichwec
thingiverse
this is the knex connector clip that will lock a wheel or gear to the axle so it can be driven by a motor.
thingiverse
free

Ender 3 Cable Chain Z-Axis Connector by Sevary
...can be used to zip-tie the cables.
because there's a slight left-shift, you'll need the new included frame connector too.
thingiverse
free

FT Bushwacker landing gear by slinkee
...holes small so it can be drilled out to your axle diameter. i printed mine in pla and it has held up fine. no need for supports.
thingiverse
free

Watch winder rotating part remixed
...s glued directly on motor shaft, next you slide in rotating part. it's much more rigid than glueing it directly on the shaft.
Stevejohnsen
thingiverse
free

Hamster Headstone by SteveJohnsen
...imilar design for their pet. oh, and yes, we do actually have a little area in our garden for burying our little pet hamsters. :)
thingiverse
free

Ryobi BS90108300 - Angle Adj. Knob Replacement by SteveJohnsen
...r, and most importantly, it works. the original replacement part can't be found anymore. the ryobi part number is bs90108300.
thingiverse
free

Hanging Soap Tray by SteveJohnsen
...64741
print with the object laying flat on its back on the print bed. see the included photo. the .stl file is oriented this way.
thingiverse
free

Settlers of Catan Number Marker Box by SteveJohnsen
...use the first model worked with my printer. if your printer is dialed in and accurate, try the model with the tighter tolerances.
thingiverse
free

Hanging Compact Soap Tray by SteveJohnsen
...n updated design from the original posted object. this design helps the soap bar to dry better and not stick as much to the tray.
thingiverse
free

One Wheel Freestyle Finger Board - Fidget Toy by SteveJohnsen
...hem that way. be sure to print the axles in their normal orientation for added strength. print the wheel/tire laying on its side.
thingiverse
free

Towel Wall Hook with Faceplate by SteveJohnsen
...hing that would hide the paint blemishes. so, i copied the original parts and made the hook a little more beefy, for strength. :)
thingiverse
free

Concave Corner Stencil Template - Metric & Imperial Versions by SteveJohnsen
...t; 69g
5 mm - 100 mm 31g
5 mm - 150 mm 59g
for round/convex corner stencils, see: https://www.thingiverse.com/thing:4785209
thingiverse
free

Antique Candle Lantern or Sconce, Hanging, for L.E.D. Votive Candle by SteveJohnsen
... roof & hanging ring). there is no need to print the fake candle; i just threw that in for fun (it isn't very realistic).
thingiverse
free

Hinge Pin Caps for Photographic Sweep Stand by SteveJohnsen
...le. an equal quantity of mirror image caps are provided in case one side of the print is better than the other from your printer.
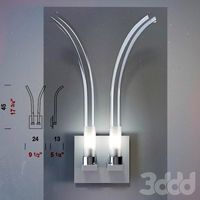
Waving
3ddd
$1
Wave
...wave
3ddd
wave
wave
3ddd
free
Mobilidea Wave
...mobilidea wave
3ddd
mobilidea , wave
mobilidea wave
design_connected
$22

Wave
...wave
designconnected
royal botania wave computer generated 3d model. designed by nyberg, erik.
3ddd
$1

Elica Wave
... вытяжка , островная
вытяжка подвесная elica wave
3d_export
$5
sideboard wave
...sideboard wave
3dexport
sideboard wave kare design
turbosquid
$5

Waves
... available on turbo squid, the world's leading provider of digital 3d models for visualization, films, television, and games.
turbosquid
$3

Wave
... available on turbo squid, the world's leading provider of digital 3d models for visualization, films, television, and games.
turbosquid
free
Wave
... available on turbo squid, the world's leading provider of digital 3d models for visualization, films, television, and games.
3ddd
$1
Бра PANZERI WAVE
... wave , led , panzeri wave
бра panzeri wave
3ddd
$1
Wave armchair
...
wave , jihye choi
кресло wave armchair от jihye choi. сделано из сталя, дерева и ткани.
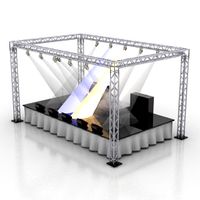
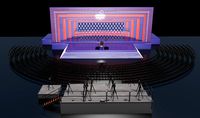
Stage
archibase_planet
free
Stage
...stage
archibase planet
stage staging boards scene
stage n290814 - 3d model (*.gsm+*.3ds+*.max) for exterior 3d visualization.
archibase_planet
free

Stage
...stage
archibase planet
stage dais rostrum
aqua - stage - 3d model for interior 3d visualization.
3d_export
$100

Stage
...stage
3dexport
collapsible mapping stage decor dimensions
3d_export
$100

Stage
...stage
3dexport
double curtain stage decor sequence order
turbosquid
$49

stage
...e
turbosquid
royalty free 3d model stage for download as obj on turbosquid: 3d models for games, architecture, videos. (1305813)
turbosquid
$29

stage
...ty free 3d model stage for download as 3ds, obj, c4d, and fbx on turbosquid: 3d models for games, architecture, videos. (1400329)
turbosquid
$29
stage
...ty free 3d model stage for download as c4d, obj, fbx, and 3ds on turbosquid: 3d models for games, architecture, videos. (1659284)
turbosquid
$15

Stage
...ty free 3d model stage for download as obj, fbx, skp, and stl on turbosquid: 3d models for games, architecture, videos. (1474331)
3d_export
$20

Pack Stage
...pack stage
3dexport
stage with furniture and complete scenography
turbosquid
$88

Stage
... available on turbo squid, the world's leading provider of digital 3d models for visualization, films, television, and games.
Prop
3ddd
$1

Props
...props
3ddd
props
3d_ocean
$10
Props
...ject you need this props design this 6 taype for props to get your design perfect and nice file include : 1 max 2 obj 3 3ds 4 zip
turbosquid
$15
Props
...s
turbosquid
royalty free 3d model props for download as max on turbosquid: 3d models for games, architecture, videos. (1249032)
turbosquid
$1

PROPS
...d model props for download as unitypackage, obj, fbx, and tga on turbosquid: 3d models for games, architecture, videos. (1627660)
turbosquid
$5
props
... available on turbo squid, the world's leading provider of digital 3d models for visualization, films, television, and games.
turbosquid
free
PROP
... available on turbo squid, the world's leading provider of digital 3d models for visualization, films, television, and games.
3ddd
$1

kids props
...kids props
3ddd
декоративный набор
kids props
3d_ocean
$8
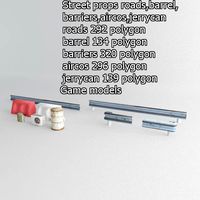
Street props
...l barrier prop roads street street prop
street props game models barrel barrier roads aircos jerrycan models fbx obj and max file
turbosquid
$39
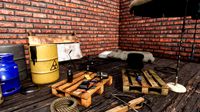
Apocalyptic Props
...uid
royalty free 3d model apocalyptic props for download as on turbosquid: 3d models for games, architecture, videos. (1380028)
turbosquid
$1
Bunker props
...rbosquid
royalty free 3d model bunker props for download as on turbosquid: 3d models for games, architecture, videos. (1196014)
Moving
3d_ocean
$12

PS Move
...ps move
3docean
move playstation ps ps move
ps move
3ddd
$1

Arketipo MOVING
...arketipo moving
3ddd
arketipo , moving
arketipo moving
turbosquid
$2

Move
...del move for download as c4d, ma, 3ds, dae, fbx, obj, and stl on turbosquid: 3d models for games, architecture, videos. (1601005)
3ddd
$1

Bellus Move
...bellus move
3ddd
bellus
диван bellus move
3ddd
$1

Arketipo Moving
... moving , угловой , модульный
диван
turbosquid
$50

Moving Light
... available on turbo squid, the world's leading provider of digital 3d models for visualization, films, television, and games.
turbosquid
free

moving water
... available on turbo squid, the world's leading provider of digital 3d models for visualization, films, television, and games.
turbosquid
$1

Move Cursor
...el 3d move cursor for download as max, 3ds, dxf, fbx, and obj on turbosquid: 3d models for games, architecture, videos. (1626504)
3ddd
$1

Кровать Move collezione Genius
...collezione genius
3ddd
move , genius
кровать фабрики move. размеры (дхгхв):
237x172x75см
turbosquid
$18

Sofa Lider Move
...id
royalty free 3d model sofa lider move for download as max on turbosquid: 3d models for games, architecture, videos. (1433350)
Sign
archibase_planet
free

Sign
...sign
archibase planet
signboard sign mask
restroom sign - 3d model for interior 3d visualization.
turbosquid
$1

Street Signs Stop Sign
...alty free 3d model street signs stop sign for download as fbx on turbosquid: 3d models for games, architecture, videos. (1672592)
turbosquid
free
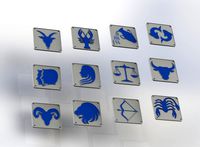
Signs for the zodiac signs pack
...signs pack for download as 3ds, obj, wrl, fbx, stl, and sldpr on turbosquid: 3d models for games, architecture, videos. (1194807)
3d_ocean
$9

Road Signs
...road signs
3docean
outdoor road signs signpost waymark
road signs 3d models.
3d_export
$5

Biohazard sign
...biohazard sign
3dexport
biohazard sign
3ddd
$1
SUBWAY SIGN
...subway sign
3ddd
subway sign
3d_export
$5

road sign
...road sign
3dexport
road sign with the texture of a cyclist.
turbosquid
$45

Sign
... available on turbo squid, the world's leading provider of digital 3d models for visualization, films, television, and games.
turbosquid
$10

Sign
... available on turbo squid, the world's leading provider of digital 3d models for visualization, films, television, and games.
turbosquid
$5

sign
... available on turbo squid, the world's leading provider of digital 3d models for visualization, films, television, and games.
Mechanism
3d_export
$50

Mechanism
...mechanism
3dexport
mechanism -------- animation is present only in the blender file.
3d_export
$5

mechanics
...mechanics
3dexport
turbosquid
$50
mechanic
... available on turbo squid, the world's leading provider of digital 3d models for visualization, films, television, and games.
3ddd
$1
Mechanical Wasp
...mechanical wasp
3ddd
робот
mechanical wasp
3d_export
$20
Mechanical tail
...mechanical tail
3dexport
mechanical tail<br>four-part movement
3d_export
$5
mechanical ballista
...mechanical ballista
3dexport
a mechanical ballista useful for medieval or fantasy games does not contain animations
turbosquid
$59

Mechanical Part
...id
royalty free 3d model mechanical part for download as c4d on turbosquid: 3d models for games, architecture, videos. (1410833)
turbosquid
$50
Mechanical Spider
...royalty free 3d model mechanical spider for download as blend on turbosquid: 3d models for games, architecture, videos. (1599864)
turbosquid
$45

Mechanical Pencil
...royalty free 3d model mechanical pencil for download as blend on turbosquid: 3d models for games, architecture, videos. (1503379)
turbosquid
$35

Mechanical fish
...id
royalty free 3d model mechanical fish for download as max on turbosquid: 3d models for games, architecture, videos. (1152530)
Etc
3ddd
free
Oranges, mandarins etc.
...син , мандарин , фрукты
oranges, mandarins etc.
3ddd
$1
Bowls, dishes etc.
...bowls, dishes etc.
3ddd
посуда , сервиз
bowls, dishes etc. for contemporary kitchens
turbosquid
$30

theater for( cinema, collage, etc.)
...model theater for( cinema, collage, etc.) for download as fbx on turbosquid: 3d models for games, architecture, videos. (1258736)
3d_export
$40
stage light ETC 3D Model
...am shaper lighting concert music electric studio set movie lens lamp zoom reflector
stage light etc 3d model braz 7043 3dexport
3d_ocean
$8

Realistic TV/Blu-ray/DVD etc. remote
...3docean
blu-ray dvd realistic remote technology television tv
this is a model of a television, dvd, blu-ray, etc. remote control.
3d_ocean
$12

Desk accessories (pen, eraser, etc.)
...ats included: .c4d, .obj – the model contains 58530 polygons – not rigged, scene setup / lighting from the preview, are included.
3d_export
$5

kitchen assets - pots pans etc
...fferent material as they have a separate material id for the ability to personalise or have alternate lid types e.g. foggy glass.
3d_export
$15

bentley continental 2015 with all surroundings complete with lightmaterials etc
...als etc
3dexport
in the car model, each part as a separate object, which allows you to make animation or destruction in the game
3d_export
$12
set of 73 parts bolts nuts washers nails etc
...red with eevee. the wood texture is not included. all the other materials are procedural pbr configured in the native blend file.
3ddd
free

Suitcase
...suitcase 3ddd suitcase plastic suitcase for tools etc ...
Decoration
3d_ocean
$3

Decoration
...arabic.arab decoration decorative plaster isalm islamic other decorative objects panel pattern stone wall
decoration for building
3d_ocean
$3

Decoration
...sic arabic.arab decoration decorative plaster isalm islamic other decorative objects panel pattern stone wall
decoration plaster…
3d_export
$10
decor
...decor
3dexport
decor
3d_export
$5

decor
...decor
3dexport
decor
archibase_planet
free

Decor
...decor archibase planet decor statuette decoration leaf decor 2 - 3d model (*.gsm+*.3ds) for interior...
3d_export
$10

decor
...decor
3dexport
lattice decor
3ddd
$1
DECOR
...decor
3ddd
панель
decor
3ddd
$1
Decor
...decor
3ddd
панель
decor
3ddd
$1
Decor
...decor
3ddd
панель
decor
3ddd
free
DECOR
...decor
3ddd
панель
decor