GrabCAD

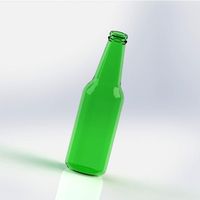
Water Bottle
by GrabCAD
Last crawled date: 6 months ago
Designing a water bottle in SolidWorks involves creating a 3D model with precise dimensions and features. Here's a brief overview of the key steps you might take:
1. Sketch the Profile:
I. Start with a new part in SolidWorks.
II. Create a 2D sketch on the plane where you want the bottle profile.
III. Use sketch tools like lines, arcs, and splines to draw the outline of the bottle.
2. Revolve Feature:
i. Utilize the revolve feature to turn your 2D sketch into a 3D shape.
ii. Select the sketch and the axis around which you want to revolve it.
3. Create the Neck and Cap:
i. Add details for the neck and cap of the bottle. This might involve creating additional sketches and using features like extrude and fillet.
4. Add Features:
i. Incorporate features such as threads on the neck, a label area, or any other details that you want to include.
5. Refine Shape:
i. Use tools like fillets and chamfers to smooth out edges and refine the overall shape of the bottle.
6. Hollow the Bottle:
i. Use the shell feature to hollow out the bottle, leaving a thickness for the walls.
7. Create the Bottom:
i. Design the bottom of the bottle, considering stability and functionality.
8. Finalize Details:
i. Fine-tune your design by adding any additional features, adjusting dimensions, and ensuring all elements are precisely modelled.
9. Render and Visualize:
i. Apply materials and colours to your model to make it visually appealing.
ii. Consider rendering the model to create realistic images.
10. Document:
i. Create 2D drawings if needed, including dimensions and annotations for manufacturing.
Remember to constantly check your design against any specifications or requirements you have for the water bottle. SolidWorks offers a range of tools to ensure accuracy and precision throughout the modelling process. Good luck with your water bottle design!
Similar models
grabcad
free

Bottle Design in Solidworks
...d features as needed. additionally, tutorials and documentation provided by solidworks can be helpful for more specific guidance.
grabcad
free

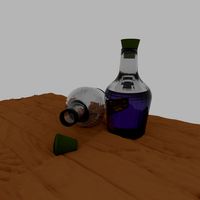
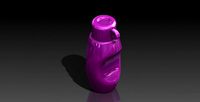
Digital asset creation 1 (water bottle)
...ead to make it stick out. i finally made the material cast allow steel and painted it a pastel purple and left the top unpainted.
grabcad
free

WHEEL
...the design before it is manufactured. this helps in ensuring the wheel's functionality, structural integrity, and aesthetics.
grabcad
free

Plastic Bottle
...h
#dimensions
#line
#spline
#fillet
#revolve
#revolve-cut
#reference-plane
#shell
#threads
#material
#appearance
#plastic-product
grabcad
free

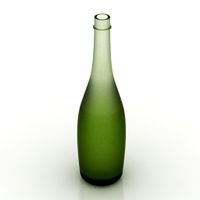
Glass Bottle
...glass bottle
grabcad
solidworks basic practice model - sketch, revolve, shell, fillet
grabcad
free

Plummer Block
...tandards and specifications relevant to your industry when creating components like plummer blocks for use in mechanical systems.
grabcad
free

Domino
...ed the rectangle, circle, and sketch fillet tool.
for 3d i used the extrude, extruded cut, revolved cut, and the fillet feature.
grabcad
free

4-cylinder engine assembly
...dering
i. generate 2d drawings with dimensions and annotations.
ii. create realistic renderings to showcase your 4-piston engine.
grabcad
free

toy car
... to refine the shape of the car body. you can use features like fillet to round off edges and give the car a smoother appearance.
grabcad
free

Drill Bit
...he drill point
flute clearances
checking dimensions
thread design (if applicable)
material assignment
exporting and documentation
Bottle
3d_ocean
$2
Bottle
...bottle
3docean
bottle glass bottle
so realistic glass bottle
archibase_planet
free
Bottle
...bottle
archibase planet
bottle litre bottle glass-ware
bottle - 3d model for interior 3d visualization.
archibase_planet
free
Bottle
...bottle
archibase planet
bottle glass bottle flask
bottle - 3d model (*.gsm+*.3ds) for interior 3d visualization.
3d_export
$5
bottles
...bottles
3dexport
bottles
archibase_planet
free
Bottle
...bottle
archibase planet
bottle wine bottle of wine
bottle n121211 - 3d model (*.gsm+*.3ds) for interior 3d visualization.
archibase_planet
free
Bottle
...bottle
archibase planet
bottle bottles kitchen ware
bottle n120213 - 3d model (*.gsm+*.3ds) for interior 3d visualization.
archibase_planet
free

Bottle
...bottle
archibase planet
small bottle bottle vial phial
bottle n060411 - 3d model (*.3ds) for interior 3d visualization.
3d_export
$5
bottle
...bottle
3dexport
bottle with liquid.
archibase_planet
free
Bottle
...bottle
archibase planet
bottle glass
bottle - 3d model for interior 3d visualization.
archibase_planet
free
Bottle
...ibase planet
bottle bottle of port alcohol
bottle of crimean port n090211 - 3d model (*.gsm+*.3ds) for interior 3d visualization.
Water
turbosquid
$2
water bin water tank
...e 3d model water bin water tank for download as blend and obj on turbosquid: 3d models for games, architecture, videos. (1594026)
archibase_planet
free
Water purifier
... purifier water purification water treatment
water purifier n050914 - 3d model (*.gsm+*.3ds+*.max) for interior 3d visualization.
3d_ocean
$6
glass water
...glass water
3docean
clear glass glass water
glass filled with water
3ddd
$1
Watering pot
...watering pot
3ddd
watering pot лейка поливалка , лейка
watering pot
3d_ocean
$12
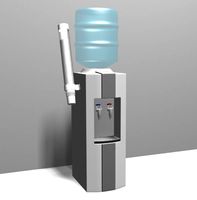
Water Dispenser
...dispenser furnishings lowpoly water
this is a water dispenser hot water for tea is winter and summer is cold for souls. have fun!
3d_ocean
$2
Water
...water
3docean
this is a tile able, hand painted water texture tile. included is one versions at 512×512 pixels in .tga format.
3d_export
$6
water tanker
...water tanker
3dexport
water tanker
3d_export
$6
water bottle
...water bottle
3dexport
water bottle
3d_export
$5
water bottle
...water bottle
3dexport
water bottle
3d_export
$5
water thermos
...water thermos
3dexport
water thermos