Thingiverse
Warhead Paint Handle by lawnmowerlatte
by Thingiverse
Last crawled date: 3 years, 3 months ago
This is (yet another) painting handle. I didn't like any designs I had seen, so I made my own with the design guides in mind.
Primarily focused on 25mm bases
I paint primarily D&D minis which mostly fit on a 25mm base. However, the raised painting platform can support large models or models which have oddly shaped pudding bases.
Smooth rotation
I liked the idea of using bearings to provide a smooth rotating platform for painting. In my experience it is really helpful to have. You don't have to reposition your hand quite as much when changing orientation.
To facilitate this, the bases support a 8mm x 22mm x 7mm bearing which serves a double purpose: It provides a magnetic surface on the base as well as smooth rotation.
Interchangable bases
I tend to paint groups of minis, so being able to hot swap what I am working on was a must. The painting platform base has slots for 7 3mm x 4mm rod magnets.
One acts as an alignment point while the others hold the bearing.
You don't necessarily have to fill all the slots, even 4 (1 alignment + 3 surrounding) seems adequate.
Detailing ledge
I hadn't seen this on anything else, but I wanted to be able to brace my painting hand directly against the handle. This gives a lot of stability when doing detailed work.
Magnetic cradle
I added a slot for a magnet in the bottom which attaches to a magnetic cradle for added stability.
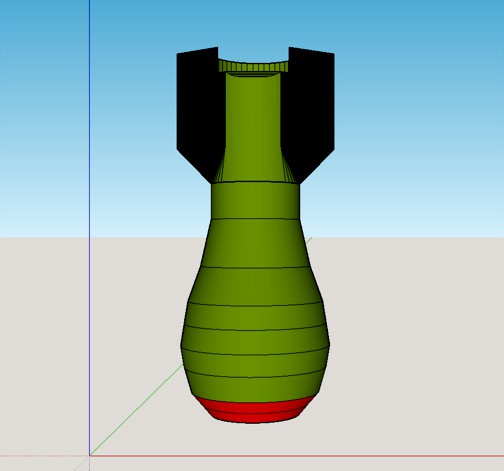
The names comes from the overall profile of the design which looks somewhat like a WW2 bomb or warhead. I've included the Sketchup designs if you want to alter it.
Instructions
Print the handle
Superglue in one magnet in the bottom, one magnet in the center of the painting stage and at least 3 more magnets around it. It's helpful to use a consistent magnetic orientation.
Print the cradle
Superglue a magnet into the cradle, make sure the orientation matches the bottom of the handle.
Print as many bases as you want
Install a bearing into each base. Depending on snugness you may want to super glue this. If you do, make sure to only glue the outside so it remains free moving.
Superglue in one magnet into each base, make sure the orientation matches the painting stage.
(Optional) If you want a really snug fit between the handle and the base, use a lighter to heat the bottom of the handle and the center of the cradle. Just enough that it starts to get slightly soft, but not enough that it gets liquified. Then push the two together, pulling apart and rotating before pushing back together. This ensures that the whole joint is snug and that the two don't begin to melt together. Repeat this until you're satisfied.
Now you can bluetak or superglue your minis to the bases and mount them into the handle for painting. Use the lip in the handle to lift the base when you are ready to swap minis. You can also use a metal surface to store your minis while you paint.
Primarily focused on 25mm bases
I paint primarily D&D minis which mostly fit on a 25mm base. However, the raised painting platform can support large models or models which have oddly shaped pudding bases.
Smooth rotation
I liked the idea of using bearings to provide a smooth rotating platform for painting. In my experience it is really helpful to have. You don't have to reposition your hand quite as much when changing orientation.
To facilitate this, the bases support a 8mm x 22mm x 7mm bearing which serves a double purpose: It provides a magnetic surface on the base as well as smooth rotation.
Interchangable bases
I tend to paint groups of minis, so being able to hot swap what I am working on was a must. The painting platform base has slots for 7 3mm x 4mm rod magnets.
One acts as an alignment point while the others hold the bearing.
You don't necessarily have to fill all the slots, even 4 (1 alignment + 3 surrounding) seems adequate.
Detailing ledge
I hadn't seen this on anything else, but I wanted to be able to brace my painting hand directly against the handle. This gives a lot of stability when doing detailed work.
Magnetic cradle
I added a slot for a magnet in the bottom which attaches to a magnetic cradle for added stability.
The names comes from the overall profile of the design which looks somewhat like a WW2 bomb or warhead. I've included the Sketchup designs if you want to alter it.
Instructions
Print the handle
Superglue in one magnet in the bottom, one magnet in the center of the painting stage and at least 3 more magnets around it. It's helpful to use a consistent magnetic orientation.
Print the cradle
Superglue a magnet into the cradle, make sure the orientation matches the bottom of the handle.
Print as many bases as you want
Install a bearing into each base. Depending on snugness you may want to super glue this. If you do, make sure to only glue the outside so it remains free moving.
Superglue in one magnet into each base, make sure the orientation matches the painting stage.
(Optional) If you want a really snug fit between the handle and the base, use a lighter to heat the bottom of the handle and the center of the cradle. Just enough that it starts to get slightly soft, but not enough that it gets liquified. Then push the two together, pulling apart and rotating before pushing back together. This ensures that the whole joint is snug and that the two don't begin to melt together. Repeat this until you're satisfied.
Now you can bluetak or superglue your minis to the bases and mount them into the handle for painting. Use the lip in the handle to lift the base when you are ready to swap minis. You can also use a metal surface to store your minis while you paint.
Similar models
thingiverse
free

Stackable Platform - Magnetized (3x1mm)
...ug-fit for me but for prolonged use you might want to affix it there with glue or something.
designed for 3x1mm circular magnets.
thingiverse
free

Basic painting handle for 28mm slotta based miniatures kit
...er glue should hold them temprarily, or some blutack.
you could also use these with based miniatures blutacked/glued to the top.
thingiverse
free

Dead Space Extruder Knob - Ender3 by ReapyPeepy
...t. can even still use it to assist in turning the gear.
i printed mine in petg; you don't need supports for the bottom slot.
thingiverse
free

Double Missile Launcher For Dominus Imperial Knights by johnbearross
...eets of a place called junctionworld!https://www.amazon.com/defiance-junctionworld-book-bear-ross-ebook/dp/b07xkw213j
thanks,
jbr
thingiverse
free

Mini Fidget Spinner by Pilotgeek
...alves of the hub together.
edit: added plugs to replace bearings on the outside, if you don't want to waste so many bearings.
thingiverse
free

Stackable Life/Heart Token by kevin_mic
...he magnet into place. repeat for all the other tokens. to press the magnet into place i used the flat side of a pair of pliers.
thingiverse
free

Phrozen sonic mini build platform holder by king1990
...'t have to remove the holder.
note: you don't have to remove the screw but be sure you have pushed the holder to the end.
thingiverse
free

model holder for painting by chris262
...ttp://www.thingiverse.com/thing:354125) which i printed sometime ago. the trays make the newer versions much easier to use imo.
thingiverse
free

Base for School of Fishies by LeHof by LeHof
...'t have to worry about any chemical reaction taking place.
for correct orientation, the little arrow points to the front ;)
thingiverse
free

Nail tool for Ikea jobs by PIORKO
...on't forget to stick a small 6mm magnet in the bottom of the planned hole. you're not going to hurt your fingers anymore.
Lawnmowerlatte
thingiverse
free

InfinityLock Clip Removal Tool (DungeonWorks) by lawnmowerlatte
...k terrain using adapter clips. the system has a lot of variety and an excellent price point. please support the original release.
thingiverse
free

InfinityLock Stone Column Extension Wall by lawnmowerlatte
...k terrain using adapter clips. the system has a lot of variety and an excellent price point. please support the original release.
thingiverse
free

InfinityLock Wooden Beam Extension Wall by lawnmowerlatte
...k terrain using adapter clips. the system has a lot of variety and an excellent price point. please support the original release.
thingiverse
free

InfinityLock Classic Wall with Magnetic Attachment Points by lawnmowerlatte
...k terrain using adapter clips. the system has a lot of variety and an excellent price point. please support the original release.
thingiverse
free

The Wall (Spider-Man villain) by DalleDC
...old spider-man villain. it's a remix made from mixing: lawnmowerlatte wall: https://www.thingiverse.com/thing:2893274 hugolurs batman: https://www.thingiverse.com/thing:3836300 masterclips hulk: https://www.thingiverse.com/thing:3742154 arabicjesus...
Warhead
turbosquid
$100

Nuclear Warhead Carrier
...lty free 3d model nuclear warhead carrier for download as skp on turbosquid: 3d models for games, architecture, videos. (1526968)
turbosquid
$7

Rocket Launcher - Projectile - Hollow Gharge Warhead
... available on turbo squid, the world's leading provider of digital 3d models for visualization, films, television, and games.
3d_export
$10

Arch Angel 3D Model
...angel 3d model 3dexport missile system arch angel weapons warhead arch angel 3d model dogmaf 32133...
3d_export
$30

Seeker Missile 3D Model
...seeker missile 3d model 3dexport missile warhead military seeker ir gyro tech gimbel combat seeker missile...
3d_export
$8

rpg-32 barkas
...multicaliber hand-held anti-tank grenade launcher.<br>caliber 72 and 105 mm warhead ...
3d_export
$10

spartan helmet 4k
...spartan helmet 4k 3dexport spartan warhead<br>warhead used in ancient roman times.<br>4k textures and ready materials<br>uv...
3d_export
$75

PIAT 3D Model
...quality world war ii british piat anti tank heat warhead ammo ammunition firearm gun weapon piat 3d model plutonius...
3d_export
$29

DRDO AGNI2AT 3D Model
...india ballistic missile drdo indian rocket defense nuke nuclear warhead rv 3ds dxf obj drdo agni2at 3d model visualmotion...
3d_export
$54

Iranian Shahab3 3D Model
...iran iranian medium range ballistic missile rocket mrbm shahab warhead cob 3ds dxf obj weapon rv iranian shahab3 3d...
3d_export
$50

Trident II C4 FBM 3D Model
...3d model 3dexport us navy trident fleet ballistic missile warhead rv mirv nuclear submarine launched trident ii c4 fbm...
Handle
archibase_planet
free
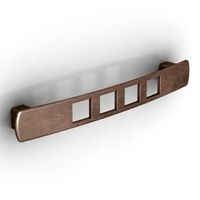
Handle
...handle
archibase planet
handle furniture handle
handle 1 - 3d model (*.gsm+*.3ds) for interior 3d visualization.
archibase_planet
free
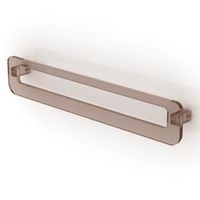
Handle
...handle
archibase planet
handle furniture handle
handle 5 - 3d model (*.gsm+*.3ds) for interior 3d visualization.
archibase_planet
free
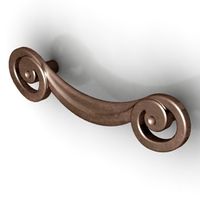
Handle
...handle
archibase planet
handle furniture handle
handle 3 - 3d model (*.gsm+*.3ds) for interior 3d visualization.
archibase_planet
free
Handle
...handle
archibase planet
handle furniture handle
handle 6 - 3d model (*.gsm+*.3ds) for interior 3d visualization.
archibase_planet
free
Handle
...handle
archibase planet
handle furniture handle
handle 4 - 3d model (*.gsm+*.3ds) for interior 3d visualization.
archibase_planet
free
Handle
...handle
archibase planet
handle furniture handle
handle 2 - 3d model (*.gsm+*.3ds) for interior 3d visualization.
archibase_planet
free
Handle
...handle
archibase planet
handle furniture handle knob
handle 2 n140814 - 3d model (*.gsm+*.3ds) for interior 3d visualization.
archibase_planet
free
Handle
...handle
archibase planet
handle door knob door-handle
handle n110413 - 3d model (*.gsm+*.3ds) for interior 3d visualization.
archibase_planet
free

Handle
...handle
archibase planet
door-handle handle door-knob
handle n070209 - 3d model (*.gsm+*.3ds) for interior 3d visualization.
archibase_planet
free
Handle
...handle
archibase planet
door-handle handle door-knob
handle n270309 - 3d model (*.gsm+*.3ds) for interior 3d visualization.
Paint
archibase_planet
free

Paints
...paints
archibase planet
paints paint
paints n241211 - 3d model (*.3ds) for interior 3d visualization.
archibase_planet
free

Paint
...paint
archibase planet
jar of paint paint can
paint - 3d model (*.gsm+*.3ds) for interior 3d visualization.
3ddd
$1

paint
...paint
3ddd
paint
archibase_planet
free

Paint
...paint
archibase planet
paint
paint - 3d model (*.gsm+*.3ds) for interior 3d visualization.
3ddd
$1

Painting
...painting
3ddd
картина
painting in double wooden frame decorated antique
3ddd
$1

The collection of paintings
...
картина , фото
collection of modern and contemporary paintings.
contemporary paintings.
turbosquid
$29

painting
...free 3d model painting for download as 3ds, obj, c4d, and fbx on turbosquid: 3d models for games, architecture, videos. (1383201)
turbosquid
$1

Painting
...ee 3d model painting for download as 3ds, obj, md3, and blend on turbosquid: 3d models for games, architecture, videos. (1207611)
turbosquid
free

Painting
... 3d model painting for download as ma, 3ds, max, obj, and fbx on turbosquid: 3d models for games, architecture, videos. (1219609)
3ddd
$1

PAINTINGS
...paintings
3ddd
панно
размеры:
1170х900