Thingiverse

Warburn Remix a la hoellenhamster by hoellenhamster123
by Thingiverse
Last crawled date: 3 years, 1 month ago
First things first: This is a toy. It flings foam darts from a magazine.
So Captain Slug made the Caliburn. Then the Talon Claw was created and sometime after that blasted.de's ImMortis created the Warburn which is basically a metric Talon Claw: https://www.thingiverse.com/thing:3808246
Thingiverse won't let me credit them right now so I have included the links to their things in this description.
I am relatively new to 3d printing and his Warburn was the first blaster I printed and sourced by myself (having built a Caliburn with the Captain's hardware kit before). While that first warburn came out great and is a superb blaster I wanted to clean up its look a little bit. This might just be me and my printer (which still isn't super fine tuned when printing petg) but I wanted to smooth some details and print the large outer pieces in as few pieces as possible to minimize wobble and visible gaps.In the pictures the red blaster is my first blaster, the blue one is the one using the remixed pieces.
One additionals aspect that I have focused on for the blue parts in the example pics: The less edges are incorporated in the design, the easier it is to paint.
I have included all the pieces I changed and will write a sentence or two for each:
Warburn back
This is mostly a remix of DevilZCall's Warburn remix (https://www.thingiverse.com/thing:3866218/files) which acommodates a sliding shoulder stock. It remains functionally the same but I have merged the four pieces into one and ensured printability. Requires minimal support for the nuts at the very bottom. Looks much cleaner in my opinion and makes the back of the warburn pretty darn solid. I have added a couple of cosmetic touchups. Will use more filament then the original, though.
Quickchange spring outer/inner
This is a part of the aforementioned Warburn back. Twist a little to slide the stock. Twist 90° to change the spring on the fly.
Stock solid glue required / collapsstock padding
In this case I split a piece into two; I wanted to use two different filaments. I also made the stock solid and changed its aesthetics a little so it will require more filament then the original. You will also have to glue in two pieces of 10mm OD aluminium pipe (or similar). The original used Nirodha's extendable Longshot design but the metal braces for that were too short for me, so I filed slots into aluminium pipe and glued them in.
RMAX front right/left
This barrel shroud is originally one of the Captains designs for the Caliburn. ImMortis remixed it for the warburn - it is usually done in 4 pieces leaving 3 gaps along the front of the blaster. I have merged these pieces and then cut them along the middle so they screw onto the modified railgasm set from the sides. They fit on a ender 3 or 5 build plate diagonally which results in a much cleaner look (in my opinion). Doesn't require support
Railgasm one piece
I merged the railgasm pieces and added two screw holes so the RMAX shroud can be screwed on. I have also shaved off a lot of material to make it easier to print diagonally so that the picatinny rail on top comes out clean. Doesn't require support. Looks wonky on its own, though - this is meant to be hidden away under the barrel shroud.
Barrel Clamp 18mm / Trench 18mm
This is mostly unchanged - I just widened the hole in order to fit a 18mm OD piece of aluminium pipe in there which I use to protect my brass barrel. The trench has received some slight cosmetic touch ups.
Muzzle 18mm
Its purely cosmetic. Its a muzzle for said 18mm aluminium pipe. I have designed this myself though I took inspiration from about 80 others like it. In my build it hides the SCAR barrel.
RMAX pump grip extended
Its the RMAX pump grip. I have extended it.
PT ring with rail2
This piece only really functions if you use a monolithic magwell. I have merged the ring covering the Plunger Tube and the rail that sits on top of the plunger tube. This results in the rail wobbling a lot less. Note this is sized for a 40mm OD PT.
Similar models
thingiverse
free

RS187 Mega Caliburn Railgasm Remix by RADIOSILENCE187
...thingiverse a toprail system for captain slug's mega caliburn, similar to the railgasm for the regular caliburn series. features...
thingiverse
free

Railgasm CPVC Coupler Adapter by Remzak
...uplers are here:https://www.mcmaster.com/mv1519231275/#catalog/5035k61
also available on my etsy:https://www.etsy.com/shop/remzak
thingiverse
free

Caliburn Railgasm Barrel Shroud - One Piece
...lure hazard. would recommend using core xy or delta style printer, as it help your chance of success when the bed is not moving.
thingiverse
free

Nerf Caliburn - Railgasm/Universal Handguard Integration by MacMeaties
...arts up.
tested now and it all does what it should.
as per request i threw together a new file with all the bshroud files merged.
thingiverse
free

Talon Claw U Bullpup RMAX 1 with Caliburn U rails by c5k0
...ell -- added extra material to keep the alignment true along the u channels - and also includes pin holes for top rail alignment.
thingiverse
free

U-Channel Valkyrie Stock by seashell_scientist
...alf laterally and glued it together to avoid a ton of overhang.
requires at least 3cm of excess rail at the end of the blaster.
thingiverse
free

Caliburn SCAR Barrel/Muzzle by HeathWanderlust
...rial has some tolerance.
i used .4 mm fishing line (picture) as to string the muzzle/barrel.
https://youtu.be/_rnqlgipyfm?t=4m56s
thingiverse
free

One-piece Caliburn Foregrip by Freebird285
... caliburn foregrip by freebird285
thingiverse
remixed from caliburn (captain slug) and user misery5567 (ar-15 skeleton foregrip)
thingiverse
free

Cosmetic Nerf barrel for N-strike attachment point by Dragonwolf007
...9;s a muzzle attachment. this is my first design so please, if you spot any errors please let me know, thanks and have a good day
thingiverse
free

Caliburn Extended Barrel Shroud by Remzak
...t completely distinct from the original argus modworks barrel shroud.
designed at the request of a customer.
etsy.com/shop/remzak
Warburn
thingiverse
free

Warburn railriser by my86outback
... the original, please feel free to comment and i will correct the situation.
it is not the cleanest design, but it is functional.
thingiverse
free

loli arms warburn receiver
...iver
thingiverse
nothing special here, just a bit slanted magwell and some cosmetic things. might do some more changes with time
thingiverse
free

DvZ'BRN Take Down Wildcard Magwell for Warburn and Talonclaw
...nted with support for the front pin holes and - depending on your confidence in your printer - also inside the plunger tube hole.
Remix
turbosquid
$5
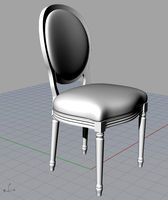
MODA Collection Remix Chair
... available on turbo squid, the world's leading provider of digital 3d models for visualization, films, television, and games.
3d_export
$12

remix yamaha rm1x
...remix yamaha rm1x
3dexport
geometry triangles 15.2k vertices 7.6k pbr no textures 1 materials 1 uv layers yes
3d_ocean
$5
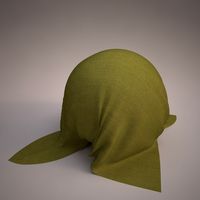
Vray fabric Kvadrat remix green - tileable
...th vray and 3dsmax. high-resolution texture images (2000×2000 px) file included: shader vray 2.40 texture image 3ds max 2011 file
turbosquid
$20

Gerrit Rietveld 1938 Zig Zag Chair Remix
... available on turbo squid, the world's leading provider of digital 3d models for visualization, films, television, and games.
3d_export
$10

multicolored remix parametric table furniture
... fbx, obj, mtl, archive with textures. the model has no glitches. render and materials - vray . without using plugins. good use!
3ddd
$1
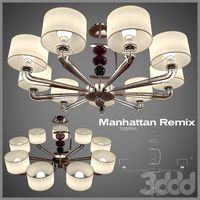
Barovier&Toso / Manhattan Remix 7192
... 004293-142405
в коллекции есть люстры 7, 9, 12 рожковые. диаметр соответственный 1000, 1250, 1500 мм.
3ddd
$1

Muuto fiber chair
...grey/grey, dusty green/dusty green, nature/oak, natural white/oak upholstery options remix 183/black, remix 133/grey, remix 643/dusty red leather options black...
3ddd
$1
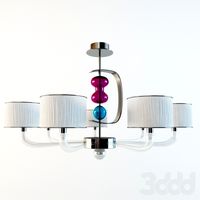
Barovier&Toso 7190-7195
...7190-7195 3ddd barovier&toso потолочнай люстра фабрики barovier&toso;, коллекция manhattan remix артикул 7190-7195. размеры в inches: 39"...
3d_export
$5
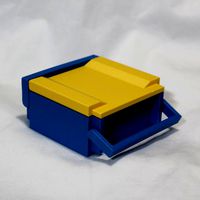
3D Locking Handle Weatherproof Storage Box Container
...handle weatherproof storage box container 3dexport new, improved and remixd! no screws required. print-in-place. weatherproof. parametric. 2 parts. easy...
cg_studio
$49

HTC One Mini 2 Amber Gold3d model
...cell phone mobile cellular super lcd touchscreen touch screen remix amber gold .max .obj .mb .lwo .fbx .c4d .3ds...
