Thingiverse
Wanhao Duplicator 6 Centrifugal Supermagnum Duct (Prototype) by Reflector
by Thingiverse
Last crawled date: 4 years, 7 months ago
Low sarcasm, low humor and boring summary ahead.
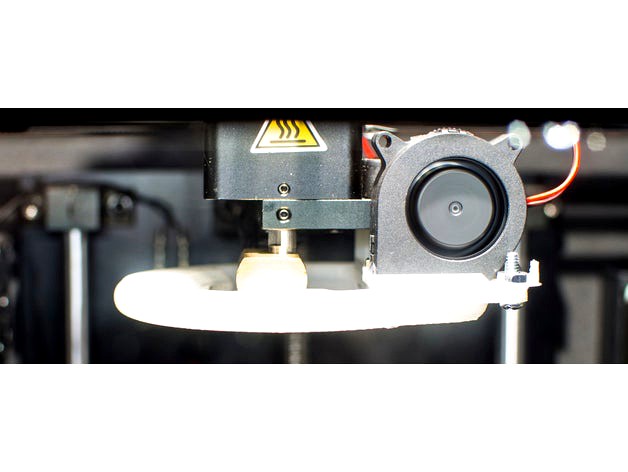
Edit: Added a photo (Third in sequence) for anyone asking "will it airprint." 215C @ 0.3mm height, fairly slow rate at 12mm/s since I had to low the temperature on that print and I manually sped to prevent underextrusion given I'm pushing so much filament through. Been printing with this nozzle at 240C and it holds up.
Fits a 40x40x20mm centrifugal blower (Go on Amazon/ebay/whatever and you'll probably recognize what I got, the connector is a JST XHP-2. Remember, 24V or the fan motor will suffer). The greater Z depth of the fan, centrifugal blower instead of an axial fan, etc means you get more static pressure. Helps with these shrouds since they're not nice big clean funnels that point right at the nozzle and are instead rings. You will experience significantly improved airflow with this design and with a blower. That is according to my hand anyways. The Supermagnum did pretty well in regards to bridging already but I'm not stopping there when I have options to make something even better.
Holes are left in on the plate to allow you to use the screw and nuts of your choice to secure the adapter plate onto the Supermagnum. If your prints are messy and have a little bit of material in the hole causing them to be semi undersized, then you can possibly get away without a nut on the end of the screw, right up until you strip the tiny pieces of ooze out anyways. You now know why I left in the two "unneeded" holes on my designs. Modularity and room for growth is pretty useful.
The shroud is effectively the same as the Supermagnum but with the cavity modified to fit a perpendicular axial blower in that kind of a compact arrangement. To fit the blower flat with the housing with the intake pointed up would take some redesign time and I just wanted to have an already designed, tested and proven shroud without having to go through a dance and basically have a functional design out the day I got the centrifugal blower. The only problem is that it does tend to bump into the belt if you travel right up to the very front of the build area, so you will lose a tiny little bit of build area, mostly to the tension spring on the belt since that will actually catch right up on the fan housing.
When replacing the fan, the connectors are on the left. On my D6, it appears to be the connector on the front. There's a little bit of hot melt on but it appears to not add significant holding force to the connector. There is also possibly a connector that bridges the board to the extruder that will be over the connectors, pulling the end out on the motor will make your life easier. I recommend cutting the ziptie after you print this and if you have to use a cutting instrument that could nick the wires, to have the wires arranged in such a way you're more likely to take out the fan you're trying to replace rather than any of the other wires.
Also regarding the bracket: I am pretty sure the little mount I put in for the screw on the blower is all kinds of not accurately placed given I've went through several revisions and the current one released is actually untested due to me making some last minute changes to pull the bracket a little closer to the screw mount. Otherwise the dimensions for the rectangular hole for the blower and all the other mounting holes I know work. Right now I just tape the fan from the bottom of the bracket and into the inside of the exhaust of the fan. This helps with sealing it to the bracket and by extension, the duct. It seems to hold fine for now and I will probably be making revisions to the bracket but if you want to try to get it now then the stls are here for you.
Also if you are wondering why the blower is orientated like that: It has plain bearings, so I am sure the bearings in it feel happier that way than lying down and dealing with some thrust loading. And no, inverting it doesn't help since it causes the same problem as the original fan and duct mount: It ends up pulling air from too close to the HOT BED. This means a redesign to lower the fan will be more nuanced since it needs to have the advantages of increased blow while having the large diameter of the Supermagnum, etc. Which means I will effectively be making a completely new duct instead of a variant of a reliable design.
A warning: You will lose a little bit of print area in the rear left corner (Perspective: You facing the printer) if you use these ducts, they will bump the motor. They effectively take about 1 inch/2-3cm, as in the legs of a triangle more or less. Obviously you have more to lose if you stick anything like a heatsink onto your steppers. Also you will lose a small (About 1 inch/2-3cm) strip that is about 1/4"/5mm in the front center due to the belt tensioning clip bumping into the blower. Unless you like that kind of centrifugal blower fan on belt tensioning clip action, I recommend not to drag the models dead center to the front.