Thingiverse

VertexEvo (Rev.1) - Vertex K8400 Evolution by Bo_Ris
by Thingiverse
Last crawled date: 3 years ago
This is the initial version of VertexEvo. Newer and improved version is published here.
Please check also my Vertex-H MOD, which is the next step after VertexEvo.
Before you start making such a major modification to your Vertex printer please be aware about Cons:
Properly assembled and tuned K8400 can produce rather good printouts and it is unlikely that this upgrade will further improve print quality
VertexEvo works in CoreXY printing mode that requires firmware upgrade to the latest Marlin version 1.1.5. As the result you will loose K8400-specific menu items like filament loading/unloading, LED light control, etc. Entire menu structure will be different and it may take you some time to get used to it.
Front and side panels of K8400 are not strong enough to hold the amount of load produced in CoreXY mode. As the result the panels wobble and this in some cases may slightly degrade print quality. To address this you will need to attach 25mm x 3mm aluminium bars along the top of front and side panels.
Having polyurethane GT2 belts with steal threads is the must, however the threads eventually break, belts stretch and will need to be replaces 2-3 times a year.
You may need to adjust (lower) the speed and acceleration to retain original quality, i.e. overall printing time will increase. At certain speeds side panels start to resonate, which causes additional noise.
This mod requires soldering. You will need to relocate X-stop sensor from back panel to the print-head, extend and re-route X-stop wires.
You will need to drill a hole in aluminium plate supporting the print-bed to move it forward and down as described here.
and Pros:
Printer has much simpler mechanics, only linear bearings and is easier to tune and maintain.
There are only 2 belts instead of 6 in the original design.
The carriage outer shape is very simple, which makes it easy to change the print-head. You can even design and attach your own print-head, for example single e3D with proximity sensor, etc.
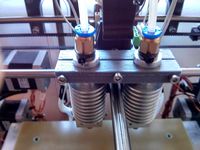
When using dual e3D, there is no need to cut heat sinks as in my other designs published here and here.
Dual e3D mount can be tilted along Y-axis that makes it very easy to level nozzles.
Overall print volume increases from the original 6840 cm³ to over 7414 cm³.
This design is completely revertible, i.e. you can always roll back to the old configuration.
Other considerations:
STL files posted here were designed for 0.35mm nozzles (wall thickness 0.7, 1.05 and 1.4mm). They were printed with e3D hotend on K8400 that has all my mods posted earlier on Thingiverse. Unfortunately I have no way of testing how well the things posted here will print with the original hotend from Velleman.
You will need to use the latest Arduino version to compile and install the latest firmware.
Having 2 Carbon-fiber 8mm rods for X-axis is highly recommended. Each weights about 14 grams versus 200 grams of steel equivalent.
The print volume with dual e3D print-head and MK3 heated bed is X=182mm, Y=210mm and Z=194mm.
Bill of Materials
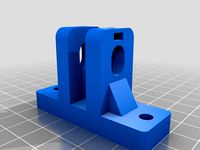
Left Motor and rear-left Y-rod mount
4 x M3 x 8mm screws for motor mount
2 x M3 x 12mm screws for Y-rod
4 x M5 x 16mm socket-cup screws
4 x M5 self locking nuts
1 x GT20 pulley with 5mm bore
Right Motor and rear-right Y-rod mount
4 x M3 x 8mm screws for motor mount
1 x M3 x 12mm screw for Y-rod
4 x M5 x 16mm socket-cup screws
4 x M5 self locking nuts
1 x GT20 pulley with 5mm bore
Left Front Corner with front-left Y-rod mount
1 x M5 x 50mm socket-cup screw
5 x M5 x 16mm socket-cup screws
6 x M5 self locking nuts
2 x GT2 idler pulleys with teeth and 5mm bore
2 x M3 x 12mm screws for Y-rod
Right Front Corner with front-right Y-rod mount
1 x M5 x 50mm socket-cup screw
5 x M5 x 16mm socket-cup screws
6 x M5 self locking nuts
2 x GT2 idler pulleys with teeth and 5mm bore
2 x M3 x 12mm screws for Y-rod
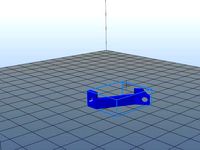
Left XY Clamp
2 x M3 x 16mm screws for Y-rods
6 x M3 x 12mm screws for X-rods
2 x M5 x 25mm socket head button screws
1 x GT2 idler pulley with teeth and 5mm bore
1 x GT2 idler toothless pulley with 5mm bore
1 x 8mm tube bearing
Right XY Clamp
2 x M3 x 16mm screws for Y-rods
6 x M3 x 12mm screws for X-rods
2 x M5 x 25mm socket head button screws
1 x GT2 idler pulley with teeth and 5mm bore
1 x GT2 idler toothless pulley with 5mm bore
1 x 8mm tube bearing
Rods
2 x 8mm x 315mm steel rods for Y-axis
2 x 8mm x 320mm carbon-fiber rods for X-axis
Print head
4 x 8mm IGLIDUR linear bearings
2 x e3d v6 original hotends (clones will not fit)
5 x M4 x 20mm socket cup screws for dual e3d holder and filament fan
8 x M3 x 15mm screws for dual e3d fan mount and for carriage corners
5 x M3 x 12mm screws mounting dual e3d holder and pcb with cable holder
2 x M3 washers (optional but recommended)
14 x M3 self locking nuts
9 x M3 x 8mm screws for X-stop sensor, filament fan mount, pcb mount
4 x M3 x 30mm socket cup screws for belt ends
1 x filament fan
Belts
2 x 1.5 meters of polyurethane belt with steel enforcement
Other
1 paper clip to hold belt ends
All bearings, filament fan and many screws and nuts can be reused from the original printer.
Please check also my Vertex-H MOD, which is the next step after VertexEvo.
Before you start making such a major modification to your Vertex printer please be aware about Cons:
Properly assembled and tuned K8400 can produce rather good printouts and it is unlikely that this upgrade will further improve print quality
VertexEvo works in CoreXY printing mode that requires firmware upgrade to the latest Marlin version 1.1.5. As the result you will loose K8400-specific menu items like filament loading/unloading, LED light control, etc. Entire menu structure will be different and it may take you some time to get used to it.
Front and side panels of K8400 are not strong enough to hold the amount of load produced in CoreXY mode. As the result the panels wobble and this in some cases may slightly degrade print quality. To address this you will need to attach 25mm x 3mm aluminium bars along the top of front and side panels.
Having polyurethane GT2 belts with steal threads is the must, however the threads eventually break, belts stretch and will need to be replaces 2-3 times a year.
You may need to adjust (lower) the speed and acceleration to retain original quality, i.e. overall printing time will increase. At certain speeds side panels start to resonate, which causes additional noise.
This mod requires soldering. You will need to relocate X-stop sensor from back panel to the print-head, extend and re-route X-stop wires.
You will need to drill a hole in aluminium plate supporting the print-bed to move it forward and down as described here.
and Pros:
Printer has much simpler mechanics, only linear bearings and is easier to tune and maintain.
There are only 2 belts instead of 6 in the original design.
The carriage outer shape is very simple, which makes it easy to change the print-head. You can even design and attach your own print-head, for example single e3D with proximity sensor, etc.
When using dual e3D, there is no need to cut heat sinks as in my other designs published here and here.
Dual e3D mount can be tilted along Y-axis that makes it very easy to level nozzles.
Overall print volume increases from the original 6840 cm³ to over 7414 cm³.
This design is completely revertible, i.e. you can always roll back to the old configuration.
Other considerations:
STL files posted here were designed for 0.35mm nozzles (wall thickness 0.7, 1.05 and 1.4mm). They were printed with e3D hotend on K8400 that has all my mods posted earlier on Thingiverse. Unfortunately I have no way of testing how well the things posted here will print with the original hotend from Velleman.
You will need to use the latest Arduino version to compile and install the latest firmware.
Having 2 Carbon-fiber 8mm rods for X-axis is highly recommended. Each weights about 14 grams versus 200 grams of steel equivalent.
The print volume with dual e3D print-head and MK3 heated bed is X=182mm, Y=210mm and Z=194mm.
Bill of Materials
Left Motor and rear-left Y-rod mount
4 x M3 x 8mm screws for motor mount
2 x M3 x 12mm screws for Y-rod
4 x M5 x 16mm socket-cup screws
4 x M5 self locking nuts
1 x GT20 pulley with 5mm bore
Right Motor and rear-right Y-rod mount
4 x M3 x 8mm screws for motor mount
1 x M3 x 12mm screw for Y-rod
4 x M5 x 16mm socket-cup screws
4 x M5 self locking nuts
1 x GT20 pulley with 5mm bore
Left Front Corner with front-left Y-rod mount
1 x M5 x 50mm socket-cup screw
5 x M5 x 16mm socket-cup screws
6 x M5 self locking nuts
2 x GT2 idler pulleys with teeth and 5mm bore
2 x M3 x 12mm screws for Y-rod
Right Front Corner with front-right Y-rod mount
1 x M5 x 50mm socket-cup screw
5 x M5 x 16mm socket-cup screws
6 x M5 self locking nuts
2 x GT2 idler pulleys with teeth and 5mm bore
2 x M3 x 12mm screws for Y-rod
Left XY Clamp
2 x M3 x 16mm screws for Y-rods
6 x M3 x 12mm screws for X-rods
2 x M5 x 25mm socket head button screws
1 x GT2 idler pulley with teeth and 5mm bore
1 x GT2 idler toothless pulley with 5mm bore
1 x 8mm tube bearing
Right XY Clamp
2 x M3 x 16mm screws for Y-rods
6 x M3 x 12mm screws for X-rods
2 x M5 x 25mm socket head button screws
1 x GT2 idler pulley with teeth and 5mm bore
1 x GT2 idler toothless pulley with 5mm bore
1 x 8mm tube bearing
Rods
2 x 8mm x 315mm steel rods for Y-axis
2 x 8mm x 320mm carbon-fiber rods for X-axis
Print head
4 x 8mm IGLIDUR linear bearings
2 x e3d v6 original hotends (clones will not fit)
5 x M4 x 20mm socket cup screws for dual e3d holder and filament fan
8 x M3 x 15mm screws for dual e3d fan mount and for carriage corners
5 x M3 x 12mm screws mounting dual e3d holder and pcb with cable holder
2 x M3 washers (optional but recommended)
14 x M3 self locking nuts
9 x M3 x 8mm screws for X-stop sensor, filament fan mount, pcb mount
4 x M3 x 30mm socket cup screws for belt ends
1 x filament fan
Belts
2 x 1.5 meters of polyurethane belt with steel enforcement
Other
1 paper clip to hold belt ends
All bearings, filament fan and many screws and nuts can be reused from the original printer.
Similar models
grabcad
free

GT2 idler pulley, 10mm belt, 8mm bore.
...gt2 idler pulley, 10mm belt, 8mm bore.
grabcad
smooth idler pulley for 10mm gt2 belt. 8mm internal bore.
grabcad
free

GT2 5mm bore idler pulley
...gt2 5mm bore idler pulley
grabcad
just a simple idler pulley file for gt2 x 6mm belts.
thingiverse
free

Hictop 3dp11 Adjustable Y Idler Mount 2.0 by SaberShip
...ler pulley for 6mm wide gt2 belt
1x m5 x30 bolt
1x m5 nylon lock insert nut (regular m5 nut may work)
2x m3 x10 screws
2x m3 nuts
thingiverse
free

Belt driven Z pulley mount w/ GT2 6mm belt 5mm bore 20t idler by Evilkoal
...e idler mount to fit the idlers i have.
gt2 20t 6mm belt, 5mm bore idler.
printed with 50% "archimedian chords" infill.
thingiverse
free

Elbow belt tensioner suitable for 2020 frame
...allbearing x 2
5mm id 20 tooth gt2 idler pulley
feature:
easy to print,easy to adjust,fit for various system,fit for closed belt.
3dwarehouse
free

Idler Pulley 8mm x 21mm x 11mm for GT2, T5, T2.5 belt
... for gt2, t5, t2.5 belt
3dwarehouse
8mm bore, 21mm inner(belt mount) diameter, 27mm outer diameter, 11mm width #cnc #gt2 #t2 #t5
thingiverse
free

Anet A8 single motor Z axis drive by osadchy
...he original 400 to 800)
hope i included everything here. if you find anything missing, please comment and i'll answer/update.
thingiverse
free

TRONXY X5S - Z motor sync by WT1704
...e platform on the stepper and 3 * m5 screws and nuts for the pulley
1 * m3 screw and nut to hold the tension stick with the block
thingiverse
free

M3 to M5 spacer hülse 3mm to 5mm for e.g. belt pulley by TimJuPe
...spacer for using m5 holes with m3 screws. designed this for fitting gt2 belt pulley wit m3 skrews. 8.5mm long (belt pulley width)
thingiverse
free
Hictop 3dp11 Adjustable Y Idler Mount by SaberShip
...rts:
x1 stock 608zz idler bearing
x1 stock m3 bolt and nut
x2 stock m5 bolts
x2 stock m5 t-slot nuts
x2 m3 x 10 screws
x2 m3 nuts
Vertexevo
thingiverse
free

Side Support for VertexEvo by Bo_Ris
...escription and remaining stl files.
note: this design requires drilling 4 additional 5mm holes in each side panel of the printer.
thingiverse
free

VertexEvo Y-visor by Bo_Ris
... make sure that y-visor_part3 moves freely and closes y-stop sensor only when pushed towards the back of the printer by xy_clamp.
thingiverse
free

Raspberry Pi Fish Eye Camera for VertexEvo by Bo_Ris
...3 x 6mm screws
2 x m5 x 16mm socket head screws
2 x m5 self locking nuts.
update 29-nov-2017 added flat cable holders and images.
thingiverse
free

VertexEvo with Ultimaker glass by Bo_Ris
...edesign things to make sure they all fit together.
update 8-feb-2018: new y-visor solving aforementioned issue is published here.
thingiverse
free

VertexEvo (K8400) Z-axis Support by Bo_Ris
...here. don't forget to place spacers between clamps and the bearing. wider side of each spacer should face its adjacent clamp.
thingiverse
free

VertexEvo Rev.2 by Bo_Ris
...018 vertex-h project was a success. please read the description here and choose which of these 2 mods will work the best for you.
thingiverse
free

"Brake" for K8400 VERTEX Universal Spool Holder by Bo_Ris
...part2.stl is for the original vertex, part2evo.stl is for vertexevo with 3mm thick aluminium enforcement bars. part3 is designed...
thingiverse
free

Anti-spill Cup Holder by Bo_Ris
...designed to utilize the maximum print space of my vertexevo printer and can fit up-to 15 cm high cups....
K8400
thingiverse
free
Vertex K8400 Small Corner part (K8400-HQP-SC) by Hest
...vertex k8400 small corner part (k8400-hqp-sc) by hest
thingiverse
vertex k8400 small corner part (k8400-hqp-sc)
thingiverse
free

Base for K8400 by Hitty
...base for k8400 by hitty
thingiverse
just a base for your k8400 to extend the space for the power adapter.
thingiverse
free

K8400 Fan tool by dergringo
...k8400 fan tool by dergringo
thingiverse
k8400 fan tool
thingiverse
free
Support ventilateur K8400 / Fan support K8400 by ldellanna
........................
fan support for velleman vertex k8400
minimum layer : 0.2mm
printing time in 0.1mm -> max 20 minutes
thingiverse
free

K8400 Scraper holder by Storm67
...k8400 scraper holder by storm67
thingiverse
scraber holder for velleman k8400 vertex
thingiverse
free

Fan Tool K8400 Velleman by dergringo
...fan tool k8400 velleman by dergringo
thingiverse
fan tool velleman k8400
thingiverse
free

Endcap Custom for Vertex K8400 by olechristiandalseth
...endcap custom for vertex k8400 by olechristiandalseth
thingiverse
endcap for vertex k8400
left and right.
thingiverse
free
Vertex K8400 spool holder by simersion
...vertex k8400 spool holder by simersion
thingiverse
spoolholder for vertex k8400
100mm length and 35mm diameter.
thingiverse
free
E3D dual head K8400 by hexxter
...e3d dual head k8400 by hexxter
thingiverse
holder for the e3d hot end on the vertex k8400 printer.
thingiverse
free

Vertex K8400 power switch by Zannddor
...vertex k8400 power switch by zannddor
thingiverse
alternative power switch to the 3d printer vertex k8400
Ris
turbosquid
$20

ris
... available on turbo squid, the world's leading provider of digital 3d models for visualization, films, television, and games.
3ddd
$1

Лампа Настольная Vita Ri 22163
...лампа настольная vita ri 22163
3ddd
vita , ri
лампа настольная vita ri 22163
3ddd
$1

Кресло JUMBO RIS-41b
...hymia
стиль: классика
длина: 80
глубина: 85
высота: 155
артикул: ris-41b
варианты отделки: орех, крашенный, с золотом, с серебром
3ddd
free
Диван JUMBO RIS-42b
...hymia
стиль: классика
длина: 155
глубина: 85
высота: 155
артикул: ris-42
варианты отделки: орех, крашенный, с золотом, с серебром
3d_export
$25

Parth 11 riing 3D Model
...ing 3d model
3dexport
parth 11 riing 3d model download .c4d .max .obj .fbx .ma .lwo .3ds .3dm .stl gorgsalvatore 109549 3dexport
3d_export
$10

M4A1 rifle RIS version 3D Model
...m4a1 rifle ris version 3d model
3dexport
rifle gun weapon
m4a1 rifle ris version 3d model figlif 1347 3dexport
3ddd
$1
Centennial Regulation Pool Table by RI Anderson
...by ri anderson
3ddd
brunswick
бильярдный стол в стиле ар-деко centennial regulation pool table by ri anderson
размеры 264x147x81h
turbosquid
$2

KWA SR5 RIS - 4inch HandGuard
... available on turbo squid, the world's leading provider of digital 3d models for visualization, films, television, and games.
turbosquid
$199
Tank Type 5 Chi-Ri Japan
...el tank type 5 chi-ri japan for download as max, max, and fbx on turbosquid: 3d models for games, architecture, videos. (1640853)
cg_studio
$59
Colt M4A1 Carbine RIS Assault rifle3d model
...s .c4d .lwo .obj - colt m4a1 carbine ris assault rifle 3d model, royalty free license available, instant download after purchase.
Bo
3d_export
$5

boing
...boing
3dexport
boing plane
turbosquid
$19

Boing boing Park
... available on turbo squid, the world's leading provider of digital 3d models for visualization, films, television, and games.
3ddd
$1
Boing 747
...boing 747
3ddd
boing 747 без текстур
3ddd
$1

Bo concept
...bo concept
3ddd
boconcept , декоративный набор
bo concept
3ddd
$1
Bo Concept / Pinto
...bo concept / pinto
3ddd
boconcept
bo concept pinto
3ddd
$1
кровать bo concept
...кровать bo concept
3ddd
boconcept
кровать bo concept
3ddd
$1
Bo concept sidebroad
...bo concept sidebroad
3ddd
тумба , boconcept
bo concept
3ddd
$1

Bo-box / Ирис
...bo-box / ирис
3ddd
bo-box
кресло ирис, пр-ль bo-box, коллекция soul. габариты (мм): 720x900x880
3ddd
free
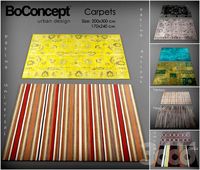
Bo Concept
... ковер
сборник ковров от bo concept
размер - 200х300см, 170х240 см
10 шт.http://www.boconcept.ru
turbosquid
$5

Bo Shuriken
...y free 3d model bo shuriken for download as obj, fbx, and dae on turbosquid: 3d models for games, architecture, videos. (1412495)
Rev
3d_export
$5

Rev Gun 3D Model
...rev gun 3d model
3dexport
rev gun
rev gun 3d model sone93 52014 3dexport
3d_export
$15

Maverick REV-6
...n act as the main blaster of a nerfer, but due to the short range, it is recommended to use it as a secondary, additional weapon.
turbosquid
$84

Euro Pallet rev 2009
... available on turbo squid, the world's leading provider of digital 3d models for visualization, films, television, and games.
turbosquid
$9

Chandra rugs REV-15802
... available on turbo squid, the world's leading provider of digital 3d models for visualization, films, television, and games.
turbosquid
$60

rev"s drum set
... available on turbo squid, the world's leading provider of digital 3d models for visualization, films, television, and games.
3ddd
$1
Sova Design/Rev coffee table
... table
3ddd
журнальный
https://www.facebook.com/media/set/?set=a.514295972031044.1073741841.343660145761295&type;=3
turbosquid
$30

Yak-44 (Rev) AEW Aircraft Solid Assembly Model
... available on turbo squid, the world's leading provider of digital 3d models for visualization, films, television, and games.
turbosquid
$30

Mitsubishi Mu-2 Aircraft Solid Assembly Model(Rev)
... available on turbo squid, the world's leading provider of digital 3d models for visualization, films, television, and games.
turbosquid
$30
An-71 Madcap (Rev) AEW Aircraft Solid Assembly Model
... available on turbo squid, the world's leading provider of digital 3d models for visualization, films, television, and games.
turbosquid
$30

Antonov An-74 (Rev} STOL Transport Aircraft Solid Assembly Model
... available on turbo squid, the world's leading provider of digital 3d models for visualization, films, television, and games.
Evolution
3ddd
$1
Evolution
... evolution , комод
комод из каталога emmemobili модель evolution
design_connected
$18

Evolution
...evolution
designconnected
zanotta evolution computer generated 3d model. designed by ïto, ora.
design_connected
$11

Evolute
...evolute
designconnected
danese evolute computer generated 3d model. designed by crasset, matali.
design_connected
$22

Evolution
...evolution
designconnected
emmemobili evolution shelves and storage computer generated 3d model. designed by ferruccio laviani.
3ddd
$1

Zanotta / EVOLUTION
...zanotta / evolution
3ddd
zanotta
zanotta
884 evolution
3ddd
free
Simas Evolution
...simas evolution
3ddd
simas
раковина simas evolution
3ddd
$1

Lancer Evolution
...lancer evolution
3ddd
автомобиль , машина
lancer evolution viii
3ddd
$1
Zanotta Evolution
...zanotta evolution
3ddd
zanotta
современное кресло evolution фабрики zanotta
turbosquid
$25
Evolution Dragon
...d
royalty free 3d model evolution dragon for download as obj on turbosquid: 3d models for games, architecture, videos. (1212928)
turbosquid
$6

Flowers Evolution
...
royalty free 3d model flowers evolution for download as obj on turbosquid: 3d models for games, architecture, videos. (1214159)
Vertex
3d_export
$10

vertex decorative003
...vertex decorative003
3dexport
vertex decorative_003
3d_export
$10

vertex decorative001
...vertex decorative001
3dexport
vertex decorative_001
turbosquid
$5

Vertex Pendant
...uid
royalty free 3d model vertex pendant for download as stl on turbosquid: 3d models for games, architecture, videos. (1565161)
turbosquid
$5

Vertex Coaster
...uid
royalty free 3d model vertex coaster for download as stl on turbosquid: 3d models for games, architecture, videos. (1565158)
3ddd
$1

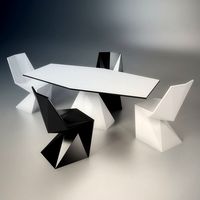
Vertex von Vondom
...vertex von vondom
3ddd
vondom
vertex von vondomhttp://www.vondom.com/producto/52/0/vertex/
turbosquid
$3

Vertex Set
...d model vertex vondom set for download as usdz, gltf, and fbx on turbosquid: 3d models for games, architecture, videos. (1599323)
3ddd
$1

VONDOM / VERTEX
...vondom / vertex
3ddd
karim rashid , vondom
designer - karim rashid
3d_export
$15
Vondom Vertex 3D Model
...d model
3dexport
vondom vertex table chair plastic seat furniture furnishing
vondom vertex 3d model rogojin.denis 87870 3dexport
3ddd
$1

VONDOM / VERTEX
..., karim rashid , vondom
designer - karim rashid
3ddd
$1
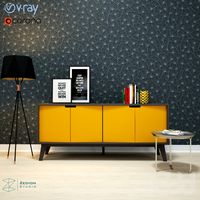
BUFFET VERTEX
...nical specification :
height 65 cm , width 150 cm , depth 43 cmhttp://www.oppa.com.br/buffet-vertice-4-portas-amarelo
1
turbosquid
$69

armchairs(1)(1)
... available on turbo squid, the world's leading provider of digital 3d models for visualization, films, television, and games.
turbosquid
$15

ring 1+1
... available on turbo squid, the world's leading provider of digital 3d models for visualization, films, television, and games.
turbosquid
$10

chair(1)(1)
... available on turbo squid, the world's leading provider of digital 3d models for visualization, films, television, and games.
turbosquid
$8

Chair(1)(1)
... available on turbo squid, the world's leading provider of digital 3d models for visualization, films, television, and games.
turbosquid
$2

RING 1(1)
... available on turbo squid, the world's leading provider of digital 3d models for visualization, films, television, and games.
turbosquid
$1

house 1(1)
... available on turbo squid, the world's leading provider of digital 3d models for visualization, films, television, and games.
turbosquid
$1

Table 1(1)
... available on turbo squid, the world's leading provider of digital 3d models for visualization, films, television, and games.
turbosquid
$59

Formula 1(1)
...lty free 3d model formula 1 for download as max, fbx, and obj on turbosquid: 3d models for games, architecture, videos. (1567088)
design_connected
$11

No 1
...no 1
designconnected
sibast no 1 computer generated 3d model. designed by sibast, helge.
turbosquid
$2

desert house(1)(1)
...3d model desert house(1)(1) for download as 3ds, max, and obj on turbosquid: 3d models for games, architecture, videos. (1055095)