Thingiverse
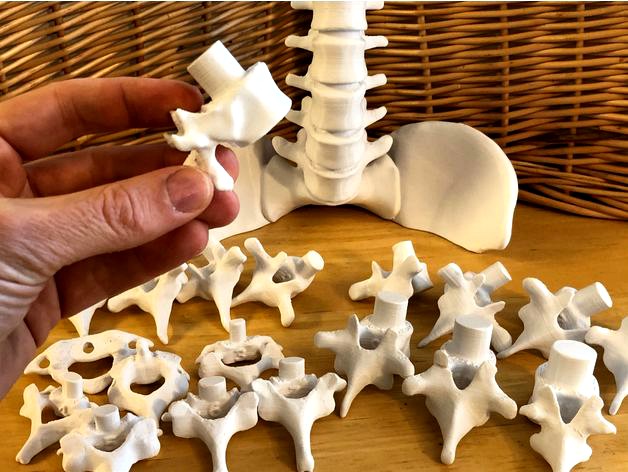
Vertebral Stacking Blocks by DaveMakesStuff
by Thingiverse
Last crawled date: 2 years, 10 months ago
These vertebral stacking blocks fit together to form a three-quarter size spine model. See here for assembly video: https://youtu.be/z6MckyVLsLw
This model is designed as an interactive way to learn basic spinal anatomy. It is not suitable for young children. If you are looking for a more robust display model, you might consider this design: https://www.thingiverse.com/thing:4863003. If you are looking for a full-size model with more biomechanically accurate movement, you might consider this design: https://www.thingiverse.com/thing:4801717
With the exception of C1 and C2, vertebrae are numbered on the posterior aspect of the vertebral body. The numbers are to assist with assembly and are hidden in the final assembled model. There was only space for numbers, so you’ll have to learn what C1 and C2 look like and be able to differentiate between cervical, thoracic and lumbar vertebrae. (It’s not that hard!)
Every effort has been made to maintain anatomical accuracy; however some small modifications were necessary to optimize the files for printing. In particular, the bone around the transverse foramen in the cervical spine, and the articular processes and lamina of the cervical and upper thoracic vertebrae have been thickened.
Anatomically, the odontoid process of the C2 axis is held in place by the transverse ligament of the C1 atlas. In this model, the transverse ligament has been “ossified” leaving a hole for the odontoid process to click into place. This hole is intentionally tight to hold it in place. Expect to use a bit for force to snap them together, or file down the surfaces of the odontoid process as needed.
Male and female connectors have of course been added to each vertebral body.
Printing:
This is an intermediate project that requires good skills in setting up supports and in post-print cleaning and preparation.
The vertebrae in the files are oriented upside-down to print on the flat surface of the male connector. You will need to set up supports for the rest of the vertebral body. Be especially careful when setting up supports for the downward-oriented superior facet joints. “Tree” supports in Cura work well.
Assembly:
There are some important considerations for post-print clean-up of this model.
The fit between adjacent vertebra must be as tight as possible. Any movement between vertebra, especially the lower ones, will amplify up the spine and you will end up with an unstable spine with very poor posture!
When the pieces come of the print bed the first layer will be protruding out slightly, this is known as the “elephant’s foot.” If you try to connect the vertebra right off the print bed, this elephant’s foot will prevent the male piece from inserting. In order to achieve optimal fit, gradually file off the elephant’s foot while repeatedly attempting to connect the vertebra. As soon as you can forcefully insert the male piece, stop filing! The first few attempts to connect the vertebra should be very tight and difficult. After a few insertions, the surfaces will smooth out and you’ll be left with a nice tight connection.
Do not overdo the filing or you’ll be left with wiggly vertebrae!
Similar models
3d_export
$25

Vertebrae C1 C2 Cervical Spine Bones 3D Model
... male thoracic lumbar backbone circulatory system realistic
vertebrae c1 c2 cervical spine bones 3d model terreo76 30859 3dexport
thingiverse
free

Big Bowl O’ Back Bones by DaveMakesStuff
...ww.thingiverse.com/thing:4868387
flexible three-quarter spine model with display stand: https://www.thingiverse.com/thing:4863003
cg_trader
$15

Cervical Spine
... adult specimen. includes all 7 cervical vertebrae. each vertebra is labeled with the appropriate anatomical name (c1, c2, c3...)
thingiverse
free

Flexible Three-Quarter Spine Model with Display Stand by DaveMakesStuff
...633188
brain puzzle: https://www.thingiverse.com/thing:4158232
anatomical heart puzzle: https://www.thingiverse.com/thing:4146688
3d_export
$45

Cervical Spine Human 3D Model
...ailed spinal cord column medical skeleton vertebrae thoracic c1 c2 c3 c4 c5
cervical spine human 3d model terreo76 30863 3dexport
cg_trader
$50

Vertebral Column Spinal Cord
...ont and the back, and in between the vertebrae joining the spinous processes, the transverse processes and the vertebral laminae.
thingiverse
free

Full-sized Anatomically Correct Articulating Spine by DaveMakesStuff
...t this point, i have had some success with silicone caulking. i will post pictures and recommendations when i get it figured out!
cg_trader
$15

Vertebra bone model Cervical vertebra thoracic vertebra lumbar
...a bone model cervical vertebra thoracic vertebra lumbar vertebra sacrum coccyx human bone medical model intervertebral disc spine
3d_export
$79

Human Thoracic Vertebrae 3D Model
... 3ds max maya
human thoracic vertebrae 3d model download .c4d .max .obj .fbx .ma .lwo .3ds .3dm .stl digitallab3d 106353 3dexport
cg_studio
$79

Human Thoracic Vertebrae3d model
...3ds .xsi .obj .max .ma .lxo - human thoracic vertebrae 3d model, royalty free license available, instant download after purchase.
Davemakesstuff
thingiverse
free

Pointer by DaveMakesStuff
... pointing at things.
sections screw apart for compact storage and transport. rods are 10cm long, print whatever length you need.
thingiverse
free

Gyroid Sculpture with Oval Profile by DaveMakesStuff
...roid/. it can be purchased at: https://www.shapeways.com/designer/davemakesstuff
see here for video: https://youtu.be/wcjtddytqi0
thingiverse
free

Corona Pumpkin by DaveMakesStuff
...#39;ll probably end up with a headache and fever.
here's a better one for printing: https://www.thingiverse.com/thing:4620382
thingiverse
free
Voronoi Rhombic Dodecahedron Sphere by DaveMakesStuff
... in this sphere are centered on the faces of a rhombic dodecahedron. connecting multiple spheres hole-to-hole will tile 3d space.
thingiverse
free

Hextuple Klein Bottle by DaveMakesStuff
...hat it takes a long time to print, the good news is that it prints without supports.
see video here: https://youtu.be/zcb6e3u87qm
thingiverse
free
Golden Rhombohedra by DaveMakesStuff
...
see here for christmas ornament versions: https://www.thingiverse.com/thing:4577036
see video here: https://youtu.be/odaqybfys84
thingiverse
free

Three Voronoi Gyroid Spheres by DaveMakesStuff
...rnal structures and edge boundary. files are provided with and without supports.
see here for video: https://youtu.be/lunhqfodetm
thingiverse
free

Golden Rhombohedra Ornaments by DaveMakesStuff
...s are separate shells that can be removed by your mesh editing software if you wish.
see video here: https://youtu.be/odaqybfys84
thingiverse
free
Coronavirus Tree Topper by DaveMakesStuff
...ole object is also provided for you to print as you wish.
see here for a plain ornament:https://www.thingiverse.com/thing:4321410
thingiverse
free

Boy's Bowl by DaveMakesStuff
...pasta :)
boy's surface on wikipedia:https://en.wikipedia.org/wiki/boy%27s_surface
see video here:https://youtu.be/x6b0zxcwoye
Vertebral
turbosquid
$99

Vertebral Column
...tebral column for download as ma, c4d, lwo, max, 3ds, and obj on turbosquid: 3d models for games, architecture, videos. (1521188)
turbosquid
$175

Vertebral (Spinal) Column
...ty free 3d model vertebral(spinal) column for download as fbx on turbosquid: 3d models for games, architecture, videos. (1370242)
3d_export
$84

Human Vertebral Column
...rae can vary between 32 and 35. usually there are 7 cervical, 12 thoracic, 5 lumbar, 5 sacral and 4 caudal (coccygeal) vertebrae.
3d_export
$179

Human Vertebral Column 3D Model
...rt long 3ds max
human vertebral column 3d model download .c4d .max .obj .fbx .ma .lwo .3ds .3dm .stl digitallab3d 106352 3dexport
cg_studio
$219

Human Vertebral Column and Brain Anatomy3d model
...o .lwo .fbx - human vertebral column and brain anatomy 3d model, royalty free license available, instant download after purchase.
3d_export
$5

vertebral implants lumbar cage m4 thread real operation
...ter the operation. lifelong fusion of the vertebrae occurs within 4-6 months, when bone fusion of the vertebrae occurs – fusion.
3d_export
$49

Spleen 3D Model
...tomach pancreas model animation
spleen 3d model download .c4d .max .obj .fbx .ma .lwo .3ds .3dm .stl digitallab3d 106483 3dexport
3d_export
$59

Spleen Anatomy 3D Model
...ds max maya lwo lxo c4d
spleen anatomy 3d model download .c4d .max .obj .fbx .ma .lwo .3ds .3dm .stl digitallab3d 106482 3dexport
3d_export
$69

Stomach External 3D Model
... max maya c4d lwo lxo
stomach external 3d model download .c4d .max .obj .fbx .ma .lwo .3ds .3dm .stl digitallab3d 106485 3dexport
3d_export
$49

Skin Anatomy 3D Model
...llicle medical veins hair
skin anatomy 3d model download .c4d .max .obj .fbx .ma .lwo .3ds .3dm .stl digitallab3d 106332 3dexport
Stacking
3d_ocean
$12

Box Stacks
...n
barrel box box stack shards
this is model of box stack with texture that equipped with its shards around the box to add detail.
3ddd
$1
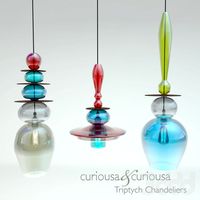
Triptych Stacks
...sa
triptych stacks
современный светильникhttp://curiousaandcuriousa.co.uk/index.php/home/chandeliers1/hayward-gallery1
3ddd
$1

Stacking D
...stacking d
3ddd
leucos
stacking
manufacturer leucos
designer rockwell group
3d_ocean
$5

Stack of Dollars
... realistic stack
ready to render! textured photorealistic dollars are animated. stack of dollars are falling down over and over…
3d_export
$5

dollar stack
...dollar stack
3dexport
turbosquid
$16

Stack of Wood
...quid
royalty free 3d model stack of wood for download as max on turbosquid: 3d models for games, architecture, videos. (1360320)
3d_ocean
$5

Money Stacks
... formats: c4d (textured) – obj (untextured) texture type: standard engine materials poly count per stack: 120 important: this ...
turbosquid
$5

stack machine
...lty free 3d model stack machine for download as ige and sldas on turbosquid: 3d models for games, architecture, videos. (1226834)
turbosquid
$19
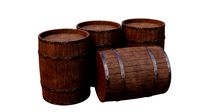
Stack of Barrels
...3d model stack of barrels for download as blend, fbx, and obj on turbosquid: 3d models for games, architecture, videos. (1472525)
turbosquid
$6

Brick Stack
...y free 3d model brick stack for download as 3ds, max, and obj on turbosquid: 3d models for games, architecture, videos. (1239828)
Blocks
archibase_planet
free

Blocks
...blocks
archibase planet
blocks bricks toy
toy blocks - 3d model (*.gsm+*.3ds) for interior 3d visualization.
3d_export
$5

Block
...block
3dexport
3d_export
$10
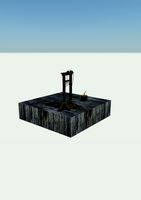
The guillotine and the block
...the guillotine and the block
3dexport
the guillotine and the block autocad 2013
3d_ocean
$8
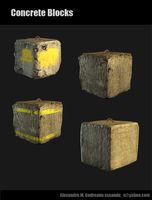
Concrete Blocks
... blocks, barriers or cover for characters during a fire fight. each one has its own diffuse map, specular and normal map in tg...
archibase_planet
free
Glass block
...glass block
archibase planet
glass block brick
glass block n211009 - 3d model (*.gsm+*.3ds) for interior 3d visualization.
3d_export
$99
city block
...city block
3dexport
city block 3d model. include max, obj and fbx files.
3d_ocean
$3
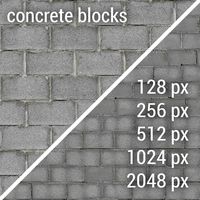
Concrete Blocks Textures
...res
3docean
block blocks concrete seamless wall walls
a couple of seamless textures with two differents sizes of concrete blocks.
3d_export
$5
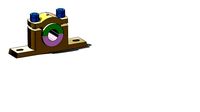
plummer block
...plummer block
3dexport
this is an 3d model of plummer block assembly where seven parts are required to assemble this.
design_connected
$16
Block 2
...block 2
designconnected
henry pilcher block 2 computer generated 3d model. designed by pilcher, henry.
3d_export
$7

concrete blocks on pallets
...concrete blocks on pallets
3dexport
concrete blocks on pallets, 3 types of blocks. there are all the necessary textures.