Thingiverse
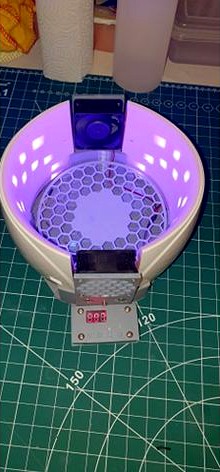
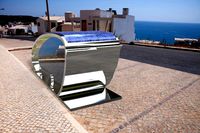
UV curing Station for SLA WITH TIMER
by Thingiverse
Last crawled date: 4 years, 2 months ago
i had just ordered my 1st resin printer and as anyone was eager to get started, i live in the uk and sun is not something we get much of at all and i knew it was ether find a way to cure my prints or spend out 500 pounds plus on a curing station, was searching here and found an amazing looking print by RyanTheMast for a working curing station, after thinking about it for some time i desided it was real good and couldn't be leave no one else had made one, i wanted one but would rather have a timer on it, so i got cracking with adding to RyanTheMast design and here are the results
lets start with the build its self, RyanTheMast files where spot on but i do like to play with things to suit me, if you just want a simple low cost effective way to set our prints then his files will suit you down to the ground, its a lovely design and will work well, wether you use mine or use his thay are one and the same, the only difference is i built a timer in and changed the way it prints, i did not just jump in to this i did print all of his files 1st and then worked out what i wanted to change to suit me.
1st thing i have done is made the fan mounts removable so thay can be printed flat to save some print time and to make them a little stronger, second thing i have done is change the power button, last but not least i added the timer, problem with my changes is you need a bit more amps coming from the power supply to get this all up and running, if you have 12v power supply's laying about then you can just change the one out that comes with the nail curers or you can buy another one 3-5 amps, or if you dont want to spend even more money then you can join the 2 supply's together plus to plus and neg to neg, only problem with this is it takes up 2 sockets.
on to the timer, this is something i have never used before and there are not any English videos showing how to get it to trigger and how to program so this was a task on its own but i got there in the end, i set mine to 300 seconds (5 minits) but can go up to 999 seconds if needed, i set mine so i can check the print and see if it needs another 5 minits or not,
printing the parts, i printed the main body on a cr10, speed .40 1600 layer height with no problems at all, the fan covers and the timer box i used the mars to resin print, in doing this i had to re drill holes so that there was no forcing threads to go thru as i dident want to crack or brake any parts, if it was pla then it wouldn't have been a problem.
also i ordered latching switches from amazon and it turns out thay where push to make switches that turned up so i had to wire mine direct for now, the button on the right was ment to be power and on the left was the trigger button to start the timer and everything going,
wiring this was fun so you will need a little skill in electrics and soldering to get this going, i will explain from start to finish for you,
i started with taking the left uv light apart and removing what is not needed, there are 2 censers in each one that i just cut at the base of as thay will not be needed, i unplugged everything from the main board and removed all the wires only leaving the red and black coming from the lights there self's, i then poked that out of the bottom and put it back together leaving the wires coming out of the bottom
i then moved on to the right uv light, i done the same as above but leaving the uv light wire and the power plug in place, i extended the wire for the power to reach the front of the box again putting it out the bottom along with the light wire then put it back together.
mounted the switches in place on the fan cover and mounted the fans, one blowing in one blowing out
this is where it gets fun,
the power wires go to + and - on the on off switch as it has a led in it,
then connects to the - on the timer board from the - you just connected to the switch,
then comes from the other + on the switch down to the 12v vcc on the timer,
you also need to take another - wire from the timer to the - of the trigger connector on the other side of the board,
wire 2 wires to the push to make switch (one on left), take one wire to the + on the timer board and connect the other to the + on the trigger side of the board
this puts 12v in to the timer and when you push the start button it sends 12v to the trigger side of the board and triggers the timer to start,
now take a + and - from the output side of the timer and run it back in side the box, this is what all your lights, motors and fans will be running from, you can then wire them all up in any way you want as long as + go's to + and - go's to -
when my head has stopped thumping and my brain relaxs again ill go in to programing the timer but for now i think thats me done till next time.
please go and take a look at the files this was remixed from as thay might be better fitted for you who knows but big thanks to RyanTheMast as if he ha-dent of done all the hard work then i wouldn't have a banging head right now lol
parts needed,
1 push to make switch
1 latching switch
2 nail curing stations
8 pc fan screws
4 pc main board screws
3 m3 10mm bolts
2 m3 15mm bolts
1 timer module
4 fans
1 motor
all printed items
You'll want 2 of these:
Ceenwes UV LED Nail Lamp 24W Professional Polish Curing Dryer Lighthttps://www.amazon.co.uk/gp/product/B07NWDZ18Y/ref=ppx_od_dt_b_asin_title_s00?ie=UTF8&psc=1
latching button, you can just wire it all to come on when plugged in but who doesn't love a light up clicky push button?https://www.amazon.co.uk/gp/product/B07ZF5YG6P/ref=ppx_od_dt_b_asin_title_s00?ie=UTF8&psc=1
push to make button same as above but push to make
Really any 12v 60mmx6omm fans could work:
Wathai 60mm x 60mm x 25mm 12V 2P Dual Ball DC Case Fan Brushless Cooling Fanhttps://www.amazon.com/Wathai-60mm-25mm-Brushless-Cooling/dp/B07Q2JWNFX
Slow geared 12v motor to make it spin:
uxcell Uxcell DC 12V 6RPM Worm Gear Motor 6mm Female Shaft High Torque Turbine Reducerhttps://www.amazon.com/15RPM-Shaft-Torque-Turbine-Geared/dp/B01MXPNX7P
timer modulehttps://www.amazon.co.uk/gp/product/B073W7Q5FY/ref=ppx_yo_dt_b_asin_title_o05_s00?ie=UTF8&psc=1
Similar models
thingiverse
free

Microswitch Tactile Power Button by r0ckR
...t. it works by bending the lever so that it pushes on the switch contact.
can be adjusted with a lighter if it triggers unpushed.
thingiverse
free

3DX Push Button
...ngiverse
first i started out with putting in code for the push button. i then printed a 3d bracket, and hooked up all the wires.
thingiverse
free

3D Printer Shutdown Timer, Auto Off Switch by kb0nly
... timer circuit and added power switch if its ever needed.
this all works great and i only wish i would have built this sooner!!
grabcad
free

Metal LED Illuminated Latching 16mm Power Push Button ON-OFF Switch 12V
...atching 16mm power push button on-off switch 12v
grabcad
metal led illuminated latching 16mm power push button on-off switch 12v
thingiverse
free

T-Slot &/or 20/20 Rocker Switch Box by Tech7
...ly from my power supply.
jicywtk - the 2nd switch is for my light bar.
printing notes below...
rocker switch: http://a.co/ctnxcfx
thingiverse
free

Soldering Fume Extractor
...the baffle, it should be a snug fit and stay in on its own. switch it on and give it a test to see how it works. happy soldering!
thingiverse
free
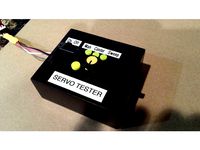
Servo Tester Case by MakerDan55
...switch on the top).
plug in a servo and test it out!
i sanded and spray painted my case to get rid of the rough plastic surface.
thingiverse
free

120mm Fan and 12v Timer Bracket / Mounting Plate by Kwerkshop
... on the rear side of the mounting plate.
i am in the process of creating a louvered vent cover for the external wall fo the shed.
thingiverse
free

Fatshark Fan Switch Box by zann68
... go, no 8 to 10 min run. this is to compliment the faceplate fat shark attitude v2 with fan by mrracequad, published dec 30, 2015
thingiverse
free

ANET A8 Wiring Cover by jimb15122
...ase check out my new product the "offi" auto-off switch for anet a8 at: http://www.ebay.com/sch/i.html?_nkw=jimb15122
Timer
turbosquid
$5

timer
... available on turbo squid, the world's leading provider of digital 3d models for visualization, films, television, and games.
turbosquid
free

Timer
... available on turbo squid, the world's leading provider of digital 3d models for visualization, films, television, and games.
design_connected
$9

Two Timer
...two timer
designconnected
established & sons two timer computer generated 3d model. designed by industrial facility.
3d_export
free
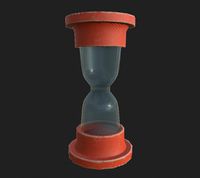
sand timer
...sand timer
3dexport
turbosquid
$3

Timer Ball
...lty free 3d model timer ball for download as ma, obj, and fbx on turbosquid: 3d models for games, architecture, videos. (1525312)
turbosquid
$15

Bomb with Timer
... model bomb with timer for download as max, obj, c4d, and fbx on turbosquid: 3d models for games, architecture, videos. (1273930)
turbosquid
$59

Timer Bomb
... available on turbo squid, the world's leading provider of digital 3d models for visualization, films, television, and games.
turbosquid
$15

oven timer
... available on turbo squid, the world's leading provider of digital 3d models for visualization, films, television, and games.
turbosquid
$9

Kitchen Timer
... available on turbo squid, the world's leading provider of digital 3d models for visualization, films, television, and games.
turbosquid
$7

Eggs Timer
...odel eggs timer for download as 3ds, obj, fbx, blend, and dae on turbosquid: 3d models for games, architecture, videos. (1455294)
Curing
turbosquid
$80

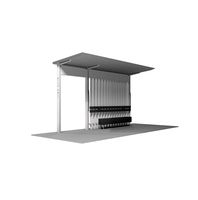
UV curing oven
...uring oven for download as sldas, max, ige, 3ds, fbx, and obj on turbosquid: 3d models for games, architecture, videos. (1656005)
3d_export
$10

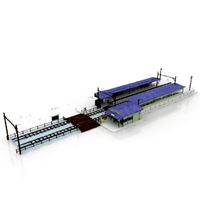
Automatic circuit board UV curing machine
.... the uv curing device consists of five parts: light source system, ventilation system, control system, conveying system and box.
3d_export
$7

display automatic dispensing uv curing line
...display automatic dispensing uv curing line
3dexport
display automatic dispensing, uv curing line
3d_export
$69

plate curing press rubber curing press plate curing press
...pment operation and less maintenance. the temperature is provided by the heating medium (usually steam, heat transfer oil, etc.).
3d_export
$80

uv curing oven
... you can email to me.<br>designed with solidworks 2017, render with keyshot<br>**************************************
3d_export
$15

potion cure life
...nown as the "potions master" ("potions master"). he is one of the main characters in the books in the series.
3ddd
$1

Стул
...ir by rossetto
base available in a range of options
made in italy
steel framework, entirely moulded in cold-cure polyurethane.
3d_export
$35

Madicaments 3D Model
...port
medicines tablets capsules pill physic doctor's stuff cure drug medicaments
madicaments 3d model 3d.dasha 87130 3dexport
3d_export
$26

Salame 3D Model
...xport
salami salame cured sausage meat food antipasto dried texture material italian italy
salame 3d model tartino 35279 3dexport
3d_export
$7

Injection 3D Model
...ort
aid cure equipment drug flu health help injection hospital medical pharmacy science
injection 3d model petrosg 22506 3dexport
Sla
3ddd
$1

CILEK SL ACTIVE
...sl active 3ddd cilek cilek active (sl active white) sla1304 кровать...
3ddd
$1
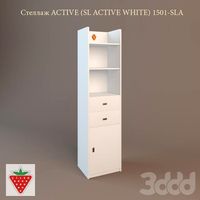
Cilek SL ACTIVE
...3ddd cilek , стеллаж cilek active (sl active white) 1501-sla стеллаж...
3d_export
$5

ring-love norian-54-64 mm 4pcs
...norian-54 ring-love norian-56 ring-love norian-60 ring-love norian-64 suitable for sla and sls and similar printing...
3d_export
$10

cute kitten v2 stl 3d print model
...print model 3dexport solid type (fdm) and hollow type (sla & dlp)<br>stl file for 3d print<br>size :<br>x : 66...
3d_export
$5
tesseract hypercube
...each diagonal has 6 faces. you can use sls, sla and other technologies to print it. moreover different textures...
3d_export
$23
the last engineer 3d printing figurine
...will also receive "assembly manual" for fff/fdm 1.0 and dlp/sla 1.0 versions in pdf format. the figurine is saved...
3d_export
$5
groot con grabadora
...enabled, however you can also use a dlp or sla printer with resin as well. for small scale printouts,...
3d_export
$5

deer christmas 3
...enabled, however you can also use a dlp or sla printer with resin as well. you should use a...
3d_export
$5

deer christmas 2
...enabled, however you can also use a dlp or sla printer with resin as well. you should use a...
3d_export
$5

deer christmas
...enabled, however you can also use a dlp or sla printer with resin as well. you should use a...
Station
3d_export
$5
station
...station
3dexport
station
archibase_planet
free
Station
...station
archibase planet
railroad station railway station bay
railway station n160707 - 3d model for interior 3d visualization.
archibase_planet
free
Station
...station
archibase planet
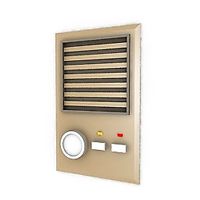
intercom station equipment
intercom station - 3d model for interior 3d visualization.
archibase_planet
free
Station
...station
archibase planet
station
station n260108 - 3d model (*.gsm+*.3ds) for interior 3d visualization.
3d_export
$5
Station
...station
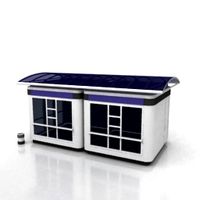
3dexport
low poly bus station
archibase_planet
free
Station
...station
archibase planet
building station construction
station n170708 - 3d model(*.gsm+*.3ds) for interior 3d visualization.
archibase_planet
free

Station
...station
archibase planet
bus station bus stop
station 1 - 3d model (*.gsm+*.3ds) for interior 3d visualization.
archibase_planet
free
Station
...station
archibase planet
bus station bus stop
station 2 - 3d model (*.gsm+*.3ds) for interior 3d visualization.
archibase_planet
free

Station
...station
archibase planet
bus station bus stop
station 3 - 3d model (*.gsm+*.3ds) for interior 3d visualization.
3d_ocean
$19
Space station
...space station
3docean
space station
space station
Uv
turbosquid
$16

uv microscope
...free 3d model uv microscope for download as max, obj, and fbx on turbosquid: 3d models for games, architecture, videos. (1469743)
turbosquid
$5

Grenade UV
...ee 3d model grenade uv for download as max, max, obj, and fbx on turbosquid: 3d models for games, architecture, videos. (1674956)
turbosquid
$20

Rug With UVs
... available on turbo squid, the world's leading provider of digital 3d models for visualization, films, television, and games.
turbosquid
$10

Uved Character
... available on turbo squid, the world's leading provider of digital 3d models for visualization, films, television, and games.
turbosquid
$1

Katana with UV
... available on turbo squid, the world's leading provider of digital 3d models for visualization, films, television, and games.
turbosquid
free

UV Spot
... available on turbo squid, the world's leading provider of digital 3d models for visualization, films, television, and games.
turbosquid
$30

UV Lamp
...wnload as max, max, unitypackage, upk, max, obj, fbx, and max on turbosquid: 3d models for games, architecture, videos. (1685958)
3d_export
$5

cracked uv sphere
...cracked uv sphere
3dexport
cracked uv sphere. made in blender 3d.
3d_export
free

UV lamp
...up. subscribe to the telegram channel to keep up to date with all the new products:) link:https://t.me/blog_engineer_designer ♥♥♥
turbosquid
$10

Unrigged Deer with UV
...lty free 3d model unrigged deer with uv for download as blend on turbosquid: 3d models for games, architecture, videos. (1282447)