Thingiverse
USB Digital Microscope Stand (Mostly Printable Parts) by hawkliao
by Thingiverse
Last crawled date: 4 years, 10 months ago
Short Briefs of Thing
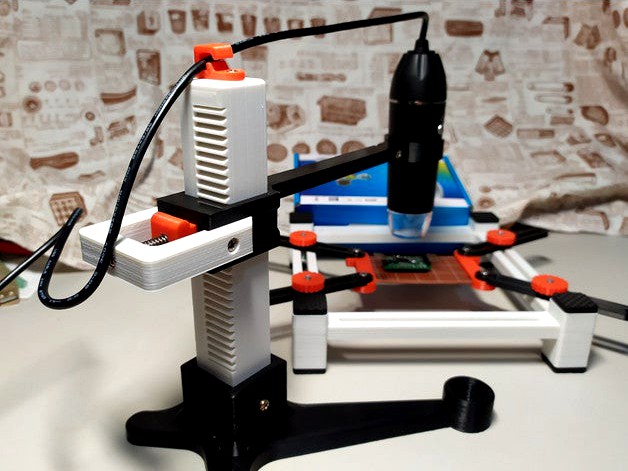
This USB Microscope stand provides 4 different assembly styles, and give you the freedom of using a USB Microscope in different operation requirements or other accessories. The original stand from the vendor, which sucks, with a very short work distance.
The working distance of this design is movable by releasing the stuck latching on the back side of the lever, which is pushing by a spring. Pull the latch and move lever up and down to adjust the working distance. The design of the gear rail on the column is a module 1.2 mm one. It has around 4mm (actually, 3.77mm) pitch. It's not that much in detailed movement, but it stronger and easier printing by must of the 3DP. After defined the working distance, you can adjust the focus on your USB microscope.
The cable hook on the top of the column can hold the cable well.
Equipment Needed
螺絲
M3x12 screw 2pcs, for fixing stand and column (not necessary)
M3x10 screw & hex nut 1set, for microscope holder (clamp)
M3x10 screw 1pcs, for cable hook
M3x25 screw 1pcs, for spring fixing
彈簧
Spring 1pcs, , any spring which fits into M3 screw and length between 20mm to 30mm, if you only has shorter spring, ring a ring with certain length to push the spring ahead.
2.5mm drill 手鑽
M3 tapping tool 攻牙器
Prepare
Sending Works
The gape between the column and stand is small in the design. If your printer is not so accurate as mine you will need some sanding works, as well as the interface between the stuck latch and the lever base.
Drill & Thread Tapping
Most of the M3 holes in the design are Φ2.4mm or Φ2.2mm. You will need a hand driller with 2.5mm drill to make the hole beautiful. And then, use M3 tapping tool for the threads.
Assembly
There are 4 assembly mode can be selected:
1. Standard Mode
A table is placed in front of the column. Space for accessories placement or design other useful microscope accessories by mounting a M3 screw onto the center of the table.
2. Easy Mode
Remove the table to get an empty space for some bigger targets. And the two Φ16mm toe holes of the stand allow you to insert necessary load (like screws with hex nuts) or design other sample fixers/holders like the way of table of this thing.
3. Open Mode
Open mode gives you a widest operation space for target, such as a larger PCB board or other bigger stuffs. You can put some weights onto the table to increase the stability of the stand and avoid microscope falls.
4. Loading Mode
This assembly mode gives you a more stable stand, because of it's reversing table, which has a longer leverage. With a heavy loading on the table, you can even hang something onto the lever. A coffee cup is good enough for the loading, but I won't suggest any coffee inside. Coffee accident may happen sometimes :)