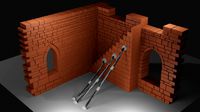
Thingiverse

Two Player Arcade1Up Conversion Kit (Laser Cut)
by Thingiverse
Last crawled date: 4 years, 3 months ago
This is a collection of several parts designed to convert an Arcade1Up machine into a MAME/RetroPie cabinet. I made these using a laser cutter; I think that they could also be made on a CNC router without too much difficulty. I don't believe that many people have 3D printers large enough to print these, but if you do, the design could probably be converted to an STL without too much difficulty.
There are three main components included:
The control deck. There are three button options, and two mounting options, for a total of 6 variants.
The front panel. There are two speaker sizes: one with 3 grille options, and one with 2 grille options, for a total of 5 variants.
A mounting plate for an LCD controller.
Inkscape SVG source files for all parts are included, with components broken out by layer, so you can mix and match design elements or modify them as desired.
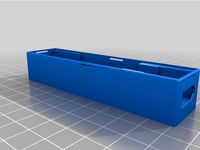
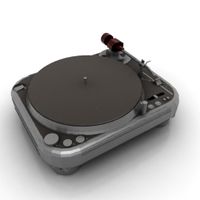
The Control Deck
The control deck is made up of two sheets of 1/4" (6mm) MDF or plywood stacked on top of each other and glued together. The exact thickness isn't all that important. I generally prefer MDF for this because it has a more consistent surface finish and is less likely to warp. After cutting out the control deck and gluing the layers together, I finished it with gloss black spray paint. I found that I got a much more consistent finish using name brand paint vs. the cheap stuff. The joysticks are attached to the control deck using #6 or M3/M4 screws. The circuit boards for the buttons can be attached to the underside of the control deck using double-sided foam tape.
There are three button styles:
All 28mm buttons (e.g. https://www.aliexpress.com/item/32908189648.html) Note: a complete set of buttons is included, but only 2 of each color. If you want to install them in groups of three as shown, you'll need to buy extra buttons: https://www.aliexpress.com/item/32883348042.html
Almost all 24mm buttons with two 28mm buttons (e.g. https://www.aliexpress.com/item/32923130627.html) Note: This set only includes 16 buttons, but the control deck is designed for 18. You can either remove the extra two buttons from the design before cutting, or buy two extra buttons such as these: https://www.aliexpress.com/item/32883348042.html. The buttons are illuminated, but I had to buy the 6.3mm wiring harness for the lights separately: https://www.aliexpress.com/item/32950422365.html
Almost all 28mm buttons with 4 24mm buttons (https://www.aliexpress.com/item/32827744750.html) Note: These buttons have a very soft touch response. They are not at all "clicky", unlike the first two options. The buttons are illuminated, but I had to buy the 2.8mm wiring harness for the lights separately: https://www.aliexpress.com/item/32950422365.html
There are two mounting styles:
Standard screw mounting - Uses the stock screws that are included with the Arcade1Up system.
Thumb screw mounting - Uses 4 of these thumb screws from McMaster: https://www.mcmaster.com/91746a514. I had intended for the thumb screws to allow fast swapping of the two-player control deck for a trackball version which so far has not been designed.
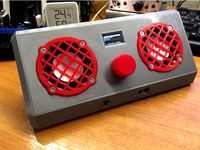
The Front Panel
The front panel is made up of a sheet of 5mm MDF or plywood. In theory, you could probably reuse the stock front panel that comes with the machine, but I don't know for sure if the finish on it is safe to cut with the laser.
The front panel has two speaker size options, each with several grille options. The speakers are mounted to the front panel with M3 or #4 screws.
~77mm (I used ones from my parts box, but they looked like these: https://www.aliexpress.com/item/32882798866.html)
Slotted grille
Drilled grille
~100mm (https://www.aliexpress.com/item/32848466737.html)
Soltted grille
Drilled grille
Mesh grille (fits the optional mesh grille that can be bought with the speakers)
The speakers connect to the LCD controller's built-in amplifier using this cable: https://www.digikey.com/product-detail/en/jst-sales-america-inc/A04KR04KR26E305B/455-3155-ND/. I cut off one end and extended the wires so that they would reach from the LCD controller to the front panel.
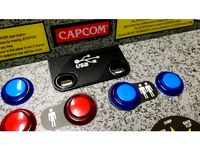
The front panel has a mounting location for the LCD controller button board. I had to splice in some additional wire to get the button board wiring to reach all the way to the LCD controller. Having the button board easily accessible is primarily useful for easy adjustment of the speaker volume.
A bezel for the button board is included and should be glued into place as shown in the pictures. (I would suggest cutting the bezel out of 1/8" (3mm) wood). The bezel covers up the pocket for the button board connector. There are also optional reinforcement strips that can be glued onto the back of the front panel. The button board then mounts to the front panel using M3 or #4 screws.
The front panel has cutouts for a power switch, a lighting switch, and USB/audio ports.
Switches: https://www.aliexpress.com/item/4000061576913.html
Front panel dual USB: https://www.aliexpress.com/item/32922583345.html
Front panel USB/audio: https://www.aliexpress.com/item/32954513684.html
I wired the power switch with a 5.5mm male and female barrel connector so that I could put it inline with the stock power supply. The male barrel plug goes directly into the LCD controller. I also tapped off power here for a 12V-5V USB step-down converter to power a Raspberry Pi.
I spliced a female JST-SM connector in line with the power wire to the button lighting, and attached a male connector to the lighting switch. This allows the control deck to be easily separated from the control deck if necessary. Connectors: https://www.aliexpress.com/item/4000054508354.html
My 5mm plywood ended up being slightly thicker than the stock front panel. I had to shave the back of it down near the edges to get it to fit into the slot.
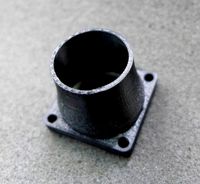
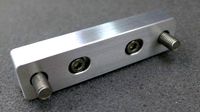
LCD Controller Mount
The Arcade1Up machine requires a new LCD controller to convert from HDMI to the LCD's LVDS interface. I used one like this: https://www.aliexpress.com/item/4000095954176.html
I designed a simple mount for this controller. The cut file includes some spacers for both the top and bottom of the main mounting plate, which should be glued on. The LCD controller attaches to the mount with #6 screws, and I attached the mount to the inside of the cabinet using self-adhesive velcro. There is also space on the left side of the mount for a 12V to 5V step down converter to power the Raspberry Pi. It can be attached using cable ties or double-sided tape. https://www.aliexpress.com/item/32811446277.html
There are three main components included:
The control deck. There are three button options, and two mounting options, for a total of 6 variants.
The front panel. There are two speaker sizes: one with 3 grille options, and one with 2 grille options, for a total of 5 variants.
A mounting plate for an LCD controller.
Inkscape SVG source files for all parts are included, with components broken out by layer, so you can mix and match design elements or modify them as desired.
The Control Deck
The control deck is made up of two sheets of 1/4" (6mm) MDF or plywood stacked on top of each other and glued together. The exact thickness isn't all that important. I generally prefer MDF for this because it has a more consistent surface finish and is less likely to warp. After cutting out the control deck and gluing the layers together, I finished it with gloss black spray paint. I found that I got a much more consistent finish using name brand paint vs. the cheap stuff. The joysticks are attached to the control deck using #6 or M3/M4 screws. The circuit boards for the buttons can be attached to the underside of the control deck using double-sided foam tape.
There are three button styles:
All 28mm buttons (e.g. https://www.aliexpress.com/item/32908189648.html) Note: a complete set of buttons is included, but only 2 of each color. If you want to install them in groups of three as shown, you'll need to buy extra buttons: https://www.aliexpress.com/item/32883348042.html
Almost all 24mm buttons with two 28mm buttons (e.g. https://www.aliexpress.com/item/32923130627.html) Note: This set only includes 16 buttons, but the control deck is designed for 18. You can either remove the extra two buttons from the design before cutting, or buy two extra buttons such as these: https://www.aliexpress.com/item/32883348042.html. The buttons are illuminated, but I had to buy the 6.3mm wiring harness for the lights separately: https://www.aliexpress.com/item/32950422365.html
Almost all 28mm buttons with 4 24mm buttons (https://www.aliexpress.com/item/32827744750.html) Note: These buttons have a very soft touch response. They are not at all "clicky", unlike the first two options. The buttons are illuminated, but I had to buy the 2.8mm wiring harness for the lights separately: https://www.aliexpress.com/item/32950422365.html
There are two mounting styles:
Standard screw mounting - Uses the stock screws that are included with the Arcade1Up system.
Thumb screw mounting - Uses 4 of these thumb screws from McMaster: https://www.mcmaster.com/91746a514. I had intended for the thumb screws to allow fast swapping of the two-player control deck for a trackball version which so far has not been designed.
The Front Panel
The front panel is made up of a sheet of 5mm MDF or plywood. In theory, you could probably reuse the stock front panel that comes with the machine, but I don't know for sure if the finish on it is safe to cut with the laser.
The front panel has two speaker size options, each with several grille options. The speakers are mounted to the front panel with M3 or #4 screws.
~77mm (I used ones from my parts box, but they looked like these: https://www.aliexpress.com/item/32882798866.html)
Slotted grille
Drilled grille
~100mm (https://www.aliexpress.com/item/32848466737.html)
Soltted grille
Drilled grille
Mesh grille (fits the optional mesh grille that can be bought with the speakers)
The speakers connect to the LCD controller's built-in amplifier using this cable: https://www.digikey.com/product-detail/en/jst-sales-america-inc/A04KR04KR26E305B/455-3155-ND/. I cut off one end and extended the wires so that they would reach from the LCD controller to the front panel.
The front panel has a mounting location for the LCD controller button board. I had to splice in some additional wire to get the button board wiring to reach all the way to the LCD controller. Having the button board easily accessible is primarily useful for easy adjustment of the speaker volume.
A bezel for the button board is included and should be glued into place as shown in the pictures. (I would suggest cutting the bezel out of 1/8" (3mm) wood). The bezel covers up the pocket for the button board connector. There are also optional reinforcement strips that can be glued onto the back of the front panel. The button board then mounts to the front panel using M3 or #4 screws.
The front panel has cutouts for a power switch, a lighting switch, and USB/audio ports.
Switches: https://www.aliexpress.com/item/4000061576913.html
Front panel dual USB: https://www.aliexpress.com/item/32922583345.html
Front panel USB/audio: https://www.aliexpress.com/item/32954513684.html
I wired the power switch with a 5.5mm male and female barrel connector so that I could put it inline with the stock power supply. The male barrel plug goes directly into the LCD controller. I also tapped off power here for a 12V-5V USB step-down converter to power a Raspberry Pi.
I spliced a female JST-SM connector in line with the power wire to the button lighting, and attached a male connector to the lighting switch. This allows the control deck to be easily separated from the control deck if necessary. Connectors: https://www.aliexpress.com/item/4000054508354.html
My 5mm plywood ended up being slightly thicker than the stock front panel. I had to shave the back of it down near the edges to get it to fit into the slot.
LCD Controller Mount
The Arcade1Up machine requires a new LCD controller to convert from HDMI to the LCD's LVDS interface. I used one like this: https://www.aliexpress.com/item/4000095954176.html
I designed a simple mount for this controller. The cut file includes some spacers for both the top and bottom of the main mounting plate, which should be glued on. The LCD controller attaches to the mount with #6 screws, and I attached the mount to the inside of the cabinet using self-adhesive velcro. There is also space on the left side of the mount for a 12V to 5V step down converter to power the Raspberry Pi. It can be attached using cable ties or double-sided tape. https://www.aliexpress.com/item/32811446277.html
Similar models
thingiverse
free

Mini Monitor by hanguyenblender
...power adapter: https://www.aliexpress.com/item/32701301978.html
youtube: https://www.youtube.com/channel/ucjd2poy6i5cge0fvie8aclg
thingiverse
free
XT60 to USB power converter by Tiitan
...ews inside
mounted to my printer with m216 t-nut bolt
i use it to power my printer octopi directly from my printer power supply.
thingiverse
free

Laser-Cut Arcade Console
...ww.aliexpress.com/item/32966098346.html
https://www.amazon.com/neutrik-nausb-w-b-reversible-genderchanger-d-housing/dp/b003vsxqvi
thingiverse
free

Radio toilet paper holder by ansisliepkalns
...w.aliexpress.com/item/1005001659711183.html
powered by 3 aa batteries. the paper roll holder is held by magnets for easy removal.
thingiverse
free

Stern Spike 2 Custom LCD Panel and controller mount by Scotty_C
... speaker plate set combo
lcd controller board: lp156wh4
lcd: lp156wh4
2mm acrylic sheet cut to width of lcd and 1/2" taller
thingiverse
free

Mount for LCD driver board (Arcade1up modding) by Tinkering_On_Steroids
...nt for lcd driver board (arcade1up modding) by tinkering_on_steroids
thingiverse
mount for lcd driver board (arcade1up modding).
thingiverse
free
Ka-Radio WiFi Internet radio
...k, so i used https://www.aliexpress.com/item/32574110297.html )
2" speakers https://www.aliexpress.com/item/32593991938.html
thingiverse
free

MP3 speakers
...ansparent part of the panel.
you also needs connectors, cables, screws, and a power source.
i recommend to use damping materials.
thingiverse
free

Arcade cases for left and right individual controllers with pinball and modes buttons
...is jack for the leds 12v power input adapterhttps://www.aliexpress.com/item/32797586610.html?spm=a2g0s.9042311.0.0.1ec64c4dht9zck
thingiverse
free

IEC 320 C14 Panel Mount Plug Adapter Power Connector Socket
...pins inlet power plug socket
where to buy - https://amzn.to/2tmls6g
follow me on instagram - https://www.instagram.com/kasa_tech/
Arcade1Up
thingiverse
free

Arcade1up Monitor Bracket
...uot;) for mounting monitor inside arcade1up cab.
make shure to use non brittal material for 3d printing.
100% infill recommended.
thingiverse
free

Mount for Raspberry Pi (Arcade1up modding) by Tinkering_On_Steroids
...mount for raspberry pi (arcade1up modding) by tinkering_on_steroids
thingiverse
mount for raspberry pi (arcade1up modding)
thingiverse
free

Arcade1Up PC Power Button
...r switch with a 16mm pc power button.
button i used -https://www.amazon.com/knacro-chassis-switch-computer-restart/dp/b01n6ksuzl/
thingiverse
free
Mount for LCD driver board (Arcade1up modding) by Tinkering_On_Steroids
...nt for lcd driver board (arcade1up modding) by tinkering_on_steroids
thingiverse
mount for lcd driver board (arcade1up modding).
thingiverse
free

Arcade1Up SwitchBracket_v2 for Monoprice Select Mini by Hilux74
... the edges of bumbumbum's arcade1up switchbracket v2 so it will fit the print bed area of the monoprice select mini printer
thingiverse
free

Happ Joystick Alignment Tool. Arcade1Up
.... tool works perfectly and cuts out all the time of aligning and realigning, then aligning some more in order to get it perfect.
thingiverse
free
ARCADE1UP SPACER
...hen youi add the plexiglass control panel overlay. this prevents your plexiglass cover from cracking when you tighten the screws.
thingiverse
free

arcade1up marquee panel mounts by arcadeforever
... by arcadeforever
thingiverse
these are mounts for the amazon or aliexpress lcd panel that most people use for a marquee.
enjoy!
thingiverse
free
Arcade1Up USB Button Plate (Arcade 1Up)
...the holes, covers up the text on the control panel, and features a usb logo. i used a silver sharpie marker to color in the logo.
thingiverse
free

Arcade1up 14.9 Inch Marquee Frame by topperge
... a large printer where i could pre-assemble the 3 parts of the frame and just print it once and save some screws, glue, and pins.
Player
archibase_planet
free

Player
...player
archibase planet
player cd player cd
cd player - 3d model for interior 3d visualization.
archibase_planet
free
Player
...player
archibase planet
record-player vinyl player
dj vinyl player - 3d model (*.gsm+*.3ds) for interior 3d visualization.
archibase_planet
free
Player
...player
archibase planet
mp3 player equipment player
player mp3 alro n010511 - 3d model (*.3ds) for interior 3d visualization.
archibase_planet
free

Player
...player
archibase planet
mp3 player player equipment
player mp3 n270211 - 3d model (*.gsm+*.3ds) for interior 3d visualization.
archibase_planet
free

Player
...rtable media player
player portable pocket apple ipod nano 4g 8gb n170213 - 3d model (*.gsm+*.3ds) for interior 3d visualization.
archibase_planet
free
Player
...r
archibase planet
ipod player mp3 player
player ipod classic mp3 n280111 - 3d model (*.gsm+*.3ds) for interior 3d visualization.
archibase_planet
free
Player
...player
archibase planet
equipment player
player - 3d model (*.gsm+*.3ds) for interior 3d visualization.
archibase_planet
free
Player
...player
archibase planet
player equipment
v-player - 3d model (*.gsm+*.3ds) for interior 3d visualization.
archibase_planet
free
Player
...player
archibase planet
dvd player home equipment
player dvd - 3d model (*.gsm+*.3ds) for interior 3d visualization.
archibase_planet
free
Player
...player
archibase planet
player
phono1 - 3d model for interior 3d visualization.
Conversion
3ddd
$1

Conversation Seat
...шетка
the conversation seat made in englandhttp://www.squintlimited.com/products/the_conversation_seat/gold
+ max 2011
3d_export
$10

Converse 3D Model
...converse 3d model
3dexport
converse shoe pc unix mac
converse 3d model electropainter17075 38067 3dexport
turbosquid
$100

converse-shoe
...quid
royalty free 3d model converse-shoe for download as c4d on turbosquid: 3d models for games, architecture, videos. (1398427)
turbosquid
$10

Conversation Furniture
... available on turbo squid, the world's leading provider of digital 3d models for visualization, films, television, and games.
turbosquid
$7

Converse Allstars
... available on turbo squid, the world's leading provider of digital 3d models for visualization, films, television, and games.
design_connected
$16

Conversation Club Chair
...conversation club chair
designconnected
donghia conversation club chair chairs computer generated 3d model. designed by n/a.
design_connected
$27

Hemicycle Conversation Chair
...rsation chair
designconnected
ligne roset hemicycle conversation chair computer generated 3d model. designed by nigro, philippe.
3d_export
$24

Converse keds 3D Model
...converse keds 3d model
3dexport
converse all star ked shoe clothes sports
converse keds 3d model vermi1ion 26201 3dexport
3ddd
$1

Converse All-Star Shoes
...converse all-star shoes
3ddd
кеды , обувь
converse all-star shoes
design_connected
$18

CONVERSE Jack Purcell Sneakers
...converse jack purcell sneakers
designconnected
converse jack purcell sneakers computer generated 3d model.
Laser
3d_export
$5
laser
...laser
3dexport
a 3d laser
3d_export
free
cnc 3dp laser nozzle for 2w laser opt lasers
...logy that gave birth to cutting and engraving laser heads this laser nozzle was designed for, read the article in the link below:
3d_export
free
cnc laser mount opt lasers
...eive the engraving and cutting laser heads this cnc machine laser mount was designed for, read the article on the following page:
turbosquid
$20

Laser
... available on turbo squid, the world's leading provider of digital 3d models for visualization, films, television, and games.
turbosquid
$15
Laser
... available on turbo squid, the world's leading provider of digital 3d models for visualization, films, television, and games.
turbosquid
$3
Laser
... available on turbo squid, the world's leading provider of digital 3d models for visualization, films, television, and games.
3d_export
$5

laser sword
...laser sword
3dexport
it is a blue laser sword with a metal frame
3d_ocean
$19
Laser Turret
...be used in any sf type of game, especially in tower defense games. - laser turret: 3025 polygons - props: 270 polygons - textu...
3d_export
free
workbee cnc laser mount for opt lasers
...the specifications of engraving and cutting laser heads this mount was designed for, please take a look at the following website:
3d_export
free

shapeoko cnc laser mount for opt lasers
...ind out the opportunities that adding a cutting and engraving laser head to your cnc can bring, take a look at the website below:
Kit
turbosquid
$3

Bathroom Kit Baño kit
... available on turbo squid, the world's leading provider of digital 3d models for visualization, films, television, and games.
turbosquid
$19

Kit
... available on turbo squid, the world's leading provider of digital 3d models for visualization, films, television, and games.
3d_export
$20

Drift Kit
...drift kit
3dexport
turbosquid
$40

BitCoin Kit
...urbosquid
royalty free 3d model bitcoin kit for download as on turbosquid: 3d models for games, architecture, videos. (1519068)
turbosquid
$9

Industrial kit
...osquid
royalty free 3d model industrial kit for download as on turbosquid: 3d models for games, architecture, videos. (1144117)
turbosquid
$6

Kit Vases
...
turbosquid
royalty free 3d model kit vases for download as on turbosquid: 3d models for games, architecture, videos. (1285114)
turbosquid
free

Survival Kit
...rbosquid
royalty free 3d model survival kit for download as on turbosquid: 3d models for games, architecture, videos. (1637721)
turbosquid
$50

Ninja Kit
...rbosquid
royalty free 3d model ninja kit for download as fbx on turbosquid: 3d models for games, architecture, videos. (1672364)
turbosquid
$35

Brushes Kit
...osquid
royalty free 3d model brushes kit for download as max on turbosquid: 3d models for games, architecture, videos. (1216721)
turbosquid
$19
Medical kit
...osquid
royalty free 3d model medical kit for download as fbx on turbosquid: 3d models for games, architecture, videos. (1486089)
Cut
design_connected
$11
e15 Cut Cutting Boards
...e15 cut cutting boards
designconnected
e15 cut cutting boards computer generated 3d model.
design_connected
$16
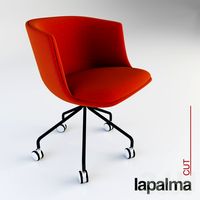
Cut
...cut
designconnected
lapalma cut computer generated 3d model. designed by rota, francesco.
3d_export
$5
cutting machine
...cutting machine
3dexport
crop cutting machine
3d_export
$5

cutting board
...cutting board
3dexport
12 models for cutting boards
3d_export
$20
wire laser cutting peeling cutting machine ffc cutting machine
...and receiving machine, with the structure of this drawing, you don't need to draw by yourself, welcome to collect, thank you.
3ddd
$1
Lapalma CUT
... cut
фабрика: lapalma
коллекция: cut
размер:↑ 74 cm, ↔ 55 см.
описание: стул, ткань, кожа, дерево.
сайт: www.lapalma.it
3ddd
$1
стул lapalma cut
...стул lapalma cut
3ddd
lapalma , cut
стул lapalma cut
3ddd
$1

Lapalma CUT
...
коллекция: cut
размер:↑ 74 cm, ↔ 55 см.
описание: стул, порошковое покрытие, черный, белый, ткань, пластик.
сайт: www.lapalma.it
design_connected
$16
Hi Cut
...hi cut
designconnected
kartell hi cut computer generated 3d model. designed by starck, philippe.
3ddd
$1
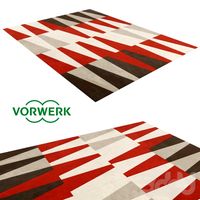
Vorwerk Cut
...vorwerk cut
3ddd
ковер
vorwerk cut
прямоугольный:
размеры : 2400mm x 3200mm
круглый:
размеры : 2400mm
Two
turbosquid
$4

Two Axes Two States
...free 3d model two axes two states for download as obj and fbx on turbosquid: 3d models for games, architecture, videos. (1468396)
3d_export
$5
s of two one and two
...blender file. one burner cooker: vertices: 16,221 faces: 14,780 triangle: 31,490 two burner stove: vertices: 25,200 faces: 23,625
turbosquid
$20
two
...osquid
royalty free 3d model two for download as 3ds and stl on turbosquid: 3d models for games, architecture, videos. (1435051)
3ddd
$1
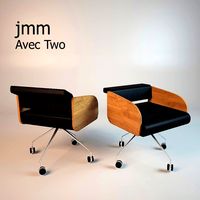
avec two
...avec two
3ddd
jmm , avec two
jmm avec two
3ddd
$1
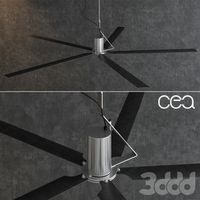
cea two
... вентилятор , потолочный
cea two
все размеры
vray+corona
3d_export
$5
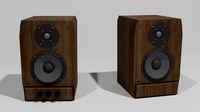
Two speaker
...two speaker
3dexport
this is a 3d model of two speakers from sven
3d_export
free
Two wall
...two wall
3dexport
two wall<br>.blend
design_connected
$29
All-Two
...all-two
designconnected
bonaldo all-two computer generated 3d model. designed by bicego, sergio.
design_connected
$9

Two Timer
...two timer
designconnected
established & sons two timer computer generated 3d model. designed by industrial facility.
turbosquid
$21
DAVENTRY Two Over Two Chest of Drawers
... chest of drawers for download as max, max, max, fbx, and obj on turbosquid: 3d models for games, architecture, videos. (1684477)