Thingiverse
Trinus Extruder Cooling Fan Shroud Version 2 by Rethys
by Thingiverse
Last crawled date: 4 years, 2 months ago
***UPDATED 8/16/2017** - It was pointed out to me that the original design of V2 caused the x axis to jam against the wire cable hook at the extreme right of it's travel. I've redesigned the cable management to eliminate this issue. Be sure to tuck the cable tightly behind the guide and into the hook, and avoid any wire ties around the cable from being oriented so as to catch on the x axis end plate.
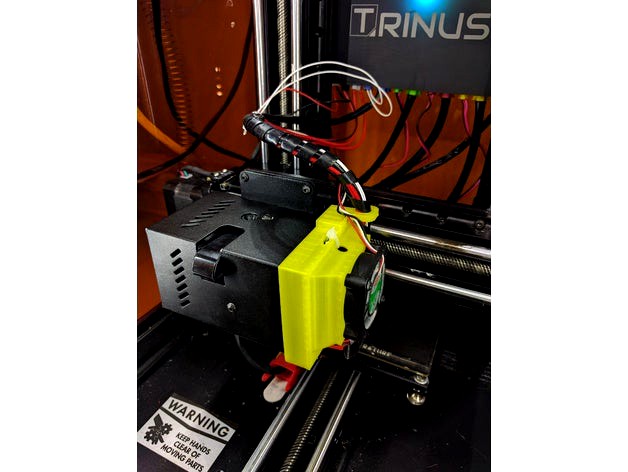
This is version 2 of my extruder shroud. I always intended to redo it to a closer fit, but it took a while to get back to it. This version doesn't require any velcro, double sided tape, hooks or spring arms. It slides perfectly over the right side of the extruder, and has an integral hook to hold the wires out of the way.
I also included two holes to utilize the extruder's original wire tie location a way to absolutely fix this in place, but it does require some fidgeting. Using the smallest wire tie, insert the tie from the right through the slot in the extruder and fish it out the top hole. Then slip the wire tie 'box' end through the round hole in the shroud and the flat 'tail' end through the ellipse hole in the collar. Loosely close the tie, push the shroud in place and align the wire bundle under the hook. Finally, pull the wire tie tight and you are done. The rest of this summary is from the original.
I was having a problem with filament softening in the extruder housing and bending, creating jams. Kodama chose to piggyback the parts cooling fan onto the extruder cooling fan, which resulted in insufficient air flow through the extruder. This shroud positions a fan to draw air through the extruder housing and out the side exhaust. Its still a work in progress, as the shroud requires a piece of velcro on the top of the extruder housing and under the hook to stay in place. Creating a bow in the hook and extending the sides around the extruder housing will fix that, but I won't have time for a while, hence the velcro.
In using the shroud while printing a model that takes up the entire bed, I found that the wires from the extruder need to be routed over the output end of the fan using wire ties, as shown in the new picture above. As I'm using a low velocity fan, it doesn't impede the airflow significantly. If the wires are routed on the axis side of the shroud, they can catch on the end of the axis. If routed on the outside of the shroud, they overstretch the wire connections. I've also used wire ties to minimize the pulling of the connectors at the PCB end. I'm going to include wire management clips on the next version to avoid this issue.