Thingiverse
Train freight car for OS-Railway - fully 3D-printable railway system! by Depronized
by Thingiverse
Last crawled date: 3 years ago
OS-Railway is a complete railway kit designed from the ground up to be fully 3D-printable! Everything from track, switches, locomotives and cars and accessories are specially designed to be printable.
Note! this is the first version, I apologize in advance if not everything fits together perfect, I have printed and built one and it works so don't hesitate to ask in the comments if you have any questions!
Update 27/6/2017 Added a shorter version of the chassis on request, the short version is 195mm. The orientation of the holes in respect of the boogies are still the same, although other things like hopper car addon and other stuff made for the longer chassis will of course not work with this one.
Update 7/4/2017 I changed the coupling to a new simpler but more rigid version. It is a simpler coupler than the one made by gfrantz so if you want the most scale like, click on the link below.
Scale coupler Click on the following link for a scale like coupling mechanism made by gfranz: http://www.thingiverse.com/thing:2196463
Update! gfrantz has made some nice doors for the container, you can find them here: http://www.thingiverse.com/thing:2159257
Container stand: http://www.thingiverse.com/thing:2179125
This is the page for freight car, please see separate pages for tracks, locomotives and more.
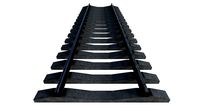
Tracks: http://www.thingiverse.com/thing:2146361
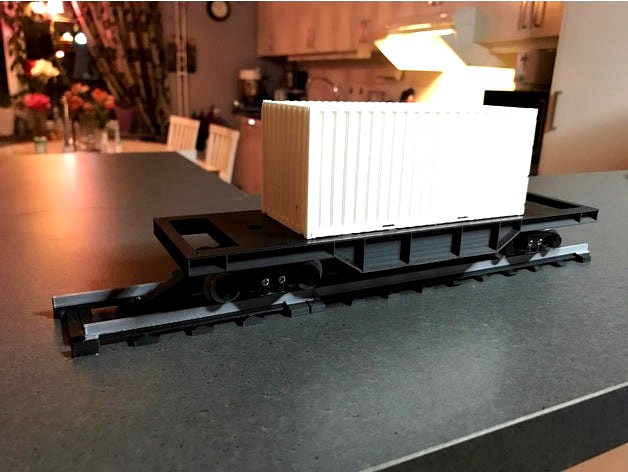
This is the first version of the freight car. It is made to be a flexible chassi platform with several M2 holes distributed over the chassi in order for you to mount different structures on top. In the pictures I just placed a 20 foot ISO container on it for visual reference. I will make more fastening elements and other things for this car although I prioritize the track system now when this car is functional. Check this page now and then to see updates. I will not change the chassi so you will be able do download and mount upgrades later on if you print and assemble the chassi now.
What you need:
8pcs ball bearings 6mm OD 3mm ID and 2,5mm W. (I will use these as standard).
4pcs wheel shafts, 42mm lenght, 3mm thickness. I used carbon fiber rod
8pcs M2x8-10 (between 8 and 10mm, not critical which) (absolut max 12mm)
4pcs M3x10 hex (these keep the car holder in place in the middle of the bogie, therefore their heads cannot be too wide. The car holder needs to rotate freely so that the train car can cope with vertical radius for bridges, so don't set them tight.)
2pcs M3x10-12 to attach the bogies to the chassi. I designed the chassi with room for a nut, but when I mounted the car I realized that the screw set so tight without so there is no need for the nut. Without nut you can use M3x10, if you want to use a nut, you need M3x12.
2pcs M3x10 to attach couplers.
2pcs M1,6x5-6 for the coupler assembly (if you only have longer ones, don't worry, they are easy to cut off.)
Notes on printing and assmbly
The chassi is made to be printed upside-down. That is why there is a chamfer angle to the side details to avoid the need for support. Note, there can be a bit trouble with the room for the bogie nuts, so if you intend to use such, you can enable support from build plate so that this space is printed nice and clean.
Ballbearings To mount the ballbearings in the bogie sides, a good way is to use a vice. It's a very tight fit and is supposed to be. You can trim the edges a bit so it's easier to guide the ball bearing right.
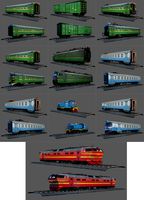
Orientation on print bed Take a look at the image showing all the parts on the build plate, NOTE! I do not recommend that you print all at once like this, I always print a couple of parts at a time to avoid loosing a whole batch if something goes wrong. This pictures is only intended to show you the orientation the parts should have on the build plate for best result.
Bogie sides require a tight fit to the hub, use a knife to trim the edges if it doesn't fit perfect. If you mount the sides and they don't fit perfect, your wheel shafts will not align and all wheels will not touch the track.
The included container is just a modified old CAD-file for reference, just to have something to put on the chassi. It doesn't print perfect and lack doors, but I include it anyway as it's in the pictures.
The coupler system has been designed after the Z70 locomotive was published. If you printed the first version, don't worry, the only thing you need is a 3mm hole on the underside on the back to attach a screw to mount the coupler arm. Place it center, roughly 4-5mm in (it's not critical a mm here or there doesn't matter). Only make sure that you don't drill all the way into your sevo if you have mounted one (I did...). The coupler has a 4mm hole but stil use a 3mm screw, this is intentional to give the coupler a bit of freedom of movement.
Note! this is the first version, I apologize in advance if not everything fits together perfect, I have printed and built one and it works so don't hesitate to ask in the comments if you have any questions!
Update 27/6/2017 Added a shorter version of the chassis on request, the short version is 195mm. The orientation of the holes in respect of the boogies are still the same, although other things like hopper car addon and other stuff made for the longer chassis will of course not work with this one.
Update 7/4/2017 I changed the coupling to a new simpler but more rigid version. It is a simpler coupler than the one made by gfrantz so if you want the most scale like, click on the link below.
Scale coupler Click on the following link for a scale like coupling mechanism made by gfranz: http://www.thingiverse.com/thing:2196463
Update! gfrantz has made some nice doors for the container, you can find them here: http://www.thingiverse.com/thing:2159257
Container stand: http://www.thingiverse.com/thing:2179125
This is the page for freight car, please see separate pages for tracks, locomotives and more.
Tracks: http://www.thingiverse.com/thing:2146361
This is the first version of the freight car. It is made to be a flexible chassi platform with several M2 holes distributed over the chassi in order for you to mount different structures on top. In the pictures I just placed a 20 foot ISO container on it for visual reference. I will make more fastening elements and other things for this car although I prioritize the track system now when this car is functional. Check this page now and then to see updates. I will not change the chassi so you will be able do download and mount upgrades later on if you print and assemble the chassi now.
What you need:
8pcs ball bearings 6mm OD 3mm ID and 2,5mm W. (I will use these as standard).
4pcs wheel shafts, 42mm lenght, 3mm thickness. I used carbon fiber rod
8pcs M2x8-10 (between 8 and 10mm, not critical which) (absolut max 12mm)
4pcs M3x10 hex (these keep the car holder in place in the middle of the bogie, therefore their heads cannot be too wide. The car holder needs to rotate freely so that the train car can cope with vertical radius for bridges, so don't set them tight.)
2pcs M3x10-12 to attach the bogies to the chassi. I designed the chassi with room for a nut, but when I mounted the car I realized that the screw set so tight without so there is no need for the nut. Without nut you can use M3x10, if you want to use a nut, you need M3x12.
2pcs M3x10 to attach couplers.
2pcs M1,6x5-6 for the coupler assembly (if you only have longer ones, don't worry, they are easy to cut off.)
Notes on printing and assmbly
The chassi is made to be printed upside-down. That is why there is a chamfer angle to the side details to avoid the need for support. Note, there can be a bit trouble with the room for the bogie nuts, so if you intend to use such, you can enable support from build plate so that this space is printed nice and clean.
Ballbearings To mount the ballbearings in the bogie sides, a good way is to use a vice. It's a very tight fit and is supposed to be. You can trim the edges a bit so it's easier to guide the ball bearing right.
Orientation on print bed Take a look at the image showing all the parts on the build plate, NOTE! I do not recommend that you print all at once like this, I always print a couple of parts at a time to avoid loosing a whole batch if something goes wrong. This pictures is only intended to show you the orientation the parts should have on the build plate for best result.
Bogie sides require a tight fit to the hub, use a knife to trim the edges if it doesn't fit perfect. If you mount the sides and they don't fit perfect, your wheel shafts will not align and all wheels will not touch the track.
The included container is just a modified old CAD-file for reference, just to have something to put on the chassi. It doesn't print perfect and lack doors, but I include it anyway as it's in the pictures.
The coupler system has been designed after the Z70 locomotive was published. If you printed the first version, don't worry, the only thing you need is a 3mm hole on the underside on the back to attach a screw to mount the coupler arm. Place it center, roughly 4-5mm in (it's not critical a mm here or there doesn't matter). Only make sure that you don't drill all the way into your sevo if you have mounted one (I did...). The coupler has a 4mm hole but stil use a 3mm screw, this is intentional to give the coupler a bit of freedom of movement.
Similar models
thingiverse
free

OS-Railway-knuckle-coupler by gfrantz
...very tiny, so breakage is very possible. i used a emery board to sand things down a bit so everything fits together as designed.
thingiverse
free

Motorized bogie for OS-Railway - fully 3D-printable railway system by Depronized
...elated designs: https://www.thingiverse.com/groups/os-railway/things
these new files will also be uploaded to the hectorrail 141.
thingiverse
free

Tanker car for OS-Railway - fully 3D-printable railway system! by Depronized
...ake the shafts turn loose. i actually used these on my prototypes to save ball bearings and this works way better than expected!)
thingiverse
free

Lock motor coupler by rcaridade
...sing marlin's auto bed level the z axis is in constant move so this disables the spring efect and probably improve precision.
thingiverse
free

Open top hopper car addon for OS-Railway freight car chassi by Depronized
... down. i used 0,3mm for the first print, and 0,25 for the second and that one turned out really good so 0,25 is what i recommend.
thingiverse
free

OS-Railway DIY chassis and body - Fusion 360 tutorial by Depronized
...use a smartphone or a tablet: https://www.thingiverse.com/thing:3252986
suitable track: https://www.thingiverse.com/thing:4408535
thingiverse
free

Lego_US_Style_Bumper_Track by gfrantz
...published for them don't work for me as well. of course, the passenger car i used for the photo has the normal lego couplers!
thingiverse
free

G-scale double bogie by Vendorf70
...a, not tried in abs.
the side mounts on the main bar, need a touch of sandpaper for the side to fit.
i use an axel width of 62mm.
thingiverse
free

Railbike Chassis by BouncyMonkey
...ilway straight track https://www.thingiverse.com/thing:3400784
os-railway curved track https://www.thingiverse.com/thing:3400779
thingiverse
free

Logitech C615 sandwich mount 2020 2040 rail compatible by Shmoee
...glue on the threads to ensure they don't back out over time. a nylon nut would be better if you happen to have those.
enjoy.
Depronized
thingiverse
free

Guignol planeur depron by Titia3311
...guignol planeur depron by titia3311
thingiverse
guignol pour model réduit de depron ou epp
thingiverse
free

Motor Mount 6mm Depron 24mm
...motor mount 6mm depron 24mm
thingiverse
motor holder for 6mm depron
screw spacing 24mm
thingiverse
free

Depron bevel cutter by stavrosk
...nk for remixing:
https://cad.onshape.com/documents/05aa20f52ede97ef198b6cbd/w/4d6cee81ec0aa3b2d90bab70/e/3972a78f435f035eeddc0227
thingiverse
free

3D Parts Edge 540 3mm depron
...3d parts edge 540 3mm depron
thingiverse
3d parts for the edge 540 indoor plane.
these are suitable for the 3mm depron version.
thingiverse
free

Brusless DC Motor mount for 6mm DEPRON models by Javio
... holes diameter is 3mm. i have placed holes in every wall in contact with the depron material in order to apply some glue easily.
thingiverse
free

Plastic parts for GASB Two in depron by Carletto73
...to build this depron model on rc groups ( https://www.rcgroups.com/forums/showthread.php?2813512-gasb-two-fan-jet-60cm-wingspan )
thingiverse
free

Plastic parts for Nano GASB Two in depron by Carletto73
...on model on rc groups ( https://www.rcgroups.com/forums/showthread.php?2820667-nano-gasb-two-fan-jet-45cm-wingspan#post36718640 )
thingiverse
free

Motor Mount Depron F3P indoor plane Roxxy C27 Slowflyer Shockflyer
...e
this motor- mount is designed for 3mm depron or epp indoor planes.
distance fixing screws (pitch circle diameter): 32x 32 [mm]
thingiverse
free

support moteur brushless mini 2700KV pour depron 6mm by Jo400
....
https://youtu.be/ozizgqr__ia
toutes les constructions rc sur rc3dgeek :https://www.youtube.com/channel/ucmno-9wt1ejke_6oqone2eg
thingiverse
free

Motor mount/ firewall for 6mm depron parkjets by MusFPV
...n parkjets by musfpv
thingiverse
hi
i create this piece for all the people need a solid firewall for their own parkjets.
enjoy!!
Freight
3d_export
free

freight elevator
...freight elevator
3dexport
freight elevator
3d_export
$7

freight wagon
...freight wagon
3dexport
turbosquid
$7

Freight Wagon
... model freight wagon for download as blend, obj, fbx, and dae on turbosquid: 3d models for games, architecture, videos. (1542176)
turbosquid
$79

Freight Car
... available on turbo squid, the world's leading provider of digital 3d models for visualization, films, television, and games.
turbosquid
$25

Freight Container
... available on turbo squid, the world's leading provider of digital 3d models for visualization, films, television, and games.
turbosquid
$12

Freight Shipment
... available on turbo squid, the world's leading provider of digital 3d models for visualization, films, television, and games.
turbosquid
$12

Freight Container
... available on turbo squid, the world's leading provider of digital 3d models for visualization, films, television, and games.
turbosquid
$10

Freight crates
... available on turbo squid, the world's leading provider of digital 3d models for visualization, films, television, and games.
turbosquid
$3

Freight carriage
... freight carriage for download as 3ds, obj, fbx, dae, and stl on turbosquid: 3d models for games, architecture, videos. (1496301)
turbosquid
$3

Freight roughneck
...freight roughneck for download as 3ds, obj, fbx, dae, and stl on turbosquid: 3d models for games, architecture, videos. (1496231)
Railway
archibase_planet
free

Railway
...tact wire railroad contact wire railway line
railway contact wire n210814 - 3d model (*.gsm+*.3ds) for exterior 3d visualization.
3d_export
$9

railway stations
...railway stations
3dexport
railway stations<br>сollection of four railway stations.
turbosquid
$10
Railway
...yalty free 3d model railway for download as max, obj, and fbx on turbosquid: 3d models for games, architecture, videos. (1283992)
turbosquid
$29

railway
... available on turbo squid, the world's leading provider of digital 3d models for visualization, films, television, and games.
3d_export
$5

railway tank
...railway tank
3dexport
low-poly railway tank model
3d_export
$65

railway
...railway
3dexport
simple rendering of the scene file
3d_export
$65

railway
...railway
3dexport
simple rendering of the scene file
3d_export
$65

railway
...railway
3dexport
simple rendering of the scene file
3d_export
$65

railway
...railway
3dexport
simple rendering of the scene file
3d_export
$65

railway
...railway
3dexport
simple rendering of the scene file
Os
3d_export
$22

Android OS character 3D Model
...android os character 3d model
3dexport
android google robot os
android os character 3d model chepman32 83952 3dexport
3ddd
$1

Гитарная педаль Boss OS-2
...ная педаль boss os-2
3ddd
boss , педаль
гитарная педаль boss os-2, текстуры прилагаются.
3d_export
$35

Swimex 400 OS 3D Model
...swimex 400 os 3d model
3dexport
swimming pool water swimex therapy swim spa
swimex 400 os 3d model artet 27422 3dexport
turbosquid
$19

Karcher Oscillating Sprinkler OS 3.220
...prinkler os 3.220 for download as 3ds, max, obj, fbx, and dwg on turbosquid: 3d models for games, architecture, videos. (1453338)
3ddd
$1

Кровать VITTORIO GRIFONI Kronos K361 OS
...oni , kronos
кровать vittorio grifoni kronos - k361/os италия
размер
l184 x p210 x h137
turbosquid
$5
![[KTH] Google Android OS Character(robot)](/t/13305260.jpg)
[KTH] Google Android OS Character(robot)
... available on turbo squid, the world's leading provider of digital 3d models for visualization, films, television, and games.
3d_export
$15

Official Google Android OS Logo Mascot 3D Model
...operating system androboi funny cartoon toon humanoid
official google android os logo mascot 3d model 5starsmodels 42857 3dexport
turbosquid
$19

Lens Sigma 17-50mm F2.8 EX OS
... available on turbo squid, the world's leading provider of digital 3d models for visualization, films, television, and games.
turbosquid
$15

Graphics Card Msi GeForce GTX 1660 Ventus OS
...e gtx 1660 ventus os for download as blend, 3ds, fbx, and obj on turbosquid: 3d models for games, architecture, videos. (1702385)
turbosquid
$45

Samsung i5700 Galaxy Spica (Communicator, Android OS) ( Lite, Portal for T-Mobile)
... available on turbo squid, the world's leading provider of digital 3d models for visualization, films, television, and games.
Train
archibase_planet
free

Train
...train
archibase planet
train fast train high-speed train
train speed n221014 - 3d model (*.3ds) for exterior 3d visualization.
3d_ocean
$29

Train
...train
3docean
locomotive train
hello i havolk train
3d_export
$5

train
...train
3dexport
train
3d_export
$5

train
...train
3dexport
train
3d_export
$10

train
...train
3dexport
a lowpoly train...
3ddd
$1
train
...train
3ddd
паровоз
train old
3d_ocean
$12

Train
...train
3docean
child children model old retro toy train wood wooden
old wooden children’s train.
3d_ocean
$5
toy train
...toy train
3docean
kids toy train
3d model toy train
turbosquid
$55
train
...n
turbosquid
royalty free 3d model train for download as max on turbosquid: 3d models for games, architecture, videos. (1477635)
turbosquid
$50

train
...n
turbosquid
royalty free 3d model train for download as max on turbosquid: 3d models for games, architecture, videos. (1419091)
Fully
turbosquid
$50

Drone fully rigged
...
royalty free 3d model drone fully rigged for download as max on turbosquid: 3d models for games, architecture, videos. (1282280)
turbosquid
$12

FULLY PARAMETRIC CHAIR
...alty free 3d model fully parametric chair for download as rvt on turbosquid: 3d models for games, architecture, videos. (1280209)
turbosquid
$10

firetruck-fully-rigged
...yalty free 3d model firetruck-fully-rigged for download as ma on turbosquid: 3d models for games, architecture, videos. (1653811)
turbosquid
$6

Fully rigged character
...ty free 3d model fully rigged character for download as blend on turbosquid: 3d models for games, architecture, videos. (1486076)
turbosquid
$3
Fully Rigged shark
...ee 3d model fully rigged 3d shark model for download as blend on turbosquid: 3d models for games, architecture, videos. (1517695)
turbosquid
$75
Fully Customizable Hospital
... available on turbo squid, the world's leading provider of digital 3d models for visualization, films, television, and games.
turbosquid
free

Fully Rigged Link
... available on turbo squid, the world's leading provider of digital 3d models for visualization, films, television, and games.
design_connected
$16

Troy W Fully Covered
...troy w fully covered
designconnected
magis troy w fully covered computer generated 3d model. designed by wanders, marcel.
cg_studio
$99

Pepe fully rigged3d model
...ully rigged3d model
cgstudio
.max - pepe fully rigged 3d model, royalty free license available, instant download after purchase.
3d_export
$60

Ankylosaur 8K - fully animated
...ankylosaur 8k - fully animated
3dexport
System
archibase_planet
free

System
...m
archibase planet
fire alarm system fire alarm box
security light system - 3d model (*.gsm+*.3ds) for interior 3d visualization.
archibase_planet
free

Spider system
...stem spider glass system
spider system to fix glass stefano galli n050912 - 3d model (*.gsm+*.3ds) for interior 3d visualization.
3ddd
$1

Euforia System
...euforia system
3ddd
euforia
euforia system
3d_export
$50

Roof system Truss system 3D Model
...oof system truss system 3d model
3dexport
roof system truss truss stage
roof system truss system 3d model aleksbel 38970 3dexport
3ddd
$1

DVD System
...dvd system
3ddd
dvd , schneider
dvd system
design_connected
free

Seating system
...seating system
designconnected
free 3d model of seating system
3d_export
$5

solar system
...solar system
3dexport
solar system in c4d, with 8k nasa textures
3ddd
$1

Quanta System
...quanta system
3ddd
медицина
quanta system.
лазерное оборудование для медицинских центров
3d_export
$15

solar system
...nd the other the sun, the earth and the moon, the latter has an animation with camera movement included, the files are in spanish
3d_export
$14

missile system
...missile system
3dexport
Printable
turbosquid
$5
printable giraffe
...uid
royalty free 3d model printable giraffe for download as on turbosquid: 3d models for games, architecture, videos. (1504825)
turbosquid
$49

Longhorn Printable
...
royalty free 3d model longhorn printable for download as stl on turbosquid: 3d models for games, architecture, videos. (1712930)
3d_export
$2
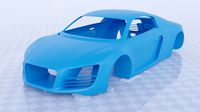
printable audi car
...printable audi car
3dexport
printable audi car
turbosquid
$40
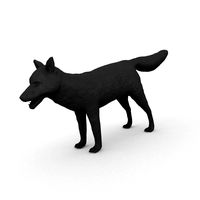
Fox printable
...lty free 3d model fox printable for download as blend and stl on turbosquid: 3d models for games, architecture, videos. (1507558)
turbosquid
$23

Printable Statue
...ty free 3d model printable statue for download as obj and stl on turbosquid: 3d models for games, architecture, videos. (1415137)
turbosquid
$3

Ear Printable
...yalty free 3d model ear printable for download as obj and stl on turbosquid: 3d models for games, architecture, videos. (1671689)
turbosquid
$1

heart printable
...y free 3d model heart printable for download as stl and sldpr on turbosquid: 3d models for games, architecture, videos. (1209566)
turbosquid
$1
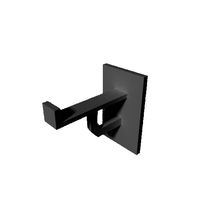
Printable Hook
...
royalty free 3d model 3d printable hook for download as stl on turbosquid: 3d models for games, architecture, videos. (1413683)
turbosquid
$30
Printable support
... model 3d printable support for download as max, 3ds, and stl on turbosquid: 3d models for games, architecture, videos. (1689342)
turbosquid
$24

Printable Dolphin
...el printable dolphin for download as , dae, fbx, obj, and stl on turbosquid: 3d models for games, architecture, videos. (1602353)
Car
3d_export
$5

car
...car
3dexport
luxury car high quality car
3d_export
$5

car
...car
3dexport
luxury car high quality car
3d_export
$5

car
...car
3dexport
luxury car high quality car
3d_export
$5

car
...car
3dexport
luxury car high quality car
3d_export
$5

car
...car
3dexport
luxury car high quality car
archibase_planet
free
Car
...
archibase planet
car sports car motor-car sportster
car nascar#1 n300114 - 3d model (*.gsm+*.3ds) for exterior 3d visualization.
archibase_planet
free

Car
...ibase planet
car motor-car sportster sports car
car gablota xform n190214 - 3d model (*.gsm+*.3ds) for exterior 3d visualization.
archibase_planet
free
Car
...car
archibase planet
car motor car transport
car vaz 2104- 3d model for interior 3d visualization.
3d_export
$15

car
...car
3dexport
car
3d_export
free

car
...car
3dexport
car