3DWarehouse
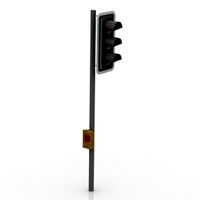
Traffic Lights (for TRAINS)
by 3DWarehouse
Last crawled date: 1 year, 9 months ago
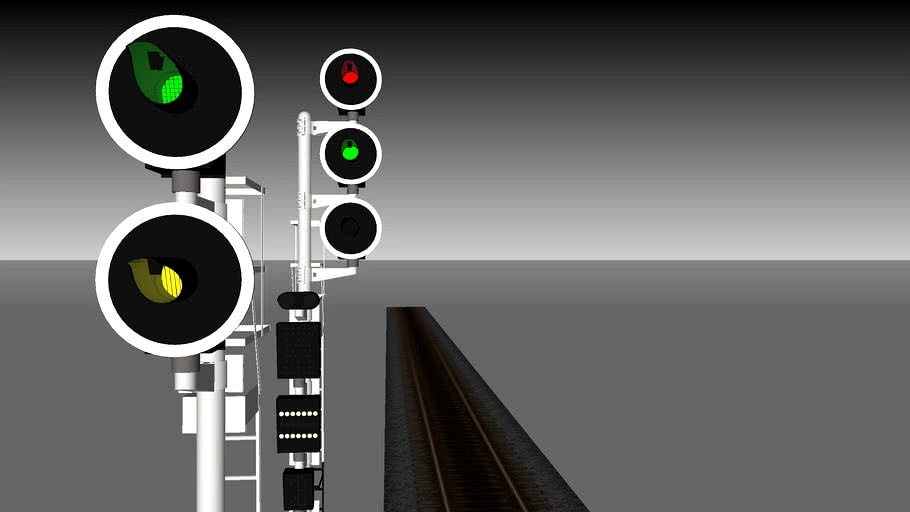
THIS MODEL In this model are represented: a Warning signal. a 1th category signal with warning coupled. A quick explanation on the two signals components. Few scenes will help you to understand signal aspects, with some examples seen from a locomotive mockup. PLEASE NOTE: the distance from the two signals is of course reduced, to make both visible in the model (the correct distance should be 300-400ft for a 100-130mph mainline) INTRODUCTION RAILROAD SIGNALS Railroad signals has the main task to help who controls the railroad to send some information to who drive the trains. These basic informations are: -Tell if the track is clear or not (if the Movement Authority exists) -When the MA exists, we need to specify the speed limitations (if needed). -Temporary speed restrictions (for work in progress or some other reasons) ITALIAN SIGNALS Modern Italian signals are light signals of 'searchlight' type that show red, yellow and green through a single aperture. These were made standard in 1947, replacing all other types of light signals. Signals are normally placed to the left of the track and have a circular background that is black with a white border. When signals are placed to the right of the tracks that they govern, the background is square, black with a white border. The lights may be fixed or blinking. The signal background table is called “Sail” in the railroad slang. In this tutorial, only circular background signals are represented. Due to Sketchup limitations, blinking signals cannot be represented. SIGNAL TYPES WARNING SIGNALS GREEN: Proceed. Next 1th category signal is green YELLOW: Prepare to stop. Next 1th category signal is RED. Prepare to stop 100 ft before it. YELLOW (BLINKING): Same of yellow, but the red signal is at a limited braking distance. YELLOW+GREEN: Proceed and slow down to 20mph. Next 1th category signal is set on “proceed” but on a diverging route with a 20mph speed restriction. YELLOW+GREEN (BLINKING TOGETHER) Proceed and slow down to 40mph. Next 1th category signal is set on “proceed” but on a diverging route with a 40mph speed restriction. YELLOW+GREEN (BLINKING ALTERNATELY) Proceed and slow down to 60mph. Next 1th category signal is set on “proceed” but on a diverging route with a 60mph speed restriction. NOTE: Warning signals becames RED only after a train pass them. ---G---G---Y---R--->TRAIN>---G---G--- 1TH CATEGORY SIGNALS GREEN: Proceed at full speed (highest limit). If the train is departing from a side track with a speed restriction of 20mph, the train must keep 20mph on the switches to the mainline. RED: STOP (Imperative) RED+GREEN: Proceed, with speed reduction confirmation (20mph if rappel is turned of; 40mph if rappel shows one white line; 60mph if rappel shows two white lines) 1TH CATEGORY SIGNALS (WARNING COUPLED) GREEN: Proceed. YELLOW: Prepare to stop. Next signal could be RED or YELLOW+YELLOW. YELLOW (BLINKING): Prepare to stop. Next signal is at a limited braking distance and could be RED or YELLOW+YELLOW. RED: STOP (Imperative) YELLOW+YELLOW: Train is going on a DEAD END or on a track with another train stopped. YELLOW+GREEN: Proceed and slow down to 20mph. Next 1th category signal is set on “proceed” but on a diverging route with a 20mph speed restriction. YELLOW+GREEN (BLINKING TOGETHER) Proceed and slow down to 40mph. Next 1th category signal is set on “proceed” but on a diverging route with a 40mph speed restriction. YELLOW+GREEN (BLINKING ALTERNATELY) Proceed and slow down to 60mph. Next 1th category signal is set on “proceed” but on a diverging route with a 60mph speed restriction. RED+YELLOW: Proceed, with speed reduction confirmation (20mph if rappel is turned off; 40mph if rappel shows one white line; 60mph if rappel shows two white lines). Next signal could be RED. RED+YELLOW (YELLOW BLINKING): Proceed, with speed reduction confirmation (20mph if rappel is turned off; 40mph if rappel shows one white line; 60mph if rappel shows two white lines). Next signal is on a reduced braking distance and is set on “Proceed” RED+YELLOW+YELLOW: Proceed, with speed reduction confirmation (20mph). Next signal is on a reduced braking speed, OR train is going on a DEAD END track, OR train is going on a side track with another train stopped. RED+GREEN: Proceed, with speed reduction confirmation (20mph if rappel is turned off; 40mph if rappel shows one white line; 60mph if rappel shows two white lines). Next signal is set on “Proceed” without speed restrictions. RED+YELLOW+GREEN (“Christmas Three”) : Proceed, with speed reduction confirmation (20mph if rappel is turned off; 40mph if rappel shows one white line; 60mph if rappel shows two white lines). Next signal is set on “Proceed” with a 20mph speed restriction. RED+YELLOW+GREEN(YELLOW AND GREEN BLINKING TOGETHER) : Proceed, with speed reduction confirmation (20mph if rappel is turned off; 40mph if rappel shows one white line; 60mph if rappel shows two white lines). Next signal is set on “Proceed” with a 40mph speed restriction. RED+YELLOW+GREEN(YELLOW AND GREEN BLINKING ALTERNATELY) : Proceed, with speed reduction confirmation (20mph if rappel is turned off; 40mph if rappel shows one white line; 60mph if rappel shows two white lines). Next signal is set on “Proceed” with a 60mph speed restriction. ROUTE INFORMATIONS Some signals can be equipped with a route indicator: a black background table with lighted white numbers that indicates the way (from LEFT to RIGHT with 1 for the 1th left…). This is intended to avoid route-mistakes (the train driver knows the number of the route that is written on his train schedula, and if the number on the signal does not correspond to the number on the paper, the driver have to stop and call the Traffic Control. SIGNALS ANOMALYES Signals lights are turned on EVERYTIME from top to down. If a signal has top light off and some other light turned on it is broken (example BLACK+YELLOW or RED+BLACK+GREEN). When signals present some unusual aspects, the train driver MUST stop (as for a RED signal) and call the Traffic Control Center for get instructions. RED SIGNALS that’s requires a special Movement Authority RED+RAPPEL Rappel: black table where light letters can appears to give special informations or instructions. If a signal is RED and requires some special actions, a letter can be displayed on the rappel and signal aspect will be RED+BLACK+BLACK+”Rappel Letter” RAPPEL “T”: Call Traffic Control for instructions. RAPPEL “D”: The signal protects an unmanned service place. Call Traffic Control to get the Movement Authority. If this signal protects a railroad crossing, the train must go at 2mph and horn repeatedly while approaching the rail road crossing. RAPPEL “D” (BLINKING): same of above + STOP before EACH switch and manually check the correct position. RAPPEL “A”: The signal protects the departure route of an unmanned service place or a rail section equipped with axle-counter block system or manual block system. If letter “A” appears, the electric block system is set on “Proceed”. Call Traffic Control to get the Movement Authority. If this signal protects a railroad crossing, the train must go at 2mph and horn repeatedly while approaching the rail road crossing. RAPPEL “A” (BLINKING): same of above + STOP before EACH switch and manually check the correct position. RAPPEL “P”: In the next block section there could be another train. If the signal does not change (to yellow or green) in the next 3 minutes, the train driver must call Traffic Control to gen instructions. If the Traffic Controller does not say trains ahead, but the signal is RED, the train could be authorized to proceed at 20mph till it meets a green signal. If this signal protects a railroad crossing, the train must go at 2mph and horn repeatedly while approaching the rail road crossing. RAPPEL “P” (BLINKING): same of above + STOP before EACH switch and manually check the correct position. RAPPEL “Lambda” (Overturned “V”) (BLINKING): The next signal, common for more than one tracks, is set on “RED”. The train driver is authorized to overpass this signal, but keeping attention and getting ready to stop before the next signal. RED+MAS Movement Auxiliary Signal (MAS): Signal composed by two lights that can be WHITE or BLUE (for departure signals), Static or Blinking. Booth lights are of the same colour; these lights are horizontal. WHITE+WHITE: Call Traffic Control to Movement Authority. Proceed at 20mph and look for obstacles on the tracks. The train MUST stop before the nest signal (also if green). WHITE+WHITE (BLINKING TOGETHER): same of above + STOP before EACH switch and manually check the correct position. If necessary, the train driver must move the switches to the corret position, following the instructions given from the Traffic Control. BLUE+BLUE: Call Traffic Control to Movement Authority. Proceed at 20mph and look for obstacles on the tracks. The train MUST stop before the nest signal (also if green). BLUE+BLUE (BLINKING TOGETHER): same of above + STOP before EACH switch and manually check the correct position. If necessary, the train driver must move the switches to the corret position, following the instructions given from the Traffic Control. #3D_Challenge_259 #Light #Railroad #Railway #RFI #Signal #Traffic #Train
Similar models
3dwarehouse
free

Repeating Signal
...tion: diagonal line (reduced speed/caution/speed restriction) ; stop: horizontal line #railroad #railway #railway_signals #signal
3dwarehouse
free

Yellow traffic lights set
...
#signals #lamps #signal #stop #control #red #amber #green #crossing #overhead #pedestrian #safe #traffic #lights #traffic_lights
3dwarehouse
free

DB Semaphore Signals
...erate the shunting signal, click on the white circle with the stripe to change its aspect. #train #signal #db #germany #semaphore
3dwarehouse
free

Stoplight
...stoplight
3dwarehouse
a realilistic stoplight. #green #highway #light #red #road #signal #stop #stoplight #traffic #yellow
3d_export
$33

Traffic Light 3D Model
...rt
stop traffic light signal red yellow green warning yield caution street road
traffic light 3d model 3dfurniture 34951 3dexport
3d_export
$40

Traffic Signal Light 3D Model
...trafficlight car 3d animated street streetlight ready late lamp signal pole
traffic signal light 3d model blacks3d 68897 3dexport
3dwarehouse
free

Traffic Signal-Advance Green, 12 Inches: Red & Left Green Arrow, 8 Inches: Yellow, Green
...e green, 12 inches: red & left green arrow, 8 inches: yellow, green
3dwarehouse
traffic signal 2x12' 2x8' #utilities
3dwarehouse
free

Traffic Signal, 12 Inchs: Red & Green; 8 Inches: Yellow
...traffic signal, 12 inchs: red & green; 8 inches: yellow
3dwarehouse
traffic signal 2x12' 1x8' #utilities
3dwarehouse
free

Traffic Signal with Frame 12 Inches: Red & Green; 8 Inches: Yellow
...traffic signal with frame 12 inches: red & green; 8 inches: yellow
3dwarehouse
traffic signal 2x12' 1x8' #utilities
3dwarehouse
free

Acme Semaphore Traffic siganal silver
...go_sign #green #metal #metal_roof #red #shade #stainless_steal #stop #traffic_signal #traffic_signal_company #white_metal #yellow
Traffic
3d_ocean
$7
Traffic signboard
...traffic signboard
3docean
signboard traffic
a high quality traffic signboard
3d_ocean
$2
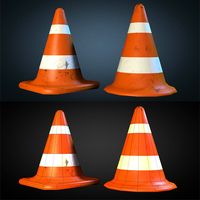
Traffic cone
...traffic cone
3docean
cone traffic
a lowpoly traffic cone model .
3d_ocean
$2
Traffic Cone
... and high poly to clear edges traffic cone is fully perfectly uvw mapped uses a single multi/sub-object material textures incl...
3d_export
$5

traffic cone
...traffic cone
3dexport
traffic cone
3d_export
free

traffic cone
...traffic cone
3dexport
traffic cone
archibase_planet
free
Traffic light
...net
traffic light traffic lights light signal
traffic light n260215 - 3d model (*.gsm+*.3ds+*.max) for exterior 3d visualization.
3d_export
$5

traffic cone
...traffic cone
3dexport
simple traffic cone
3d_ocean
$9
Traffic Chair
...traffic chair
3docean
chair traffic
features highly-resistant interchangeable feet. quality model – traffic chair
3d_export
$18
traffic barriers
...traffic barriers
3dexport
traffic barriers + 8k texture
3d_ocean
$3
Traffic Cones
...cones, great for game enviroments. low poly (224 poly – 212 verts) (cone 1) low poly (259 poly – 230 verts) (cone 2) 1024×1024...
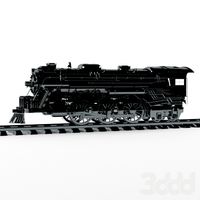
Trains
archibase_planet
free

Train
...train
archibase planet
train fast train high-speed train
train speed n221014 - 3d model (*.3ds) for exterior 3d visualization.
3d_ocean
$29

Train
...train
3docean
locomotive train
hello i havolk train
3d_export
$5

train
...train
3dexport
train
3d_export
$5

train
...train
3dexport
train
3d_export
$10

train
...train
3dexport
a lowpoly train...
3ddd
$1
train
...train
3ddd
паровоз
train old
3d_ocean
$12

Train
...train
3docean
child children model old retro toy train wood wooden
old wooden children’s train.
3d_ocean
$5
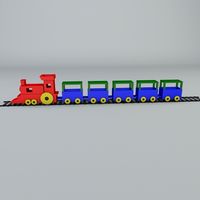
toy train
...toy train
3docean
kids toy train
3d model toy train
turbosquid
$55
train
...n
turbosquid
royalty free 3d model train for download as max on turbosquid: 3d models for games, architecture, videos. (1477635)
turbosquid
$50

train
...n
turbosquid
royalty free 3d model train for download as max on turbosquid: 3d models for games, architecture, videos. (1419091)
Lights
archibase_planet
free

Light
...light
archibase planet
lamp lighting light
light - s2 - 3d model for interior 3d visualization.
archibase_planet
free

Light
...light
archibase planet
light luminaire lighting
light l0465 - 3d model (*.gsm+*.3ds) for interior 3d visualization.
3d_export
$5

lighting
...lighting
3dexport
lighting
3d_export
$5

lighting
...lighting
3dexport
lighting in livingroom
turbosquid
$3

Lighting Tree with Lights
...d model lighting tree with lights for download as max and 3ds on turbosquid: 3d models for games, architecture, videos. (1585507)
archibase_planet
free

Light
...light
archibase planet
luster lighting solution
light - s - 3d model for interior 3d visualization.
archibase_planet
free

Light
...light
archibase planet
luster lamp lighting
light 1 - 3d model for interior 3d visualization.
archibase_planet
free

Lights
...lights
archibase planet
surgical lights surgical lamp
surgical lights (floor) - 3d model for interior 3d visualization.
archibase_planet
free

Light
...light
archibase planet
lighting luminaire candlelight
light l0463 - 3d model (*.gsm+*.3ds) for interior 3d visualization.
3d_export
$18

street light-lighting-light-xia bing
...
3dexport
street light-lighting-light-xia bing<br>max 2015 v-ray 3 max 2015<br>textures<br>all files in zip...