Thingiverse
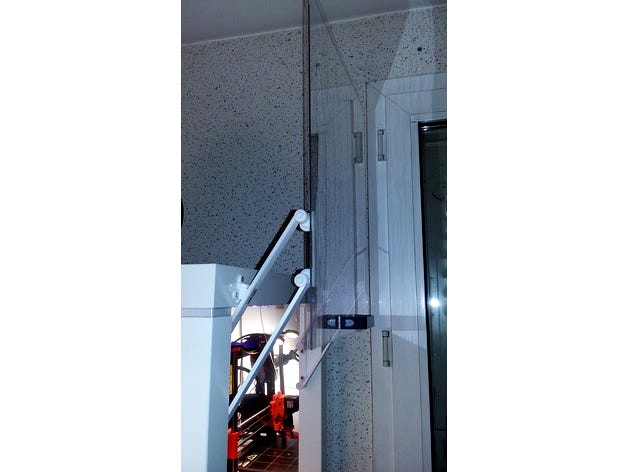
Top-Door-Opener Ikea Lack Enclosure made stronger by paparazzi
by Thingiverse
Last crawled date: 3 years ago
This remix solves the weaknesses of the source.
I have now used this design for 3 years +, opened and closed door about >400 times (carefully). Still holds good. Magnets still strong.
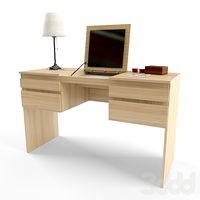
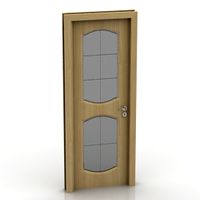
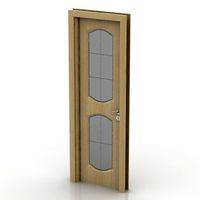
Front door for the IKEA Lack enclosure 490mm
My version of the connectors is for a height of 490mm. (Lack's legs raised). But also works down to 440mm.
If your version has shorter (total) legs length, all you have to do it reduce the height of the front plexi sheet. See example at the end.
The length of the arms (connectors) is adapted for this IKEA LACK Enclosure design : https://www.thingiverse.com/thing:2212749
using the option Upper_Legs_Long_490mm.stl
See my make https://www.thingiverse.com/make:384455 in order to know what to print.
Looks like I can remove my original prusa mk2s when the door is open. No need to dismantle the door.
Parts
Walls and front Door using
4 synthetic glass sheets 2.5mm, 4 x 444 x 490 : can cut that from one 1m2 sheet.
or 3 x 444 x 490 for walls + 444 x 488 for front door for a little more margin and confort.
It is important to use sheets having 2.5mm thickness for the door, no more because of the weight, no less because of the solidity.
Using 2x(4x2) = 16 neodyme magnets : 10 x 5 x 3 mm
Get 20 of these in case you need more strength. This ref or equivalenthttps://www.ebay.com/itm/282888360765
3D printing instructions
can print everything in PLA if you are confident you have a quite strong PLA, screws printed vertical.
See picture print_orientation_table_mount.jpg
Best is PLA for the connectors and PET for the mount parts.
Screws and threads behave well in PET (low friction).
2x_connector_325mm_v1.stl was a specific request for a 650mm enclosure that you can ignore.
Assembly
Please notice that the connector_with_hole part is slightly asymmetrical. By about 1-2mm, which might help. Try the orientation that best fits for the alignment of the mags to the triangle.
Positioning : look at the pictures they have the measurements in metric system.
Screw first : top of Table Mount parts should be screwed to the legs at 83mm from the roof.
assemble the connectors and the plexi mounts using the screws and washers, just by hand. If necessary, make them play until they rotate fine.
finding the right place for the triangles (don't need the plexi)
left
put 2 mags in a triangle (same polarity orientation) + maintain top magnet with some strong tape (else it will jump out !)
add 2 more mags on front of triangle, maintain with some strong tape.
hold with your hand the triangle at very approx final position
push up the left assembly to the top
throw 2 magnets in it, they will orient correctly, close with some tape.
add 2 more magnets again on the tape.
now, find the position for the triangle that maximizes stability, mark with stylus
right, do the same.
once you are confident with all position, screw and stick.
The thing to stick last (and last operation) is to stick the plexi mounts to the plexi. Do it flat on a table. When fully cured, mount the door keeping it STRAIGHT (hold at top center), very carefully.
chipboard wood (aka shitwood) screws to use :
diam 3mm x L20 for the triangles (3 per Triangle, total 6)
diam 4mm x L30 for the mounts (2 per Table Mount, total 4)
https://www.thingiverse.com/thing:36465 for the front door handle
video of door actionhttps://youtu.be/pxghWBwZGv4https://youtu.be/WngNIq5Koo4
Compatibility with the Prusa i3 MK3 ikea Enclosure.
I think that this design is not compatible with the Prusa i3 MK3 ikea Enclosure as is.
Even if you remove the 4 Hinges of MK3 enclosure.
The only problem is that when open, my top connectors touch the upper corners standoffs because of their added plastic thickness of 5mm inward.
The MK3 enclosure by prusa recommends sheets of 440mm horizontal. Just use a 440x440 sheet for the front door.
3DPrint orange at your convenience.
The only change in my pictures is the distance from bottom of plexi to bottom of plexi_mount. Instead of 72-73 mm it would be approx 72-490+440 = 22mm. But the best is to just look where it goes naturally when in bottom position, then stick.
For shorter legs
If your version has shorter (total) legs length, all you have to do it reduce the height of the front plexi sheet.
For example, if your legs are 440mm, then the plexi sheet for the door should be 444 x 440 or 444 x 438 for some margin of confort.
I have now used this design for 3 years +, opened and closed door about >400 times (carefully). Still holds good. Magnets still strong.
Front door for the IKEA Lack enclosure 490mm
My version of the connectors is for a height of 490mm. (Lack's legs raised). But also works down to 440mm.
If your version has shorter (total) legs length, all you have to do it reduce the height of the front plexi sheet. See example at the end.
The length of the arms (connectors) is adapted for this IKEA LACK Enclosure design : https://www.thingiverse.com/thing:2212749
using the option Upper_Legs_Long_490mm.stl
See my make https://www.thingiverse.com/make:384455 in order to know what to print.
Looks like I can remove my original prusa mk2s when the door is open. No need to dismantle the door.
Parts
Walls and front Door using
4 synthetic glass sheets 2.5mm, 4 x 444 x 490 : can cut that from one 1m2 sheet.
or 3 x 444 x 490 for walls + 444 x 488 for front door for a little more margin and confort.
It is important to use sheets having 2.5mm thickness for the door, no more because of the weight, no less because of the solidity.
Using 2x(4x2) = 16 neodyme magnets : 10 x 5 x 3 mm
Get 20 of these in case you need more strength. This ref or equivalenthttps://www.ebay.com/itm/282888360765
3D printing instructions
can print everything in PLA if you are confident you have a quite strong PLA, screws printed vertical.
See picture print_orientation_table_mount.jpg
Best is PLA for the connectors and PET for the mount parts.
Screws and threads behave well in PET (low friction).
2x_connector_325mm_v1.stl was a specific request for a 650mm enclosure that you can ignore.
Assembly
Please notice that the connector_with_hole part is slightly asymmetrical. By about 1-2mm, which might help. Try the orientation that best fits for the alignment of the mags to the triangle.
Positioning : look at the pictures they have the measurements in metric system.
Screw first : top of Table Mount parts should be screwed to the legs at 83mm from the roof.
assemble the connectors and the plexi mounts using the screws and washers, just by hand. If necessary, make them play until they rotate fine.
finding the right place for the triangles (don't need the plexi)
left
put 2 mags in a triangle (same polarity orientation) + maintain top magnet with some strong tape (else it will jump out !)
add 2 more mags on front of triangle, maintain with some strong tape.
hold with your hand the triangle at very approx final position
push up the left assembly to the top
throw 2 magnets in it, they will orient correctly, close with some tape.
add 2 more magnets again on the tape.
now, find the position for the triangle that maximizes stability, mark with stylus
right, do the same.
once you are confident with all position, screw and stick.
The thing to stick last (and last operation) is to stick the plexi mounts to the plexi. Do it flat on a table. When fully cured, mount the door keeping it STRAIGHT (hold at top center), very carefully.
chipboard wood (aka shitwood) screws to use :
diam 3mm x L20 for the triangles (3 per Triangle, total 6)
diam 4mm x L30 for the mounts (2 per Table Mount, total 4)
https://www.thingiverse.com/thing:36465 for the front door handle
video of door actionhttps://youtu.be/pxghWBwZGv4https://youtu.be/WngNIq5Koo4
Compatibility with the Prusa i3 MK3 ikea Enclosure.
I think that this design is not compatible with the Prusa i3 MK3 ikea Enclosure as is.
Even if you remove the 4 Hinges of MK3 enclosure.
The only problem is that when open, my top connectors touch the upper corners standoffs because of their added plastic thickness of 5mm inward.
The MK3 enclosure by prusa recommends sheets of 440mm horizontal. Just use a 440x440 sheet for the front door.
3DPrint orange at your convenience.
The only change in my pictures is the distance from bottom of plexi to bottom of plexi_mount. Instead of 72-73 mm it would be approx 72-490+440 = 22mm. But the best is to just look where it goes naturally when in bottom position, then stick.
For shorter legs
If your version has shorter (total) legs length, all you have to do it reduce the height of the front plexi sheet.
For example, if your legs are 440mm, then the plexi sheet for the door should be 444 x 440 or 444 x 438 for some margin of confort.
Similar models
thingiverse
free

Prusa i3 MK3 ENCLOSURE 4mm plexi parts by Harpalyke
... i3 mk3 enclosure 4mm plexi parts by harpalyke
thingiverse
parts for the prusa ikea lack enclosure modified for 4mm plexiglass.
thingiverse
free

Logitech C270 Mount for IKEA Lack Enclosure by sidoh10
...ea lack enclosure. fits on top of the top left leg mount in the front of the enclosure.
fusion 360 file: https://a360.co/2jmy5bt
thingiverse
free

Ikea lack leg connector by whitewhidow
...enclosure
both have a slot to allow room for the plexiglass when using the typical prusa enclosure
you need 2 of each (obviously)
thingiverse
free

Ender 5 resized Prusa i3 MK3 enclosure for IKEA Lack leg spacer by alucard321pl
...osure for ikea lack leg spacer by alucard321pl
thingiverse
3mm leg spacer for ikea lack enclosure. scale in z to fit your needs.
thingiverse
free

Ikea lack table long extension (Prusa i3 MK3s)
...uctural reinforcement l steel bracket and another flat sleet bar to ensure rigidity of the vertical stacked lack table enclosure.
grabcad
free

Prusa Lack Enclosure
...rks-with-step-1)
and ikea lack table.
base for further modifications like adding 3rd lack table to the side or designing drawers
thingiverse
free

Ikea Lack Enclosure - Leg Support by DesignTime3D
...or the already tapped hole. these supports will screw into the leg and the table top with the 3d printed connector in the middle.
thingiverse
free

Prusa i3 MK3s IKEA Enclosure PSU mount(Black PSU)
...3s with the new black psu and you don't have to drill a hole in the table to fit the cables. the cable goes around the table.
thingiverse
free

Prusa i3 MK3S LCD Holder for lack enclosure
...of lcd holder for prusa i3 mk3s lack enclosure.
you need to buy these screws:
panhead screw 5x20 - 2x
countersunk screw 3x10 - 1x
thingiverse
free

PRUSA Printer Table Enclosure Connectors by rscheirer
...ial remix of parts from: original prusa i3 mk3 enclosure -ikea lack table - prusa research
by cisardom, published apr 16, 2018
Paparazzi
3ddd
$1

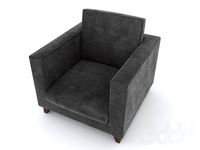
Baker / Paparazzi
...er , chair , кресло
baker - paparazzi arm chair
turbosquid
$8

Baker Paparazzi Chair
... available on turbo squid, the world's leading provider of digital 3d models for visualization, films, television, and games.
3d_export
$99

Nikon D4 Photo Camera 3D Model
...mapping professional camera photo electronics nikon d4 photography digital paparazzi nikon d4 photo camera 3d model squir 87359...
3d_sky
free

Baker / Paparazzi
...baker / paparazzi
3dsky
baker-paparazzi arm chair
thingiverse
free

BearingBracket-1-_SH.stl corrected by paparazzi
...bearingbracket-1-_sh.stl corrected by paparazzi
thingiverse
this one stl has the cylinders in contact with the walls.
thingiverse
free

Enclosure for Paparazzi-IR-Sensor by iliis
...ement of the horizon.
see http://paparazzi.enac.fr/wiki/infrared_double_small_sensor_board for more details on the sensor itself.
thingiverse
free

A stand for the Geared Egg by paparazzi
...ingiverse
use supports for support_egg.stl
use 100% infill for the legs.
the base was precisely adjusted to fit the bottom shape
thingiverse
free

Soldering_Iron_Stand_NoSupport stronger by paparazzi
...lightly less filament.
using fast profile 0.35mm on prusa
designed because original did break (case of rather bad layer adhesion)
thingiverse
free

Reuleaux Triangle by paparazzi
...ooting on the plug, good. push the plug foot first in one side. it will lock. don't really need glue. it seems to hold as is.
thingiverse
free

NCR18650B Battery Holder (Integrated BMS) by paparazzi
...tly more elaborate design.
for bms protected version of 18650 like the ncr18650b.
for plates
mouser 534-5223
and
mouser 534-5201
Lack
3d_export
$5

LACK LACK Coffee table white 90x55 cm IKEA
..., white, 90x55 cm ikea<br>https://www.ikea.com/ru/ru/p/lack-lakk-zhurnalnyy-stol-belyy-50449907/?ysclid=l8zshj49w6656165430
turbosquid
$4

Ikea Lack
... available on turbo squid, the world's leading provider of digital 3d models for visualization, films, television, and games.
3ddd
$1

IKEA Lack Coffee Table
... кофейный
ikea lack coffee tablehttp://www.ikea.com/gb/en/catalog/products/00104291
turbosquid
$5

IKEA Lack Table
...ack table for download as blend, blend, unitypackage, and fbx on turbosquid: 3d models for games, architecture, videos. (1623135)
turbosquid
$10

Ikea Lack Set
... available on turbo squid, the world's leading provider of digital 3d models for visualization, films, television, and games.
turbosquid
$3

IKEA Lack Library
... available on turbo squid, the world's leading provider of digital 3d models for visualization, films, television, and games.
turbosquid
$1

IKEA LACK TABLE
... available on turbo squid, the world's leading provider of digital 3d models for visualization, films, television, and games.
turbosquid
free

IKEA Lack Shelf
... available on turbo squid, the world's leading provider of digital 3d models for visualization, films, television, and games.
turbosquid
$9

Ikea Table 5 Lack
... available on turbo squid, the world's leading provider of digital 3d models for visualization, films, television, and games.
turbosquid
$5

IKEA Lack Side Table
... available on turbo squid, the world's leading provider of digital 3d models for visualization, films, television, and games.
Stronger
3d_export
$5

gorilla monster stronger rigged
...stronger rigged
3dexport
gorilla zombie made in blender<br>textures albedo,normal,specular 1024x1024<br>rigged model
3d_export
$39

Mercedes-Benz G Line Stronger Than Time 2021 wheel
...mercedes-benz g line stronger than time 2021 wheel
3dexport
3d_export
$129

mercedes-benz g 400 d amg line stronger than time 2021
...------------------------- thank you for buying this product. we look forward to continuously dealing with you. creator 3d team!!!
3d_export
free

monster flower
...power that gave the flower the ability to grow stronger and...
3d_export
$60
lockheed martin f-35 c lightning ii
...wingtip sections, larger control surfaces for improved low-speed control, stronger landing gear for the stresses of carrier arrested landings,...
3d_ocean
$15

New Shoe
...so forth this is a 3d model. it is stronger and more lasting shoe is comfortable and sturdy and...
3d_ocean
$5

HDRi Studio Light 5
...studio hdri hdri studio light 5 front light is stronger then the side ones. 10000×5000 px hdr exr...
3d_ocean
$10

Green-Steel Weapon Set
...models. a special emerald powder ingredient makes green-steel much stronger than ordinary...
3d_export
$7

wheel rims
...the connection between parts of structures to make it stronger and the movements of each prong to make it...
3d_export
$5

Bill chipper
...beings in the entire multiverse. only the axolotl is stronger than him (a little more about him later). his...
Enclosure
3d_export
free

electrical enclosure
...l enclosure where electrical devices like (relays, contactors, busbars ) are kept in order to protect from hazardous environment.
turbosquid
$100

GPU Enclosure
...yalty free 3d model gpu enclosure for download as obj and stl on turbosquid: 3d models for games, architecture, videos. (1381061)
3d_export
$5

Electrical Enclosure
...ed. also has tower lights attaced on the top.<br>file format that are available:<br>.step<br>.obj<br>.stl
archive3d
free

Enclosure 3D Model
...closure 3d model
archive3d
shower enclosure-acquarius- 3d model for interior 3d visualization.
archive3d
free

Enclosure 3D Model
...enclosure 3d model
archive3d
shower enclosure-omega- 3d model for interior 3d visualization.
archive3d
free

Enclosure 3D Model
...enclosure 3d model
archive3d
shower enclosure-vega - 3d model for interior 3d visualization.
archive3d
free

Enclosure 3D Model
...enclosure 3d model
archive3d
shower enclosure-zenith - 3d model for interior 3d visualization.
turbosquid
$20

shower enclosure
... available on turbo squid, the world's leading provider of digital 3d models for visualization, films, television, and games.
turbosquid
$14

Dumpster Enclosure
... available on turbo squid, the world's leading provider of digital 3d models for visualization, films, television, and games.
turbosquid
$25

3d printer enclosure
... model 3d printer enclosure for download as ipt, skp, and fbx on turbosquid: 3d models for games, architecture, videos. (1634310)
Ikea
3ddd
$1
IKEA
...ikea
3ddd
ikea , стеллаж
ikea
3ddd
$1
IKEA
...ikea
3ddd
ikea
кухня ikea
3ddd
$1
IKEA
...ikea
3ddd
ikea
осторожно, тяжелая модель
ikea
3ddd
$1
IKEA
...ikea
3ddd
ikea
5 зеркал от ikea
3ddd
$1
IKEA
...ikea
3ddd
ikea , бойа
ikea светильник потолочный
3ddd
$1
IKEA
...ikea
3ddd
ikea , барный
bar stool ikea
3ddd
$1

IKEA
...ikea
3ddd
ikea , зубная щетка , косметика
ikea
3ddd
free
IKEA
...ikea
3ddd
ikea , трюмо
дамский столик ikea.
3ddd
$1
IKEA
...3ddd
ps , декоративный набор , ikea
ikea decor
3ddd
$1

Ikea
...ikea
3ddd
ikea , lagra
модель лампы от ikea
Door
3d_export
$5
door handle of doors
...door handle of doors
3dexport
door handle of doors
3d_ocean
$4

Door
...3docean
architecture door gate gothic door old style door
door, 3d door, gothic door, architecture, old style door, gate, 3d gate
3d_ocean
$10

Door
...door
3docean
design door doors home house indoor interior opening doors
door design
archibase_planet
free
Door
...r
archibase planet
door sliding door interior door rail door
door n250515 - 3d model (*.gsm+*.3ds) for interior 3d visualization.
archibase_planet
free
Door
...door
archibase planet
door sash door sash-door interior door
door 900 - 3d model (*.gsm+*.3ds) for interior 3d visualization.
archibase_planet
free
Door
...door
archibase planet
door sash door sash-door interior door
door 600 - 3d model (*.gsm+*.3ds) for interior 3d visualization.
archibase_planet
free
Door
...door
archibase planet
door sash door sash-door interior door
door 800 - 3d model (*.gsm+*.3ds) for interior 3d visualization.
archibase_planet
free
Door
...door
archibase planet
door sash door sash-door interior door
door 800 - 3d model (*.gsm+*.3ds) for interior 3d visualization.
archibase_planet
free
Door
...door
archibase planet
door sash door sash-door interior door
door 700 - 3d model (*.gsm+*.3ds) for interior 3d visualization.
archibase_planet
free
Door
...door
archibase planet
door sash door sash-door interior door
door 600 - 3d model (*.gsm+*.3ds) for interior 3d visualization.
Opener
3d_export
free

Opener
...r
3dexport
3d model of can opener. its my first work, if u can please show me my mistakes. this 3d model was created in autocad.
3d_export
free
Cap opener
...cap opener
3dexport
handy cap opener, more files/formats here:
3ddd
$1
Кресло, Open Oreon.
...кресло, open oreon.
3ddd
open , oreon
кресло, open oreon.
3d_ocean
$4
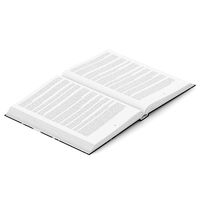
Open Book
...r interior max mental model open ray reading shelf text vray
open hardcover book with unique texture map on front and back cover.
turbosquid
$6
Opening Flag
...squid
royalty free 3d model opening flag for download as c4d on turbosquid: 3d models for games, architecture, videos. (1593555)
turbosquid
$10

Open book
...
royalty free 3d model open book for download as skp and obj on turbosquid: 3d models for games, architecture, videos. (1690781)
turbosquid
$2
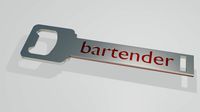
bottle opener
...lty free 3d model bottle opener for download as blend and obj on turbosquid: 3d models for games, architecture, videos. (1621201)
turbosquid
$24

Bottle Opener
...free 3d model bottle opener for download as max, obj, and fbx on turbosquid: 3d models for games, architecture, videos. (1300948)
turbosquid
$20
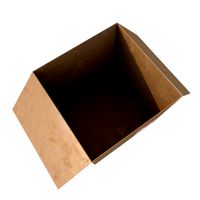
Open Box
...yalty free 3d model open box for download as ma, obj, and fbx on turbosquid: 3d models for games, architecture, videos. (1481218)
turbosquid
$10

Wine Opener
...ty free 3d model wine opener for download as ma, obj, and fbx on turbosquid: 3d models for games, architecture, videos. (1240730)
Top
archibase_planet
free
Top
...top
archibase planet
top
top - 3d model (*.gsm+*.3ds) for interior 3d visualization.
3ddd
free
Range Top V36C top
...range top v36c top
3ddd
гриль
проф. гриль range top v36c top
archibase_planet
free
Top
...top
archibase planet
dresser kitchen furniture
top - 3d model (*.gsm+*.3ds) for interior 3d visualization.
archibase_planet
free
Top
...top
archibase planet
bracket bar furniture
bar top - 3d model (*.gsm+*.3ds) for interior 3d visualization.
turbosquid
$5

Top
...lty free 3d model top for download as ma, max, blend, and obj on turbosquid: 3d models for games, architecture, videos. (1579951)
turbosquid
$39
Top
... available on turbo squid, the world's leading provider of digital 3d models for visualization, films, television, and games.
turbosquid
$30
Top
... available on turbo squid, the world's leading provider of digital 3d models for visualization, films, television, and games.
3d_export
$15

top knifle
...top knifle
3dexport
top knifle
design_connected
$11
Drop Top
...drop top
designconnected
plumen drop top computer generated 3d model.
3d_export
$245
top of the material
...top of the material
3dexport
top of the material,commercial ceiling ceiling material, metal material
Made
design_connected
$11

Geometry Made Easy
...geometry made easy
designconnected
micromacro geometry made easy computer generated 3d model. designed by bernardi, sara .
turbosquid
$20

Loopa Bed by MADE
...
royalty free 3d model loopa bed by made for download as max on turbosquid: 3d models for games, architecture, videos. (1159987)
turbosquid
$10

MADE Barstool Sean
...
royalty free 3d model made barstool sean for download as max on turbosquid: 3d models for games, architecture, videos. (1564047)
turbosquid
$10

MADE Kitson Barstool
...oyalty free 3d model made kitson barstool for download as max on turbosquid: 3d models for games, architecture, videos. (1564045)
turbosquid
$10

MADE Rory chair
...id
royalty free 3d model made rory chair for download as max on turbosquid: 3d models for games, architecture, videos. (1563827)
turbosquid
$10

Toys made of wood
...
royalty free 3d model toys made of wood for download as max on turbosquid: 3d models for games, architecture, videos. (1329711)
turbosquid
$2

Shotgun made of bones
...yalty free 3d model shotgun made of bones for download as obj on turbosquid: 3d models for games, architecture, videos. (1689901)
3ddd
$1

Made In Ratio - Alpha Chair
...made in ratio - alpha chair
3ddd
made in ratio
the alpha chair by made in ratio.
fully unwrapped uvs.
turbosquid
$26

Sofa Made Hewitt
...ty free 3d model sofa made hewitt for download as max and obj on turbosquid: 3d models for games, architecture, videos. (1398557)
turbosquid
$26

Sofa Made Julianne
... free 3d model sofa made julianne for download as max and obj on turbosquid: 3d models for games, architecture, videos. (1397776)