Thingiverse

TNS's E3D V6 Carriage - Adjustable Edition by GrkMangas
by Thingiverse
Last crawled date: 3 years, 1 month ago
Introduction
The purpose of this remix is to increase the smoothness of the X axis movements for TNS's E3D v6 Carriage. The parts where created to allow X axis parts with a variety of X rod distance to be used and still allow smooth movements. This project first started when I noticed that after installation of my new igus bearing holders (the purpose was to eliminate the heavy play caused by putting Igus bearings in the aluminum blocks. They are not a tight fit at all and cause small defects to appear) it required a lot more force to move. Looking into this more I noticed that my X rod distance where measured 45.75mm while the carriage was designed for rod spacings of 45.95mm. This small difference caused a lot of force required to move it.
My aim was to design the carriage in such a way to allow different rod spacing to be used. An example is that Leo_N's X axis parts (https://www.thingiverse.com/thing:1919544) will have issues as the center rod to rod distance is only 45mm instead of 45.95mm. This remix solves that. Let's say that you aren't using an Anet and you are using a Prusa i3 clone. This should work with that as well as long as the center rod to rod distance is between 44mm to 47mm.
These parts where all created ground up in Fusion 360. I don't have OpenScad so I had to use the original stl's for dimensional references.
TNS's original parts can be found here. https://www.thingiverse.com/thing:2099577
Features added
-Allows for center rod to rod spacings of 44-47mm to be used.
-Different version for 4 bearing printers
-Adjustable fan height feature to allow for more fans to be used or to allow user to adjust fan to the perfect height.
-Fixes some of the dimensions on the original model.
-Not printer specific, can be used on other printer models
-Interchangeable with the Caps for TNS's parts.
-Fusion 360 files provided. Go nuts and remix this.
Changes
4/24/2018 - 4 Bearing .STL version taken down for now. I need to design a belt holder for this version. Once I create or find a solution, I will be posting it up. I am leaving the Fusion 360 files up if anyone still wants to play with it.
5/2/18 - Added the 4 Bearing Holder with it's Belt holder bearing block. I integrated both components together in other to solve the issue. I also updated the .stl and removed the old belt holder holes. They are no longer needed for this set up. This update only effects the 4 bearing version.
9/9/2018 - Updated the holder. Decreased the size of the holder so that it sort of clamps onto the E3D. Originally it was designed to specs of the E3D but I noticed that it started to wiggle in the mount. Made it a tad bit smaller so that it just clamps onto it stronger.
9/19/2018 - Updated the fan holder. Creating a new blower has caused me to notice a few issues with the old placement of the holes which creates the fan to be lob sided.
12/20/2018 - Clipped the corners of the 3 bearing holder. This is to make room for the fan.
Special Assembly Instructions
Most of the assembly instructions can be found here. https://www.thingiverse.com/thing:2099577.
One of the special instructions tho is when attaching your bearing blocks to the carriage, you want the screws on the bottom bearings to be loose until you are ready to add the electronics. That means you will tighten the top bearing screws first and then slowly start screwing in the bottom bearing screws. You want to screw each corner of the bottom screws in a bit and then switch to another one and keep doing that until it is all tight. Move the x axis left and right and make sure it doesn't have too much friction when moving. If you are using Igus bearings with bearing holders like mine, you will feel some resistance as there is no play in them at all. If you are using bearing blocks, they will move very smoothly.
Parts I Used
I am currently using this belt holder by Simhopp. It works great if you are using 16T pulleys on your printer. If you want to use this carriage with 20T pulleys, let me know and I can create something for you.https://www.thingiverse.com/thing:1433295
I am using Leo's Mistral Fan Duct. I like it but now that the height is adjustable, I may try out different fan ducts... I say may because this fan duct kicks butt and I may not want to try other ones :Phttps://www.thingiverse.com/thing:2121279
I'm using these bearing holders. They fit perfectly and are easy to install.https://www.thingiverse.com/thing:2892732
Suggestions
Feel free to comment or message me with any questions or suggestions. I am always looking for feedback.
Similar models
thingiverse
free

Bowden carriage 18mm Sensor Holder by rcaridade
...arriage for my anet a8, so i created this one.
it's to be used with this carriage: https://www.thingiverse.com/thing:2099577
thingiverse
free

Spriya for E3D by smallindine
...a for e3d by smallindine
thingiverse
remixed fan duct to fit e3d v6 with this carriage: http://www.thingiverse.com/thing:2099577
thingiverse
free

ANET A8 | Backplate for Customizable E3D v6 Carriage / Bowden Mount by iRazoR
...from him: http://www.thingiverse.com/thing:1404861
i also uploaded the sketchup file so feel free to improve and share my design.
thingiverse
free

igus replacement for Prusa I3 MK2(s) by Knickohr
...s for the mk2, it will work for the mk2s too, but with the old disadvantages.
update :
fixed another belt rubbing at the carriage
thingiverse
free

Adapter carriagre Igus Anet A8 Prusa by Lupo77
...re igus anet a8 prusa by lupo77
thingiverse
per poter adattare il carriage mount e3d v6https://www.thingiverse.com/thing:2099577
thingiverse
free

Linear Bearing Holder Combo by Bellorophon
...with this linear bearing holder. i modified gijs belt tensioner to give it a sharper curve and merged it with this holder combo.
thingiverse
free

Remade X and Y axis by Jureg
...3d printed idlers will spin on, a screw will chew them in no time.
i used this fan duct https://www.thingiverse.com/thing:3160328
grabcad
free

Anet A8 E3Dv6 Clone Part Cooling Fan Duct
...d during print... i'm currently waiting on new bearings because my bearings are sticking and shifted the x axis about 1 cm =(
thingiverse
free

E3D cyclops and chimera dualextruder FLSUN Prusa i3 (2017) by pipa666
...hite pu steel core belt lock: https://www.thingiverse.com/thing:2522231
radial fan fang https://www.thingiverse.com/thing:2209349
thingiverse
free

x carriage for E3D V6 / 50 mm axis distance with Auto Bed Leveling by MacNite
...lace - if you have the adapter from e3d you wont need this.
for assembly you will need some m3 hex nuts and m3 screws (18-30 mm).
Grkmangas
thingiverse
free

Diamond Tealight by GrkMangas
...rong led powered tealight. i suggest using the led powered tealight as i have not tested this out with an actual tealight candle.
thingiverse
free

Cat Magnet by GrkMangas
...ay on your cat cookies!
12mm magnet. if you guys want another version of magnet type, let me know so i can edit the size for you.
thingiverse
free

3D Printing in Progress Sign by GrkMangas
...t had to make this :d
for those who want to change color halfway through the print, the text and picture start at the 2mm mark :p
thingiverse
free

GrkMangas' Lithophane Lamp V4 + power switch
... consumption of this lamp, with six 2835 leds on each column, is about 2w.
a 12v ~500ma psu is more than enough. no need for 1a+.
thingiverse
free

Angry Benchy by GrkMangas
...l you have amassed an armada to take over the world.
and once you do, post them! post the benchys in all of there glorious might!
thingiverse
free

Idler Pulley Arm for Smooth X-Axis by GrkMangas
...ard arms do not fit a 2gt 16t idler pulley. modified arms and increased distance from 8mm to 9mm to allow an idler pulley to fit.
thingiverse
free

Ghost Straw by GrkMangas
...if you do use it... but other then using it as an actual straw, it's a great decoration piece as well as political statement.
thingiverse
free

Christmas Snowflake Magnet by GrkMangas
...ook great.
add some superglue in the hole, add the magnet, wipe off excess superglue, let dry and viola. instant fridge magnet :)
thingiverse
free

Don't F Up My Table Coaster by GrkMangas
...ent straight to the point! perfect for those days when your friends come over and put there drinks straight on your wooden table.
thingiverse
free

Aureole Tealight by GrkMangas
...ing with 3-4 perimeter walls (depending on layer size. the smaller the layer the less perimeters you will need for the overhangs)
Tns
turbosquid
$45

TN-72_a
... available on turbo squid, the world's leading provider of digital 3d models for visualization, films, television, and games.
3d_export
$10

Knife TN push dagger 3D Model
...knife tn push dagger 3d model
3dexport
tactical knife push dagger game dev
knife tn push dagger 3d model dustok 76645 3dexport
3ddd
$1

"ОМ" Тумба Элли TN-2
...остарался оформить максимально аккуратно. автор моделей yn3.
имейте ввиду, конструкция и размеры могут изменятся производителем.
3ddd
$1

"ОМ" Тумба Элли TN-12
...остарался оформить максимально аккуратно. автор моделей yn3.
имейте ввиду, конструкция и размеры могут изменятся производителем.
3ddd
$1

"ОМ" Тумба Элли TN-3
...остарался оформить максимально аккуратно. автор моделей yn3.
имейте ввиду, конструкция и размеры могут изменятся производителем.
3ddd
$1

"ОМ" Тумба Элли TN-16
...остарался оформить максимально аккуратно. автор моделей yn3.
имейте ввиду, конструкция и размеры могут изменятся производителем.
3ddd
$1

"ОМ" Тумба Элли TN-14
...остарался оформить максимально аккуратно. автор моделей yn3.
имейте ввиду, конструкция и размеры могут изменятся производителем.
3ddd
$1

"ОМ" Тумба Элли TN-4
...остарался оформить максимально аккуратно. автор моделей yn3.
имейте ввиду, конструкция и размеры могут изменятся производителем.
3ddd
$1

"ОМ" Тумба Элли TN-5
...остарался оформить максимально аккуратно. автор моделей yn3.
имейте ввиду, конструкция и размеры могут изменятся производителем.
3ddd
$1

"ОМ" Тумба Элли TN-11
...остарался оформить максимально аккуратно. автор моделей yn3.
имейте ввиду, конструкция и размеры могут изменятся производителем.
E3D
turbosquid
$23

E3D - Google Home
... 3d model e3d - google home for download as max, obj, and c4d on turbosquid: 3d models for games, architecture, videos. (1192509)
cg_studio
free

e3d model
...e3d model
cgstudio
- e 3d model, royalty free license available, instant download after purchase.
turbosquid
$2

Syringe C4D (E3D Ready)
...lty free 3d model syringe c4d (e3d ready) for download as c4d on turbosquid: 3d models for games, architecture, videos. (1336720)
turbosquid
$12

Microphone USB E3D and C4D
...ree 3d model microphone usb e3d & c4d for download as c4d on turbosquid: 3d models for games, architecture, videos. (1568216)
turbosquid
$29

E3D - OnePlus 6 Black
...model e3d - oneplus 6 black for download as max, obj, and c4d on turbosquid: 3d models for games, architecture, videos. (1358534)
turbosquid
$29

E3D - Motorola One 2018
...del e3d - motorola one 2018 for download as max, obj, and c4d on turbosquid: 3d models for games, architecture, videos. (1358533)
turbosquid
$29

E3D - Disney MagicBands 2
...l e3d - disney magicbands 2 for download as max, obj, and c4d on turbosquid: 3d models for games, architecture, videos. (1355515)
turbosquid
$29

E3D - Samsung Z4 Smartphone
...e3d - samsung z4 smartphone for download as max, obj, and c4d on turbosquid: 3d models for games, architecture, videos. (1182179)
turbosquid
$23

E3D - Razer Phone model
...del e3d - razer phone model for download as max, obj, and c4d on turbosquid: 3d models for games, architecture, videos. (1231207)
turbosquid
$23

E3D - Alcatel Idol 5
... model e3d - alcatel idol 5 for download as max, obj, and c4d on turbosquid: 3d models for games, architecture, videos. (1212799)
V6
3d_export
$100

v6 engine
...engine
3dexport
complete v6 engine modeled on solidworks 2017 along with .stl, .sldprt and .sldasm of all th parts and assembly.
3d_export
$10

V6 engine
... the first v6 engines were designed and produced independently by marmon motor car company, deutz gasmotoren fabrik and delahaye.
3d_export
$35

v6 engine
...s a complete model of a v6 engine containing over 400 components. you can contact me for a video of all the components assembling
3d_export
$10

v6 engine
...v6 engine
3dexport
turbosquid
$25

Bed1001-v6
... available on turbo squid, the world's leading provider of digital 3d models for visualization, films, television, and games.
turbosquid
$22

Chair2-v6
... available on turbo squid, the world's leading provider of digital 3d models for visualization, films, television, and games.
turbosquid
$20

V6.mb
... available on turbo squid, the world's leading provider of digital 3d models for visualization, films, television, and games.
3d_export
$20

V6 engine
...rovided in this package is all the parts in sldprt format and assembly in sldasm format. i can also convert the format on demand.
3ddd
$1

Стол V6
...6" в стиле дизельпанк изготовлен из блока двигателя, 4х поршней и 4х шатунов.
столешница изготовлена из стекла толщиной 8мм.
cg_studio
$199

V6 VVTi3d model
...v6 vvti3d model
cgstudio
.3ds - v6 vvti 3d model, royalty free license available, instant download after purchase.
Carriage
archibase_planet
free

Carriage
...arriage
archibase planet
perambulator baby carriage pram
carriage n250908 - 3d model (*.gsm+*.3ds) for interior 3d visualization.
3d_export
free

carriage
...carriage
3dexport
old fashion carriage model, more files here:
turbosquid
$140

Carriage
...urbosquid
royalty free 3d model carriage for download as max on turbosquid: 3d models for games, architecture, videos. (1482052)
turbosquid
$25

Carriage
...urbosquid
royalty free 3d model carriage for download as max on turbosquid: 3d models for games, architecture, videos. (1285944)
3d_export
free

carriage
...carriage
3dexport
game cart
3d_ocean
$15

Barrel Carriage
...ieval oak old transport wheels wine wood
this model contains a barrel and a carriage. it is a medieval type of wood oak carriage.
turbosquid
$40

Carriage
...ty free 3d model carriage for download as obj, fbx, and blend on turbosquid: 3d models for games, architecture, videos. (1290094)
turbosquid
free

Carriage
...yalty free 3d model carriage for download as ma, obj, and fbx on turbosquid: 3d models for games, architecture, videos. (1239157)
3d_export
$5

Medieval carriage
...medieval carriage
3dexport
medieval carriage in fairy style
turbosquid
$58

Carriage
...d model carriage with scene for download as max, obj, and fbx on turbosquid: 3d models for games, architecture, videos. (1276262)
Adjustable
3d_ocean
$7
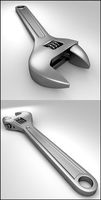
Adjustable Wrench
...adjustable wrench
3docean
adjustable wrench highly detailed wrench
highly detailed adjustable wrench.
3ddd
$1
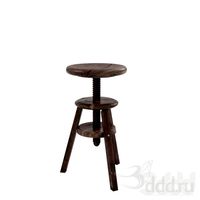
Adjustable Stool
...adjustable stool
3ddd
табурет
wooden adjustable stool.
3d_ocean
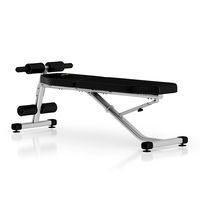
$20

Adjustable Gym Bench
...st adjustable bench black equipement gym gymnastic indoor silver sport workout
3d model of black and silver adjustable gym bench.
3d_ocean
$20
Adjustable Gym Bench
...st adjustable bench black equipement gym gymnastic indoor silver sport workout
3d model of black and silver adjustable gym bench.
3d_ocean
$16

Adjustable Weight Bench
...arbell bench black equipement gym gymnastic indoor sport weight workout
3d model of black adjustable weight bench with a barbell.
turbosquid
$5

Adjustable wrench
...
royalty free 3d model adjustable wrench for download as fbx on turbosquid: 3d models for games, architecture, videos. (1313414)
3d_export
$5

adjustable tension lock
...adjustable tension lock
3dexport
adjustable tension lock
turbosquid
$1

Adjustable Wrench
...free 3d model adjustable wrench for download as obj and blend on turbosquid: 3d models for games, architecture, videos. (1446736)
turbosquid
$1

Adjustable Wrench
...y free 3d model adjustable wrench for download as c4d and fbx on turbosquid: 3d models for games, architecture, videos. (1379022)
3d_export
$5

Adjustable key
...adjustable key
3dexport
Edition
turbosquid
$33
Natuzzi Editions
... available on turbo squid, the world's leading provider of digital 3d models for visualization, films, television, and games.
turbosquid
$29

Guitar_MJ-Edition
... available on turbo squid, the world's leading provider of digital 3d models for visualization, films, television, and games.
turbosquid
$20
Editable Fountain
... available on turbo squid, the world's leading provider of digital 3d models for visualization, films, television, and games.
3ddd
$1

Kueco Edition Palais
...kueco edition palais
3ddd
keuco
зеркальный шкаф kueco edition palais
design_connected
$16

369 Classic Edition
...369 classic edition
designconnected
walter knoll 369 classic edition computer generated 3d model.
3ddd
$1
Martz Edition
...martz edition
3ddd
martzedition
http://www.martzedition.com/a-500-3
3ddd
$1

Martz Edition
...martz edition
3ddd
martzedition
http://www.martzedition.com/b-400-3
design_connected
$25

Chester - Limited Edition
...nnected
established & sons chester - limited edition computer generated 3d model. designed by future systems, amanda levete.
3ddd
$1
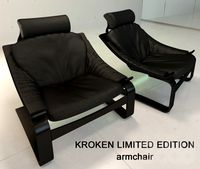
KROKEN LIMITED EDITION
...d
rochebobois
autumn/winter collections 2012 rochebobois paris
kroken limited edition armchairhttp://m.roche-bobois.com
3ddd
$1
stilwerk limited edition
...stilwerk limited edition
3ddd
3000х1200х750