Thingiverse
Tight Tolerance Calibration Clips by JP1
by Thingiverse
Last crawled date: 3 years, 3 months ago
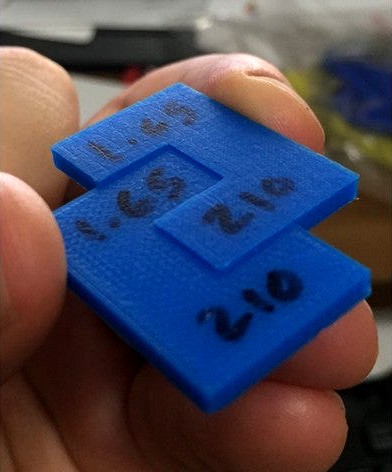
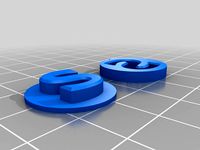
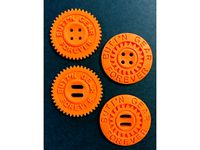
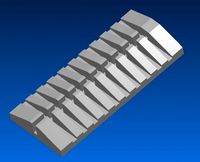
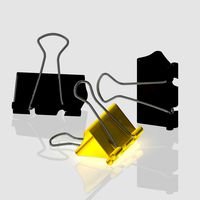
This is not for every printer. This is a tight tolerance calibration clip to thermally calibrate your roll of filament for printing objects with a 0.1mm clearance or within a 0.05mm tolerance. Thermal calibration compensates for the expansion and shrinkage of the filament as it melts and then cools. This result is much different than the physical measured diameter and can change from one roll of filament to the next.
Used in the same way as the clips these are remixed from you print two of them with one rotated 90 degrees from the other. This will give you a test fit with one feature printed in X and the matching feature printed in Y. When fitting them together flip one upside down so that the squish layers (sides touching the bed) are facing out. You do not want to calibrate to the squish layer. The surfaces of the clips will not be flush and the fit should be easy. Not too tight or too loose. Keep reading to see how to adjust the fit.
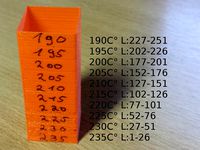
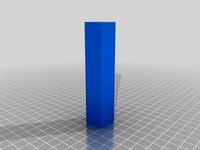
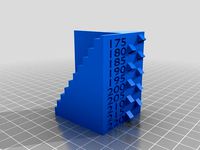
The first step is to determine the optimal temperature for your filament. You can do this without having to print a test object with non-calibrated filament which can give you misleading results. With your print head about 35mm off the bed set a temperature and extrude a continuous strand for about 5 seconds. If your temperature is too cold the filament will glob up under the printer nozzle. Raise the temp 5C and try again. If it is just right it will drop straight down and coil up like a rope. When you stop extruding the vertical stand should remain vertical. If your temp is too hot the vertical stand will tip over to one side. Drop you temp by 5C and try again.
Once you have the proper melt point for your filament (+/- 5C) print a set of clips using this temperature. Print them with at least two shell perimeters. This will be used to give you an indication of if you need to further refine the print temperature. To start with use the nominal measured diameter of the filament. Print using the layer resolution you plan on using for your prints. I prefer to use 0.1 layers and find that the calibration at this height will work for 0.05 layers as well.
If your clips do not fit together they are over-extruded. Increase the nominal diameter of the filament by 0.02-0.03mm and print again until the clips fit together easily and hold their position.
If your clips fit but are loose and fall apart you are under-extruding. Decrease the nominal diameter of the filament by 0.02-0.03mm and print again until the clips fit together easily and hold their position.
When the clips fit easily you will be with in a 0.05mm tolerance and neither over-extruded or under-extruded. If there are gaps between the inner and outer shell perimeters but the clips fit together nicely then raise the temperature between 3-5C and the gaps will disappear.
I write the final results of the thermal calibration on the roll of filament and then use those parameters in my slicer when selecting that roll to print from.
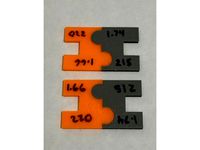
Designs with 0.1mm of clearance between flat assembly features can now be designed for and printed on your printer. The mixing of different rolls of thermally calibrated filament with different values can be used for assemblies with guaranteed interchangeability.
If for some reason your printer is not capable of calibrating to this tight of tolerance you can always revert back to the the clips these were remixed from. In that case designs with 0.2mm clearances between flat assembly surfaces can be used with similar results to what these clips will give you. You just have to design for what your printer is capable of being calibrate to.
Used in the same way as the clips these are remixed from you print two of them with one rotated 90 degrees from the other. This will give you a test fit with one feature printed in X and the matching feature printed in Y. When fitting them together flip one upside down so that the squish layers (sides touching the bed) are facing out. You do not want to calibrate to the squish layer. The surfaces of the clips will not be flush and the fit should be easy. Not too tight or too loose. Keep reading to see how to adjust the fit.
The first step is to determine the optimal temperature for your filament. You can do this without having to print a test object with non-calibrated filament which can give you misleading results. With your print head about 35mm off the bed set a temperature and extrude a continuous strand for about 5 seconds. If your temperature is too cold the filament will glob up under the printer nozzle. Raise the temp 5C and try again. If it is just right it will drop straight down and coil up like a rope. When you stop extruding the vertical stand should remain vertical. If your temp is too hot the vertical stand will tip over to one side. Drop you temp by 5C and try again.
Once you have the proper melt point for your filament (+/- 5C) print a set of clips using this temperature. Print them with at least two shell perimeters. This will be used to give you an indication of if you need to further refine the print temperature. To start with use the nominal measured diameter of the filament. Print using the layer resolution you plan on using for your prints. I prefer to use 0.1 layers and find that the calibration at this height will work for 0.05 layers as well.
If your clips do not fit together they are over-extruded. Increase the nominal diameter of the filament by 0.02-0.03mm and print again until the clips fit together easily and hold their position.
If your clips fit but are loose and fall apart you are under-extruding. Decrease the nominal diameter of the filament by 0.02-0.03mm and print again until the clips fit together easily and hold their position.
When the clips fit easily you will be with in a 0.05mm tolerance and neither over-extruded or under-extruded. If there are gaps between the inner and outer shell perimeters but the clips fit together nicely then raise the temperature between 3-5C and the gaps will disappear.
I write the final results of the thermal calibration on the roll of filament and then use those parameters in my slicer when selecting that roll to print from.
Designs with 0.1mm of clearance between flat assembly features can now be designed for and printed on your printer. The mixing of different rolls of thermally calibrated filament with different values can be used for assemblies with guaranteed interchangeability.
If for some reason your printer is not capable of calibrating to this tight of tolerance you can always revert back to the the clips these were remixed from. In that case designs with 0.2mm clearances between flat assembly surfaces can be used with similar results to what these clips will give you. You just have to design for what your printer is capable of being calibrate to.
Similar models
thingiverse
free
3D Printer Calibration Piece by JP1
...com/thing:4579156
the tighter tolerance clips will allow you to use designs with 0.1mm clearances between flat assembly surfaces.
thingiverse
free
Interlocking calibration clips - Curves and straights by JP1
...lt temperature you have a +/- 5c range for adjustments to counter oozing (lower the temp) and perimeter gaps (increase the temp).
thingiverse
free
Heattower for Extruder Heat Calibration by zumili
...esults! so if you print your outer perimeters with let say an averange speed of 35mm/s then also print the heattower with 35mm/s.
thingiverse
free
Extruder Calibration (Part Fitting) Test by jonnieZG
...ound em value to 3 decimals.
update 2017-09-06
added a groove on the top of both parts, in order to identify correct orientation.
thingiverse
free
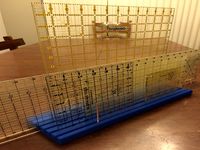
Quilting Ruler Holder
...ght to scrape the markings on them and damage them.
i used these clips for calibration: https://www.thingiverse.com/thing:2502677
thingiverse
free
Calibration Pyramid by i23D
... temperature, air humidity, bed temperature, extruder temperature, same filament, filament storage humidity and temperature ect.
thingiverse
free
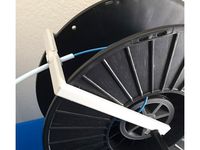
Filament Anti-De-Spooler Arm by JP1
...ed that you use thermally calibrated filament using these calibration clips found here: https://www.thingiverse.com/thing:1037301
thingiverse
free
Temperature Test Cube-20x20x100 by bill102473
...rnail to test the layer will collapse or not
or see the texture to found the best temperature for your new filament in 3d printer
thingiverse
free
Temperature Calibrations by inventimark
...cause it to burn.
included is a video on how it works and how to edit the gcode manually to make your own temperature calculator.
thingiverse
free

Temperature Test Cube-20x20x20 by bill102473
...rnail to test the layer will collapse or not
or see the texture to found the best temperature for your new filament in 3d printer
Jp1
turbosquid
$18
jp1
... available on turbo squid, the world's leading provider of digital 3d models for visualization, films, television, and games.
thingiverse
free

Mod of JP1's Death Star Turret for Lego by ICanMakingThings
...nclude a destroyed turret conversion. it opens up all sorts of options. find it here... http://www.thingiverse.com/make:178576
thingiverse
free
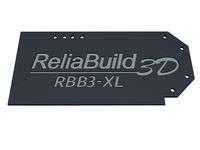
RBB3-XL Name Plate by JP1
...our own front plates this name plate replaces the reliabuild 3d name plate found here: https://www.thingiverse.com/thing:2096308
thingiverse
free
BUTToN GEAR FOREVER by JP1
...
https://www.thingiverse.com/thing:1037301https://www.thingiverse.com/thing:2502677
a good part cooling fan helps as well.
enjoy!
thingiverse
free
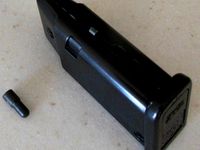
Ammo clip loader Pin by JP1
....
the stl file is cura scaled and oriented for printing. note the printing instructions to get a strong accurately printed part.
thingiverse
free

BUTToN GEAR by JP1
...and a button installed on a boot.
for further details see the original style post here: http://www.thingiverse.com/thing:1117591
thingiverse
free
Spool Hub - 56mm to 8mm by JP1
...include the source file with object units in mm and scene units in inches. the cs file is cura scaled and oriented for printing.
thingiverse
free

ID Badge Holder by JP1
... is extra security to keep the two parts together when strapped to your arm.
the parts are cura scaled and oriented for printing.
thingiverse
free

Can Handle - High Resolution by JP1
...ted in pla but i would not leave it in a hot car when using that material.
the stl file is cura scaled and oriented for printing.
thingiverse
free
Spool Hub 54mm x 8mm with tapered shims by JP1
...ated filament for best results using the clip system found here:http://www.thingiverse.com/thing:1037301
print two of these hubs.
Calibration
turbosquid
$15

DEFIBRILLATOR CALIBRATORS
... available on turbo squid, the world's leading provider of digital 3d models for visualization, films, television, and games.
turbosquid
$3
Calibration Test Benches
...libration test benches for download as 3ds, obj, c4d, and fbx on turbosquid: 3d models for games, architecture, videos. (1355804)
turbosquid
$79
Tag Heuer Monaco Calibre 11
...free 3d model tag heuer monaco calibre 11 for download as max on turbosquid: 3d models for games, architecture, videos. (1634427)
turbosquid
$50

Smith & Wesson 50 Calibre Magnum
... available on turbo squid, the world's leading provider of digital 3d models for visualization, films, television, and games.
3d_export
$10
Laboratory Calibration Weight Set 1 3D Model
... 3d model
3dexport
laboratory lab science equipment weight set
laboratory calibration weight set 1 3d model bessoo 88084 3dexport
3d_export
$15
Laboratory Scale and Calibration Weight Set 3D Model
...port
laboratory lab science equipment weight set scale
laboratory scale and calibration weight set 3d model bessoo 88203 3dexport
3d_export
$5
3D printer filament calibration tool 3D Model
...ernier
3d printer filament calibration tool 3d model download .c4d .max .obj .fbx .ma .lwo .3ds .3dm .stl locoman 107942 3dexport
3d_export
$59
tag heuer link calibre 16 watch
...built to real-world scale. units used: centimeters. model is 18 centimeters tall.<br>scene objects are organized by groups.
3d_export
free
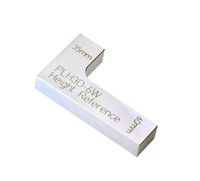
laser height reference calibration tool opt lasers
...ind out more about the engraving and cutting laser heads, this item was designed to work with, take a look at the following page:
3d_export
$99
Patek Philippe White Gold Calibre 89
...br>please note: this 3d model like all my other models cannot be used as nft, as is or modified<br>thank you for reading
Tolerance
turbosquid
$3
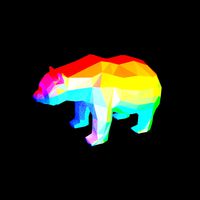
Low polygonal tolerant bear
... polygonal bear for download as 3ds, obj, fbx, blend, and stl on turbosquid: 3d models for games, architecture, videos. (1392956)
3d_export
$50

Micrometer 3D Model
...dial vernier metrological tool industrial measure measurement precision accuracy tolerance dimension mike metric micrometer 3d model plutonius 33278...
3d_export
$12
clutch assembly line
...clutch assembly line 3dexport according to the principle of tolerance fit from left to right in the general assembly...
3d_export
$5
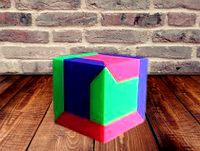
puzzle cube
...functions of your printer. i have left some extra tolerance at the bridge location to account for some sagging....
3d_export
$9

beskar mandalorian steel
...alloy used in mandalorian armor, notable for its high tolerance to extreme forms of damage. the metal was durable...
3d_export
$5

4 spring Azalea Flower Bush
...50cm bush 2 : 160cm bush 3 : 170cm bush 4 : 180cm formats 3ds max - vray / corona cinema 4d - vray / standard blender obj fbx stl
3d_export
$10
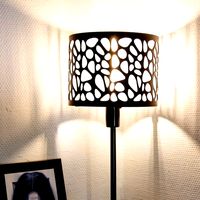
varonoi lamp
...cm. al of the components are designed with small tolerance which can make it hard to scale down, but...
3d_export
$20
9KH30 Ring die pellet machine
...be smoothly made for sale according to the dimensions, tolerance and technical requirements. the characteristics of the pellet machine...
3d_export
$5
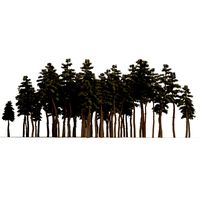
Douglas Fir Forest trees
...ats<br>3ds max - vray / corona<br>cinema 4d - vray / standard<br>blender<br>obj<br>fbx<br>stl
3d_export
$20
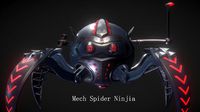
mech-spider-ninjia
...22815 verts:23663<br>animation clips: idle walk jump attack<br>textures format: jpg.<br>texture size: 4096*4096
Tight
design_connected
$16
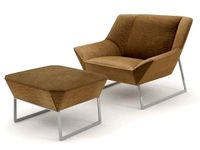
Tight
...tight
designconnected
molteni & c tight computer generated 3d model. designed by laviani, ferruccio.
turbosquid
$10
Y178 Tights
...urbosquid
royalty free 3d model y178 tights for download as on turbosquid: 3d models for games, architecture, videos. (1612407)
turbosquid
$30
woman shirt tight
...y free 3d model woman shirt tight for download as max and pac on turbosquid: 3d models for games, architecture, videos. (1452687)
turbosquid
$30
Female tight polo
... available on turbo squid, the world's leading provider of digital 3d models for visualization, films, television, and games.
turbosquid
$8

Tight Sexy Dress
... available on turbo squid, the world's leading provider of digital 3d models for visualization, films, television, and games.
3ddd
$1
Кресло Molteni&C Tight
...t
3ddd
molteni&c , tight
кресло molteni&c; tight, по размерам, с текстурами.
turbosquid
$40
Woman Sexy Skin Tight
...ee 3d model woman sexy skin tight for download as max and pac on turbosquid: 3d models for games, architecture, videos. (1456048)
turbosquid
$30
Lady in Tight Pants and Boot
... available on turbo squid, the world's leading provider of digital 3d models for visualization, films, television, and games.
turbosquid
$6
Pants Skin Tight Leggings
...ght leggings for download as max, max, 3ds, fbx, pac, and obj on turbosquid: 3d models for games, architecture, videos. (1617184)
turbosquid
$7
Fendi Casa Belt Tight Sofa
... fendi casa belt tight sofa for download as max, obj, and fbx on turbosquid: 3d models for games, architecture, videos. (1597436)
Clips
archibase_planet
free
Clip
...clip
archibase planet
paper-clip clip office equipment
clip band - 3d model for interior 3d visualization.
3d_export
$5
screw clip
...screw clip
3dexport
screw clip
3d_ocean
$4
Butterfly clip
... a butterfly clip, it comes with a ready to render set for out of the box rendering. obj version and max alones version included.
turbosquid
$2
clip
...
royalty free 3d model clip for download as ma, obj, and fbx on turbosquid: 3d models for games, architecture, videos. (1358622)
turbosquid
$5

Clip
...lty free 3d model clip for download as c4d, 3ds, fbx, and obj on turbosquid: 3d models for games, architecture, videos. (1521355)
turbosquid
$19
Clip
... available on turbo squid, the world's leading provider of digital 3d models for visualization, films, television, and games.
turbosquid
$4
Clips
... available on turbo squid, the world's leading provider of digital 3d models for visualization, films, television, and games.
turbosquid
$3
clip
... available on turbo squid, the world's leading provider of digital 3d models for visualization, films, television, and games.
turbosquid
$2

clips
... available on turbo squid, the world's leading provider of digital 3d models for visualization, films, television, and games.
turbosquid
free
clip
... available on turbo squid, the world's leading provider of digital 3d models for visualization, films, television, and games.