GrabCAD

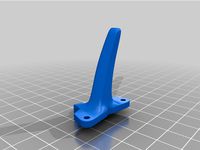
Thing ico Resin vapor aspirator for Anycubic Photon
by GrabCAD
Last crawled date: 1 year, 12 months ago
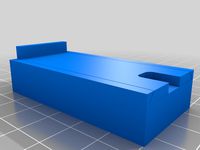
This accessory, to be installed in place of the upper glass of the Anycubic photon printer, will suck in part of the odor emitted by the resin during printing and, if properly connected with a rubber tube, will discharge it to the outside, for example by letting the tube come out through a window opening (I made the 15mm tube of external section pass through the shutter box so I can send it outside even with the window closed).
All the elements to have the complete accessory can be found on:
https://www.redpah.com/profile/16098/sergio-lanna
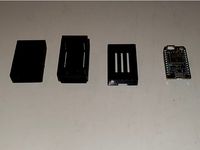
In addition to the two printed pieces, you need a fan (recovered from an old PC, choose a fairly powerful and non-noisy one), 4 M4 35 mm bolts, 4 washers and 4 M4 nuts
INSTRUCTIONS
Insert the fan into the molded base by passing the power cable through the hole provided
Apply the upper printed piece and fix it with bolts
Remove the top cover of the anycubic photon by removing the 6 screws
Insert the aspirator in place of the cover of the Anycubic Photon, fix it with the 6 original screws previously removed (if necessary use washers)
Close the lid and insert a 15 mm tube of external section (sold in a common hardware store) inside the hole at the apex of the aspirator
Now put the other end of the tube on the outside. You can pass it through a window or else, with a little more work, you can do as I did, by passing the tube along the edge of the window to the shutter box and from there outside, so I guaranteed the connection to the outside as well with the window closed
To complete the work, the fan must be powered. To do this there are two possibilities: 1) get an adequate external power supply (normally the fan is 12 Vdc) 2) use the same power supply as the Anycubic Photon In the second case you will have to make a branch so that you can connect both the printer and the fan to the power supply
And that's it! If you want you can add a wire switch to turn the fan on and off independently and without having to disconnect the plug every time
ITALIANO
Questo accessorio, da installare al posto del vetro superiore della stampante Anycubic photon, aspirerà parte dell'odore emanato dalla resina in fase di stampa e, se opportunamente collegato con un tubo di gomma, lo scaricherà all'esterno, ad esempio facendo uscire il tubo da uno spiraglio della finestra (io ho fatto passare il tubo, da 15mm di sezione esterna, attraverso il cassonetto della serranda così posso mandarlo all'esterno anche con la finestra chiusa).
Tutti gli elementi per avere l'accessorio completo li trovate su:
https://www.redpah.com/profile/16098/sergio-lanna
Oltre ai due pezzi stampati, occorre una ventola (recuperata da un vecchio PC, sceglietene una abbastanza potente e non rumorosa), 4 bulloni M4 da 35 mm, 4 rondelle e 4 dadi M4
ISTRUZIONI
Inserite la ventola nella base stampata facendo passare il cavo di alimentazione attraverso l'apposito foro
Applicare il pezzo stampato superiore e fissarlo con i bulloni
Smontare il coperchio superiore della anycubic photon togliendo le 6 viti
Inserire l'aspiratore al posto del coperchio della Anycubic Photon, fissarlo con le 6 viti originali precedentemente tolte (se necessario utilizzare delle rondelle)
Chiudere il coperchio e inserite un tubo da 15 mm di sezione esterna (acquistabile in una comune ferramenta) all'interno del foro all'apice dell'aspiratore
A questo punto mettete l'altra estremità del tubo all'esterno. Potete farlo passare da uno spiraglio di una finestra oppure, con un pochino più di lavoro, potete fare come ho fatto io, facendo passare il tubo lungo il bordo della finestra fino al cassonetto della serranda e da li all'esterno, così ho garantito il collegamento all'esterno pure con la finestra chiusa
Per completare l'opera bisogna alimentare la ventola. Per fare questo ci sono due possibilità: 1) vi procurate un alimentatore esterno adeguato (normalmente la ventola è da 12 Vcc) 2) utilizzate lo stesso alimentatore della Anycubic Photon Nel secondo caso dovrete realizzare una derivazione in modo da poter collegare sia la stampante che la ventola all'alimentatore
Ed ecco fatto! Se volete potete aggiungere un interruttore a filo per accendere e spegnere la ventola in modo indipendente e senza dover disinserire lo spinotto ogni volta
All the elements to have the complete accessory can be found on:
https://www.redpah.com/profile/16098/sergio-lanna
In addition to the two printed pieces, you need a fan (recovered from an old PC, choose a fairly powerful and non-noisy one), 4 M4 35 mm bolts, 4 washers and 4 M4 nuts
INSTRUCTIONS
Insert the fan into the molded base by passing the power cable through the hole provided
Apply the upper printed piece and fix it with bolts
Remove the top cover of the anycubic photon by removing the 6 screws
Insert the aspirator in place of the cover of the Anycubic Photon, fix it with the 6 original screws previously removed (if necessary use washers)
Close the lid and insert a 15 mm tube of external section (sold in a common hardware store) inside the hole at the apex of the aspirator
Now put the other end of the tube on the outside. You can pass it through a window or else, with a little more work, you can do as I did, by passing the tube along the edge of the window to the shutter box and from there outside, so I guaranteed the connection to the outside as well with the window closed
To complete the work, the fan must be powered. To do this there are two possibilities: 1) get an adequate external power supply (normally the fan is 12 Vdc) 2) use the same power supply as the Anycubic Photon In the second case you will have to make a branch so that you can connect both the printer and the fan to the power supply
And that's it! If you want you can add a wire switch to turn the fan on and off independently and without having to disconnect the plug every time
ITALIANO
Questo accessorio, da installare al posto del vetro superiore della stampante Anycubic photon, aspirerà parte dell'odore emanato dalla resina in fase di stampa e, se opportunamente collegato con un tubo di gomma, lo scaricherà all'esterno, ad esempio facendo uscire il tubo da uno spiraglio della finestra (io ho fatto passare il tubo, da 15mm di sezione esterna, attraverso il cassonetto della serranda così posso mandarlo all'esterno anche con la finestra chiusa).
Tutti gli elementi per avere l'accessorio completo li trovate su:
https://www.redpah.com/profile/16098/sergio-lanna
Oltre ai due pezzi stampati, occorre una ventola (recuperata da un vecchio PC, sceglietene una abbastanza potente e non rumorosa), 4 bulloni M4 da 35 mm, 4 rondelle e 4 dadi M4
ISTRUZIONI
Inserite la ventola nella base stampata facendo passare il cavo di alimentazione attraverso l'apposito foro
Applicare il pezzo stampato superiore e fissarlo con i bulloni
Smontare il coperchio superiore della anycubic photon togliendo le 6 viti
Inserire l'aspiratore al posto del coperchio della Anycubic Photon, fissarlo con le 6 viti originali precedentemente tolte (se necessario utilizzare delle rondelle)
Chiudere il coperchio e inserite un tubo da 15 mm di sezione esterna (acquistabile in una comune ferramenta) all'interno del foro all'apice dell'aspiratore
A questo punto mettete l'altra estremità del tubo all'esterno. Potete farlo passare da uno spiraglio di una finestra oppure, con un pochino più di lavoro, potete fare come ho fatto io, facendo passare il tubo lungo il bordo della finestra fino al cassonetto della serranda e da li all'esterno, così ho garantito il collegamento all'esterno pure con la finestra chiusa
Per completare l'opera bisogna alimentare la ventola. Per fare questo ci sono due possibilità: 1) vi procurate un alimentatore esterno adeguato (normalmente la ventola è da 12 Vcc) 2) utilizzate lo stesso alimentatore della Anycubic Photon Nel secondo caso dovrete realizzare una derivazione in modo da poter collegare sia la stampante che la ventola all'alimentatore
Ed ecco fatto! Se volete potete aggiungere un interruttore a filo per accendere e spegnere la ventola in modo indipendente e senza dover disinserire lo spinotto ogni volta
Similar models
thingiverse
free

Anycubic I3 Mega - Coperchio alimentatore by scigola
...
modifica del coperchio alimentatore della anycubic i3 mega
per installare una ventola da 80mm e abbassare la rumorosità generale
thingiverse
free

Anycubic I3 Mega S - DCDC relays DS18B20 by spugna85
...fianco all'alimentatore e portati all'esterno tramite il foro usato per la selezione del voltaggio dell'alimentatore.
thingiverse
free

Coperchio alimentatore by Enugenio
...
coperchio per alimentatore 24v stampante hictop 3dp12
ho recuperato la presa e l'interruttore da un vecchio
alimentatore pc
thingiverse
free

Supporto ventola da 70 mm per Samsung Gear VR by DarkZone1985
...ntazione ho provveduto alla modifica di un cavetto usb che va ad alimentare sia la ventola sia il telefono tramite un power bank.
thingiverse
free

PSU_ThinkerSE_Fan_silencer_Eryone by Ulisse_Bds_78
...sempre trattenuta da almeno una vite; in questo modo la ventola non cadrà all' interno dell'alimentatore.
==============
thingiverse
free

PC power supply cover for Commodore Amiga by sonicboom79
...all'alimentatore dei pc,per lo schema di collegamento all'amiga 500 / 600 / 1200 lo potete trovare facilmente in rete....
thingiverse
free

Oldsmobile 1903 by markfan
...to il sedile dovrebbe esserci un coperchio ma non l'ho fatto.
manca il carburatore , lo spinterogeno e il sistema del cambio.
thingiverse
free

PSU holder for Betafpv 1S liHV Charger Board BT2.0 by pulcepulce
...8x60mm
the lid and the box have been molded in abs v0 while the base in tpu.
everything is printable without the use of supports.
thingiverse
free

Zucca by 3DStefano
...circa e attaccarlo sotto il coperchio (file top) della zucca.
scegliere come tipo di piattaforma di adesione brim con linea di 5.
thingiverse
free

Anycubic I3 Mega S - Pi support and cable management by spugna85
...i:
supporto pi camera: https://www.thingiverse.com/thing:3475279
supporto striscia led: https://www.thingiverse.com/thing:2797456
Ico
3ddd
$1

Elica Ico
...co
3ddd
вытяжка , elica , ico
вытяжка elica ico
3ddd
$1

ICO Parisi Dining Chair
...ng chair , ico , parisi
ico parisi dining chair
turbosquid
$16

Dice Box ICO
...squid
royalty free 3d model ico dice box for download as stl on turbosquid: 3d models for games, architecture, videos. (1643324)
turbosquid
$15

Sofa by Ico Parisi
...3d model sofa by ico parisi for download as max, obj, and fbx on turbosquid: 3d models for games, architecture, videos. (1491740)
3d_export
$5

ico staff
...design visualization, etc.<br>texture size: 2048x2048 (color, emit, roughness, metal)<br>polygons: 1342 vertices: 972
3ddd
$1

Раковина OXO ICO BA 2020
...раковина oxo ico ba 2020
3ddd
oxo
материал: санфаянс
производитель: oxo
серия: ico
3ddd
$1

GALIMBERTI NINO ICO
...o модель ico. размеры: длина-76, глубина-50, высота-80. стек свернут. еденицы. изм. сцены - мм, масштаб - 1:1, текстуры в архиве.
turbosquid
$10

Ico Parisi Dining Table
...del ico parisi dining table for download as max, obj, and fbx on turbosquid: 3d models for games, architecture, videos. (1499582)
3d_export
$15

sofa by ico parisi
...el , please contact me. before buying a model, you can try to download one of my free models and testing. thank you for watching.
turbosquid
$79

Ico Sphere Smart Bed set
... available on turbo squid, the world's leading provider of digital 3d models for visualization, films, television, and games.
Photon
3d_export
$7

swimming pool waterfall
...caustics<br>-disable the vraymtl's affect shadows parameter when using caustics.<br>-set photon emit radius (v-ray sun)<br>-increase caustics subvids (vray properties >...
3d_sky
$8

PHOTON
...photon
3dsky
wall lamp table lamp floor lamp
photon
3d_sky
free

PHOTON
...photon
3dsky
wall lamp table lamp floor lamp
photon factory
thingiverse
free
Photons
...photons
thingiverse
my last test before i print real things.
files come with the anycubic photon s
thingiverse
free
knocker for photon by Mckymn2000
...hoton by mckymn2000
thingiverse
was redon for photon you wont the 4kcnoker for photon
https://www.thingiverse.com/thing:1458545
thingiverse
free
Antimatter Photon Fin
...antimatter photon fin
thingiverse
antimatter photon fin, dieborr fpv style.
3d_sky
free
PHOTON
...photon
3dsky
chandelier lamp light floor lamp
chandelier table lamp and floor lamp from the factory "foton"
thingiverse
free

Photon Torpedoes by Mike1701
...photon torpedoes by mike1701
thingiverse
star trek's primary means of blowing the crap out of something, the photon torpedo.
thingiverse
free
Anycubic Photon Door Holder
...anycubic photon door holder
thingiverse
anycubic photon door holder
thingiverse
free
Particle Photon Case by mpleander
...particle photon case by mpleander
thingiverse
case for particle photon iot device.
Vapor
3ddd
$1

VAPOR
...vapor
3ddd
karim rashid
современный торшер из коллекции
vapor
design karim rashid
turbosquid
$15
Vaporizer
... available on turbo squid, the world's leading provider of digital 3d models for visualization, films, television, and games.
3d_export
$20
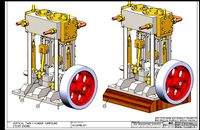
MAQUINA DE VAPOR
...maquina de vapor
3dexport
vertical twin cylinder compound<br>steam engine, project modeled in solidworks
3ddd
$1

Сноуборд Burton Vapor
... сноуборд
модель не сверх точная, но для средних планов вполне сгодится.
в комплекте текстура, сделанно в 2009 максе, vray маты.
3d_export
$25

Chrysler 300 SRT8 Satin Vapor rim 3D Model
... part of avto car chrysler 300 srt8 satin vapor rim
chrysler 300 srt8 satin vapor rim 3d model creativeideastudio 97157 3dexport
turbosquid
$39

Chrysler 300 SRT8 Satin Vapor wheel
... available on turbo squid, the world's leading provider of digital 3d models for visualization, films, television, and games.
turbosquid
$29

Chrysler 300 SRT8 Satin Vapor rim
... available on turbo squid, the world's leading provider of digital 3d models for visualization, films, television, and games.
3d_ocean
$20

Chrysler 300 SRT8 Satin Vapor wheel
.... model with physically accurate materials. model is separated on parts and correctly named. so it is easy to use and modified...
3d_ocean
$18

Chrysler 300 SRT8 Satin Vapor rim
...model has got physically accurate materials. it is separated on parts and they are correctly named. so it is easy to use and m...
3d_export
$5

Cloud X-1 Vaporizer concept 3D Model
...smokeless vape
cloud x-1 vaporizer concept 3d model download .c4d .max .obj .fbx .ma .lwo .3ds .3dm .stl colten3d 104598 3dexport
Aspirator
3d_export
$5

Aspirator bundle
...aspirator bundle
3dexport
aspirator bundle 3d model
turbosquid
$17

Aspire Chair
...squid
royalty free 3d model aspire chair for download as max on turbosquid: 3d models for games, architecture, videos. (1597494)
turbosquid
$15

Aspire Settee
...quid
royalty free 3d model aspire settee for download as max on turbosquid: 3d models for games, architecture, videos. (1597810)
3d_export
free

nose aspirator
...nose aspirator
3dexport
more info and files here:
3d_export
$99

aspire masjid in doha qatar
...aspire masjid in doha qatar
3dexport
aspire masjid in doha qatar
3d_export
$99

aspire tower in doha qatar
...aspire tower in doha qatar
3dexport
aspire tower in doha qatar
turbosquid
$10

Aspirator APRO-110
...3d model aspirator apro-110 for download as max, fbx, and obj on turbosquid: 3d models for games, architecture, videos. (1633733)
turbosquid
$3

VECTRIC ASPIRE MODEL1
... available on turbo squid, the world's leading provider of digital 3d models for visualization, films, television, and games.
turbosquid
$199

Aspire Mosque, Doha, Qatar
...l aspire mosque, doha, qatar for download as ma, obj, and fbx on turbosquid: 3d models for games, architecture, videos. (1419177)
3d_export
$5

Acer Aspire 5050 3D Model
...acer aspire 5050 3d model
3dexport
bun makara computer latop acer
acer aspire 5050 3d model bunjan 10998 3dexport
Anycubic
thingiverse
free

anycubic filament holder
...anycubic filament holder
thingiverse
anycubic filament holder
thingiverse
free

Cableholder Anycubic Mega
...cableholder anycubic mega
thingiverse
cableholder anycubic mega
thingiverse
free

AnyCubic Toolholder by WildManPrinting
...anycubic toolholder by wildmanprinting
thingiverse
anycubic i3 mega toolholder that clips on the side of the spool a-frame.
thingiverse
free

AnyCubic Funnel by phana007
...anycubic funnel by phana007
thingiverse
funnel for anycubic resin and also a reducer for a normal soda bottle.
thingiverse
free

Anycubic Kossel PID calibration
...ir mount:
kossel raspberry camera ir mount
extruder pid calibration.
simple extruder temperature calibration of your 3d printer.
thingiverse
free

anycubic mega i3
...anycubic mega i3
thingiverse
anycubic i3 mega/mega s led 30mm 10-14v 6500k
thingiverse
free

Handle for anycubic by cruiser7
...handle for anycubic by cruiser7
thingiverse
its easier to handle the cover of the anycubic mono x and wash&care
thingiverse
free

anycubic predator Printbed by Lihyon
...anycubic predator printbed by lihyon
thingiverse
anycubic predator printbed
thingiverse
free

Anycubic Predator Triggers by marcelcountry
...anycubic predator triggers by marcelcountry
thingiverse
anycubic predator triggers
thingiverse
free

support anycubic cable by sarpdental
...support anycubic cable by sarpdental
thingiverse
support anycubic cable
Resin
turbosquid
$5

Resin table
...royalty free 3d model resin table for download as max and fbx on turbosquid: 3d models for games, architecture, videos. (1433351)
turbosquid
free
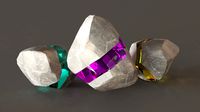
Resin Stone Free
...urbosquid
free 3d model resin stone free for download as max on turbosquid: 3d models for games, architecture, videos. (1521898)
turbosquid
$6

Epoxy Resin Table
...
royalty free 3d model epoxy resin table for download as max on turbosquid: 3d models for games, architecture, videos. (1425329)
turbosquid
$9

RESIN CHATEAU CHAIR
...sin chateau chair for download as max, max, 3ds, fbx, and obj on turbosquid: 3d models for games, architecture, videos. (1640415)
3d_export
$39

waraji resin statue sculpture
... sculpture
3dexport
waraji resin statue sculpture file 3dsmax 2014 max - fbx - stl - obj - 3ds polys : 163098 vertices : 85396
turbosquid
$10

Decorative Resin Decorative Box
...ree 3d model decorative resin decorative box for download as on turbosquid: 3d models for games, architecture, videos. (1341022)
turbosquid
$2

Resin Table LOW POLY
...oyalty free 3d model resin table-low poly for download as fbx on turbosquid: 3d models for games, architecture, videos. (1568798)
turbosquid
$1

Doll eye resin and molding
...ree 3d model doll eye (resin and molding) for download as stl on turbosquid: 3d models for games, architecture, videos. (1461887)
turbosquid
$1

Resin Ring - Epoxy Accessory
...odel resin ring - epoxy accessory for download as max and fbx on turbosquid: 3d models for games, architecture, videos. (1422041)
turbosquid
$7

Resin Wicker Dining Set
... available on turbo squid, the world's leading provider of digital 3d models for visualization, films, television, and games.
Thing
turbosquid
free

spinny thing
...ng
turbosquid
free 3d model spinny thing for download as max on turbosquid: 3d models for games, architecture, videos. (1414103)
turbosquid
$9

The decorated Thing
...royalty free 3d model the decorated thing for download as obj on turbosquid: 3d models for games, architecture, videos. (1634636)
turbosquid
$2

HORROR THINGS
...quid
royalty free 3d model horror things for download as fbx on turbosquid: 3d models for games, architecture, videos. (1316296)
turbosquid
$1
Stone things
...osquid
royalty free 3d model stone things for download as ma on turbosquid: 3d models for games, architecture, videos. (1252237)
turbosquid
$90

the thing - Vyzandan
... available on turbo squid, the world's leading provider of digital 3d models for visualization, films, television, and games.
turbosquid
free

Yellow Thing
... available on turbo squid, the world's leading provider of digital 3d models for visualization, films, television, and games.
turbosquid
free

Ball Thing
... available on turbo squid, the world's leading provider of digital 3d models for visualization, films, television, and games.
3d_export
$20
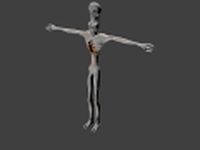
The Thing 3D Model
...the thing 3d model
3dexport
slender alien horror monster enemy scary
the thing 3d model ileon18 99013 3dexport
3d_ocean
$5

Marvel Comics Thing
... poly count (triangles): 4056. files : .obj (multi format), .3ds (multi format), .fbx (multi format), .max (2011-2012-2013-2014).
3d_export
$5

the thing
...d and animated with meta-rig<br>particle system hair for fur<br>blend,fbx,obj,colada and abc files<br>unwrapped