Thingiverse
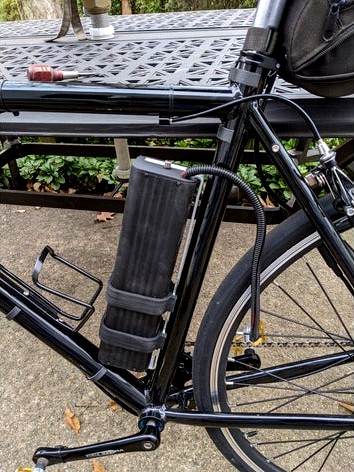
The Downspout E-bike Battery Case by bugeye59
by Thingiverse
Last crawled date: 3 years, 3 months ago
Building up a battery case for a DIY e-bike is a challenge.
It must be lightweight but rugged and must be easily detachable.
Achieving this on a budget is even more difficult.
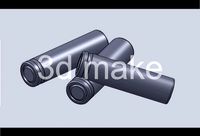
The following case is made up of 3d printed ABS components included here
and some 3"x2" PVC downspout available from your local home center for about $3
(it is sold in a 15" length called a downspout extension")
The 1" x 1/8" aluminum bracket is also procured from the hardware isle of
the home center for about $8. You should have enough to make two brackets.
This formed bracket will bolt to the water bottle mount on the bike. The 3d printed mounts on the battery dovetail into the bracket and the battery drops down into place, the top portion of the bracket then snaps over the top of the battery to lock it securely into place.
While at the home center also pick up a small can of ABS-PVC transition adhesive
and some flat head screws (countersunk taper) that will fit in your bike bottle mount holes.
Also look for some very small self tapping machine screws (or very tiny wood screws)
It turns out that a three row, hexagonally packed, 18650 cell group fits perfectly
inside the downspout - with some ample room on either side to accommodate the sensing wires for the BMS board. However, the cells must be packed closely and hotmelt glue is used to connect them all together. My bike is 36V and I used 40 cells. However your system may be different. Naturally you may make the length longer/shorter to accommodate a different number of cells.
Speaking of BMS boards - I have thus far made two of these batteries using two different kinds of BMS boards. In my case these are 10S (36V) BMS boards as shown in the pictures and are available on ebay. They both fit fine inside the case, but the 40 amp white board is a close fit. I use some 1/4" thick construction foam between the batteries and the BMS. See the diagram image.
Since every bike frame is different and you may be using an alternate number of batteries I do not provide overall dimensions of the downspout and the aluminum mount. You have to work this out for your particular bike frame configuration and battery case length.
Here is the general workflow..
1) Decide on the number of cells you want and determine what the overall length of the PVC tube will be. Take into account the space needed for the BMS board. Give yourself some extra space as well for the wires at the top of the pack and the charging connector.
2) Take this measurement and "mock up" on the bike. Make sure you have some clearance between the top of the battery and the top tube of the frame - this allows for the battery to insert into the dovetail and then drop down about 7/8". Basically whatever length your downspout ends up it needs to be able to fit in the allocated space on the bike with at least 7/8" above it and it must not hit the bottom bracket or the front frame tube when it drops into final position.
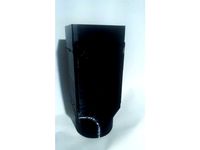
3) Print two endcaps and build up your battery. These caps get printed in ABS with 3 outer layers, 5-6 top/bottom layers and about 30% infill.
4) I presume you know how to safely build up a lithium ion battery pack. It is a dangerous process. If you don't know what your doing then you better study some of the videos on youtube. You will need a spot welder and the Nickle strips, and you need to know what a BMS is and how to solder up the BMS sense wires.
6) I don't provide holes in the model for the harness or for the charging connector. These are also variable. I happen to use an RCA jack for my charge connection and I just drilled a hole for the silicone insulated wires to exit.
7) I glue the bottom cap in place. I then drill four small holes and use four small machine screws that provide some extra hold.
8) The top cap is only held in by the 4 small screws, in case the battery must be serviced later on.
9) At this point your battery is built and tested and everything is inside the downspout case. Print the two dovetail mounts that slip over the downspout. Print these in ABS at 100% infill. Use concentric infill to get the best strength for these parts.
10) You will probably have to file the dovetail on these parts to get them to slide easily over the aluminum bar. Not too loose mind you, just enough to ensure no binding.
11) Take your battery over to the bike for another mockup. Slide the mounts over the downspout case. Position the battery where it will be in its final "locked in" on the frame and slide the mounts so each are centered over each bottle mount hole. Mark the position of each of the mounts location on the downspout tube with a permanent marker.
12) Slide the mounts just above their final locations and apply ABS-PVC transition cement to the final location of the mounts. Then slide each mount to it's final position over the glued area. Carefully wipe off the excess glue and let them set.
13) Now cut the aluminum bar about 2 inches longer that the overall length of the case. This should allow just under an inch to be bend over. Center the bar along the length of the case and mark the top and bottom places where you will bend the bar. The bar will be bent in a vise.
14) The bottom "L" bend should be left at about 1 inch. The top "L" should be cut down to about 1/4"
15) Now final mockup on the bike. Take the aluminum bracket and the battery over to the bike determine final location of the aluminum bracket and mark the two hole in the bracket for the screws to go into the bottle mount.
16) Drill the holes in the bar and then follow up with a 45 degree counter sink. The screwheads cannot protrude above the bar's surface when the bar is bolted to the bottle mount on the bike.
17) Finally the dovetail cutouts are made on the bar. These are not done at the final rest position of the case in the aluminum bracket, but instead are cut just above the final rest positions. Such that the top "L" bend is pushed back, the dovetails engage the bar, and the battery then drops down about 7/8" to finally rest on the bottom "L" bend. The top "L" bend then snaps back thus locking the battery case onto the bar. I cut the dovetail notches on a bandsaw, but you can do it with multiple cuts with a hacksaw and then file them to finish. Be sure to deburr and slightly round over the edges of the notches to allow easy engagement.
18) When you are all done wipe the case down in alcohol and then spray paint. I used Rustoleum fast dry flat black.
19) To prevent water egress use a dab of silicone sealant where the wires exit the top cap. A very thin smear of silicone can be applied around the perimeter of the top cap as well. Just don't overdo it as it can make the cap difficult to remove later on.
Possible future improvements:
I was thinking about adding a molded in hoop on the bottom cap, so you can run a bike lock cable through it when you lock up the bike.
It must be lightweight but rugged and must be easily detachable.
Achieving this on a budget is even more difficult.
The following case is made up of 3d printed ABS components included here
and some 3"x2" PVC downspout available from your local home center for about $3
(it is sold in a 15" length called a downspout extension")
The 1" x 1/8" aluminum bracket is also procured from the hardware isle of
the home center for about $8. You should have enough to make two brackets.
This formed bracket will bolt to the water bottle mount on the bike. The 3d printed mounts on the battery dovetail into the bracket and the battery drops down into place, the top portion of the bracket then snaps over the top of the battery to lock it securely into place.
While at the home center also pick up a small can of ABS-PVC transition adhesive
and some flat head screws (countersunk taper) that will fit in your bike bottle mount holes.
Also look for some very small self tapping machine screws (or very tiny wood screws)
It turns out that a three row, hexagonally packed, 18650 cell group fits perfectly
inside the downspout - with some ample room on either side to accommodate the sensing wires for the BMS board. However, the cells must be packed closely and hotmelt glue is used to connect them all together. My bike is 36V and I used 40 cells. However your system may be different. Naturally you may make the length longer/shorter to accommodate a different number of cells.
Speaking of BMS boards - I have thus far made two of these batteries using two different kinds of BMS boards. In my case these are 10S (36V) BMS boards as shown in the pictures and are available on ebay. They both fit fine inside the case, but the 40 amp white board is a close fit. I use some 1/4" thick construction foam between the batteries and the BMS. See the diagram image.
Since every bike frame is different and you may be using an alternate number of batteries I do not provide overall dimensions of the downspout and the aluminum mount. You have to work this out for your particular bike frame configuration and battery case length.
Here is the general workflow..
1) Decide on the number of cells you want and determine what the overall length of the PVC tube will be. Take into account the space needed for the BMS board. Give yourself some extra space as well for the wires at the top of the pack and the charging connector.
2) Take this measurement and "mock up" on the bike. Make sure you have some clearance between the top of the battery and the top tube of the frame - this allows for the battery to insert into the dovetail and then drop down about 7/8". Basically whatever length your downspout ends up it needs to be able to fit in the allocated space on the bike with at least 7/8" above it and it must not hit the bottom bracket or the front frame tube when it drops into final position.
3) Print two endcaps and build up your battery. These caps get printed in ABS with 3 outer layers, 5-6 top/bottom layers and about 30% infill.
4) I presume you know how to safely build up a lithium ion battery pack. It is a dangerous process. If you don't know what your doing then you better study some of the videos on youtube. You will need a spot welder and the Nickle strips, and you need to know what a BMS is and how to solder up the BMS sense wires.
6) I don't provide holes in the model for the harness or for the charging connector. These are also variable. I happen to use an RCA jack for my charge connection and I just drilled a hole for the silicone insulated wires to exit.
7) I glue the bottom cap in place. I then drill four small holes and use four small machine screws that provide some extra hold.
8) The top cap is only held in by the 4 small screws, in case the battery must be serviced later on.
9) At this point your battery is built and tested and everything is inside the downspout case. Print the two dovetail mounts that slip over the downspout. Print these in ABS at 100% infill. Use concentric infill to get the best strength for these parts.
10) You will probably have to file the dovetail on these parts to get them to slide easily over the aluminum bar. Not too loose mind you, just enough to ensure no binding.
11) Take your battery over to the bike for another mockup. Slide the mounts over the downspout case. Position the battery where it will be in its final "locked in" on the frame and slide the mounts so each are centered over each bottle mount hole. Mark the position of each of the mounts location on the downspout tube with a permanent marker.
12) Slide the mounts just above their final locations and apply ABS-PVC transition cement to the final location of the mounts. Then slide each mount to it's final position over the glued area. Carefully wipe off the excess glue and let them set.
13) Now cut the aluminum bar about 2 inches longer that the overall length of the case. This should allow just under an inch to be bend over. Center the bar along the length of the case and mark the top and bottom places where you will bend the bar. The bar will be bent in a vise.
14) The bottom "L" bend should be left at about 1 inch. The top "L" should be cut down to about 1/4"
15) Now final mockup on the bike. Take the aluminum bracket and the battery over to the bike determine final location of the aluminum bracket and mark the two hole in the bracket for the screws to go into the bottle mount.
16) Drill the holes in the bar and then follow up with a 45 degree counter sink. The screwheads cannot protrude above the bar's surface when the bar is bolted to the bottle mount on the bike.
17) Finally the dovetail cutouts are made on the bar. These are not done at the final rest position of the case in the aluminum bracket, but instead are cut just above the final rest positions. Such that the top "L" bend is pushed back, the dovetails engage the bar, and the battery then drops down about 7/8" to finally rest on the bottom "L" bend. The top "L" bend then snaps back thus locking the battery case onto the bar. I cut the dovetail notches on a bandsaw, but you can do it with multiple cuts with a hacksaw and then file them to finish. Be sure to deburr and slightly round over the edges of the notches to allow easy engagement.
18) When you are all done wipe the case down in alcohol and then spray paint. I used Rustoleum fast dry flat black.
19) To prevent water egress use a dab of silicone sealant where the wires exit the top cap. A very thin smear of silicone can be applied around the perimeter of the top cap as well. Just don't overdo it as it can make the cap difficult to remove later on.
Possible future improvements:
I was thinking about adding a molded in hoop on the bottom cap, so you can run a bike lock cable through it when you lock up the bike.
Similar models
grabcad
free

Aluminum Brace / Bracket
...s must measure 1" and be 10' across.
finally from the top of the flat plate to the center of the holes must be 5".
thingiverse
free

Bike light mount replacement by Macksvoltage
... meant to be tapped and are 3.4mm dia.
this is my first tinkercad design, so its a work in progress? or it works the first time?
thingiverse
free

TDA7492P Bluetooth Amp Case by jasonsd
... in place. holes line up with the buttons on the board and a printable button allow use of the onboard buttons while in the case.
thingiverse
free

GM328 Transistor Tester Case (9V battery or double 18650 batteries) by jonweb
...or batteries 18650 and a cheap board tp4056 for charging. you can use a wires welded on nichel strips for 18650 batteries.
jonweb
thingiverse
free

prototype board bottom case with mount holes by AleyRobotics
...prototype board bottom case with mount holes by aleyrobotics
thingiverse
prototype board bottom case with mount holes
thingiverse
free

Samsung Bike Battery Mount for 40mm Frame by samdoyle
...ry battery to the 3d printed brackets.
its designed so the bracket cant be removed once the battery is keyed on to prevent theft.
thingiverse
free

T12 / T15 soldering iron tip holder by Hemi345
...t; and 1,2 or 3 "top" models) to be used with them to keep four of your favorite tips on top of your soldering station.
grabcad
free

Kawasaki KX 65 skid plate
...ount. if you make one i was thinking of adding 1 or 2 inches on the right side up front to add more protection to the water pump.
thingiverse
free

Rumba Case by hockeyman247
... to it in my profile pic. will upload the top in a few days along with some pictures once i have it mounted
feedback is welcome
thingiverse
free

Casing for Wemos ESP-8266 Board with 0.96" OLED and Battery by dagnall53
...tch.
the larger case allows the addition of a ky-040 rotary encoder.
holes for 1.8mm by 12mm screws are provided in the corners.
Bugeye59
thingiverse
free

Automotive Trim Thumbscrew by bugeye59
... fit through. you can probably scale this to work for other applications. i printed this at 100% infill with petg for strength.
thingiverse
free

Ebikeling S830 display stem mount by bugeye59
...t this. i printed this with priline pc carbon fiber, but you could probably get by with petg.
print at 100% infill with supports.
thingiverse
free

Parametric Jack Pad by bugeye59
...t model before you print your final in tpu.
i have used the pad for several jobs and it has held up well. it is a nice jack pad!
thingiverse
free

Merkur Scorpio Fog Light Cover by bugeye59
...n black asa for best results.
i've had them on the car for over 2 years now with no ill effects. seldom do i encounter fog!
thingiverse
free

Topeak QuickClick Saddle Rail Mount B17 WIDE by bugeye59
...e flat version of the original poster's files.
fwiw, i print this at 100% infill and i used priline carbon fiber pc filament.
thingiverse
free

Merkur Scorpio Steering Firewall Bushing by bugeye59
...n the sheet metal hole. your are then back to scorpio bliss...
dimensions were pulled from what remained of my original bushing.
thingiverse
free

Suspension Rebound, Buffer, Bump Stop by bugeye59
...nd more description is available at the merkur club forum here...http://forum.merkurclub.com/forum/viewtopic.php?f=29&t=32858
Downspout
3d_export
$40

Downspout Gutter 00 3D Model
...ain drainage tube tubing pvc metal exterior outdoor roof wall 3d max vray
downspout gutter 00 3d model pharametriq 10162 3dexport
3d_export
$58

2 Story Brick House 3D Model
...photoreal brick two story attached garage bay window gutter downspout detailed building fbx cutaway materials obj sketchup textured 2...
3d_sky
free

Downspouts
...downspouts
3dsky
downspouts (metal)
thingiverse
free

Gutter Downspout by cornellana
...gutter downspout by cornellana
thingiverse
piece to extend a gutter downspout
thingiverse
free
Downspout Filter by Junkmail90210
...downspout filter by junkmail90210
thingiverse
simple downspout filter with removable basket/door.
thingiverse
free

Downspout Stand by MildMastermind
... keep the downspout off the lawn for those of us too lazy to lift them when it's not raining. fits 2"x3" downspout.
thingiverse
free

Downspout anchor/post by pj_samm
...or/post by pj_samm
thingiverse
downspout anchor/post for 3x4 inch downspouts.
update:
added a second version with modified spike
thingiverse
free

Downspout adapter by jpindi
...in tinkercad and it is an adapter for two different size downspouts. i printed grey pla and then spray-painted it black to match.
thingiverse
free

Downspout adapter by KerwoodDerby
...thing like 3.5").
the openscad file is also supplied, for those who have to deal with slightly different makes of downspout.
thingiverse
free

Louisville Library Downspout by Jpac
...rary downspout. the color version of the model can be viewed here: https://sketchfab.com/models/2b74617ac22649119cdd275243c3b951
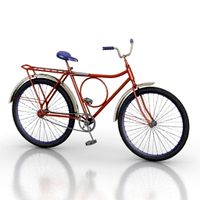
Bike
3d_ocean
$18
Bike
...bike
3docean
bicycles bike sports transport
3d model bike
3d_export
$5
bike
...bike
3dexport
bike
3d_export
$50
bike
...bike
3dexport
3d bike model
turbosquid
free
bike-bike-rack
... available on turbo squid, the world's leading provider of digital 3d models for visualization, films, television, and games.
archibase_planet
free

Bike
...bike
archibase planet
bike bicycle cycle
bike n161113 - 3d model (*.gsm+*.3ds+*.max) for exterior 3d visualization.
archibase_planet
free
Bike
...bike
archibase planet
bike bicycle cycle
bike and rack n220613 - 3d model (*.gsm+*.3ds+*.max) for exterior 3d visualization.
archibase_planet
free
Bike
...rchibase planet
bike bicycle cycle two-wheeled bicycle
bike n031213 - 3d model (*.gsm+*.3ds+*.max) for exterior 3d visualization.
archibase_planet
free
Bike
...rchibase planet
bike bicycle cycle two-wheeled bicycle
bike n180714 - 3d model (*.gsm+*.3ds+*.max) for exterior 3d visualization.
3d_ocean
$35
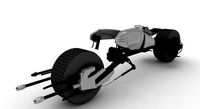
Batpod Bike
...cean
batman batman bike batpod bike bike motorcycle stylish bike
detailed model of a famous batpod bike used in the movie batman.
3d_export
$5
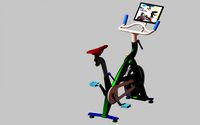
exercise bike
...exercise bike
3dexport
exercise bike, spin bike, bike, gym equipment, exerciser
Battery
3d_ocean
$2
Battery
...battery
3docean
battery electronic
a high quality battery .
3d_export
free
battery
...battery
3dexport
battery
3d_ocean
$5
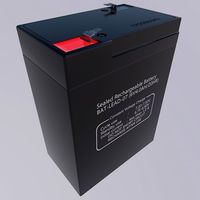
Battery
...battery
3docean
battery electronics
a classic 6 v battery, high poly with materials
3d_ocean
$3
Batteries
...batteries 3docean aa aaa batteries battery d electronics energy materials power subdivision uv unwrapped aa,...
3d_export
$19
Lead-acid battery storage battery lithium battery
...ttery storage battery lithium battery
3dexport
1.lead-acid battery storage battery lithium battery 2.files include 3dmax obj fbx
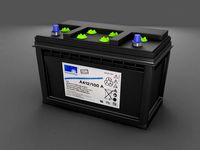
3d_ocean
$7
Battery Model
...battery model
3docean
big battery car battery vehicle battery
car battery, big battery, vehicle battery.
3ddd
free
battery energier
...battery energier
3ddd
battery energier , батарейка
battery energier
turbosquid
free
battery
...battery
turbosquid
free 3d model battery for download as obj on turbosquid: 3d models for games, architecture, videos. (1151676)
3d_ocean
$1
Battery Model
...lack minus plus white yellow
this is battery model is about 1000 triangles. turntable preview is smoothed version of the battery.
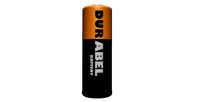
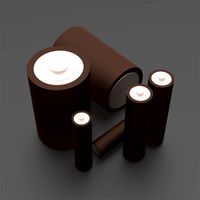
3d_export
$10
battery 18650
...battery 18650
3dexport
battery 18650
Case
3d_export
$1

case
...case
3dexport
case
archibase_planet
free

Case
...case
archibase planet
showcase show-case glass case
glass-case + cakes - 3d model for interior 3d visualization.
archibase_planet
free

Case
...case
archibase planet
showcase show-case glass case
glass-case for chips - 3d model for interior 3d visualization.
archibase_planet
free

Case
...case
archibase planet
case shelving drawer
case - 3d model for interior 3d visualization.
archibase_planet
free

Case
...case
archibase planet
case rack locker
case - 3d model for interior 3d visualization.
archibase_planet
free

Case
...case
archibase planet
case drawer kitchen furniture
case - 3d model for interior 3d visualization.
archibase_planet
free

Case
...case
archibase planet
case cupboard shelving
glass case - 3d model for interior 3d visualization.
archibase_planet
free

Case
...case
archibase planet
case handbag suitcase
case - 3d model (*.gsm+*.3ds) for interior 3d visualization.
archibase_planet
free

Case
...case
archibase planet
case suitcase
case 5 - 3d model (*.gsm+*.3ds) for interior 3d visualization.
archibase_planet
free

Case
...case
archibase planet
locker case dresser
case - 3d model (*.gsm+*.3ds) for interior 3d visualization.
E
3ddd
$1
WALL-E
...wall-e
3ddd
wall-e , робот
wall-e
3d_export
$100

e-rickshaw
...e-rickshaw
3dexport
e-rickshaw- it have 3d model of passenger e-rickshaw
3d_ocean
$12

Wall E
...wall e
3docean
character robot wall e
its a 3d model of wall e….
turbosquid
$68
Model-E Droids 2-E Q-E Star Wars
... available on turbo squid, the world's leading provider of digital 3d models for visualization, films, television, and games.
cg_studio
$45

Model-E Droids 2-E Q-E Star Wars3d model
....3ds .c4d .obj .vue - model-e droids 2-e q-e star wars 3d model, royalty free license available, instant download after purchase.
3d_export
$100
e-rickshaw
...e-rickshaw
3dexport
e-rickshaw design for passenger it have all mechanical component
design_connected
$7

Cone E
...cone e
designconnected
bonaldo cone e computer generated 3d model. designed by pasini, ennio.
3ddd
$1

Wall-E NEW
...wall-e new
3ddd
wall-e , робот
wall-e
design_connected
$29

Extrasoft E
...extrasoft e
designconnected
living divani extrasoft e computer generated 3d model. designed by lissoni, piero.
3ddd
$1

E-Turn
... скамейка
современная скамейка фирмы kundalini.
модель e-turn.
дизайнер brodie neil.
размеры: h 42 cm l 185 cm w 54 cm