Thingiverse
Taller Cell Phone Spring Loaded Tripod Mount, ninjaflex grippers and better threads for mount by Biffington716
by Thingiverse
Last crawled date: 3 years ago
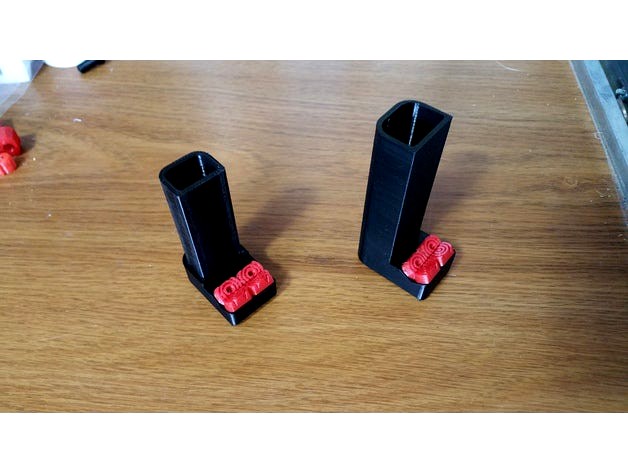
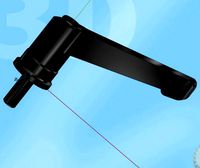
I printed the cell phone spring loaded tripod mount, and found my phone is larger and thicker (extra capacity battery) than what it could hold. On top of that, my tripod has rather short threads, so I couldn't use the embedded 1/4" nut. So, I visited my local hardware store to look for options. I selected a little longer spring and a 1/4" thread insert (for wood). (spring is the same 3/8" OD, length is more like 2 3/4") Keep the spring under 2 3/4" so the spring keeps the whole assembly tight.
The grippers must be printed in Ninjaflex, otherwise the retention bulbs will not flex for installation. I printed in PLA, if you print in other materials you may need to scale the files to account for shrinkage different than PLA. The retention bulbs are necessarily hard to insert so they stay in place, so if your material shrinks a lot they could be impossible to insert.
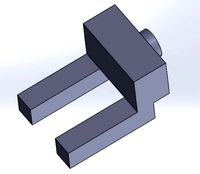
The mount is re-designed to take the threaded insert after printing so I wouldn't need to interrupt printing and it brings the threads to the edge of the part so my tripod would work. You need to print 2 grippers in ninjaflex, and of course 2 spring pins. (read DarthBane's instructions too, this one goes together pretty much the same way)
After printing the bottom mount, install the thread insert with the slot going in first so it cuts into plastic as it goes in. You will need an insertion tool, so fully thread the insert onto a 1/4" bolt and use that to turn the insert into the plastic. This process takes a lot of force, don't try to do it by hand. Turn it down until the threaded insert is flush with the bottom of the mount and remove the installation tool (the 1/4" bolt). Installing the spring is tricky because it is under tension once installed. Thread a loop of string, as pictured, through the insert and over the spring hook. Pull the string, aligning the assembly as the parts come together, until the spring hook is in position and insert the spring pin.
The grippers are installed with a blunt pin. (a 1.5 mm ball end hex key works well) Push the pin into the hole on the face of the gripper (opposite the retention bulb). Align the bulb with the retention hole on the mount and push the bulb into the hole using the blunt pin. The pin elongates the bulb allowing it to be forced through the retention hole. Once the gripper is fully seated, remove the blunt pin and the gripper will stay where it is.
The grippers must be printed in Ninjaflex, otherwise the retention bulbs will not flex for installation. I printed in PLA, if you print in other materials you may need to scale the files to account for shrinkage different than PLA. The retention bulbs are necessarily hard to insert so they stay in place, so if your material shrinks a lot they could be impossible to insert.
The mount is re-designed to take the threaded insert after printing so I wouldn't need to interrupt printing and it brings the threads to the edge of the part so my tripod would work. You need to print 2 grippers in ninjaflex, and of course 2 spring pins. (read DarthBane's instructions too, this one goes together pretty much the same way)
After printing the bottom mount, install the thread insert with the slot going in first so it cuts into plastic as it goes in. You will need an insertion tool, so fully thread the insert onto a 1/4" bolt and use that to turn the insert into the plastic. This process takes a lot of force, don't try to do it by hand. Turn it down until the threaded insert is flush with the bottom of the mount and remove the installation tool (the 1/4" bolt). Installing the spring is tricky because it is under tension once installed. Thread a loop of string, as pictured, through the insert and over the spring hook. Pull the string, aligning the assembly as the parts come together, until the spring hook is in position and insert the spring pin.
The grippers are installed with a blunt pin. (a 1.5 mm ball end hex key works well) Push the pin into the hole on the face of the gripper (opposite the retention bulb). Align the bulb with the retention hole on the mount and push the bulb into the hole using the blunt pin. The pin elongates the bulb allowing it to be forced through the retention hole. Once the gripper is fully seated, remove the blunt pin and the gripper will stay where it is.
Similar models
thingiverse
free

Mobile Phone Holder for small tripod by modelmaker_PVG
...use only, does not hold your phone securely in other situations.
hole has 1/4 20 thread modelled in to fit standard tripod mount.
thingiverse
free

Kindle Fire HD 8" Tripod Mount by SmithRC
...mount.
(excuse the print quality - it was printed fast and dirty to test concept - it works - so i haven't needed to reprint)
thingiverse
free

Phone Tripod Mount by beetlevc
...phone tripod mount by beetlevc
thingiverse
this mount has printed inner thread, so you will not need a nut to install it.
thingiverse
free

Sony A6000 Tripod Mount Plate by TMuel1123
...ead designed into the stl. in this case i would recommend to print it in 0.1mm layerheight to increase the quality of the thread.
thingiverse
free

Phone Tripod Mount by SteveGlenner
... if you go carefully. i recommend printing both parts on their sides (long edge) for maximum strength and printing with supports.
thingiverse
free

Tripod Mount for Phone by d3delta3d
...d.
comes with 2 tripod base mount styles, one designed to be tapped with a 1/4" tap and one to insert a 1/4" nut into.
thingiverse
free

GoPro tripod mount by Occasionally_Inspired
...eed to be punched out after printing. the brass insert is best heated before inserting. it provides half an inch of thread depth.
thingiverse
free

Velbon DF 40 Tripod Quick Release Mount by MRSinks
...printed these at 100% infill as i wanted the strength (i did not want the mount to fail with a camera with a heavy lens attached.
thingiverse
free

Tripod holder by zcohen
...n it (i used a bolt), run it under water to keep it in place.
the screw holes are for #8 countersunk screws to mount to whatever.
thingiverse
free

iPhone XS Max in Battery Case Tripod Mount by DPS_Design
...phone slides right in holder with no binding!
the bottom of the mount is threaded for a 1/4" x 20 normal tripod mount screw.
Ninjaflex
thingiverse
free

Ninjaflex Test by demomansample
...t by demomansample
thingiverse
this is a test print for ninjaflex. this will help you configure your printer to print ninjaflex.
thingiverse
free

Ninjaflex Spacer by fozzybear
...ninjaflex spacer by fozzybear
thingiverse
spacer for the ninjaflex roll.
thingiverse
free

NinjaFlex K8200 by dntppe
...ninjaflex k8200 by dntppe
thingiverse
i modified the extruder base for ninjaflex
thingiverse
free

NinjaFlex Flexiband by David_Ahlzadeh
... my robo 3d printer. if you are testing out ninjaflex out on your 3d printer too i recommend using this as your first test print.
thingiverse
free

NinjaFlex Silver Necklace by DiabaseEngineer
...ninjaflex silver necklace by diabaseengineer
thingiverse
print it in ninjaflex at 70mm/s with the flexion extruder
thingiverse
free

NinjaFlex Frisbee by RobotMama
...ally cool flying abilities :d so it is a frisbee now.
the white version is pla, the transparent is petg and the orange ninjaflex.
thingiverse
free

cuboid 150w coque ninjaflex by forange
...cuboid 150w coque ninjaflex by forange
thingiverse
coque ninjaflex
thingiverse
free

Kindle Fire NinjaFlex by ttturner68
...kindle fire ninjaflex by ttturner68
thingiverse
ninjaflex is too soft to do hard arcs from the table, this version address it.
thingiverse
free

Anti-Vibration Mount NINJAFLEX by Nilltan
...anti-vibration mount ninjaflex by nilltan
thingiverse
a anti-vibration foot thats it´s made of ninjaflex.
thingiverse
free

PrintrBot Metal NinjaFlex adapter by dubi
...printrbot metal ninjaflex adapter by dubi
thingiverse
my take on the printrbot extruder mod for ninjaflex filament.
Grippers
turbosquid
$10

Gripper
...er
turbosquid
royalty free 3d model gripper for download as on turbosquid: 3d models for games, architecture, videos. (1341108)
archive3d
free

Gripper 3D Model
...gripper 3d model archive3d gripper hand gripper expander grippers hand grippers gripper n231212 - 3d model (*.3ds) for...
3d_export
$5
gripper test
...gripper test
3dexport
robot gripper test model
3d_export
$10

adjustable bag gripper- gripper robot
...2 sizes : 400 or 500 mm of width. detailed and fully detailed design (screws, full part). designed for robot kawasaki cp180. web:
turbosquid
$10

Gripper 1
...
turbosquid
royalty free 3d model gripper 1 for download as on turbosquid: 3d models for games, architecture, videos. (1341110)
3d_export
$7

robotic gripper
...robotic gripper
3dexport
turbosquid
$40

Pneumatic Gripper 01
...d model pneumatic gripper 01 for download as ma, obj, and fbx on turbosquid: 3d models for games, architecture, videos. (1589617)
turbosquid
$19

Fitness Hand Gripper
...el fitness hand gripper for download as blend, blend, and obj on turbosquid: 3d models for games, architecture, videos. (1711575)
turbosquid
$15

Steel Hand Gripper
... 3d steel hand gripper for download as 3ds, obj, c4d, and fbx on turbosquid: 3d models for games, architecture, videos. (1466474)
3d_export
free

Hexagonal Gripper M8
...hexagonal gripper m8
3dexport
more free 3d models here:
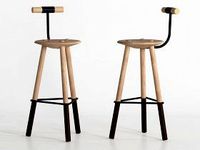
Taller
3ddd
$1

Lineas Taller
...d
lineas taller , письменный
стол lineas taller/ высота 73см, ширина 170см, глубина 45см
3ddd
$1

Lineas Taller Desk
... natural chic
модель:lt.wd.nc.3
коллекция:natural chic;
бренд:lineas taller
страна:испания
размер (дхшхв) 86*40*110.8
3ddd
$1

Natural chic / Lineas taller
...natural chic / lineas taller
3ddd
lineas taller
набор детской мебели natural chic от lineas taller.
3d_export
$5

radicchio taller cabbage
...radicchio taller cabbage
3dexport
3ddd
$1

Чайник Taller TR-1343
...чайник taller tr-1343
3ddd
чайник , taller
имеется low и high poly
3ddd
$1

Lineas Taller - Natural Chic
...иалами, текстурами и размерами.
max + obj + fbx
габариты:
920 х 2550 х 1000h
polys/verts:
400443/200517
maxfile ~ 15,000 mb
3ddd
free

Lineas Taller - Natural Chic
...териалами, текстурами и размерами.
max + obj + fbx
габариты:
600 х 1500 х 750h
polys/verts:
120104/60038
maxfile ~ 3,500 mb
3ddd
$1

Комплект мебели Фабрика LINEAS TALLER, Испания
... коллекция oslo & viena , lineas taller
тумбочка 600*390*555,
комод 121*50*104
3ddd
free

Lineas Taller - Oslo & Viena
...ериалами, текстурами и размерами.
max + obj + fbx
габариты:
193 х 207 х 170h
polys/verts:
373842/188497
maxfile ~ 18,850 mb
3ddd
$1

Фабрика LINEAS TALLER, Коллекция OSLO & VIENA
... oslo & viena
фабрика lineas taller, коллекция oslo & viena,
размер кровати 169х208х126,
размер тумбочки 63х40х57
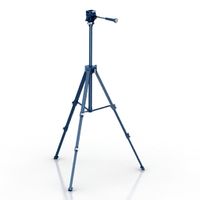
Tripod
archibase_planet
free
Tripod
...tripod
archibase planet
tripod staff state stand
tripod - 3d model for interior 3d visualization.
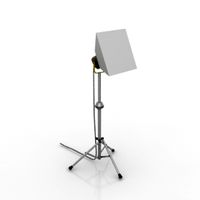
archibase_planet
free
Tripod
...tripod
archibase planet
camera tripod
cam tripod 2 - 3d model (*.gsm+*.3ds) for interior 3d visualization.
archibase_planet
free
Tripod
...tripod
archibase planet
tripod support stand holder
tripod n191213 - 3d model (*.gsm+*.3ds+*.max) for interior 3d visualization.
design_connected
$13
Tripod
...tripod
designconnected
erickson æsthetics tripod computer generated 3d model. designed by erickson, ben.
design_connected
$13

Tripod
...tripod
designconnected
david weeks studio tripod computer generated 3d model. designed by weeks, david.
3d_ocean
$4

Tripod
...tripod
3docean
3d models coffee table furnishings furniture tripod
3d models,furnishings,furniture
archibase_planet
free
Tripod
...tripod
archibase planet
tv camera equipment
cam tripod - 3d model (*.gsm+*.3ds) for interior 3d visualization.
turbosquid
$4

Tripod
...urbosquid
royalty free 3d model tripod for download as blend on turbosquid: 3d models for games, architecture, videos. (1580064)
turbosquid
$5

Tripod
...uid
royalty free 3d model tripod for download as c4d and fbx on turbosquid: 3d models for games, architecture, videos. (1593078)
turbosquid
$35

Tripod
... available on turbo squid, the world's leading provider of digital 3d models for visualization, films, television, and games.
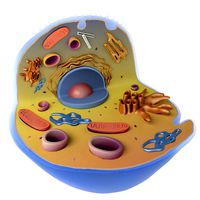
Cell
archibase_planet
free

Cell
...cell
archibase planet
cage cell
cell n050510 - 3d model (*.gsm+*.3ds) for interior 3d visualization.
3d_export
$14

Blood Cells
...poiesis and found in the blood. major types of blood cells include; red blood cells (erythrocytes) white blood cells (leukocytes)
3d_export
$5

cell
...cell
3dexport
turbosquid
$89
Cell
...
royalty free 3d model cell for download as max, obj, and fbx on turbosquid: 3d models for games, architecture, videos. (1225448)
turbosquid
$19

Cell
...
royalty free 3d model cell for download as max, fbx, and obj on turbosquid: 3d models for games, architecture, videos. (1528922)
3d_ocean
$5
Lithium Cells
...cr2032 cr2450 lithium lithium battery lithium cell power
some lithium cells. cr2032, cr2025, cr2016, cr2450 faces: ca. 65000 each
turbosquid
$45

cell
...yalty free 3d model cell for download as ma, ma, fbx, and obj on turbosquid: 3d models for games, architecture, videos. (1650714)
3d_export
$5

Blood cells
...blood cells
3dexport
blood cells 3d model
3ddd
$1
solar cell
...solar cell
3ddd
солнечная батарея
solar cell
turbosquid
$60

Cell
... available on turbo squid, the world's leading provider of digital 3d models for visualization, films, television, and games.
Spring
3d_export
free

spring
...spring
3dexport
spring
3ddd
$1

Spring
... , spring
кресло spring фабрики potocco (италия)
длина 84
ширина 79
высота 100
design_connected
$16

Spring
...spring
designconnected
cappellini spring chairs computer generated 3d model. designed by erwan bouroullec.
3ddd
$1
Еmmemobili Spring
...еmmemobili spring
3ddd
еmmemobili , spring
кресло еmmemobili spring
design_connected
$11

Spring
...spring
designconnected
de padova spring chairs computer generated 3d model. designed by damian williamson.
turbosquid
$5

Spring
...
turbosquid
royalty free 3d model spring for download as skp on turbosquid: 3d models for games, architecture, videos. (1148583)
turbosquid
$1
Spring
...
turbosquid
royalty free 3d model spring for download as fbx on turbosquid: 3d models for games, architecture, videos. (1351471)
3ddd
$1

Еmmemobili Spring
...mobili spring
3ddd
emmemobili , spring
кресло еmmemobili spring, вариант в мягкой обивке
3d_export
$5

Ball spring
...ball spring
3dexport
ball spring
3ddd
$1
Смеситель SPRING
... fir italia , смеситель
смеситель spring, две модели, производитель fir italia!
Loaded
3ddd
$1
Billiani Load
...billiani load
3ddd
billiani , load
стулья load итальянской фабрики load
turbosquid
$5

Wheelbarrow loaded
...id
royalty free 3d model wheelbarrow loaded for download as on turbosquid: 3d models for games, architecture, videos. (1615308)
turbosquid
$15
Dummy Load
...odel dummy load for download as 3ds, obj, fbx, blend, and dae on turbosquid: 3d models for games, architecture, videos. (1363932)
turbosquid
$3

Load-limitroadsign
...oad-limitroadsign for download as 3ds, dae, fbx, obj, and stl on turbosquid: 3d models for games, architecture, videos. (1532902)
3d_export
$79

iveco daily loading
...iveco daily loading
3dexport
iveco daily loading 3d model. include max, obj, fbx files.
3d_export
$9

automatic loading and unloading punch
...automatic loading and unloading punch
3dexport
automatic loading and unloading punch
3d_export
$19

concrete loading ramp
...te loading ramp
3dexport
concrete loading ramp 3d model. real-time ready, multiple import formats<br>thank you for reading
turbosquid
$1
Front Load Dumpster
...free 3d model front load dumpster for download as obj and fbx on turbosquid: 3d models for games, architecture, videos. (1694510)
turbosquid
$45
AGV to Container Load
... model agv to container load for download as ma, obj, and fbx on turbosquid: 3d models for games, architecture, videos. (1589627)
turbosquid
$20

Pelican Loading Center
... available on turbo squid, the world's leading provider of digital 3d models for visualization, films, television, and games.
Phone
archibase_planet
free

Phone
...se planet
mobile phone smartphone cellular phone cell phone
phone n270513 - 3d model (*.gsm+*.3ds) for interior 3d visualization.
archibase_planet
free

Phone
... phone cell phone smartphone iphone cellular phone
phone iphone 4 apple n010113 - 3d model (*.3ds) for interior 3d visualization.
archibase_planet
free

Phone
...se planet
phone telephone dial telephone rotary phone
phone retro n130913 - 3d model (*.gsm+*.3ds) for interior 3d visualization.
archibase_planet
free

Phone
...se planet
phone telephone dial telephone rotary phone
phone n191213 - 3d model (*.gsm+*.3ds+*.max) for interior 3d visualization.
archibase_planet
free

Phone
...se planet
phone telephone rotary phone dial telephone
phone n150214 - 3d model (*.gsm+*.3ds+*.max) for interior 3d visualization.
archibase_planet
free

Phone
...se planet
phone telephone dial telephone rotary phone
phone n100414 - 3d model (*.gsm+*.3ds+*.max) for interior 3d visualization.
archibase_planet
free

Phone
...base planet
phone telephone rotary phone dial telephone
phone old n310116 - 3d model (*.gsm+*.3ds) for interior 3d visualization.
archibase_planet
free

Phone
...phone
archibase planet
equipment phone
phone n240110 - 3d model (*.3ds) for interior 3d visualization.
archibase_planet
free

Phone
...phone
archibase planet
telephone phone
mobile phone - 3d model (*.3ds) for interior 3d visualization.
archibase_planet
free

Phone
...phone
archibase planet
telephone phone
phone n021009 - 3d model (*.gsm+*.3ds) for interior 3d visualization.
Threads
3d_export
$5

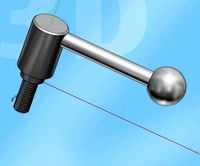
threaded handle
...threaded handle
3dexport
threaded handle
turbosquid
free

threaded
... available on turbo squid, the world's leading provider of digital 3d models for visualization, films, television, and games.
3d_ocean
$5
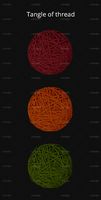
Tangle of thread
... tangle thread triangles – 36 in one strand in scene 300 thread includes materials includes 3 colors tangle thread in psd for ...
3d_export
$5
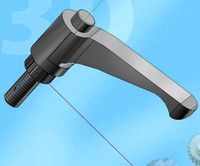
threaded lock handle
...threaded lock handle
3dexport
threaded lock handle
3d_export
$5
threaded machine handle
...threaded machine handle
3dexport
threaded machine handle
3d_export
$5
threaded door knob
...threaded door knob
3dexport
threaded door knob
3d_export
$5
threaded rope ring
...threaded rope ring
3dexport
threaded rope ring
3d_export
$5

threaded door knob
...threaded door knob
3dexport
threaded door knob
turbosquid
$56

Threaded Inserts
... available on turbo squid, the world's leading provider of digital 3d models for visualization, films, television, and games.
turbosquid
$10
Thread Lamp
... available on turbo squid, the world's leading provider of digital 3d models for visualization, films, television, and games.
Better
3ddd
$1

Мозаика Better B-MOS D1
...os d1
3ddd
better , мозаика
мозаика better b-mos d1.
розтайленая мною.
+ бамп
+ рефлеккт
turbosquid
$19

BETTER THAN CHOCOLATE SOFA
... better than chocolate sofa for download as max, obj, and fbx on turbosquid: 3d models for games, architecture, videos. (1144132)
3d_export
$5
Soviet Tank T-150
...t-150 3dexport simple tank model. in project texture are better ...
archive3d
free
Polycarbonate 3D Model
...polycarbonate plastic polycarbonate sheet a little bit oversized for better ...
3d_export
$20
Terminator
...a robot created by skynet to defeat the resistance. better watch the movie if you haven’t seen it...
3d_export
free
simple grass
...simple grass scene with procedural texture for grass, is better swaps the texture of grass by...
3d_export
$5

picture-mirror
...father,for the bath,it is desirable to make out of wood,better than...
3ddd
$1

APLLES with wood vase
...3ddd яблоко zip archive contain fbx model too, for better textures import to 3d software. kind...
3d_export
$5
vinyl record player
...size 295x260mm without any materials (just standart grey for better ...
3ddd
$1
Armchair 400
...armchair 400, designed by alvar aalto in 1936 and better known as tank. pelt coat idea by...
Mount
3d_export
free

mounting bracket
...mounting plate is the portion of a hinge that attaches to the wood. mounting plates can be used indoors, cabinetry and furniture.
turbosquid
$2

MOUNTING
... available on turbo squid, the world's leading provider of digital 3d models for visualization, films, television, and games.
turbosquid
free

Mounts
... available on turbo squid, the world's leading provider of digital 3d models for visualization, films, television, and games.
turbosquid
free

Mount Fuji
...fuji
turbosquid
free 3d model mount fuji for download as obj on turbosquid: 3d models for games, architecture, videos. (1579977)
3d_export
$5

Headphone mount LR
...headphone mount lr
3dexport
headphone mount l+r
turbosquid
$39

Mount rainier
...quid
royalty free 3d model mount rainier for download as fbx on turbosquid: 3d models for games, architecture, videos. (1492586)
turbosquid
$5

pipe mounting
...quid
royalty free 3d model pipe mounting for download as obj on turbosquid: 3d models for games, architecture, videos. (1293744)
turbosquid
$3

Mounting Tires
...uid
royalty free 3d model mounting tires for download as fbx on turbosquid: 3d models for games, architecture, videos. (1708511)
3d_export
$5

Magnetic GoPro Mount
...pro mount
3dexport
cool magnetic mount for gopro. allows you to mount the camera on flat metal surfaces and get exclusive shots.
turbosquid
$5

Stone Mount
...ty free 3d model stone mount for download as ma, obj, and fbx on turbosquid: 3d models for games, architecture, videos. (1370306)