Thingiverse

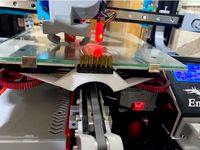
SV01 BMG complete upgrade kit (FW included) by ixactual
by Thingiverse
Last crawled date: 3 years ago
This Kit includes everything you need to get started with the sv01 and a bmg extruder including the Firmware(only if you have the silent board and BLtouch with a Sovol style bracket.) The Fan duct is designed for a 4020 fan(6+CFM) and a 5010 blower fan (24v)
Fan Guard included(print duct with ABS or petg and tree support).
I did not design all these files, these are either remixes or originals and the authors are awesome. I didnt save the locations so if they get mad, this will disappear.
remixed from:https://www.thingiverse.com/thing:4652242https://www.thingiverse.com/thing:4778927https://www.thingiverse.com/thing:4730352
FIRMWARE:
https://drive.google.com/file/d/1no-1OyXwd-mZWNZLi75RCOiTOW0aRJ3S/view?usp=sharing
ONLY if you have:
-BLtouch with sovol bracket
-silent board from Sovol (2208 drivers)
-BMG extruder
-X axis extension mod that is posted above (xmotcover)
-Cartridge style thermistor with a Firmware Value of 5
Custom Coptertec firmware(tested and proven) for those of us with BMG extruder upgrade, silent board, bltouch with stock bracket and cartridge style thermistor with a FW value of 5.
IMPORTANT: This Firmware is meant to be used in conjunction with the X axis extension mod available on thingiverse under the "SV01 savior kit".I have included this file under Xmot cover. The use of this allows you to extend the x axis and regain lost space. This mod is NOT OPTIONAL with the preconfigured firmware.
This version corrects your machines build plate dimensions after you install a mirrored BMG extruder onto your Sovol SV01. You can now print without worrying about going over the edge. The corrected dimensions insure you are always centered on the buildplate with the new offset of your hotend.
After the update you will need to change your build plate dimensions to Z(300) X(295) Y(238) in CURA or whatever slicing software you use.
This will ensure that you always print on your build plate and makes sure you do not overextend your printers Y axis.
SAFETY: This version has a max Temp of 285 which is the max temp of the thermistor this firmware package is designed for. This is to tighten your hotend nozzle. Do NOT try to print at 285 for an extended period of time because your thermistor might not survive this heat for an extended time.
STEPS TO FOLLOW AFTER INSTALLATION
-PID TUNE and Esteps
-CHANGE CURA BED DIMESIONS!
-OPTIONAL**** UPDATE YOUR STARTING GCODE IN CURA TO THE FOLLOWING FOR AUTOMATED TILT DETECT BEFORE EACH PRINT. THIS WILL USE MESH YOU HAVE SAVED IN SLOT 0.
M501;Load settings from EEPROM (necessary for Z offset)
; Following settings from Sovol
M201 X500.00 Y500.00 Z100.00 E5000.00 ;Setup machine max acceleration
M203 X500.00 Y500.00 Z10.00 E50.00 ;Setup machine max feedrate
M204 P500.00 R1000.00 T500.00 ;Setup Print/Retract/Travel acceleration
M205 X8.00 Y8.00 Z0.40 E5.00 ;Setup Jerk
M220 S100 ;Reset Feedrate
M221 S100 ;Reset Flowrate
M140 S{material_bed_temp_wait} ;Start heating bed
M104 S{material_print_temperature} ;Start heating extruder
G28 ;Home
M420 S ; Turn leveling back on after G28 (why is this needed?)
G29 L0 ;Load mesh
G29 J ;Three point level
M109 S{material_print_temperature} ;Wait for extruder to reach temp before proceeding
M190 S{material_bed_temp_wait} ;Wait for bed to reach temp before proceeding
G92 E0 ;Reset Extruder
G1 Z2.0 F3000 ;Move Z Axis up
G1 X10.1 Y20 Z0.28 F5000.0 ;Move to start position
G1 X10.1 Y200.0 Z0.28 F1500.0 E15 ;Draw the first line
G1 X10.4 Y200.0 Z0.28 F5000.0 ;Move to side a little
G1 X10.4 Y20 Z0.28 F1500.0 E30 ;Draw the second line
G92 E0 ;Reset Extruder
G1 Z2.0 F3000 ;Move Z Axis up
Similar models
thingiverse
free

E3(Pro) Glass Build Plate Corner Caps by kai_to_makes
... ;move to side a little
g1 x10.4 y20 z0.28 f1500.0 e30 ;draw the second line
g92 e0 ;reset extruder
g1 z2.0 f3000 ;move z axis up
thingiverse
free

CR-10 v3 Hermera + BLTouch + Filament sensor by f3bandit
... ;move to side a little
g1 x10.4 y20 z0.28 f1500.0 e30 ;draw the second line
g92 e0 ;reset extruder
g1 z2.0 f3000 ;move z axis up
thingiverse
free

CR-6 SE Bed Level Test For ABL points by dr_dunno
... the first line
g1 x40.4 y200.0 z0.28 f5000.0 ;move to side a little
g1 x40.4 y20 z0.28 f1500.0 e30 ;draw the second line
thingiverse
free

CR-6 SE 16 Point Bed Level Test by dr_dunno
...15 ;draw the first line
g1 x40.4 y200.0 z0.28 f5000.0 ;move to side a little
g1 x40.4 y20 z0.28 f1500.0 e30 ;draw the second line
thingiverse
free

Ender 3 V2 Brush mount by SharpSeer
...ed
g1 x5 y20 z0.3 f5000.0 ; move over to prevent blob squish
lastly, rotate the print till it is flat, i have not altered it yet.
thingiverse
free

Ender 3 with bltouch and runout sensor
... fan. because hot end cooling fan is not always turned on on the first layer, then pcb board is not cooled and can be overheated.
thingiverse
free

Cold Pull GCode by flickeringsight
...nd shutdown
m106 s0 ;turn-off fan
m104 s0 ;turn-off hotend
m140 s0 ;turn-off bed
m84 x y z e ;disable all steppers
;end of gcode
thingiverse
free

Bed Level Ender 3 / Ender 3 Pro by maxwellhau5caffy
...move to side a little
g1 x0.4 y20 z0.3 f1500.0 e30 ; draw the second line
;end purge line
.
..
...
..
.
g1 x0 y235 ;present print
thingiverse
free
Ender 3/Pro Ender5/Pro Bed Nozzle Brush by blindley125
...1 z10.0 f3000 ; move z axis up little to prevent scratching of heat bed
g1 x8 y20 z0.3 f5000.0 ; move over to prevent blob squish
thingiverse
free

Sovol SV01 BMG-Extruder E3D-V6-Hotend Bauteillüfter by schloti
...bmg-extruder e3d-v6-hotend bauteillüfter by schloti
thingiverse
bauteillüfter für sovol sv01 mit bmg-extruder und e3d v6 hotend.
Ixactual
thingiverse
free

blink camera mount mix n match by ixactual
...blink camera mount mix n match by ixactual
thingiverse
thingiverse
free

SV01 BMG fan duct by ixactual
...to print and less likely to warp with use
oriented for best printing. add tree supports and use heat resistant materials to print
thingiverse
free

SV01 electronics cooling fan duct for enclosure by ixactual
...h fan of your choice. drill the holes and use screws. print with wide end facing down, at least 30% infill. no supports required.
Sv01
design_connected
$16
Svarga SV01 Carpet
...svarga sv01 carpet
designconnected
mischioff svarga sv01 carpet computer generated 3d model.
thingiverse
free

Sovol SV01 Rail Cover
...sovol sv01 rail cover
thingiverse
this is a rail cover for the sovol sv01 printer
thingiverse
free
Sovol SV01 BLTouch Mount
...sovol sv01 bltouch mount
thingiverse
bltouch mount for sovol sv01, nozzle offset of -33, -11.
thingiverse
free

Sovol SV01 Logitech C270 Mount
...sovol sv01 logitech c270 mount
thingiverse
camera mount for sovol sv01
thingiverse
free

Sovol SV01 Rail Cover by Flamingbrad
...sovol sv01 rail cover by flamingbrad
thingiverse
added sovol logo for sv01 users
thingiverse
free
Zugentlastung Kabelführung Sovol SV01 by pcmaik
...zugentlastung kabelführung sovol sv01 by pcmaik
thingiverse
kabelführung für den sovol sv01
thingiverse
free
Sovol SV01 BLT base by Sir_Stig
...sovol sv01 blt base by sir_stig
thingiverse
just a remix for a sovol sv01 baseplate.
thingiverse
free
Braket for Laser Module SV01 by Sovol
...ducts/laser-kits
sovol sv01: https://sovol3d.com/products/sv01-direct-drive-printer
sovol sv03: https://sovol3d.com/products/sv03
thingiverse
free

SV01 Damper Foot (Fully Printable)
...sv01 damper foot (fully printable)
thingiverse
a nice and easy fully printable damper foot for the sv01
made with pla and tpu
thingiverse
free
X-Axis template for Sovol SV01 by piervania
...x-axis template for sovol sv01 by piervania
thingiverse
x-axis template for sovol sv01
Fw
turbosquid
$12

FW-189
... available on turbo squid, the world's leading provider of digital 3d models for visualization, films, television, and games.
3d_export
$17

Focke Wulf Fw 190
...focke wulf fw 190
3dexport
focke wulf fw 190
design_connected
$18

Sandur Club fw
...nnected
photo-realistic 3d models of the sandur club fw chair from oasiq for 3d architectural and interior design presentations.
design_connected
$18

Sandur fw, sbw
...cted
photo-realistic 3d models of the sandur fw, sbw armchair from oasiq for 3d architectural and interior design presentations.
turbosquid
free

FOCKE WULF FW-190 III Gruppe-JG2 FW-190
... available on turbo squid, the world's leading provider of digital 3d models for visualization, films, television, and games.
turbosquid
$20

InOut-881-FW
... available on turbo squid, the world's leading provider of digital 3d models for visualization, films, television, and games.
3d_ocean
$15

Focke-Wulf Fw 190
...fw fw190 jet plane soar transport wulf
low polygon and very well detailed focke-wulf fw 190. check out my profile for more items!
3d_export
$20

Focke Wulf Fw 190 3D Model
... fw190 aircraft jet attacker fighter bomber transport air bombrun plane soar
focke wulf fw 190 3d model heartbreak 59223 3dexport
turbosquid
$79

Focke-Wulf Fw 190
... available on turbo squid, the world's leading provider of digital 3d models for visualization, films, television, and games.
cg_studio
$15

Focke-Wulf Fw 1903d model
...cgstudio
.3ds .max .fbx .dxf .obj - focke-wulf fw 190 3d model, royalty free license available, instant download after purchase.
Bmg
turbosquid
$3

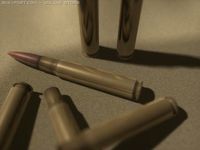
.50 BMG
... available on turbo squid, the world's leading provider of digital 3d models for visualization, films, television, and games.
turbosquid
$2

.50 BMG
... available on turbo squid, the world's leading provider of digital 3d models for visualization, films, television, and games.
turbosquid
$25

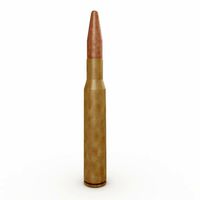
50 BMG Cartridge
...e 3d model 50 bmg cartridge for download as 3ds, max, and obj on turbosquid: 3d models for games, architecture, videos. (1303035)
turbosquid
$30

Sniper 50 bmg
... available on turbo squid, the world's leading provider of digital 3d models for visualization, films, television, and games.
turbosquid
free

Cal 50 BMG
... available on turbo squid, the world's leading provider of digital 3d models for visualization, films, television, and games.
cg_studio
$25
.50 BMG Cartridge3d model
...odel
cgstudio
.3ds .max .obj .wrl - .50 bmg cartridge 3d model, royalty free license available, instant download after purchase.
3d_export
$5
50 caliber BMG round 3D Model
...d 3d model
3dexport
50cal caliber 50 round bullet bmg cartridge browning rifle
50 caliber bmg round 3d model csw92 27660 3dexport
3d_export
$22

.50 BMG Cartridge 3D Model
...ectile rifle round pistol cartridge m2 hb 127x99mm nato browning barrett m82a1
.50 bmg cartridge 3d model plutonius 8091 3dexport
turbosquid
free
LAR Grizzly .50 BMG Sniper
... available on turbo squid, the world's leading provider of digital 3d models for visualization, films, television, and games.
3d_export
$8
cartrige m50 bmg
...aterials are logically named<br>the main format is in 3ds max 2009.<br>satisfcation garranteed..<br>thank you !
Upgrade
turbosquid
$15

Upgraded Glock
...e 3d model upgraded glock for download as obj, fbx, and blend on turbosquid: 3d models for games, architecture, videos. (1185950)
3ddd
$1

Calligaris / UPGRADE
...calligaris / upgrade
3ddd
calligaris
c материалом
3d_export
free

cz upgrade
...cz upgrade
3dexport
https://www.buymeacoffee.com/mestrezen3d https://linktr.ee/mestrezen3
turbosquid
$80

Custer Tank upgrade
... available on turbo squid, the world's leading provider of digital 3d models for visualization, films, television, and games.
turbosquid
$39

Domestos 1 upgrade
... available on turbo squid, the world's leading provider of digital 3d models for visualization, films, television, and games.
3d_export
$10

Upgraded tea cup
...upgraded tea cup
3dexport
a cup with an unusual design and a unique shape for a more enjoyable tea experience
3d_export
$8

dixy outlander classic style upgraded poplar wood lounge chair
...utlander classic style upgraded poplar wood lounge chair
3dexport
dixy outlander classic style upgraded poplar wood lounge chair
turbosquid
free

AK-12 + Upgrades low-poly 3D model
...ow-poly 3d model for download as fbx, blend, and unitypackage on turbosquid: 3d models for games, architecture, videos. (1501145)
evermotion
$700

Upgrade from V-ray 1.5 to 3.5 for 3ds max
...here is no need to purchase a new dongle - your current dongles will be reprogrammed to carry v-ray 3. evermotion 3d models shop.
evermotion
$300

Upgrade from V-Ray 2.0 to V-ray 3.5 for 3ds Max
... interface (gui) for editing settings on one machine and one render node for rendering on one machine. evermotion 3d models shop.
Kit
turbosquid
$3

Bathroom Kit Baño kit
... available on turbo squid, the world's leading provider of digital 3d models for visualization, films, television, and games.
turbosquid
$19

Kit
... available on turbo squid, the world's leading provider of digital 3d models for visualization, films, television, and games.
3d_export
$20

Drift Kit
...drift kit
3dexport
turbosquid
$40

BitCoin Kit
...urbosquid
royalty free 3d model bitcoin kit for download as on turbosquid: 3d models for games, architecture, videos. (1519068)
turbosquid
$9

Industrial kit
...osquid
royalty free 3d model industrial kit for download as on turbosquid: 3d models for games, architecture, videos. (1144117)
turbosquid
$6

Kit Vases
...
turbosquid
royalty free 3d model kit vases for download as on turbosquid: 3d models for games, architecture, videos. (1285114)
turbosquid
free

Survival Kit
...rbosquid
royalty free 3d model survival kit for download as on turbosquid: 3d models for games, architecture, videos. (1637721)
turbosquid
$50

Ninja Kit
...rbosquid
royalty free 3d model ninja kit for download as fbx on turbosquid: 3d models for games, architecture, videos. (1672364)
turbosquid
$35

Brushes Kit
...osquid
royalty free 3d model brushes kit for download as max on turbosquid: 3d models for games, architecture, videos. (1216721)
turbosquid
$19
Medical kit
...osquid
royalty free 3d model medical kit for download as fbx on turbosquid: 3d models for games, architecture, videos. (1486089)
Complete
turbosquid
$35
complete plan
...quid
royalty free 3d model complete plan for download as max on turbosquid: 3d models for games, architecture, videos. (1221693)
turbosquid
$10
COMPLETE WASHROOM
...
royalty free 3d model complete washroom for download as max on turbosquid: 3d models for games, architecture, videos. (1413853)
turbosquid
$1

Complete Office
...id
royalty free 3d model complete office for download as max on turbosquid: 3d models for games, architecture, videos. (1323641)
vizpark
$509

VP COMPLETE
...e is the ultimate collection of 3d archviz assets, including 900 3d models, 50 hdris, 100 tileable textures and pattern software.
turbosquid
$15
excercise complete
... available on turbo squid, the world's leading provider of digital 3d models for visualization, films, television, and games.
turbosquid
$1
complete cabinet
... available on turbo squid, the world's leading provider of digital 3d models for visualization, films, television, and games.
turbosquid
free

complete Desk.lwo
... available on turbo squid, the world's leading provider of digital 3d models for visualization, films, television, and games.
3d_export
$5
Complete Wall Pack
...complete wall pack
3dexport
a complete set of 14 walls
3d_ocean
$12

Complete Model
... any other purpose. model includes, tree, street light, bench with urn, horse model. total poly and verts are 282,036 and 334,...
turbosquid
$80

sasuke complete susanoo
...oyalty free 3d model sasuke complete susanoo for download as on turbosquid: 3d models for games, architecture, videos. (1693376)
Included
turbosquid
$1

donut with display included
...free 3d model donut with display included for download as fbx on turbosquid: 3d models for games, architecture, videos. (1170714)
turbosquid
$25

Weapon - AWM - Included Highres
...ree 3d model weapon - awm - included highres for download as on turbosquid: 3d models for games, architecture, videos. (1533255)
turbosquid
$25

Weapon - M24 - Included Highres
...e 3d model weapon - m24 - included highres for download as ma on turbosquid: 3d models for games, architecture, videos. (1533263)
turbosquid
$39

man's shit (mannequin not included)
... available on turbo squid, the world's leading provider of digital 3d models for visualization, films, television, and games.
3d_export
free

the set includes a table and chair
...mless textures. table length 1.8 m width 0.8m height 0.55 m chair length 0.9m width 0.9m height 0.50m these objects are my ideas.
3d_ocean
$5

Coffee cups (scene included)
...ready to render (includes detailed,textured 2 coffee cups, lighting / texturing setup, render settings and post production -ea...
3d_export
$6

stylized - tutorial included
... just drop model into your scene and start rendering. no special plugin needed to open scene.<br>textures formats: png (2k)
turbosquid
$65

Tank T-72 (LODs Included)
...free 3d model tank t-72 (lods included) for download as blend on turbosquid: 3d models for games, architecture, videos. (1299434)
turbosquid
$19

The Studley Collection Desk Including Organizer
...on desk including organizer for download as max, obj, and fbx on turbosquid: 3d models for games, architecture, videos. (1153978)
turbosquid
$15

Design Elements including Golden Rooster
... available on turbo squid, the world's leading provider of digital 3d models for visualization, films, television, and games.