Thingiverse
Super PiBoy 64 Retropie by Maxgayet
by Thingiverse
Last crawled date: 3 years ago
[EDIT] Take V3 versions of models on the download section instead of V2, some correction have been applied.
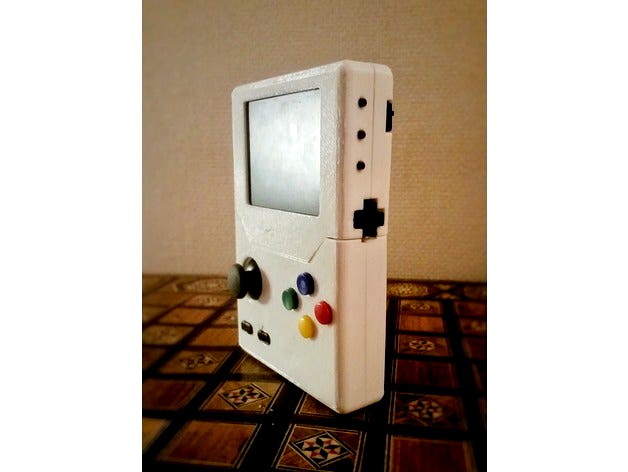
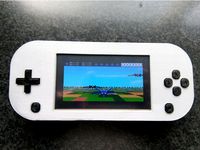
Welcome on the Super Game Pi 64 !
Inspired by the excellent adafruit, thanks to Carasibana and his projet Super Game PiSP for the Start/Select buttons.
Hi guys, I spent hours on this game console. On the design first, to make it as small as possible (while keeping performance) and on the mapping buttons for some emulators that didn't work great on the original project found on adafruit. I named it "Super Game Pi 64" because I started with the adafruit super game Pi project and I made a lot of changes to upgrade the game console and make the N64 works with GPIO buttons :)
The specs :
Size : 105.5x155x30mm
Time playing : up to 5-6 hours tested with full charged battery.
Time charging battery from empty : loonng time. Around 10-11h.
How many usable buttons : 14 + joystick. There is 2 on the back, 5 on the cross with the clic, 1 on the joystick (clic also) 6 on the front.
USB gamepad : Allowed yes ! Up to 4 (I tried with 2). So great to play in multiplayer mode on TV screen HDMI with multiple gamepad !
Multiplayer : So yes works great with USB gamepad. Should work on all emulators, I tried Snes, megadrive and N64.
Screen : small and cheap screen. But really enough for retrogaming. I had a better screen on the previous version, but it used to work on the HDMI plug (see the adafruit project)... And I really prefered design a game console with a smaller screen that is really enough good to works on standalone mode, and having the HDMI plug available to play on TV. The screen is plugged in composite mode.
Screen settings : yes : brightness, contrast, saturation, tint, language. The 3 small buttons on the side do it.
External HDMI : hell yeaahh ! Just switch off, plug the HDMI, switch on and enjoy !
Sound : no internal sound. Jack plug available. There still room up to the battery to fit some but I've tried on the previous version and I had a lot of noise even if I tuned off the sound in Retropie. So I decided to cut off internal sound.
Saving/load states : yes for all. I map a specific button to it. For all emulator but N64 and NDS : Select+Save/load state button. For N64 and NDS : just press Save/load state button.
Emulators :
I tested some of them (actually the consoles I had when I was a child), all are working really great (nes, gameboy advance, supernes, megadrive, and more...). And specially :
N64 : wooorrkkinnngg so great ! That was the biggest problem : games where launching but didn't work on standalone game console (just with USB gamepad). So I spent a lot of time on modifying files and I also add and map the little cross button on the side so you can use C button of the N64 gamepad with it. Works great.
NDS : works great ! Mapping button was made indide the emulator settings with the game console plugged in HDMI.
Playstation : Works great, that is crasy ! Use the cross button on the side to map L2 / R2.
Dreamcast : working but not with GPIO buttons. See "Regrets" section.
Why not smaller version :
I didn't make this game console for people to watch it, but to play it. So 3 reasons to the size, because I have 3 things that take a lot of place inside the game console.
Raspberry pi 3B : you can make a retropie game console with a raspberry pi Zero (cheaper, smaller). BUT you won't have enough power to run n64, playstation, psp and dreamcast. AND it doesn't have double video connection : composite and HDMI. So I choose RPI3B
Battery : you can use a smaller battery like the 2500maH. But I really wanted to have a loonngg time on the go with it. 5-6 hours is great I think.
Joystick : this part is pretty big inside and work with a cupcade. So I could use the same joystick I used for the ilttle cross button on the side and save a lot of place inside. BUT the little one is not really playable as a real D-Pad for long terme. And the joystick Adafruit use on their original project is really pleasant to play. So I manage to keep it.
Why use SNES button but not tacticle :
On the previous version I used tacticle switches for the colored buttons as you can see in the Super game PiSP, and I actually tried smallers one. This is really not playable for long term : too much sound with the "clic", each time you use it. Imagine play a submarine level of Mario64 where you need to swim. People around you will be angry very fast with that noise, belive me that is
unbearable !
By the way, there is not enough room for tacticle switches :)
See instructions for some explainations .
Thanks for reading !
https://youtu.be/EUXoH-DOapohttps://youtu.be/Z_TxG3q0bKQhttps://youtu.be/HQCEqEDNaUU
Similar models
thingiverse
free

Super Game Pi by adafruit
...ro for adafruit industries.
creative commons 2.5, attribution share-alike.
all text above must be included in any redistribution.
cults
free
Arcade Bonnet Controller for RetroPie
... also dedicated pins for wiring up an analog joystick and an 8-way switch joystick.
https://www.youtube.com/watch?v=ndnbltzojcg
thingiverse
free

JoypadOS / gamepad / joystick by grid
...#39;s 12x12mm square buttons and wingoneer ps2 joystick controller plus arduino leonardo clone ( pro micro ) and joystick library
thingiverse
free

GamePi - A retropie based portable emulator by Robolab
... a circuit board the next thing i will make and share.
hope you enjoy it, if anyone has suggestions, pleas send me a message ;)
3dwarehouse
free

retropie joystick
...retropie joystick
3dwarehouse
joystick and emulator combo
3dwarehouse
free

retropie joystick
...retropie joystick
3dwarehouse
joystick and emulator combo
thingiverse
free

PowerMinty 1.2 - OrangePi Zero Handheld Retro Game Console by ksaweryn
...custom pcbs, but i recommend using this one or similar for a display.. project is not recommended for beginners....
thingiverse
free

PieBoy Handheld Retro Game Console by melawis501
...he usb pad on rasp-pi. all internally connected. it works just great but future plan will use analog stick for more easy control.
thingiverse
free

BLE Gamepad by doomsdaywombats
...r a serial port based gamepad system. but i'm trying to be hip and use this whole new "publish/subscribe" system...
cg_trader
$5

Arcade Joystick Console | 3D
...s for the m.a.m.e. or for the retropie/raspberry
compatibile with eg starts arcade kit (with led buttons) on amazon or aliexpress
Maxgayet
thingiverse
free

Nikon Keymission - Lens Caps by Maxgayet
...nikon keymission - lens caps by maxgayet
thingiverse
lens caps for nikon keymission 360.
thingiverse
free

Nikon Keymission Gopro mount by Maxgayet
... maxgayet
thingiverse
gopro mount for nikon keymission.
print with support, this side to get a stronger gopro mount with layers.
thingiverse
free

Key help propellers replacement Cobra 2204 by Maxgayet
...key help propellers replacement cobra 2204 by maxgayet
thingiverse
all is in the title.
hope you enjoy
thingiverse
free

Gopro tripod screw mount by Maxgayet
... maxgayet
thingiverse
gopro clip to universal tripod screw.
you can mount samsung gear 360 on gopro 3m accessories for example.
thingiverse
free

QX90 canopy flat mode by Maxgayet
...ayet
thingiverse
canopy for the qx90, flat mode (camera on front, vtx on back).
fixed by m2 screw on qx90 frame
hope you like it
thingiverse
free

Spironet cover antenna for 30mm and 33mm by Maxgayet
...verse
good cover for spironet antenna with clips on bottom. easy to install, no supports no raft.
30mm is made with rislan slot.
thingiverse
free

Bullnose 3x3 for Atom RX122 with scissors by Maxgayet
...ay to create your own bullnose 3x3 props with scissors. print the file, and plug the top of the motor dys 1104, see the pictures.
thingiverse
free

Sony Xperia XZ1 - Double External Microphone Plug by Maxgayet
... double external microphone with this module on your sony xperia xz1.
don't know if it works on other devices.
hope you enjoy
thingiverse
free

Case (box) for QX90 - two height available by Maxgayet
....
two caps :
flat mode (vtx on the back and camera on front)
high mode (camera + vtx on top).
printed in pla.
hope you like it !
thingiverse
free

Sun cover for Canon 7D / 5D with Sliding Quick Release Plate Manfrotto by Maxgayet
...dslr with quick release sun cover and quick release bottom plate.
i didn't have black pla to print this but would be better !
Piboy
thingiverse
free

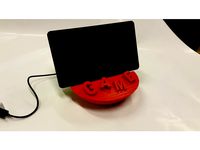
Stand for PiBoy Advance by Treespirit
... piboy when you plug in the hdmi cable.
also nice for display.
compatible with the original diy raspberry pi gameboy by adafruit.
thingiverse
free
Piboy dmg protective cover by Diablo944
...piboy dmg protective cover by diablo944
thingiverse
protective cover for experimental pi piboy dmg.
thingiverse
free

PiBoy DMG styled storage box/container by Diablo944
...piboy dmg styled storage box/container by diablo944
thingiverse
piboy styled storage container
thingiverse
free

Experimental pi piboy Controller accessory by Diablo944
...ntroller accessory by diablo944
thingiverse
experimental pi piboy controller addon. read the notes for frame difference details.
thingiverse
free
PiBoy Dmg Buttons & Trigger by rkwallace
...verse
i edited the stl for the piboy dmg buttons and triggers to add letters. i also extended the triggers to include a button.
thingiverse
free

Experimental pi Piboy cover by Diablo944
.../sleeve for the experimental pi piboy. not designed for throwing in a bag and carrying around, more a keep it safe at home thing.
thingiverse
free

Case for PiBoy Micro by jit06
...ore on my blog post: http://www.bluemind.org/piboy-micro-raspberry-pi-based-mini-portable-retrogaming
i print it with 100% infill
thingiverse
free

PiBoy Case, cut to fit Trinus by ingmaniac
...us.
works well with pla facing up with supports and rft to fight warping.
was a pain to get it going, but now it works very well.
thingiverse
free

PiBoy Advance by Treespirit
...rry pi gameboy by adafruit.
added:
speaker
amplifier
volume control
mute switch
two shoulder buttons
two extra buttons
esc button
thingiverse
free

Experimental Pi Piboy DMG stand by Diablo944
...of the piboy tipping to the right when placed off centre. it wouldn't fall over, it just wouldn't look right at an angle.
Retropie
thingiverse
free

RetroPi Logo by AwesomeA
...retropi logo by awesomea
thingiverse
retropi logo
thingiverse
free

My RetroPie
...my retropie
thingiverse
this is a test.
thingiverse
free

RetroPie Box by StreetMaker
... cabinet? its got to be portable! and better cost less than $50.
well here is my version of an all inclusive box for the retropie
thingiverse
free
RetroPie Handheld by Cees_Meijer
... 3 a+ running retropie.
check the details and build instruction on hackaday:
https://hackaday.io/project/176661-retropie-handheld
thingiverse
free
Retropie Game Station 2 by paulvanviegen
...rse
with this design you can make a retropie game station. you need a raspberry pi with retropie installed and an 7 inch screen.
thingiverse
free

Retropie Game Station by paulvanviegen
...led and an 7 inch screen. the controllers can be stored on the front of the station. a speaker could be placed inside the sftion.
thingiverse
free

RetroPi TV front panel by BC_Jeffro
... bc_jeffro
thingiverse
front cover for retropi tv
by joo, that was published feb 4, 2015https://www.thingiverse.com/thing:666802
thingiverse
free

Retropie Gaming Station by Snille
...l to come together... this is just the 3d-printable box. :)
you can make the box your own, download and edit the sketchup file.
thingiverse
free

Retropie Arcade Stick by gerk20
... printer!
buttons and joystick - https://www.amazon.com/gp/product/b01m2x88qp/ref=ppx_yo_dt_b_search_asin_title?ie=utf8&psc=1
thingiverse
free

Retropie drinkcoaster
... (100 by 100 by 5 mm), to fit in my coasterholder:
https://www.thingiverse.com/thing:3130397
made with love by:
raimon of idealab
64
3d_ocean
$15
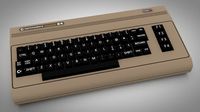
Commodore 64
...bm 64 or vic-64, is an 8-bit home computer introduced in january 1982 by commodore international. it is listed in the guinness...
3ddd
$1

Pillows 64
...pillows 64
3ddd
подушка
pillows 64. i hope you like it!.thank you!
design_connected
$16

S 64
...s 64
designconnected
thonet s 64 computer generated 3d model. designed by breuer, marcel.
turbosquid
$6

Bedcloth 64
...osquid
royalty free 3d model bedcloth 64 for download as max on turbosquid: 3d models for games, architecture, videos. (1522724)
turbosquid
$15

Chair 64
...alty free 3d model chair 64 for download as max, obj, and fbx on turbosquid: 3d models for games, architecture, videos. (1497576)
turbosquid
$15

Curtain 64
...ty free 3d model curtain 64 for download as max, obj, and fbx on turbosquid: 3d models for games, architecture, videos. (1414439)
turbosquid
$10

Table 64
...alty free 3d model table 64 for download as max, obj, and fbx on turbosquid: 3d models for games, architecture, videos. (1503890)
turbosquid
$6

Lamp 64
...yalty free 3d model lamp 64 for download as max, obj, and fbx on turbosquid: 3d models for games, architecture, videos. (1500790)
turbosquid
$20

Bath 64
... free 3d model bath 64 for download as max, dxf, fbx, and dwg on turbosquid: 3d models for games, architecture, videos. (1277100)
turbosquid
$199

Commodore 64
... available on turbo squid, the world's leading provider of digital 3d models for visualization, films, television, and games.
Super
3ddd
free

super impossible
...super impossible
3ddd
kartell , super impossible
cтул super impossible фирмы kartell
3d_ocean
$19

Super market
...ean
chain shop large super market 3d model low poly market low poly super market shop super market
low poly model of supermarket.
3d_export
$15
super mario
...r mario.<br>superstar, super mario superhero.<br>сheerful and courageous.<br>new exciting adventures await him.
3d_ocean
$30
Super Hero
...hero mask ninja super hero sword zbrush
super hero created in zbrush 4.0 hero body—6 division levels 1.668 poly to 1.705mil poly.
3d_export
$25

super promotion
...super promotion
3dexport
3d_export
$5
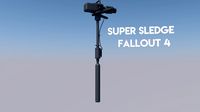
super sledge
...super sledge
3dexport
...
3ddd
$1
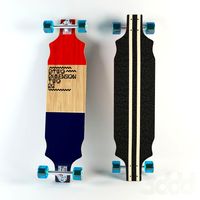
Longboard Super Sonic
...longboard super sonic
3ddd
лонгборд
longboard super sonic
turbosquid
$60
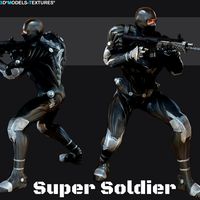
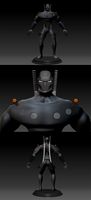
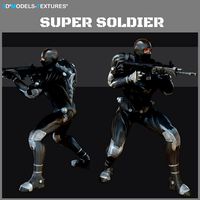
Super Soldier
...quid
royalty free 3d model super soldier for download as fbx on turbosquid: 3d models for games, architecture, videos. (1211725)
turbosquid
$60
Super Soldier
...quid
royalty free 3d model super soldier for download as fbx on turbosquid: 3d models for games, architecture, videos. (1207493)
turbosquid
$55
Super Hero
...squid
royalty free 3d model super hero for download as blend on turbosquid: 3d models for games, architecture, videos. (1387035)