Thingiverse

Sunhokey X-carriage replacement for chinese E3D V5 clone mount by good_idea
by Thingiverse
Last crawled date: 3 years ago
(stl-files uploaded, more clear pictures to come)
=== IDEA ===
Compact X-carriage with following features:
1/ Uses E3D V5 heat sink which comes with chinese Prusa Sunhokey acrylic printer.
2/ Compact, allows to print on 200x200 mm print area.
3/ Uses 40x40 mm fan with nozzle for heat sink cooling.
4/ Uses 50x50 mm centrifugal fan for print cooling.
5/ Uses 18 mm capacitive proximity sensor for auto bed leveling.
6/ Uses LEDs to light the print to see the quality underway.
7/ Uses bearing blocks to avoid play and rods scratches.
8/ Nothing is mounted on the front what allows to observe the printing nozzle.
9/ All parts should be printed without support or bridges.
10/ The heat sink with hotend is lifted up to allow printing up to 200 mm tall prints.
=== FUNNY STUFF ===
I have started this work about 18 months ago. And only close to the end I have occasionally come across this thing http://www.thingiverse.com/thing:1852785
Joshua uses almost identical design but for E3D V6 hotend. The only real difference in idea is that I have lifted up the hotend to win several millimeters of print height. This coincidence very nice illustrates the well known principle of TRIZ: there is a typical path of engineered systems development. Funny!
=== BEARING BLOCKS ===http://www.thingiverse.com/thing:1424346
=== TIPS ON PRINTING ====
If you do not have a print cooling fan the only thing which is not very easy to print is tube for 50*50 mm fan. Put it upright. No supports are needed. Prepare any computer cooling fan, hold it in your hand and direct to print when the very tip of the tube will be printed. Do not hold it too close to the print because the airflow may deform the tip of the tube. If the tip is not very accurate (like it happened in my case) do the following: put hot water in a glass (about 80-90C) and hold the deformated part in water for several seconds. It will become soft. Than you can shape it by hand. Works nice.
=== LIST OF MATERIALS ===
1/ To attach four bearing blocks to vertical wall:
bolts M4x12 - 6 pcs
botls M4x10 - 2 pcs
2/ For timing belt hook (frame):
bolts M4x20 - 2 pcs
3/ For 40x40 mm fan nozzle:
bolts M3x16 - 4 pcs
bolts M3x25 - 2 pcs
nuts M3 - 4 pcs
4/ For capacitive sensor holder:
bolts M3x12 - 2 pcs
bolt M3x10 - 1 pc
nut M3 - 1 pc
5/ For 50x50 mm centrifugal fan:
bolts M3x25 - 2 pcs
nuts M2 - 2 pcs
6/ For heat sink holder:
bolts M4x16 2 pcs
7/ For print cooling tube:
bolts M3x10 - 2 pcs
nuts M3 - 2 pcs
I might have missed a couple of M3 bolts. Forgive me.
Similar models
thingiverse
free

Chinese E3D clone fan with integrated layer fan for Prusa Sunhokey by Choro
...ure)
if you have any question, ask :) (this is my first thing uploaded here)
update !
ver. 2
improved mount and a little lighter.
thingiverse
free

Hot End Enclosure, for Reach3D Printer by Ashaman
...ttp://www.thingiverse.com/thing:2252109
credit:
beta testing and e3d v6 + blt pictures: http://www.thingiverse.com/grogo666/about
thingiverse
free

Sunhokey Fan Adapter for Filament cooling 60mm Fan by theTeV
...sunhokey fan adapter for filament cooling 60mm fan by thetev
thingiverse
for e3d hotend on an sunhokey
thingiverse
free

Sapphire PRO Mosquito Hotend mount by Mr_Helpmann
...bs. it probably works just as well with petg.
no supports needed.
i will continue to make and publish improvements to the design.
thingiverse
free

E3D V6 3010 Single Fan Cooler and Dust by OverEngineeredByDefault
...rrow dust.
it's a part of the modular a carriage system for the anet a2 3d printer.https://www.thingiverse.com/thing:3133092
thingiverse
free

E3D J-Head V6 Simple Hotend Mount for Anet ET4 ET4+ ET4 Pro ET4X by gruch4
...urbine with 4x m3 bolts, 4x m3 inserts and printed duct (note that duct is designed for e3d volcano and it needs lots of updates)
thingiverse
free

Tevo / 2020 / 2040 E3D V6 X-Carriage + Hot End Assembly
...bottom of the heat sink. adding a 90 degree fan bracket as mine was interfering with some lights i have at the top of the frame.
thingiverse
free

Mounting the E3D v6 on a Mendel90 (bowden version) by RalphHilton
...the print cooling fan is printed in 2 parts which clip together and can be glued after the 4 m3 nuts are placed in their holders.
thingiverse
free

Folger Tech FT 5 and Metal J-Head Hotend and BL Touch by Morgan_50
...bed in the manual for bl touch. and approximately 1.8 mm over the nozzle.
i have attached pdf with dimensions of the hotend i use
thingiverse
free

Kossel Pro - improved cooling - 40x40 axial fan by j3stef
...work for any printer with the specified hotend or similar ones. this version works with 40x40 mm axial fans...
Sunhokey
thingiverse
free

unique fan sunhokey by Dateless
...unique fan sunhokey by dateless
thingiverse
sistema per sunhokey ad unica ventola
thingiverse
free

Kit Prusa i3 Sunhokey by jj25000
...kit prusa i3 sunhokey by jj25000
thingiverse
sunhokey 2015
thingiverse
free

Sunhokey Z Axis support by bbeavis
...sunhokey z axis support by bbeavis
thingiverse
sunhokey z axis support
thingiverse
free

Sunhokey Spool Holder stabilizer by theTeV
...sunhokey spool holder stabilizer by thetev
thingiverse
sunhokey spool holder stabilizer
thingiverse
free

Sunhokey speed test file by JasperHope
...sunhokey speed test file by jasperhope
thingiverse
sunhokey facebook test thing
thingiverse
free

Sunhokey Enclosure (Ultihokey) by 3DesignPrint
...ss, you can discuss with us the design and modifications.
http://www.thingiverse.com/groups/sunhokey-3d-printer-owners/topic:4715
thingiverse
free

Prusa i3 Sunhokey bowden by NGR923
...prusa i3 sunhokey bowden by ngr923
thingiverse
hotend mount for prusa i3 sunhokey
thingiverse
free

Prusa i3 Sunhokey by bastago
...prusa i3 sunhokey by bastago
thingiverse
diseño stl de las piezas originales de la impresora prusa i3 sunhokey
thingiverse
free

Sunhokey Prusa I3 clamp by hacxx101
...sunhokey prusa i3 clamp by hacxx101
thingiverse
clamp designed for holding down the sunhokey prusa i3.
thingiverse
free

Sunhokey prusa I3 lcd stand by Zues007
...sunhokey prusa i3 lcd stand by zues007
thingiverse
sunhokey prusa i3 lcd stand
V5
turbosquid
$20

Door v5
...yalty free 3d model door v5 for download as max, max, and obj on turbosquid: 3d models for games, architecture, videos. (1523141)
turbosquid
$9

Silencer V5
...3d model silencer v5 for download as blend, obj, dae, and fbx on turbosquid: 3d models for games, architecture, videos. (1711483)
turbosquid
$6

surfboard V5
...e 3d model surfboard v5 for download as ma, max, obj, and fbx on turbosquid: 3d models for games, architecture, videos. (1168657)
turbosquid
$26
Apples-v5
... available on turbo squid, the world's leading provider of digital 3d models for visualization, films, television, and games.
turbosquid
$22

ChairS981-v5
... available on turbo squid, the world's leading provider of digital 3d models for visualization, films, television, and games.
3d_export
$8

Bunker Light v5
...bunker light v5
3dexport
turbosquid
$19

Fence with Ivy v5
...odel fence with ivy v5 for download as max, max, obj, and fbx on turbosquid: 3d models for games, architecture, videos. (1640139)
turbosquid
$15
Building office v5
...del building office v5 for download as max, obj, fbx, and stl on turbosquid: 3d models for games, architecture, videos. (1338336)
turbosquid
$10

Steak on the Wood V5
...l steak on the wood v5 for download as 3ds, max, obj, and fbx on turbosquid: 3d models for games, architecture, videos. (1199326)
turbosquid
$9
Car v5 concept
...model car v5 concept for download as blend, fbx, obj, and stl on turbosquid: 3d models for games, architecture, videos. (1633222)
E3D
turbosquid
$23

E3D - Google Home
... 3d model e3d - google home for download as max, obj, and c4d on turbosquid: 3d models for games, architecture, videos. (1192509)
cg_studio
free

e3d model
...e3d model
cgstudio
- e 3d model, royalty free license available, instant download after purchase.
turbosquid
$2

Syringe C4D (E3D Ready)
...lty free 3d model syringe c4d (e3d ready) for download as c4d on turbosquid: 3d models for games, architecture, videos. (1336720)
turbosquid
$12

Microphone USB E3D and C4D
...ree 3d model microphone usb e3d & c4d for download as c4d on turbosquid: 3d models for games, architecture, videos. (1568216)
turbosquid
$29

E3D - OnePlus 6 Black
...model e3d - oneplus 6 black for download as max, obj, and c4d on turbosquid: 3d models for games, architecture, videos. (1358534)
turbosquid
$29

E3D - Motorola One 2018
...del e3d - motorola one 2018 for download as max, obj, and c4d on turbosquid: 3d models for games, architecture, videos. (1358533)
turbosquid
$29

E3D - Disney MagicBands 2
...l e3d - disney magicbands 2 for download as max, obj, and c4d on turbosquid: 3d models for games, architecture, videos. (1355515)
turbosquid
$29

E3D - Samsung Z4 Smartphone
...e3d - samsung z4 smartphone for download as max, obj, and c4d on turbosquid: 3d models for games, architecture, videos. (1182179)
turbosquid
$23

E3D - Razer Phone model
...del e3d - razer phone model for download as max, obj, and c4d on turbosquid: 3d models for games, architecture, videos. (1231207)
turbosquid
$23

E3D - Alcatel Idol 5
... model e3d - alcatel idol 5 for download as max, obj, and c4d on turbosquid: 3d models for games, architecture, videos. (1212799)
Carriage
archibase_planet
free

Carriage
...arriage
archibase planet
perambulator baby carriage pram
carriage n250908 - 3d model (*.gsm+*.3ds) for interior 3d visualization.
3d_export
free

carriage
...carriage
3dexport
old fashion carriage model, more files here:
turbosquid
$140

Carriage
...urbosquid
royalty free 3d model carriage for download as max on turbosquid: 3d models for games, architecture, videos. (1482052)
turbosquid
$25

Carriage
...urbosquid
royalty free 3d model carriage for download as max on turbosquid: 3d models for games, architecture, videos. (1285944)
3d_export
free

carriage
...carriage
3dexport
game cart
3d_ocean
$15

Barrel Carriage
...ieval oak old transport wheels wine wood
this model contains a barrel and a carriage. it is a medieval type of wood oak carriage.
turbosquid
$40

Carriage
...ty free 3d model carriage for download as obj, fbx, and blend on turbosquid: 3d models for games, architecture, videos. (1290094)
turbosquid
free

Carriage
...yalty free 3d model carriage for download as ma, obj, and fbx on turbosquid: 3d models for games, architecture, videos. (1239157)
3d_export
$5

Medieval carriage
...medieval carriage
3dexport
medieval carriage in fairy style
turbosquid
$58

Carriage
...d model carriage with scene for download as max, obj, and fbx on turbosquid: 3d models for games, architecture, videos. (1276262)
Chinese
3ddd
$1

THE CHINESE CABINET
...the chinese cabinet
3ddd
комод
the chinese cabinet
3ddd
$1

chinese frame
...chinese frame
3ddd
птица , декор
chinese frame
3ddd
$1

Chinese sculpture
...chinese sculpture
3ddd
китай , статуэтка
chinese sculpture
3ddd
free

Chinese Dragon
...chinese dragon
3ddd
статуэтка , дракон
traditional chinese symbol
3d_ocean
$5

Chinese Lampion
...imlek’s (chinese day) decoration. included file .3ds, .fbx, .blend, obj, the object using bezier as the mesh of the lampion’s ...
3d_export
$5

chinese food
...chinese food
3dexport
chinese food are made on a blender made on video tutorials
3d_export
$6

chinese bowl
...chinese bowl
3dexport
it is chinese bowl to use in blender animation, lumion, catia v5
3ddd
$1

Chinese hardware
...chinese hardware
3ddd
фурнитура
a source of chinese hardware you can use for furniture projects
3d_export
$12

Chinese Siheyuan
...e: chinese siheyuan - gltf<br>- twenty one materials<br>- no textures<br>enjoy the product and leave a comment.
3ddd
$1

Chinese furnishings portfolio
... furnishings portfolio
3ddd
декор
decoration, combination , chinese, modern furnishings , furnishings , jewelry , chinese classic
Clone
3d_export
$5
Clones great republic
...clones great republic
3dexport
clones great republic.those same clones from the star wars movie universe.4 clones available.
3d_export
$10
Clone 3D Model
...clone 3d model
3dexport
clone woman girl female lady chamber sci fi
clone 3d model calcm1 51695 3dexport
turbosquid
$5

Clone machine
... available on turbo squid, the world's leading provider of digital 3d models for visualization, films, television, and games.
archive3d
free
Clone trooper 3D Model
...nd army soldier trooper
clone trooper 2 - 3d model (*.gsm+*.3ds) for interior 3d visualization.
turbosquid
free
Lego Clone Walker
...ree 3d model lego sw clone walker for download as max and fbx on turbosquid: 3d models for games, architecture, videos. (1292252)
turbosquid
$15
Clone trooper helmet
...d model clone trooper helmet for download as ma, obj, and fbx on turbosquid: 3d models for games, architecture, videos. (1199355)
archive3d
free

Clone trooper 3D Model
...and army soldier trooper
clonetrooper 3 - 3d model (*.gsm+*.3ds) for interior 3d visualization.
archive3d
free
Clone trooper 3D Model
...and army soldier trooper
clonetrooper 1 - 3d model (*.gsm+*.3ds) for interior 3d visualization.
3d_ocean
$35

Surface Clone C4D materials
...+ of the most well made materials for maxon’s cinema 4d; on the internet today. each material is crafted with a specific purpo...
turbosquid
$3

Sci-fi cloning vats
...cloning vats for download as 3ds, obj, wrl, x, fbx, and blend on turbosquid: 3d models for games, architecture, videos. (1290168)
Idea
3ddd
$1

IDEA GROUP
...idea group
3ddd
idea group
idea group, mistral comp
3ddd
free

idea group
...idea group
3ddd
idea
idea group laccato grigio viola lucido msp04
3ddd
$1

Doimo Idea SNAKE
...doimo idea snake
3ddd
комод , doimo idea
doimo idea snake
fbx and obj files
turbosquid
$69

lamp Idea
...rbosquid
royalty free 3d model lamp idea for download as max on turbosquid: 3d models for games, architecture, videos. (1487989)
3d_export
$5

Tv Shelf ideas
...tv shelf ideas
3dexport
tv shelf ideas
3ddd
$1

TREESSE IDEA
... idea
http://www.gruppotres.it/mobile/eng/box_doccia_idea.html
размеры: 82 x 90 x 216
turbosquid
free

Bad Idea
...model bad idea for download as blend, dae, fbx, gltf, and obj on turbosquid: 3d models for games, architecture, videos. (1584024)
turbosquid
$4

IDEA Icon
... available on turbo squid, the world's leading provider of digital 3d models for visualization, films, television, and games.
3ddd
$1

The Idea - Triptikh
...u/shop/mebel/mebel-dlya-doma/komody/interiernye-komody/26308-komod-triptikh
текстуры приложены, так же векторный файл.
3ddd
free
Novel Idea Caracole
...novel idea caracole
3ddd
novel idea , тумба
размеры 38w x 20d x 29.5h
Replacement
3d_export
$12

replaceable bristle
...replaceable bristle
3dexport
this is 3d printable replaceable bristle toothbrush.
3d_export
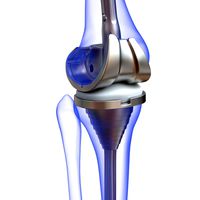
$34
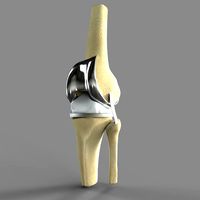
Knee Replacement
...h meets the lower leg. ... during a total knee replacement, the end of the femur bone is removed and replaced with a metal shell.
3d_export
$44
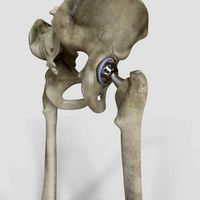
Hip Replacement
...omponents. the damaged femoral head is removed and replaced with a metal stem that is placed into the hollow center of the femur.
turbosquid
$59

Hip replacement
...el hip replacement for download as ma, c4d, lwo, lxo, and obj on turbosquid: 3d models for games, architecture, videos. (1520195)
turbosquid
$10

Module replacment station
...alty free 3d model module replacment station for download as on turbosquid: 3d models for games, architecture, videos. (1271271)
3d_export
$8
tool replacement gearbox
...tool replacement gearbox
3dexport
eccentric lifting mechanism, you can process according to available drawings.
turbosquid
$7

Globe Oil Atomizer Replacement Housing
... oil atomizer replacement housing for download as ige and stl on turbosquid: 3d models for games, architecture, videos. (1253839)
turbosquid
free

SLICE Ceramic Scapel (Replaceable Blade)
... (replaceable blade) for download as obj, fbx, blend, and dae on turbosquid: 3d models for games, architecture, videos. (1363525)
3d_export
$19
Knee Replacement Implant
...ntimeter<br>__________________________<br>poly count :<br>polygon count - 217440<br>vertex count - 108776
turbosquid
$19

(Project) Bad odor filtering sytem with support rail and pulley that assure a comfortable gel filter element replacement.
... available on turbo squid, the world's leading provider of digital 3d models for visualization, films, television, and games.
Good
3d_export
$15

The good
...inting. two versions, with base and without. there is separated stl with base for easier printing. also there is low poly version
turbosquid
$8

Goods
...quid
royalty free 3d model goods for download as obj and fbx on turbosquid: 3d models for games, architecture, videos. (1315005)
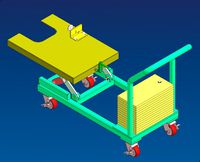
3d_export
$5

Goods cart
...goods cart
3dexport
goods cart is a traditional indonesian means of transportation
3d_export
$5

icons good
...icons good
3dexport
3d model icons perfect up good like yes
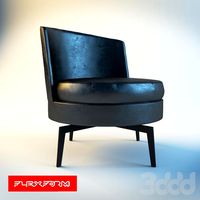
design_connected
$16

Feel Good
...nected
photo-realistic 3d models of the feel good barstool from flexform for 3d architectural and interior design presentations.
design_connected
$7

Good Morning
... morning
designconnected
ligne roset good morning coffee tables computer generated 3d model. designed by alban-sebastien gilles.
3ddd
$1
Flexform FEEL GOOD
...flexform feel good
3ddd
flexform , feel good
flexform feel good
turbosquid
$3

Marketplace Goods
...
royalty free 3d model marketplace goods for download as obj on turbosquid: 3d models for games, architecture, videos. (1193280)
3ddd
$1

feel good chair
...feel good chair
3ddd
flexform , feel good
feel good chair by flexform
3ddd
$1

диван FEEL GOOD
...иван feel good
3ddd
flexform , feel good
модель дивана feel good
производитель: flexform
Mount
3d_export
free

mounting bracket
...mounting plate is the portion of a hinge that attaches to the wood. mounting plates can be used indoors, cabinetry and furniture.
turbosquid
$2

MOUNTING
... available on turbo squid, the world's leading provider of digital 3d models for visualization, films, television, and games.
turbosquid
free

Mounts
... available on turbo squid, the world's leading provider of digital 3d models for visualization, films, television, and games.
turbosquid
free

Mount Fuji
...fuji
turbosquid
free 3d model mount fuji for download as obj on turbosquid: 3d models for games, architecture, videos. (1579977)
3d_export
$5

Headphone mount LR
...headphone mount lr
3dexport
headphone mount l+r
turbosquid
$39

Mount rainier
...quid
royalty free 3d model mount rainier for download as fbx on turbosquid: 3d models for games, architecture, videos. (1492586)
turbosquid
$5

pipe mounting
...quid
royalty free 3d model pipe mounting for download as obj on turbosquid: 3d models for games, architecture, videos. (1293744)
turbosquid
$3

Mounting Tires
...uid
royalty free 3d model mounting tires for download as fbx on turbosquid: 3d models for games, architecture, videos. (1708511)
3d_export
$5

Magnetic GoPro Mount
...pro mount
3dexport
cool magnetic mount for gopro. allows you to mount the camera on flat metal surfaces and get exclusive shots.
turbosquid
$5

Stone Mount
...ty free 3d model stone mount for download as ma, obj, and fbx on turbosquid: 3d models for games, architecture, videos. (1370306)