Thingiverse

Strain Relief Ender 3 Bed wires by Filboyt
by Thingiverse
Last crawled date: 3 years, 1 month ago
Do you Enjoy Using your full print space?
Like anything past 220mm to the back of the bed?
While using any non stock parts cooler and maximizing your print bed, you may hit your stock strain relief and have a host of close calls or broken coolers.
This sits a lot lower and farther back but stays just as effective as stock.
Added thinner / lengthened variant for options and aftermarket parts. Please use
20% Gyroid infill. Thank you ortwin!
Step 1. Print this, If you want to add Spring caps print them now as well - https://www.thingiverse.com/thing:2926119
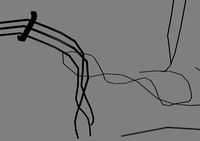
Step 2. If you have calipers or a ruler write down bed height at all 4 corners (see pic)
always use Auto home command first so gantry height is constant.
If No tools are available use a drinking straw and mark the average height(level with gantry top) in it with a hobby knife, set blade flat and spin straw into it to prevent scratching.
Step 3. Cut ziptie and pop the top cap off old strain relief and remove bed.
No Soldering iron required.No need to remove wires from Bed.
Add caps and replace strain relief.
Step 4. Replace bed and make sure to get it lower than before so when you
turn printer on and Auto Home you don't smash nozzle into the bed.
Step 5. Raise the bed back up to level. Add the Ziptie to heater wires.
Final step is pat yourself on the back.
Like anything past 220mm to the back of the bed?
While using any non stock parts cooler and maximizing your print bed, you may hit your stock strain relief and have a host of close calls or broken coolers.
This sits a lot lower and farther back but stays just as effective as stock.
Added thinner / lengthened variant for options and aftermarket parts. Please use
20% Gyroid infill. Thank you ortwin!
Step 1. Print this, If you want to add Spring caps print them now as well - https://www.thingiverse.com/thing:2926119
Step 2. If you have calipers or a ruler write down bed height at all 4 corners (see pic)
always use Auto home command first so gantry height is constant.
If No tools are available use a drinking straw and mark the average height(level with gantry top) in it with a hobby knife, set blade flat and spin straw into it to prevent scratching.
Step 3. Cut ziptie and pop the top cap off old strain relief and remove bed.
No Soldering iron required.No need to remove wires from Bed.
Add caps and replace strain relief.
Step 4. Replace bed and make sure to get it lower than before so when you
turn printer on and Auto Home you don't smash nozzle into the bed.
Step 5. Raise the bed back up to level. Add the Ziptie to heater wires.
Final step is pat yourself on the back.
Similar models
thingiverse
free

CR10 Bed Strain relief and rigid bed mounts by mverive
...strain relief and rigid bed mounts for cr10 and similar printers. strain relief helps protect the bed cables, and...
thingiverse
free

Dual Z Gantry Level by Ender3D
...to just barley rest of top of each level stick. once you have your gantry level, remove the leveling sticks and home the printer.
thingiverse
free

Ender-3 Bed Wire Strain Relief by FourDogs
...the ender 3 strain relief stuck up at the back of the bed. made another strain relief based on the original design, but shorter.
thingiverse
free

Strain Relief for Heated Bed Wires by thedayowl
... 3d printer heated bed mod. has an internal channel for a small zip tie. i glued it to the lower plate on my heated bed setup.
thingiverse
free

Wire Strain Relief for Printrbot Simple Metal Heat Bed Modification by nedkonz
...giverse
a simple bolt-on wire strain relief for the printrbot simple metal heat bed mod that will keep your wires from breaking.
thingiverse
free

Hypercube evolution 10awg MK2 style heat bed wire strain relief by warham
... hypercube evolution. this one was made for 10awg wire. i printed with petg
https://www.facebook.com/groups/hypercubeevolution/
thingiverse
free

Huxley Bed Strain Relief by tgfuellner
...huxley bed strain relief by tgfuellner
thingiverse
this is a simple strain relief for the reprappro huxley bed power wires.
thingiverse
free

AnyCubic Mega Cable Strain Relief by Sharkyivv
...adius for the cables, & you don't need to drill holes in your bed, or upset any bed levelling to fit it (result !!)
enjoy
thingiverse
free

CR-10 MINI Bed Connector Strain Relief by itslow
...t bed, or spring and y-axis sled, with spring in counter-bore. install retaining screws and level bed as per standard procedure.
thingiverse
free

CR-10 MINI Bed Connector Strain Relief with Corner Clips by itslow
...eral positioning. some sanding may be required if your heat bed and glass are thicker than that of the printer i measured. ymmv.
Filboyt
thingiverse
free

Ender 3 Vent Ring Remix (Original by Filboyt) by Clutcho
...ender 3 vent ring remix (original by filboyt) by clutcho
thingiverse
this is a remix.
thingiverse
free

Spring Cap by Filboyt
...springs.
if using on an ender 3 now is a great time to replace the stock strain relief.https://www.thingiverse.com/thing:3063046
thingiverse
free

Cartoon Bomb Pen by Filboyt
...alls, same infill. brim @ 1.2 width.
pull pen from bic type housing, clip some of the extra off the back, place in fuse of choice
thingiverse
free

Ender 3 Vent Ring 2 by Filboyt Remix by Mumm-Ra
...e remix making it a bit smaller....it seems to work fine.
in the image, the green one is the original, orange is my smaller remix
thingiverse
free

Ender 3 EndCap / Belt Cap by Filboyt
...g power, replace your stock ones and add the bling.
top belt cap just needs angled into place, no need to mess with your tension!
thingiverse
free

Dragon Claws / Ender 3 by Filboyt
.... works with anything that has the same screw pattern.
works best if printed between .11 to .14, the sweet spot with mine is .13.
thingiverse
free

Ender-3 Part Cooler by Filboyt
.../thing:2912394
for those who have tipped me a coffee, i offer back a huge thanks.
for those who wish to, i drink the cheap stuff.
thingiverse
free

Filament / Extruder Guide by Filboyt
...ide straight to the hot-end with no effort.
part one of this project can be found here: https://www.thingiverse.com/thing:2917932
thingiverse
free

Slide on Z Screw Guide by Filboyt
...t needs to do.
for those who have tipped me a coffee, i offer back a huge thanks.
for those who wish to, i drink the cheap stuff.
thingiverse
free

2020 / Ender 3 Filament Guide by Filboyt
...of resistance.
for those who have tipped me a coffee, i offer back a huge thanks.
for those who wish to, i drink the cheap stuff.
Strain
turbosquid
$85

Zeke strain
... available on turbo squid, the world's leading provider of digital 3d models for visualization, films, television, and games.
archive3d
free

Skimmer 3D Model
...skimmer 3d model archive3d skimmer perforated spoon strainng spoon skimmer - 3d model (*.gsm+*.3ds) for interior 3d...
archive3d
free

Skimmer 3D Model
...skimmer 3d model archive3d perforated spoon skimmer strainng spoon skimmer - 3d model (*.gsm+*.3ds) for interior 3d...
archive3d
free

Skimmer 3D Model
...skimmer 3d model archive3d skimmer perforated spoon strainng spoon skimmer 2 - 3d model (*.gsm+*.3ds) for interior...
archive3d
free

Skimmer 3D Model
...skimmer 3d model archive3d skimmer perforated spoon strainng spoon skimmer n160910 - 3d model (*.gsm+*.3ds) for interior...
archive3d
free

Skimmer 3D Model
...skimmer 3d model archive3d perforated spoon skimmer strainng spoon skimmer n070808 - 3d model (*.gsm+*.3ds) for interior...
archive3d
free

Skimmer 3D Model
...skimmer 3d model archive3d skimmer perforated spoon strainng spoon skimmer 2 n301007 - 3d model (*.gsm+*.3ds) for...
3d_export
$40

Influenza virus 3D Model
...h5n1 swine avian bird biology disease medical rna dna strain lipid cutaway section viral schematic infection protein cold electron...
3d_ocean
$12

Multistage water filter Aqua
...displacement draining filter filtering filtration multistage percolation pulution pure strainng water vray materials, lightning and scene setup included in...
3d_export
free

mushroom vase
...flower (in original scale), in every stalk there is strain to conduct extra water and keep this water in...
Relief
3d_export
$20

relief
...relief
3dexport
relief
turbosquid
$1

Relief
...
turbosquid
royalty free 3d model relief for download as obj on turbosquid: 3d models for games, architecture, videos. (1438537)
3d_export
$15

horse relief
...horse relief
3dexport
horse relief
3d_export
$10

jesus relief
...jesus relief
3dexport
jesus relief
3d_export
$10

rome relief
...rome relief
3dexport
rome relief
3d_export
$10

fish relief
...fish relief
3dexport
fish relief
3d_export
$10

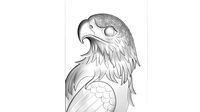
eagle relief
...eagle relief
3dexport
eagle relief
3d_export
$10
eagle relief
...eagle relief
3dexport
eagle relief
3d_export
free

3d relief
...3d relief
3dexport
3d relief
turbosquid
free

Relief
... available on turbo squid, the world's leading provider of digital 3d models for visualization, films, television, and games.
Ender
3ddd
$1

Enders / Elegance
...enders / elegance
3ddd
обогреватель
уличный газовый обогреватель enders elegance
высота: 2200 мм
3d_export
free

ender 3 frame cavity covers
... of the creality ender 3 - makes it look a bit more attractive it just slides into the open channels of the aluminium framework
turbosquid
$1

pen support for ender 3
...y free 3d model pen support for ender 3 for download as blend on turbosquid: 3d models for games, architecture, videos. (1611282)
3d_ocean
$9

Ender Dragon Minecraft
...ojang obj poly videogames
ender dragon minecraft created with cinema 4d r15 formats included: max 2013 – fbx 2012 – c4d r15 – obj
3d_export
free

Creality ender enclosure webcam mount
...e creality enclosure. sure is better than a tripod. change it up if it helps. i printed pla with 50% infill on my dd ender 3 pro.
3d_export
free

ender 3 enclosure corners
...er corners and 4 upper corners, using 25mmx25mm angled aluminium pieces that gets covered on inside of the frame with plexiglass
3d_export
free

ender 3 3d print bed clips
...ed + normal aluminium bed frame of the creality ender 3 = 6mm (b) these clips are designed for glass plate + aluminium bed = 4mm
3d_export
$5

GRUMPY CAT
...grumpy cat 3dexport grumpy cat to print in ender ...
3d_export
$5

Logs fire
...with one multi material for corona and vray r ender. albedo, normal, uvmap, roughness format jpg 4096x4096 models:...
3d_export
$42

excavator
...is the original size. 0.12 mm printing surface creality ender5 ...
Wires
design_connected
$11
Wired
...wired
designconnected
wired computer generated 3d model.
design_connected
$11

Wires
...wires
designconnected
wires computer generated 3d model.
design_connected
$11
Wire
...wire
designconnected
ronda design wire computer generated 3d model. designed by roccadadria, luca.
3d_export
$5
wire
...wire
3dexport
wire 180x180 cm arhive rar 3dmax2019. obj. fbx. mat corona
turbosquid
$2
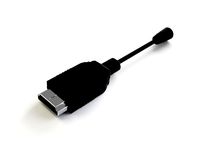
HDMI wire
... 3d model hdmi wire for download as wire, wire, fbx, and wire on turbosquid: 3d models for games, architecture, videos. (1644937)
turbosquid
free
wires
...bosquid
free 3d model wires for download as ma, obj, and fbx on turbosquid: 3d models for games, architecture, videos. (1214233)
3ddd
$1
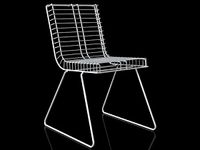
Wire chair
...wire chair
3ddd
wire chair
turbosquid
$10
wires
... available on turbo squid, the world's leading provider of digital 3d models for visualization, films, television, and games.
turbosquid
$2

Wire
... available on turbo squid, the world's leading provider of digital 3d models for visualization, films, television, and games.
3d_export
$10
wire stripper
...wire stripper
3dexport
wire stripper 5 in 1
Bed
3ddd
$1

bed
...bed
3ddd
bed , постельное белье
bed
3ddd
$1

bed
...bed
3ddd
bed , постельное белье
bed
3ddd
$1

bed
...bed
3ddd
bed , постельное белье
bed
3ddd
$1

bed
...bed
3ddd
bed , постельное белье
bed
3ddd
$1

bed
...bed
3ddd
bed , постельное белье
bed
3ddd
$1

bed
...bed
3ddd
bed , постельное белье
bed
3ddd
free

bed
...bed
3ddd
bed , постельное белье
bed
3ddd
free

bed
...bed
3ddd
bed , постельное белье
bed
3ddd
$1

Bed
...bed
3ddd
bed , постельное белье , постель
bed
3d_export
$7

bed adairs bed
...rs bed
3dexport
bed adairs bed in modern style. if you want a smoother surface, please turn on turbosmooth in the modifier list.
3
turbosquid
$10

Mountain Bike 3 -3 of 3
...model mountain bike 3 (#3 of 3) for download as fbx and blend on turbosquid: 3d models for games, architecture, videos. (1438752)
turbosquid
$6

Rock 3-3
...urbosquid
royalty free 3d model rock 3-3 for download as obj on turbosquid: 3d models for games, architecture, videos. (1628065)
turbosquid
$29

Books 150 pieces 3-3-3
...books 150 pieces 3-3-3 for download as max, obj, fbx, and stl on turbosquid: 3d models for games, architecture, videos. (1384033)
turbosquid
$3

Genesis 3 Clothing 3
... available on turbo squid, the world's leading provider of digital 3d models for visualization, films, television, and games.
3d_export
$5

hinge 3
...hinge 3
3dexport
hinge 3
3ddd
$1

Розетка 3
...розетка 3
3ddd
розетка
розетка 3
turbosquid
$50

is-3
... available on turbo squid, the world's leading provider of digital 3d models for visualization, films, television, and games.
turbosquid
$10

Mountain Bike 3 -2 of 3
...model mountain bike 3 (#2 of 3) for download as fbx and blend on turbosquid: 3d models for games, architecture, videos. (1438750)
turbosquid
$10

Mountain Bike 1 -3 of 3
...model mountain bike 1 (#3 of 3) for download as fbx and blend on turbosquid: 3d models for games, architecture, videos. (1438743)
3d_export
$5

3 CATS
...3 cats
3dexport
3 cats pen holder